Unity利用CardBoardVR制作(二)一个简易的全景相册和视频
这次紧接着上一次的应用制作,我们来实现一个简易的VR应用——VR全景相册和全景视频的播放。
我们需要准备的素材:
1.Unity2017
2.带有陀螺仪的手机
3.纸盒眼镜
4.全景照片和视频。
5.一个法线向内的球。
还是根据上一次的方法,将平台转换为安卓,然后勾选VRSupported,然后SDK选择CardBoard。
一、导入法线向内的球。
将这个球拖到面板中,并把他的位置和Camera重合。
导入我们需要的资源(全景图片和视频)(如果mp4的视频导不进去,就先将平台切成windows,导进去后再切到安卓)
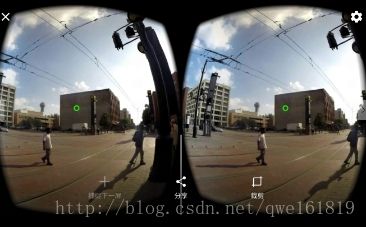
这个法线朝里的材质球目的就是为了摄像机在球内能看到球上的贴图。我们找一张图片放上去,就有下面的效果:
接下来写脚本去控制贴图的切换:
using System.Collections;
using System.Collections.Generic;
using UnityEngine;

public class SphereGallery : MonoBehaviour
{
    public Texture[] texs;

    private Material mat;//自身材质
    private float texLength;
    private int index;
// Use this for initialization
void Start ()
    {
        texLength = texs.Length;
        mat = this.GetComponent().material;
        index = 0;
        mat.mainTexture = texs[index];
 	RotateCam.changeNextTex += OnNextButtonClick;
 //把这个函数委托给相机上的脚本去执行
//RotateCam是一会要新建的相机的脚本 控制射线
    }
 void Update()
    {
        if (Input.GetKeyDown(KeyCode.Escape))
        {
            Application.Quit();   //按返回得时候退出程序
        }
    }

    public void OnNextButtonClick()//点击切换图下一张图片
    {
        index++;
        if (index >= texLength)
        {
            index = 0;
        }
        mat.mainTexture = texs[index];
    }

} 把这个脚本拖到球上,再把texture赋给这个脚本
然后建立一个Button用来切换到下一张图片,这个Button和之前准星的Canvas不是同一个,要新建一个Canvas,把他拖到Sphere下然后建立这个Button,同样也是在WorldSpace,并在这个Button上加一个碰撞用来射线选择。把这个Button拖到合适的位置。
我们的思路是,相机随着头部旋转,然后每帧都进行射线的选择,如果射线碰到了Button,那么等待1s,如果头部没有移走的话就表明选择执行图片切换。那么就在相机的脚本中执行委托,切换图片。
然后写相机的脚本RotateCam,发射射线选择,以及执行委托:
using System.Collections;
using System.Collections.Generic;
using UnityEngine;
using UnityEngine.UI;

public class RotateCam : MonoBehaviour
{
    public delegate void changeNext(); //委托,修改球体图片
    public static changeNext changeNextTex;

    public Button nextButton; //按键的引用
    public Image img;  //准心的引用
    public float waitTime;  //多久之后切换图片

   // private float x, y;
    private float timeGo;
// Use this for initialization
void Start ()
    {

       // x = y = 0f;
}
// Update is called once per frame
void Update ()
    {
        /* 方便PC测试
        x += Input.GetAxis("Mouse X");
        y += Input.GetAxis("Mouse Y");
        this.transform.rotation = Quaternion.Euler(-y, x, 0);
        */
        //射线检测
        Ray ray = new Ray(this.transform.position, this.transform.forward);
        RaycastHit hitinfo;
        //碰撞到UI的时候
        if (Physics.Raycast(ray, out hitinfo, 100f,1<= waitTime)
                    {
                        changeNextTex(); //执行这个委托
                        timeGo = 0f;

                    }
                }
            }
        }
        else
        {
            timeGo = 0f;
            nextButton.image.color = Color.white;
        }

        img.fillAmount = 1 - timeGo / waitTime;//准星的完整度

    }
} 把这个脚本拖到MainCamera上,然后拖入Button和Image(准星),并设置WaitTime
运行效果是这样:
切换后
全景相册基本就是这样。接下来实现全景视频:
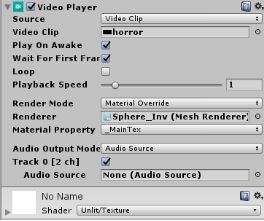
全景视频也很简单,给法线向内的球体上加一个VideoPlayer脚本,然后把我们的素材拖到Clip上就好了。
下面是运行结果:
本文内容部分参考自Think加速想象力出版的《AR与VR开发实战》教程,更多学习资料也请关注www.arvrthink.com。


