【dubbo源码解析】 --- dubbo集群容错(cluster)、负载均衡(loadbalance)底层原理探析 + 扩展自己的集群容错、负载均衡组件
本文对应源码地址:https://github.com/nieandsun/dubbo-study
文章目录
- 1 集群容错和负载均衡的概念
- 2 dubbo集群容错 + 负载均衡底层原理
- 3 简单测试
- 4 自己扩展一个dubbo集群容错组件和负载均衡组件
- 4.1 扩展一个集群容错组件(Cluster)
- 4.2 扩展一个loadbalance组件
- 4.3 不要忘了在MATE-INF/dubbo文件夹下指定这些SPI扩展组件
- 4.3 测试
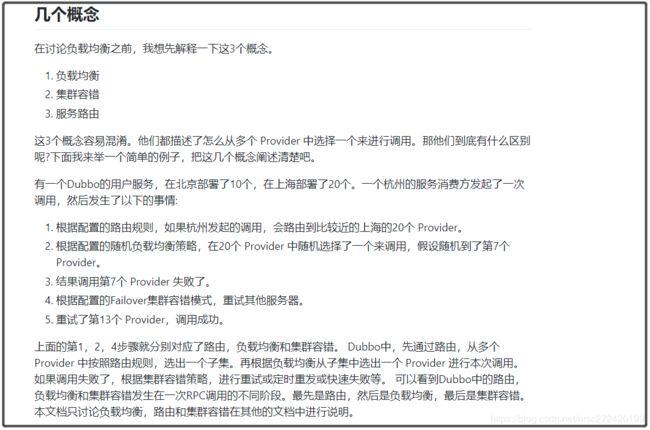
1 集群容错和负载均衡的概念
摘自dubbo官方博客:http://dubbo.apache.org/zh-cn/blog/dubbo-loadbalance.html
摘自dubbo官方博客:http://dubbo.apache.org/zh-cn/blog/dubbo-loadbalance.html
2 dubbo集群容错 + 负载均衡底层原理
首先应该明确的是集群容错 + 负载均衡其实
都是由消费端的逻辑。
由《【dubbo源码解析】— dubbo的服务暴露+服务消费(RPC调用)底层原理深入探析》文章的知识可知,在不引入注册中心时,在消费端, protocol.refer 得到 invoker 对象, 并拿着该Invoker做一个【可以调用服务端的服务】的代理对象作为@Reference标注的对象。
那加入注册中心逻辑后,dubbo是如何在RegistryProtocol对象中将集群容错功能挂入到Dubbo的RPC链条中的呢?
Dubbo 在这里玩了个心眼。 真正的过程走得百绕千回, 看如下这段代码:
RegistryProtocol. doRefer 方法:
private <T> Invoker<T> doRefer(Cluster cluster, Registry registry, Class<T> type, URL url) {
    RegistryDirectory<T> directory = new RegistryDirectory<T>(type, url);
    directory.setRegistry(registry);
    directory.setProtocol(protocol);
	//。。。。省略部分代码

    Invoker invoker = cluster.join(directory);
  	//。。。。省略部分代码
    return invoker;
}
原来的 protocol 被传进RegistryDirectory 类中去了, doRefer 返回的 invoker对象, 是 cluster.join(directory)返回的 invoker。
而cluster 是一个扩展接口, 因此, 这个接口方法最终执行的对象, 是根据容错策略自适配出来的对象, 如果 url 中不指定则默认是 failover 再看 failover 实现类的逻辑, 非常简单, 只是返回一个FailoverClusterInvoker 对象:
public class FailoverCluster implements Cluster {
    public static final String NAME = "failover";

    public FailoverCluster() {
    }

    public <T> Invoker<T> join(Directory<T> directory) throws RpcException {
        return new FailoverClusterInvoker(directory);
    }
}
再看下FailoverClusterInvoker中invoke方法调用后的的具体实现代码doInvoke的逻辑:
public Result doInvoke(Invocation invocation, List<Invoker<T>> invokers, LoadBalance loadbalance) throws RpcException {
	 //...... (省略部分代码)
	 //容错次数
      int len = this.getUrl().getMethodParameter(invocation.getMethodName(), "retries", 2) + 1;
      if (len <= 0) {
          len = 1;
      }

	  //...... (省略部分代码)
      for(int i = 0; i < len; ++i) {
      		//容错策略
		    //Reselect before retry to avoid a change of candidate `invokers`.
            //NOTE: if `invokers` changed, then `invoked` also lose accuracy.
            if (i > 0) {
                checkWhetherDestroyed();
                copyinvokers = list(invocation);
                // check again
                checkInvokers(copyinvokers, invocation);
            }
          Invoker<T> invoker = this.select(loadbalance, invocation, copyinvokers, invoked);
          //记录已经被选择的Invoker --> 用作进行负载判断
          invoked.add(invoker);
          //...... (省略部分代码)
          try {
              Result result = invoker.invoke(invocation);
  			 //...... (省略部分代码)
              Result var12 = result;
              return var12;
          }
           //...... (省略部分代码)
      }
 }
此 invoker 的逻辑:
(1)按重试次数 for 循环, 只要不是正常返回, 则再试一次
(2)调用 select 方法,大致逻辑为:先通过SPI机制取得一个 loadbalance 对象—>然后根据获取的loadbalance 对象select出来一个封装了【可以调用服务端的服务】的Invoker —> 然后执行此 invoker 对象得到结果。
需要注意的是:
此 select 方法, 是从一组 invoker(即文章《【dubbo源码解析】— dubbo的服务注册与发现机制底层原理探析》中讲到的RegistryDirectory对象的urlInvokerMap容器 中缓存的根据每一个服务端的URL生成的Invoker对象) 中选择出来的一个 invoker。
3 简单测试
注意: 如果消费端未配置集群容错 + 负载均衡策略的话,消费端会通过注册中心获取到服务端配置的参数,也就是说这些参数服务端都会以URL的形式给注册中心,然后消费端根据获取到的URL来根据SPI机制选择到底使用哪种策略。
服务端:
ExtensionLoader<Protocol> protocolLoader = ExtensionLoader.getExtensionLoader(Protocol.class);
ExtensionLoader<ProxyFactory> proxyLoader = ExtensionLoader.getExtensionLoader(ProxyFactory.class);

//注册中心服务--zk
final URL registryUrl = URL.valueOf("registry://127.0.0.1:2181/com.alibaba.dubbo.registry.RegistryService?registry=zookeeper");

//支持的协议:dubbo,http,hessian,rmi
URL serviceUrl = URL.valueOf("dubbo://127.0.0.1:9001/com.nrsc.service.InvokerDemoService");

@Test
public void serverRpc() throws IOException {
    InvokerDemoService service = new InvokerDemoServiceImpl("yoyo");
    //生成代理工厂
    //  --- 由URL确定到底是动态代理工厂(JdkProxyFactory)还是静态代理工厂(JavassistProxyFactory)
    //  --- 默认情况下为静态代理工厂
    ProxyFactory proxy = proxyLoader.getAdaptiveExtension();

    //下面这两句话完全可以放在外面 ---> 如果写在外面,这里的代码就和上文讲到的RPC完整链条的代码一致了
    //这里为了测试消费端可以动态监测到服务端的发布/下线,所以写在了这里
    serviceUrl = serviceUrl.setPort(9001);
    //url中加入负载均衡和集群容错参数
    //serviceUrl = serviceUrl.addParameter("loadbalance", "consistenthash");
    //serviceUrl = serviceUrl.addParameter("cluster", "failfast");
    //启动自己扩展的loadbalance和cluster组件
    //serviceUrl = serviceUrl.addParameter("loadbalance", "first");
    //serviceUrl = serviceUrl.addParameter("cluster", "failsms");
    URL newRegistryUrl = registryUrl.addParameter(Constants.EXPORT_KEY, serviceUrl.toFullString());

    Invoker<InvokerDemoService> serviceInvoker = proxy.getInvoker(service, InvokerDemoService.class, newRegistryUrl);

    //获取具体的协议
    Protocol protocol = protocolLoader.getAdaptiveExtension();
    Exporter<InvokerDemoService> exporter = protocol.export(serviceInvoker);
    System.out.println("server 启动协议:" + serviceUrl.getProtocol());
    // 保证服务一直开着
    System.in.read();
    exporter.unexport();
}

/****
 * 除了接口外,其他和serverRpc1()一样,主要用来测试消费端可以动态监测到服务端的发布/下线
 * @throws IOException
 */
@Test
public void serverRpc2() throws IOException {
    InvokerDemoService service = new InvokerDemoServiceImpl("nrsc");
    //生成代理工厂
    //  --- 由URL确定到底是动态代理工厂(JdkProxyFactory)还是静态代理工厂(JavassistProxyFactory)
    //  --- 默认情况下为静态代理工厂
    ProxyFactory proxy = proxyLoader.getAdaptiveExtension();

    //下面这两句话完全可以放在外面 ---> 如果写在外面,这里的代码就和上文讲到的RPC完整链条的代码一致了
    //这里为了测试消费端可以动态监测到服务端的发布/下线,所以写在了这里
    serviceUrl = serviceUrl.setPort(9002);
    //url中加入负载均衡和集群容错参数
    //serviceUrl = serviceUrl.addParameter("loadbalance", "consistenthash");
    //serviceUrl = serviceUrl.addParameter("cluster", "failfast");
    //启动自己扩展的loadbalance和cluster组件
    //serviceUrl = serviceUrl.addParameter("loadbalance", "first");
    //serviceUrl = serviceUrl.addParameter("cluster", "failsms");
    URL newRegistryUrl = registryUrl.addParameter(Constants.EXPORT_KEY, serviceUrl.toFullString());

    Invoker<InvokerDemoService> serviceInvoker = proxy.getInvoker(service, InvokerDemoService.class, newRegistryUrl);

    //获取具体的协议
    Protocol protocol = protocolLoader.getAdaptiveExtension();
    Exporter<InvokerDemoService> exporter = protocol.export(serviceInvoker);
    System.out.println("server 启动协议:" + serviceUrl.getProtocol());
    // 保证服务一直开着
    System.in.read();
    exporter.unexport();
}
消费端:
@Test
public void clientRpc() throws IOException {
    Protocol protocol = protocolLoader.getAdaptiveExtension();
    //生成代理工厂
    ProxyFactory proxy = proxyLoader.getAdaptiveExtension();

    //由代理工厂生成Invoker对象
    Invoker<InvokerDemoService> referInvoker = protocol.refer(InvokerDemoService.class, registryUrl);

    //生成DemoService的代理类
    InvokerDemoService service = proxy.getProxy(referInvoker);

    for (int i = 0; i < 6; i++) {
        String result = service.sayHello(registryUrl.getProtocol() + "调用");
        System.out.println(result);
    }
    // 保证服务一直开着 ,测试消费端可以动态监测到服务端的发布/下线
    //System.in.read();
}
测试结果2:
放开服务端代码中关于集群容错+ 负载均衡的注释代码,重新启用两个服务端,然后启用消费端,调用结果和结论如下:
4 自己扩展一个dubbo集群容错组件和负载均衡组件
4.1 扩展一个集群容错组件(Cluster)
由dubbo源码可知要想扩展一个集群容错组件,需要做两件事
- (1)实现Cluster接口,并重写其Join方法
- (2)在Join方法里返回一个XXXClusterInvoker 用于包装含有
【可以调用服务端的服务】的Invoker ,且集群容错的逻辑,就写在XXXClusterInvoker 的Invoker方法里
这里为了简便期间,我以 FailfastClusterInvoker作为XXXClusterInvoker ,则自定的Cluster代码如下:
/***
 * 当然如果想新扩展一个Cluster组件,肯定还要配套弄一个XXXClusterInvoker,这里就直接使用FailfastClusterInvoker代替了
 */
public class FailSmsCluster implements Cluster {

    @Override
    public <T> Invoker<T> join(Directory<T> directory) throws RpcException {
        sendSms();
        return new FailfastClusterInvoker<>(directory);
    }

    private void sendSms() {
        System.out.println("send sms notify!");
    }
}
4.2 扩展一个loadbalance组件
扩展loadbalance组件,要比扩展Cluster组件简单的多,只需要实现LoadBalance接口,并重写其select方法就可以了,这里提供一个比较简单的loadbalance组件 — 只选择第一个注册的Invoker。
public class FirstLoadBalance implements LoadBalance {

    @Override
    public <T> Invoker<T> select(List<Invoker<T>> invokers, URL url, Invocation invocation) throws RpcException {
        System.out.println("FirstLoadBalance : Select the first invoker...");
        return invokers.get(0);
    }
}
4.3 不要忘了在MATE-INF/dubbo文件夹下指定这些SPI扩展组件
4.3 测试
打开服务端的如下代码,并重启两个服务端 —>然后再重启消费端
 //启动自己扩展的loadbalance和cluster组件
 serviceUrl = serviceUrl.addParameter("loadbalance", "first");
 serviceUrl = serviceUrl.addParameter("cluster", "failsms");
end!


