抖音代码舞python实例代码
基本的思路如下:
1. 视频文件转图片
2.对图片处理,生成字符画
3. 合成字符画到视频
主要代码如下,需要修改的为路径,如果需要生成多种不同的效果,可以根据像素的值进行个性化设计。
# coding:utf-8
# Copyright@hitzym
# video2img
# Dec,7,2017
import cv2
vc=cv2.VideoCapture("~/video.mp4")
c=1
if vc.isOpened():
rval,frame=vc.read()
else:
rval=False
while rval:
rval,frame=vc.read()
rows, cols, channel = frame.shape
# frame2=cv2.resize(frame,(cols/3,rows/3),fx=0,fy=0,interpolation=cv2.INTER_AREA)
if ( c%5 == 0): #every 5 fps write frame to img
cv2.imwrite(('./yourImgPath/'+str(c)+'.jpg'),frame)
# cropped001 = frame2[0:300,300:600] #y change from 0 to 300 x change from 300 to 600
# cv2.imwrite('./cropped/'+str(c)+'_001.jpg',cropped001)
c=c+1
cv2.waitKey(1)
vc.release()
#coding:utf-8
import cv2
import os
import numpy as np
from PIL import Image, ImageDraw,ImageFont
fps = 2
fourcc = cv2.VideoWriter_fourcc('M', 'J', 'P', 'G')
video_writer = cv2.VideoWriter(filename='./result.avi', fourcc=fourcc, fps=fps, frameSize=(1856,1056))
for i in range(0,6000):
p = i
# print(str(p)+'.png'+'233333')
if os.path.exists('yourImgPath/'+str(p)+'.jpg'): #判断图片是否存在
img = cv2.imread(filename='yourImgPath/'+str(p)+'.jpg')
cv2.waitKey(100)
video_writer.write(img)
print(str(p) + '.jpg' + ' done!')
video_writer.release()
PIL修代码:
#-*- coding: UTF-8 -*-
from PIL import Image
from PIL import ImageDraw
from PIL import ImageFont
import matplotlib.pyplot as plt
import numpy as np
import time
def pic(srd_img_file_path, dst_img_file_path = None, scale = 2, sample_step = 3):
start_time = int(time.time())
#读取图片信息
old_img = Image.open(srd_img_file_path)
pix = old_img.load()
width = old_img.size[0]
height = old_img.size[1]
print ("width:%d, height:%d" % (width, height))
#创建新图片
canvas = np.ndarray((height*scale, width*scale, 3), np.uint8)
canvas[:, :, :] = 255
new_image = Image.fromarray(canvas)
draw = ImageDraw.Draw(new_image)
#创建绘制对象
font = ImageFont.truetype("consola.ttf", 10, encoding="unic")
char_table = list('happy new year ')
# font = ImageFont.truetype('simsun.ttc', 10)
# char_table = list(u'新年快乐')
#开始绘制
pix_count = 0
table_len = len(char_table)
for y in range(height):
for x in range(width):
if x % sample_step == 0 and y % sample_step == 0:
draw.text((x*scale, y*scale), char_table[pix_count % table_len], pix[x, y], font)
pix_count += 1
# 保存
if dst_img_file_path is not None:
new_image.save(dst_img_file_path)
print("used time : %d second, pix_count : %d" % ((int(time.time()) - start_time), pix_count))
print(pix_count)
new_image.show()
pic("input.jpg", "output.jpg")
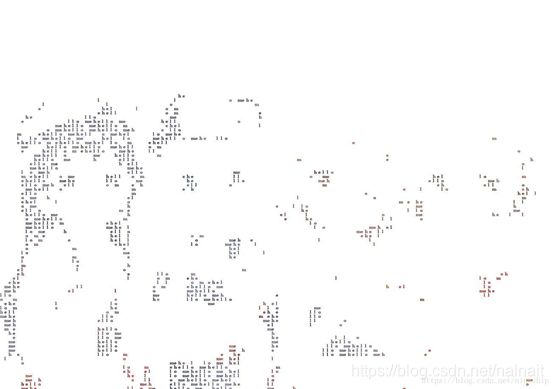
具体代码待添加,是在原作者的基础之上修改得到的。显示结果如下:
参考博客
1. https://blog.csdn.net/yinhuan1649/article/details/78746385/
2. https://www.jb51.net/article/137498.htm

