项目错误跟踪告警平台sentry安装和接入php项目
Sentry 由python开发,django为框架的跨平台多语言/框架的日志聚合平台,功能十分强悍。截至目前最新版本是8.19
安装postgresql
yum install https://download.postgresql.org/pub/repos/yum/9.6/redhat/rhel-6-x86_64/pgdg-centos96-9.6-3.noarch.rpm

yum install postgresql96
## Optionally install the server packages:
yum install postgresql96-server
## Optionally initialize the database and enable automatic start:
service postgresql-9.6 initdb
chkconfig postgresql-9.6 on   #开机启动
service postgresql-9.6 start
安装
pip install -U sentry
安装过程会出现各种各样的问题:
yum install postgresql-devel  ##安装postgresql开发包
## 给pg_config 添加环境变量
yum install libjpeg-turbo-devel  ##解决构建Pillow的问题
yum install gcc-c++ ##安装最新gcc
'NoneType' object has no attribute 'connection_pool' ,最新版本的redis驱动会存在问题,所以使用指定版本
pip install redis==2.10.5
启动
配置PostgreSQL依赖的环境,然后启动数据库
mkdir -p /data/pgsql                   # 数据库物理文件的存放目录
chown postgres:postgres /data/pgsql    # 所属组/成员
su postgres
cp /etc/skel/.bash* /var/lib/pgsql
# 编辑 /var/lib/pgsql/.bashrc文件,设置PGDATE环境变量并添加pgsql的bin路径到PATH变量。
export PGDATA=/data/pgsql
# 使环境生效:
source .bashrc
然后初始化数据库并启动:
 initdb  # 初始化
 pg_ctl start
创建数据库
[postgres@me ~]$ psql
psql (9.6.1)
Type "help" for help.

postgres=# \l
                                  List of databases
   Name    |  Owner   | Encoding |   Collate   |    Ctype    |   Access privileges
-----------+----------+----------+-------------+-------------+-----------------------
 postgres  | postgres | UTF8     | en_US.UTF-8 | en_US.UTF-8 |
 template0 | postgres | UTF8     | en_US.UTF-8 | en_US.UTF-8 | =c/postgres          +
           |          |          |             |             | postgres=CTc/postgres
 template1 | postgres | UTF8     | en_US.UTF-8 | en_US.UTF-8 | =c/postgres          +
           |          |          |             |             | postgres=CTc/postgres
(3 rows)

postgres=# CREATE USER app WITH PASSWORD '*****';
CREATE ROLE
postgres=# CREATE DATABASE sentry OWNER app;
CREATE DATABASE
postgres=# GRANT ALL PRIVILEGES ON DATABASE sentry to app;
GRANT
postgres=# \q
执行数据更新,数据填充完成后会提示是否创建用户,可以选择不创建后续再创建
首先初始化sentry生成配置文件:
sentry init #也可以自定义目录sentry init /etc/sentry
默认情况下 在Home目录下生成.sentry目录:
[team@me .sentry]$ tree
.
├── config.yml
└── sentry.conf.py
其中在sentry.conf.py下配置 PostgreSQL DATABASES 和 BROKER_URL:
DATABASES = {
    'default': {
        'ENGINE': 'sentry.db.postgres',
        'NAME': 'sentry',
        'USER': 'app',
        'PASSWORD': '*****',
        'HOST': '',
        'PORT': '',
        'AUTOCOMMIT': True,
        'ATOMIC_REQUESTS': False,
    }
}

BROKER_URL = "redis://:password@localhost:6379/2"
config.yaml 文件配置如下:
# While a lot of configuration in Sentry can be changed via the UI, for all
# new-style config (as of 8.0) you can also declare values here in this file
# to enforce defaults or to ensure they cannot be changed via the UI. For more
# information see the Sentry documentation.

###############
# Mail Server #
###############

mail.backend: 'django_smtp_ssl.SSLEmailBackend'  # Use dummy if you want to disable email entirely
mail.host: 'smtp.exmail.qq.com'
mail.port: 465
mail.username: '[email protected]'
mail.password: '****'
mail.use-tls: true
# The email address to send on behalf of
mail.from: 'support@***.cn'

# If you'd like to configure email replies, enable this.
# mail.enable-replies: false

# When email-replies are enabled, this value is used in the Reply-To header
# mail.reply-hostname: ''

# If you're using mailgun for inbound mail, set your API key and configure a
# route to forward to /api/hooks/mailgun/inbound/
# mail.mailgun-api-key: ''

###################
# System Settings #
###################

# If this file ever becomes compromised, it's important to regenerate your a new key
# Changing this value will result in all current sessions being invalidated.
# A new key can be generated with `$ sentry config generate-secret-key`
system.secret-key: '(80z$b)5u)oxq^kkzr^1r5%6^_4y3hrv0+!nlp!q1w+^fb#yux'

# The ``redis.clusters`` setting is used, unsurprisingly, to configure Redis
# clusters. These clusters can be then referred to by name when configuring
# backends such as the cache, digests, or TSDB backend.
redis.clusters:
  default:
    hosts:
      0:
        host: 127.0.0.1
        port: 6379
        password: '*****'
这里注意,因为邮件使用SSL, 则需要 SMTP SSL email backend for Django
pip install django-smtp-ssl
初始化sentry(导入数据库和其他操作)
sentry upgrade
 # 如果没有使用默认目录的话,需要使用如下命令
# SENTRY_CONF=/path/to/sentry sentry upgrade
创建用户,需要填写邮箱和密码,创建好后会提示是否作为超级用户,根据自己情况选择即可。
sentry createuser
 # 如果没有使用默认目录的话,需要使用如下命令
 # SENTRY_CONF=/path/to/sentry sentry createuser
配置supervisord
如果对supervisord还不熟悉,可以参考我的另一篇文章http://www.jianshu.com/p/2f032b52c84a
[program:sentry-web]
directory=/www/sentry/
environment=SENTRY_CONF="/etc/sentry"
command=/usr/local/sentry/bin/sentry start
autostart=true
autorestart=true
redirect_stderr=true
stdout_logfile=syslog
stderr_logfile=syslog

[program:sentry-worker]
environment=SENTRY_CONF="/etc/sentry",C_FORCE_ROOT=true
command=/usr/local/sentry/bin/sentry run worker
autostart=true
autorestart=true
redirect_stderr=true
stdout_logfile=syslog
stderr_logfile=syslog

[program:sentry-cron]
environment=SENTRY_CONF="/etc/sentry"
command=/usr/local/bin/sentry/bin/sentry run cron
autostart=true
autorestart=true
redirect_stderr=true
stdout_logfile=syslog
stderr_logfile=syslog
php接入
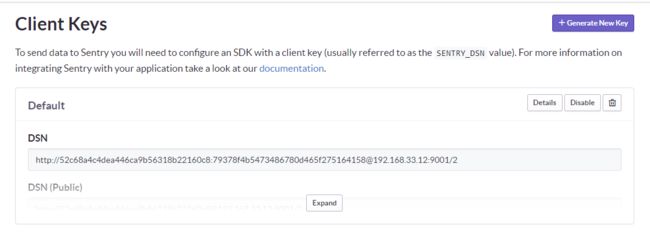
登录系统后,创建一个新项目后会出现接入文档和DSN,按照所给的文档进行安装和接入即可。
安装
composer require "sentry/sentry"
配置
$client = new Raven_Client('http://*****@192.168.33.12:9001/3');
$error_handler = new Raven_ErrorHandler($client);
$error_handler->registerExceptionHandler();
$error_handler->registerErrorHandler();
$error_handler->registerShutdownFunction();
功能点总结
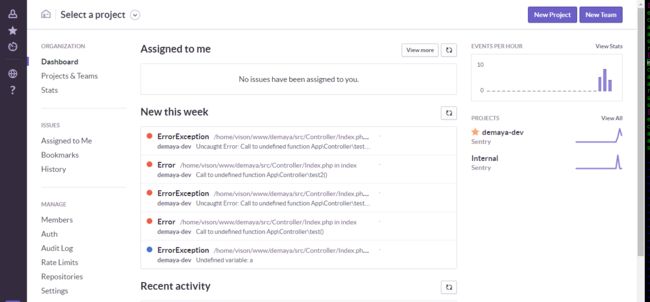
- 项目日志汇总,如果公司项目很多,这一点比较好可以有一个统一的web入口对日志进行查阅
- 特定级别日志邮件告警,当发生错误时能随时知道
- 可以统计各个项目错误,监控公司各个项目运行状态

