自己搭建纯净版vue框架
参考博客:https://segmentfault.com/a/1190000012789253
源码地址
https://github.com/mosewutong/writeSmallVue
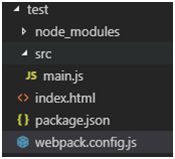
1.初始化项目
npm init //创建package.json
2.安装webpack 因为使用的是webpack4.0以上版本,所以需要安装webpack-cli
npm i webpack webpack-cli webpack-dev-server --save-dev
3.在根目录文件夹下创建一个index.html文件
Document
4.创建webpack.config.js文件
webpack.config.js文件内容
module.exports = {}
5.根目录下创建src文件夹,在src文件夹下创建main.js文件

在更改webpack.config.js文件内容,写入入口文件和输出文件
let path = require('path');

//主机和端口
let host = '0.0.0.0';
let port = '7001';

module.exports = {
    entry:['./src/main.js'],   //项目入口文件
    output:{
        path:path.resolve(__dirname,'./dist'),//项目输出路径
        publicPath:"./",    //devServer访问路径
        filename:"app.[name:8].js"    //打包后文件名
    },
    //启动一个服务器
    devServer:{
        contentBase:path.join(__dirname,"dist"),  // 服务器目录
        publicPath:"/",
        historyApiFallback: true,   //遇到404重定向到index.html
        overlay: true,    //将错误显示在html之上
        host:host,
        port:port,
        hot:true,   //热刷新
        inline: true,   //内联模式
        noInfo: false,   //只保留错误警告
    }
}
6.安装js注入插件 html-webpack-plugin
cnpm i html-webpack-plugin --save-dev
新增webpack.config.js文件内容
const HtmlWebpackPlugin  = require("html-webpack-plugin");  //js,css注入插件

plugins:[
    new HtmlWebpackPlugin({
        filename:'./index.html',
        template:'./index.html',
        inject:true,         // 自动注入   js/css
        minify:{
            collapseWhitespace:true //折叠空白区域 也就是压缩代码
        },
    })
]
可以在main.js文件中写一个console.log(“test”)
这个时候能够运行npm run dev启动项目,能够看到在控制台中输出了test
7.引入vue单文件模式
7.1安装vue vue-loader less less-loader style-loader css-loader vue-template-compiler
npm i vue --save
npm i vue-loader vue-template-compiler less less-loader style-loader css-loader --save-dev
7.2引入vue
在src文件夹下新建一个文件app.vue
{{message}}
修改index.html文件 在body中加入id为app的div
Document
修改main.js文件
console.log("test");
import Vue from 'vue';
import App from "./app.vue";
new Vue({
el:"#app",
components:{App},
template:"修改webpack.config.js用以解析vue和less
const VueLoaderPlugin = require('vue-loader/lib/plugin');
resolve: {
    alias: {
        'vue$': 'vue/dist/vue.esm.js' //内部为正则表达式  vue结尾的
    }
},
module:{
    rules:[
        {
            test:/\.(css|less)$/,
            use:[
                "style-loader","css-loader","less-loader"
            ]
        },
        {
            test:/\.vue$/,
            loader:'vue-loader',
            options:{
                loaders: [
                    {"less":"style-loader!css-loader!less-loader"},
                    {"css":"stlye-loader!css-loader"}
                ]
            }
        }
    ]
},
//插件中新增一个
plugins:[
    new HtmlWebpackPlugin({
        filename:'./index.html',
        template:'./index.html',
        inject:true,         // 自动注入   js/css
        minify:{
            collapseWhitespace:true //折叠空白区域 也就是压缩代码
        },
    }),

    //引入vue-loader报错的解决方案
    new VueLoaderPlugin(),
]
8.引入vue-router
8.1安装vue-router
npm install vue-router --save
在src文件夹下面新建router.js文件
8.2router.js文件内容
import Vue from "vue"

import VueRouter from "vue-router"
Vue.use(VueRouter)

import app from "./app.vue"

let routes = [
    {
        path:"/",
        redirect:"/app"
    },
    {
        path:"/app",
        name:"app",
        component:app,
        // redirect:"/"
    }
]

let router = new VueRouter({
    mode:"history",
    routes
})


export default router;
修改main.js文件内容
console.log("test");
import Vue from 'vue';
import App from "./app.vue";
import router from "./router.js"
new Vue({
el:"#app",
router,
components:{App},
template:"9.使用babel进行代码转换
9.1安装依赖
npm i babel-core babel-loader babel-preset-es2015 babel-preset-stage-2 --save-dev
npm i babel-polyfill --save
注意:babel的依赖包存在不兼容的问题

可以查看你的 package.json 的依赖列表
即有 babel 7.0 版本的( @babel/core , @babel/preset-react )
也可命令查看 bebel-cli 的版本 ( babel -V )
也有 babel 6.0 版本的 ( [email protected] , [email protected] , [email protected] )
处理方法
1、升级到 babel 7.0
将所有有关 babel 的包都升级为 7.0 版本
"@babel/core": "^7.0.0-beta.40",
"@babel/cli": "^7.0.0-beta.40",
"babel-loader": "^8.0.0-beta.0",
"babel-plugin-lodash": "^3.3.2",
"babel-plugin-react-transform": "^3.0.0",
"@babel/preset-react": "^7.0.0-beta.40",
"@babel/preset-stage-0":'^7.0.0'
并且修改 .babelrc 文件
对应的修改  presets 预设和 plugins 都改为 7.0 形式。
query: {
   presets: ['@babel/react', '@babel/stage-0'],
   plugins: ['']
}


2、降级到 babel 6.0 版本
有时候我们看们的 package.json 里面都是 babel 6.0 版本的。
"babel-core": "^6.26.0",
"babel-loader": "^7.1.2",
"babel-plugin-transform-runtime": "^6.23.0",
"babel-preset-env": "^1.6.1",
"babel-preset-stage-0": "^6.24.1",
修改后注意需要吧node-module文件夹删除在重新安装依赖
参考博客:https://www.cnblogs.com/jiebba/p/9618930.html
在main.js文件中引入
import 'babel-polyfill';
10.使用extract-text-webpack-plugin抽离css
10.1安装
npm i extract-text-webpack-plugin --save-dev
错误原因
extract-text-webpack-plugin还不能支持webpack4.0.0以上的版本。
解决方案
cnpm install --save-dev extract-text-webpack-plugin@next

参考博客:https://blog.csdn.net/liwenfei123/article/details/80027316
11.使用friendly-errors-webpack-plugin配置启动项目是在终端的输出信息
11.1安装
cnpm i friendly-errors-webpack-plugin --save-dev
11.2使用 在webpack.config.js中新增
const FriendlyErrorsWebpackPlugin = require('friendly-errors-webpack-plugin');

//在plugins中新增下列插件
//输出控制台插件
new FriendlyErrorsWebpackPlugin({
    //是否每次编译之间清除控制台
    //默认为true
    clearConsole:true,
    // 运行成功
    compilationSuccessInfo:{
        messages:[`Your application is running here: http://${host}:${port}`],
        // notes: ['Some additionnal notes to be displayed unpon successful compilation']
    },
    //添加格式化程序和变换器(见下文)
    additionalFormatters: [],
    additionalTransformers: []
}),
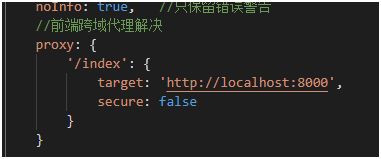
12.前端proxy代理
在webpack.config.js中的devServer设置proxy代理请求,解决跨域问题

13.source-map
直接在webpack.config.js中设置 和entry是同一级别的
devtool:"source-map",
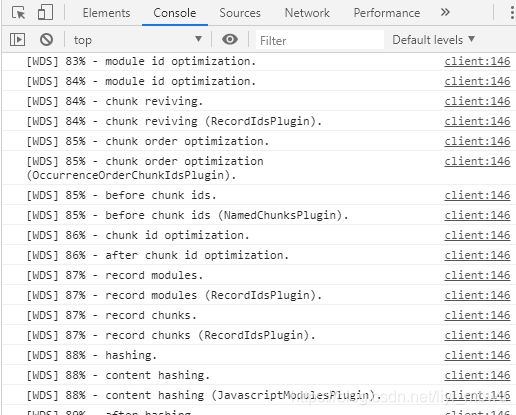
14.控制台输出热更新信息,因为是内联模式所以默认是输出更新信息的

我想要屏蔽这些信息,因此在webpack中的devServer中进行配置
clientLogLevel: "none",
这样就可以屏蔽这些信息了
15.引入图片资源
安装
npm i file-loader --save-dev
在webpack中的module的rules中配置
{
    test: /\.(png|jpg|gif|svg)$/,
    loader: 'file-loader',
    options: {
        name: '[name].[ext]?[hash]'
    }
}


