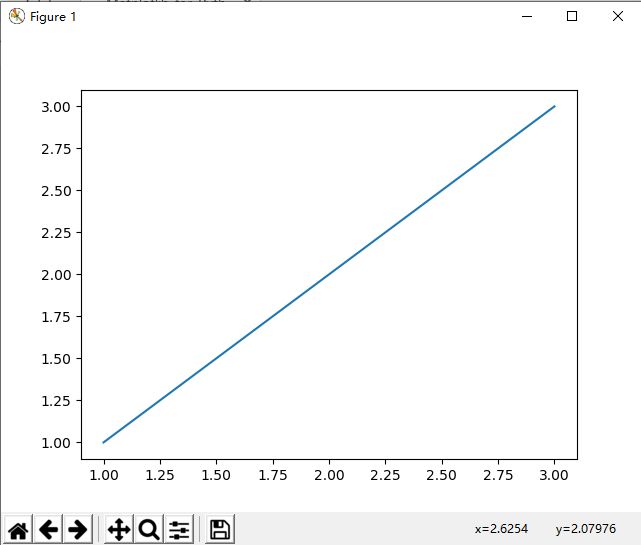
本章主题:
1、Matplotlib的面向对象接口。
2、子图(subplots)和多样图(multiple figures)。
3、附加的和共享的坐标轴。
4、Logarithmic scaled axes。
5、Date plotting with ticks formatting and locators。
6、Text properties, fonts, LaTeX typewriting。
7、Contour plots and image plotting。
Object-oriented versus MATLAB styles
There are three ways to use Matplotlib:
• pyplot: The module used so far in this book
• pylab: A module to merge Matplotlib and NumPy together in an environment closer to MATLAB
• Object-oriented way: The Pythonic way to interface with Matplotlib。
首先详细阐述pyplot模块:pyplot提供一个MATLAB风格,程序化的,状态机接口给Matplotlib中潜在的面向对象的库。
状态机是下哦那个状态系统,每个在系统上做的操作会改变它的状态。
matplotlib.pyplot是有状态的,因为根本引擎(underlying engine)保持跟踪当前图片和绘制区域信息以及绘图函数改变这些信息。为了让这更清楚,在我们画图过程中,我们不使用任何对象参考,仅仅发出一个pyplot命令,改变出现在图片中。
在更高等级上,matplotlib.pyplot是一个集合命令和函数,以使Matplotlib行为上像MATLAB(针对画图)。
这在做交互显示时真正有用,因为我们可以发出一个命令,然后立即看到结果,但是这有许多缺点,当我们需要更多比如低等级定制化或者应用嵌入。
如果我们记得,Matplotlib开始是与MATLAB交互的,我们手上有数字的和画图函数。一个相似的Matplotlib接口存在的,它的名字是pylab。
pylib是一个伙伴模块,在matplotlib模块之后安装,合并matplotlib.pyplot(针对画图)和numpy(针对数学函数)模块到一个单独的命名空间来提供尽可能接近MATLAB的环境,这样转换将很方便。
我们和Matplotlib的作者对使用pylab很沮丧,除了代码片段的概念验证阶段。当使用变得很简单是,这教会开发者错误的方式使用Matplotlib,所以我们有意不在本书提供。
第三种方式使用Matplotlib是通过面向对象接口。这是写Matplotlib代码的最强大的方式,因为这允许完全控制结果,尽管这也是最复杂的。这是Pythonic方式使用Matplotlib,高度鼓励使用Matplotlib编程而不是交互式工作。从现在起我们多多这样使用,因为这需要深入到Matplotlib中去。
请允许我们再次强调本书作者和Matplotlib作者想要强调的偏爱风格:会使用一点pyplot,特别是对于便利函数,剩下的画图代码,要么采用OO风格或者pyplot,明确引入numpy和使用数字函数。
在此偏爱风格,初始化imports是:
import matplotlib.pyplot as plt
import numpy as np
采用这种方式,我们确切知道我们使用的函数来自哪个模块(由于模块前缀),以及恰好到目前为止我们一直在在代码中做的。
现在,让我们提供相同的代码片,以我们刚描述的三种可能方式。
首先,pyplot:
In [7]: import matplotlib.pyplot as plt

In [8]: import numpy as np

In [9]: x = np.arange(0,10,0.1)

In [10]: y=np.random.randn(len(x))

In [11]: plt.plot(x,y)
Out[11]: []

In [12]: plt.title('random numbers')
Out[12]: Text(0.5, 1.0, 'random numbers')

In [13]: plt.show()
接下来看使用pylab接口:
 ipython -pylab
c:\python36\lib\site-packages\IPython\terminal\ipapp.py:299: UserWarning: `-pylab` flag has been deprecated.
    Use `--matplotlib ` and import pylab manually.
  warnings.warn("`-pylab` flag has been deprecated.\n"
Python 3.6.8 (tags/v3.6.8:3c6b436a57, Dec 24 2018, 00:16:47) [MSC v.1916 64 bit (AMD64)]
Type 'copyright', 'credits' or 'license' for more information
IPython 7.7.0 -- An enhanced Interactive Python. Type '?' for help.
Using matplotlib backend: TkAgg

In [1]: x=arange(0,10,0.1)

In [2]: y=randn(len(x))

In [3]: plot(x,y)
Out[3]: []

In [4]: title('random numbers')
Out[4]: Text(0.5, 1, 'random numbers')

In [5]: show()

In [6]:
注意:ipython -pylab与在ipython中运行from pylab import *不同。
这是因为ipyhton的pylab切换,除了从pylab引入所有东西,也使能明确的ipython线程模式,这样交互解释器和画图窗口可以同时激活。
最后,使用OO风格画相同的图,但使用一些pyplot便利函数:
import matplotlib.pyplot as plt
import numpy as np
x=np.arange(0,10,0.1)
y=np.random.randn(len(x))
fig=plt.figure()
ax=fig.add_subplot(111)
l,=plt.plot(x,y)
t=ax.set_title('random numbers')
plt.show()
我们可以看到,pylab代码最简单,pyplot居中,OO是最复杂的。
简要介绍Matplotlib对象
我们的第一个(简单的)OO Matplotlib例子
子图(Subplots)
- fig = plt.figure() :该函数返回一幅图,这里我们可以添加一个或多个坐标轴实例。
- ax = fig.add_subplot(111): 这个函数返回一个坐标轴实例,我们可以在上面画图,这也是为什么我们调用变量指向ax实例(从坐标轴)。这是常见的添加坐标轴到图片的方式,但是add_subplot()做的更多:它添加一个子图。到目前为止我们仅仅看到一个坐标轴实例的图片,所以我们仅仅可以画一个area,但Matplotlib允许画多于一个。
add_subplot()采用三个参数:
fig.add_subplot(bunrows,numcols,fignum)
这里:
- numrows 表示准备的子图行的数目
- numcols 表示准备的子图列的数目
- fignum从1变到numrows*numcols,并指定当前子图(现在使用的)
基本上,我们描述我们想要在图片上的numrowsnumcols矩阵子图;请注意在图片的左上角fignum是1,它在右底角等于numrowsnumcols。下表提供一个可视化解释:
一些用例如下:
ax = fig.add_subplot(1,1,1)
这里我们想要仅仅单个画图区域画一幅图。
ax2 = fig.add_subplot(2,1,2)
这里,我们定义图形矩阵作为在两个不同行中的两幅子图,我们想要操作第二个(fignum=2).
一个有趣的特性是我们可以指定这些数字合并到一个字符串中作为单个参数。例如:
ax2 = fig.add_subplot(212)
等价于:
ax2 = fig.add_subplot(2,1,2)
In [2]: import matplotlib.pyplot as plt

In [3]: fig = plt.figure()

In [4]: ax1 = fig.add_subplot(211)

In [5]: ax1.plot([1,2,3],[1,2,3]);

In [6]: ax2 = fig.add_subplot(212)

In [7]: ax2.plot([1,2,3],[3,2,1]);

In [8]: plt.show()
我们将对于我们使用的变量采用简单的命名转换。比如,我们称坐标轴实例变量ax,如果在相同代码中有多于一个变量,那么我们最后添加数字,比如ax1,ax2等等。
这允许我们在坐标轴实例创建后作出改变,在多坐标轴实例,这将允许我们修改它们中任意一个在它们创建之后。
这同样应用于多重图。
多重图(Multiple figures)
调用figure()多次
In [9]: import matplotlib.pyplot as plt

In [10]: fig1 = plt.figure()

In [11]: ax1 = fig1.add_subplot(111)

In [12]: ax1.plot([1,2,3],[1,2,3]);

In [13]: fig2 = plt.figure()

In [14]: ax2=fig2.add_subplot(111)

In [15]: ax2.plot([1,2,3],[3,2,1]);

In [16]: plt.show()
注意坐标轴实例是如何通过调用add_subplot()方法在两个不同的图片实例生成的。
附加的Y(或X)坐标轴
使用场景:在单幅图上画两组数据。特别地,就是这样当有相同的X变量,我们有两组数据组。
import matplotlib.pyplot as plt
import numpy as np
x=np.arange(0.,np.e,0.01)
y1=np.exp(-x)
y2=np.log(x)
fig=plt.figure()
ax1=fig.add_subplot(111)
ax1.plot(x,y1)
ax1.set_ylabel("Y values for exp(-x)");
ax2 = ax1.twinx()
ax2.plot(x,y2,'r');
ax2.set_xlim([0,np.e]);
ax2.set_ylabel('Y values for ln(x)');
ax2.set_xlabel('Same X for both exp(-x) and ln(x)');
plt.show()


