django3.0.5安装到简单例子
1.django 3.0.5 安装
1.1 python 版本为
Python 3.7.7 (v3.7.7:d7c567b08f, Mar 10 2020, 02:56:16)
[Clang 6.0 (clang-600.0.57)] on darwin
Type "help", "copyright", "credits" or "license" for more information.
等待一会后,用命令输入
>>> import django
>>> print(django.get_version())
3.0.5
或者用命令为
python -m django --version
3.0.5
1.2 创建项目
django-admin startproject django3demo
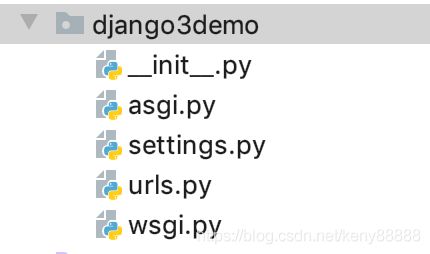
目录结构为:manage.py
- 最外层的 django3demo
/根目录只是你项目的容器, 根目录名称对Django没有影响,你可以将它重命名为任何你喜欢的名称。 manage.py: 一个让你用各种方式管理 Django 项目的命令行工具。- 里面一层的 django3demo
/目录包含你的项目,它是一个纯 Python 包。它的名字就是当你引用它内部任何东西时需要用到的 Python 包名。 (比如 django3demo.urls). mysite/__init__.py:一个空文件,告诉 Python 这个目录应该被认为是一个 Python 包。mysite/settings.py:Django 项目的配置文件。mysite/urls.py:Django 项目的 URL 声明,就像你网站的“目录”。mysite/asgi.py:作为你的项目的运行在 ASGI 兼容的Web服务器上的入口。mysite/wsgi.py:作为你的项目的运行在 WSGI 兼容的Web服务器上的入口。
1.3 用于开发的简易服务器
让我们来确认一下你的 Django 项目是否真的创建成功了。如果你的当前目录不是外层的 django3demo 目录的话,请切换到此目录,然后运行下面的命令:注意启动的目录是在django3demo目录下
python manage.py runserver1.3.1 启动如果需要修改端口可以后面加上端口,如果需要外网访问可以用0.0.0.0 0:8000是0.0.0.0:8000的简写,
python manage.py runserver 0:8000
System check identified no issues (0 silenced).
You have 17 unapplied migration(s). Your project may not work properly until you apply the migrations for app(s): admin, auth, contenttypes, sessions.
Run 'python manage.py migrate' to apply them.
April 08, 2020 - 03:51:21
Django version 3.0.5, using settings 'django3demo.settings'
Starting development server at http://127.0.0.1:8000/
Quit the server with CONTROL-C.
关闭用ctrl+c关闭服务
1.3.2 运行迁移,记录如下:成功后重新启动服务
python manage.py migrate
Operations to perform:
Apply all migrations: admin, auth, contenttypes, sessions
Running migrations:
Applying contenttypes.0001_initial... OK
Applying auth.0001_initial... OK
Applying admin.0001_initial... OK
Applying admin.0002_logentry_remove_auto_add... OK
Applying admin.0003_logentry_add_action_flag_choices... OK
Applying contenttypes.0002_remove_content_type_name... OK
Applying auth.0002_alter_permission_name_max_length... OK
Applying auth.0003_alter_user_email_max_length... OK
Applying auth.0004_alter_user_username_opts... OK
Applying auth.0005_alter_user_last_login_null... OK
Applying auth.0006_require_contenttypes_0002... OK
Applying auth.0007_alter_validators_add_error_messages... OK
Applying auth.0008_alter_user_username_max_length... OK
Applying auth.0009_alter_user_last_name_max_length... OK
Applying auth.0010_alter_group_name_max_length... OK
Applying auth.0011_update_proxy_permissions... OK
Applying sessions.0001_initial... OK
重新启动后没有红色提示
Watching for file changes with StatReloader
Performing system checks...
System check identified no issues (0 silenced).
April 08, 2020 - 03:57:21
Django version 3.0.5, using settings 'django3demo.settings'
Starting development server at http://127.0.0.1:8000/
Quit the server with CONTROL-C.
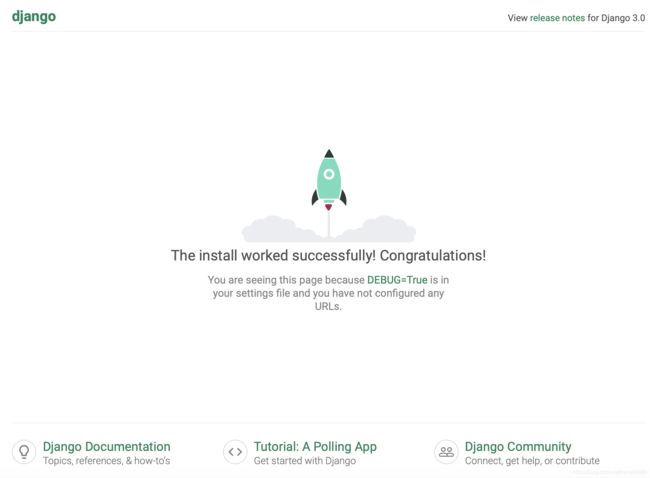
1.4 用浏览器进入 http://127.0.0.1:8000/
2.创建一个投票polls
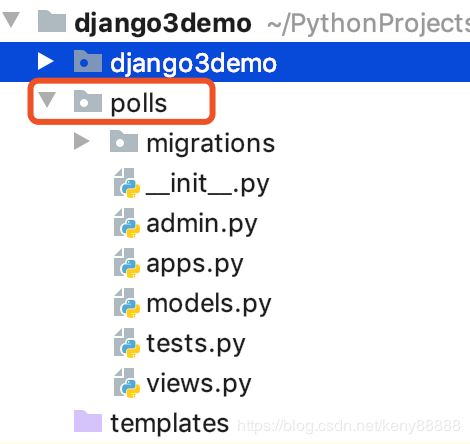
$python manage.py startapp polls生成目录如下图
2.1 编写第一个视图
polls/views.py
2.2 polls/urls.py 增加一个文件
2.3 下一步是要在根 URLconf 文件中指定我们创建的 polls.urls 模块。在 点击ango3demo/urls.py 文件的 urlpatterns列表里插入一个 include(), 如下:
from django.contrib import admin
from django.urls import include, path

urlpatterns = [
    path('polls/', include('polls.urls')),
    path('admin/', admin.site.urls),
]
备注:当包括其它 URL 模式时你应该总是使用 include() , admin.site.urls 是唯一例外。
2.4 启动服务,127.0.0.1:8000
输入127.0.0.1:8000/polls 出现下面的页面
2.5 创建一个管理员账号
python manage.py createsuperuser
输入用户名和邮箱和密码
2.6进入管理页面
127.0.0.1:8000/admin
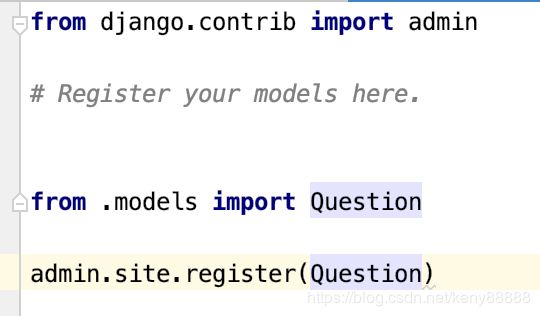
2.7 向管理页面中加入投票应用
polls/admin.py
2.8 体验便捷的管理功能
3. 自动化测试 ,编写测试代码
定义的tests.py
import datetime

from django.test import TestCase
from django.utils import timezone

from .models import Question


class QuestionModelTests(TestCase):

    def test_was_published_recently_with_future_question(self):
        """
        was_published_recently() returns False for questions whose pub_date
        is in the future.
        """
        time = timezone.now() + datetime.timedelta(days=30)
        future_question = Question(pub_date=time)
        self.assertIs(future_question.was_published_recently(), False)
3.1 运行测试用例
python manage.py test polls运行出现错误,没有通过,
Traceback (most recent call last):
File "/Users/apple/PythonProjects/django3demo/polls/tests.py", line 18, in test_was_published_recently_with_future_question
self.assertIs(future_question.was_published_recently(), False)
AttributeError: 'Question' object has no attribute 'was_published_recently'
----------------------------------------------------------------------
Ran 1 test in 0.001s
FAILED (errors=1)
失败记录
- 在
test_was_published_recently_with_future_question方法中,它创建了一个pub_date值为 30 天后的Question实例。 - 接着使用
assertls()方法,发现was_published_recently()返回了True,而我们期望它返回False。
python manage.py test polls
Creating test database for alias 'default'...
System check identified no issues (0 silenced).
..
----------------------------------------------------------------------
Ran 2 tests in 0.002s
OK
3.2 全面的测试
建立测试,增加2个test
def test_was_published_recently_with_old_question(self):
    """
    was_published_recently() returns False for questions whose pub_date
    is older than 1 day.
    """
    time = timezone.now() - datetime.timedelta(days=1, seconds=1)
    old_question = Question(pub_date=time)
    self.assertIs(old_question.was_published_recently(), False)

def test_was_published_recently_with_recent_question(self):
    """
    was_published_recently() returns True for questions whose pub_date
    is within the last day.
    """
    time = timezone.now() - datetime.timedelta(hours=23, minutes=59, seconds=59)
    recent_question = Question(pub_date=time)
    self.assertIs(recent_question.was_published_recently(), True)


