近来,很多人在使用tensorrt部署centerface遇到了各种问题,下面进行了一些解答:
1) 版本:tensorrt 6.0.1+,python3.7
2) onnx模型转化为tensorrt格式。需要注意,repo里提供centerface.onnx的input shape是10x1x32x32,需要先改为目标分辨率,再转换到tensorrt格式。相关代码如下:
import onnx
import math

input_size =(1080,1920)
model = onnx.load_model("centerface.onnx")
d = model.graph.input[0].type.tensor_type.shape.dim
print(d)
rate = (int(math.ceil(input_size[0]/d[2].dim_value)),int(math.ceil(input_size[1]/d[3].dim_value)))
print("rare",rate)
d[0].dim_value = 1
d[2].dim_value *= rate[0]
d[3].dim_value *= rate[1]
for output in model.graph.output:
    d = output.type.tensor_type.shape.dim
    print(d)
    d[0].dim_value = 1
    d[2].dim_value  *= rate[0]
    d[3].dim_value  *= rate[1]

onnx.save_model(model,"centerface_1080_1920.onnx" )
向右滑动
3) 其他问题,可能和tensorrt安装有关。
现在就详细介绍如何安装tensorrt和部署centerface。
1、Centerface模型介绍
Centerface具有具有小巧精度高特点,是目前最快的人脸检测和关键点的方法。该网络采用了anchor-free的方法,并引入了FPN的结构和思想,使得模型在小尺度的脸上具有更好的鲁棒性。
Centerface链接:
https://github.com/Star-Clouds/CenterFace
2、TensorRT 安装
TensorRT的安装方式有好几种安装方式,可以采用简单便捷的tar包的安装方式。
2.1 下载安装包
先使用下面命令确认机器的cuda、cudnn的版本,然后对应下载相应的安装包;
cat /usr/local/cuda/version.txt
cat /usr/local/cuda/include/cudnn.h | grep CUDNN_MAJOR -A 2
根据输出进行版本信息获取:
CUDA Version 10.1.243

#define CUDNN_MAJOR 7
#define CUDNN_MINOR 6
#define CUDNN_PATCHLEVEL 3
--
#define CUDNN_VERSION (CUDNN_MAJOR * 1000 + CUDNN_MINOR * 100 + CUDNN_PATCHLEVEL)

#include "driver_types.h"
向右滑动
因此,cuda的版本是19.1.243,cudnn版本为 7.6.3。如果找不到对应的包,则进行相关升级。
2.2 安装过程
安装pycuda
sudo pip install pycuda安装TensorRT
# 解压安装包
tar xzvf TensorRT-6.0.1.5.Ubuntu-18.04.x86_64-gnu.cuda-10.1.cudnn7.6.tar.gz

cd TensorRT-6.0.1.5

# 安装TensorRT-python
cd python
sudo pip install tensorrt-6.0.1.5-py2.py3-none-any.whl

#安装UFF
cd uff
sudo pip install uff-6.0.1-py2.py3-none-any.whl

#安装graphsurgeon
cd graphsurgeon
sudo pip install graphsurgeon-0.3.2-py2.py3-none-any.whl
向右滑动
环境配置
~sudo vim ~/.bashrc

# 添加下面三行
export LD_LIBRARY_PATH=$LD_LIBRARY_PATH:/home/ubuntu/TensorRT-6.0.1.5/lib
export CUDA_INSTALL_DIR=/usr/local/cuda-10.1
export CUDNN_INSTALL_DIR=/usr/local/cuda-10.1

source ~/.bashrc
向右滑动
2.3 测试
python环境
C++环境
cd sample
make
编译完成后会在TensorRT-6.0.1.5目录的bin文件夹下生产对应的可执行文件
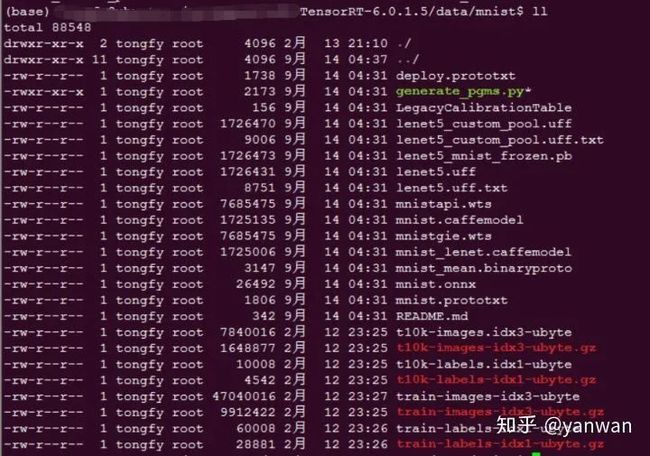
在执行mnist程序之前,先下载mnist数据放在data/mnist下,并解压:
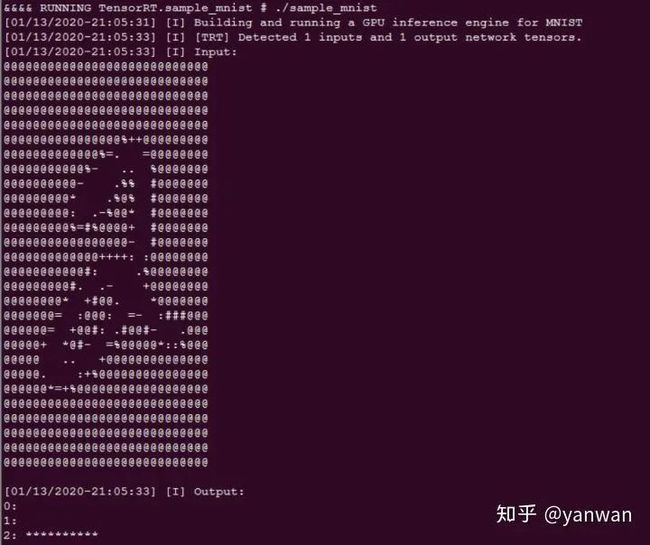
然后进行bin文件后执行sample_mnist,结果如下:
3、TensorRT 推理
现在的深度学习框架太多,直接使用训练框架做推理,很难达到真正的加速效果。而且各个训练框架很难直接进行模型的转换?在这种情况之下,拥有统一化的定义引入onnx,以实现不同框架之间的互相转化和推理,正好满足各个厂商需求。onnx可以使用netron,图像化显示ONNX模型的网络拓扑图。
先把CenterFace的onnx转化为TensorRT的trt文件,然后加载trt文件,从而构建engine。
def get_engine(max_batch_size=1, onnx_file_path="", engine_file_path="", fp16_mode=False, int8_mode=False, save_engine=False):
    """Attempts to load a serialized engine if available, otherwise builds a new TensorRT engine and saves it."""

    def build_engine(max_batch_size, save_engine):
        """Takes an ONNX file and creates a TensorRT engine to run inference with"""
        with trt.Builder(TRT_LOGGER) as builder, \
                builder.create_network() as network, \
                trt.OnnxParser(network, TRT_LOGGER) as parser:

            builder.max_workspace_size = 1 << 30  # Your workspace size
            builder.max_batch_size = max_batch_size
            # pdb.set_trace()
            builder.fp16_mode = fp16_mode  # Default: False
            builder.int8_mode = int8_mode  # Default: False
            if int8_mode:
                # To be updated
                raise NotImplementedError

            # Parse model file
            if not os.path.exists(onnx_file_path):
                quit('ONNX file {} not found'.format(onnx_file_path))

            print('Loading ONNX file from path {}...'.format(onnx_file_path))
            with open(onnx_file_path, 'rb') as model:
                print('Beginning ONNX file parsing')
                parser.parse(model.read())

            print('Completed parsing of ONNX file')
            print('Building an engine from file {}; this may take a while...'.format(onnx_file_path))

            engine = builder.build_cuda_engine(network)
            print("Completed creating Engine")

            if save_engine:
                with open(engine_file_path, "wb") as f:
                    f.write(engine.serialize())
            return engine

    if os.path.exists(engine_file_path):
        # If a serialized engine exists, load it instead of building a new one.
        print("Reading engine from file {}".format(engine_file_path))
        with open(engine_file_path, "rb") as f, trt.Runtime(TRT_LOGGER) as runtime:
            return runtime.deserialize_cuda_engine(f.read())
    else:
        return build_engine(max_batch_size, save_engine)
向右滑动
构建输入和输出
class HostDeviceMem(object):
    def __init__(self, host_mem, device_mem):
        """Within this context, host_mom means the cpu memory and device means the GPU memory
        """
        self.host = host_mem
        self.device = device_mem

    def __str__(self):
        return "Host:\n" + str(self.host) + "\nDevice:\n" + str(self.device)

    def __repr__(self):
        return self.__str__()


def allocate_buffers(engine):
    inputs = []
    outputs = []
    bindings = []
    stream = cuda.Stream()
    for binding in engine:
        size = trt.volume(engine.get_binding_shape(binding)) * engine.max_batch_size
        dtype = trt.nptype(engine.get_binding_dtype(binding))
        # Allocate host and device buffers
        host_mem = cuda.pagelocked_empty(size, dtype)
        device_mem = cuda.mem_alloc(host_mem.nbytes)
        # Append the device buffer to device bindings.
        bindings.append(int(device_mem))
        # Append to the appropriate list.
        if engine.binding_is_input(binding):
            inputs.append(HostDeviceMem(host_mem, device_mem))
        else:
            outputs.append(HostDeviceMem(host_mem, device_mem))
    return inputs, outputs, bindings, stream
向右滑动
拿到forward后的结果,进行后处理
def do_inference(context, bindings, inputs, outputs, stream, batch_size=1):
    # Transfer data from CPU to the GPU.
    [cuda.memcpy_htod_async(inp.device, inp.host, stream) for inp in inputs]
    # Run inference.
    context.execute_async(batch_size=batch_size, bindings=bindings, stream_handle=stream.handle)
    # Transfer predictions back from the GPU.
    [cuda.memcpy_dtoh_async(out.host, out.device, stream) for out in outputs]
    # Synchronize the stream
    stream.synchronize()
    # Return only the host outputs.
    return [out.host for out in outputs]
向右滑动
4:运行结果如下
完整代码:https://github.com/Star-Clouds/CenterFace
最后看一下tensorrt加速的效果:


