在本文中,我们将介绍如何使用语音控制IoT设备 。 换句话说,在本文中,我们将使用语音将一组命令发送到IoT设备。 在这篇文章中,我们将构建一个语音激活的IoT项目 。 这是一个有趣的话题,因为该项目使用不同的方式与IoT设备进行交互。 通常,我们习惯于使用设备公开的简单用户界面或使用向设备发送命令的智能手机应用程序与设备进行交互。
如何使用语音控制物联网设备–项目概述
该项目背后的想法是探索如何使用语音命令来控制Arduino或ESP8266等设备。 为了构建此语音激活项目,我们开发了一个Android应用程序,该应用程序可以捕获用户的语音并将其转换为一组发送到设备的命令。 下图描述了项目概述:

更详细地说,该项目由两个不同的子系统组成:
- Android应用
- 物联网应用
Android应用程序会注意与用户进行交互并收听语音命令。 接下来,该应用将语音命令转换为物联网设备可以理解的命令。 在本文中,作为物联网设备,我们将使用ESP8266 WeMos控制一个NeoPixel环。 您可以使用Arduino Uno代替ESP或MKR1000。
如何开发语音识别Android应用
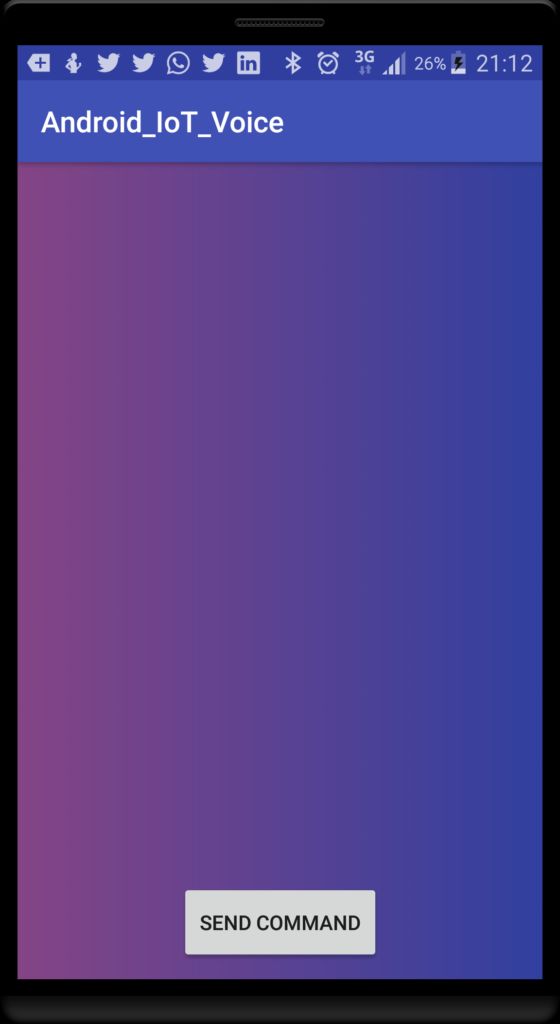
该项目的第一步是开发可识别用户语音的Android应用。 幸运的是,Android提供了一个内置系统,能够识别用户单词。 该应用程序的用户界面非常简单。 我们仅使用一个按钮来开始发送命令: 
布局非常简单,如下所示:
 < android.support.constraint.ConstraintLayout
     xmlns:android = " http://schemas.android.com/apk/res/android "
     xmlns:app = " http://schemas.android.com/apk/res-auto "
     xmlns:tools = " http://schemas.android.com/tools "
     android:layout_width = "match_parent"
     android:layout_height = "match_parent"
     tools:context = "com.survivingwithandroid.voice.MainActivity"
     android:id = "@+id/mainView"
     android:background = "@drawable/bg_gradient" >
    < Button
         android:layout_width = "wrap_content"
         android:layout_height = "wrap_content"
         app:layout_constraintLeft_toRightOf = "parent"
         app:layout_constraintRight_toLeftOf = "parent"
         android:text = "Send command"
         android:id = "@+id/btnCommand"
         app:layout_constraintBottom_toBottomOf = "parent"
android:layout_marginBottom = "15dp" /> 下一步是在MainActivity.java重写onCreate方法:
 @Override  protected void onCreate(Bundle savedInstanceState) {
   super .onCreate(savedInstanceState);
   setContentView(R.layout.activity_main);
   btn = (Button) findViewById(R.id.btnCommand);
   btn.setOnClickListener( new View.OnClickListener() {
    @Override
    public void onClick(View v) {
     startVoiceCommand();
    }
   });  }
其中, startVoiceCommand()是处理与用户进行语音交互的方法。
在这种情况下,为了捕获用户的声音,应用程序使用Intent将所有艰苦的工作委托给Android OS:
 private void startVoiceCommand() {
   Log.d(TAG, "Starting Voice intent..." );
   Intent i = new Intent(RecognizerIntent.ACTION_RECOGNIZE_SPEECH);
   i.putExtra(RecognizerIntent.EXTRA_LANGUAGE_MODEL, RecognizerIntent.LANGUAGE_MODEL_FREE_FORM);
   i.putExtra(RecognizerIntent.EXTRA_LANGUAGE, Locale.getDefault());
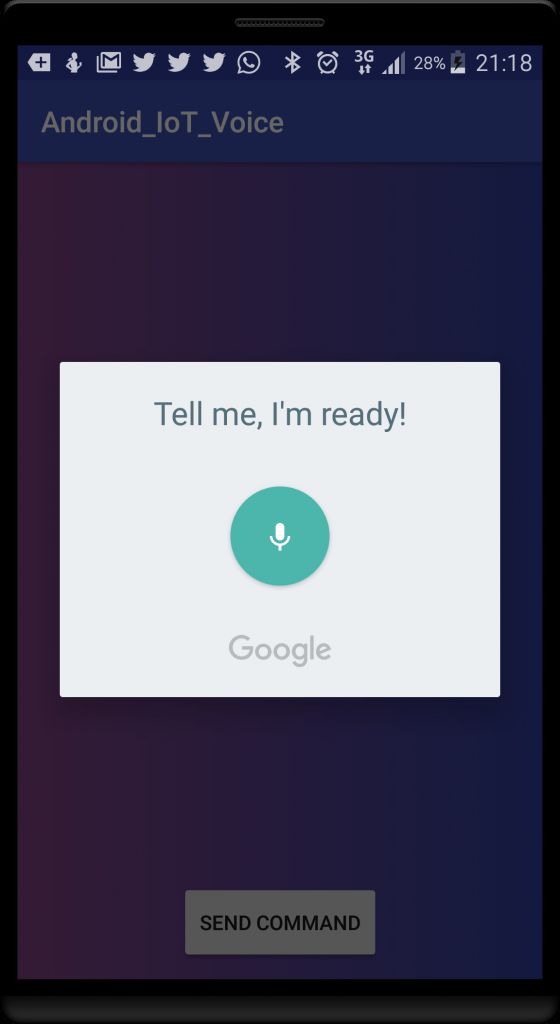
   i.putExtra(RecognizerIntent.EXTRA_PROMPT, "Tell me, I'm ready!" );
   try {
    startActivityForResult(i, REQ_SPEECH_RESULT);
   }
   catch (Exception e) {
    Snackbar.make(v, "Speech to text not supported" , Snackbar.LENGTH_LONG).show();
} } 此方法非常简单,它调用意图RecognizerIntent.ACTION_RECOGNIZE_SPEECH提供一些配置参数作为当前语言环境以及我们想要显示给用户的消息。 当用户单击按钮时,应用程序将显示对话框,等待语音输入。 最后,应用程序启动意图以等待结果: 
为此,该应用将覆盖方法onActivityResult :
 @Override  protected void onActivityResult( int requestCode, int resultCode, Intent data) {
     super .onActivityResult(requestCode, resultCode, data);
    // Check the Request code
    if (requestCode == REQ_SPEECH_RESULT) {
      Log.d(TAG, "Request speech result.." );
      ArrayList results = data.getStringArrayListExtra(RecognizerIntent.EXTRA_RESULTS);
      String command = results.get( 0 );
      Log.d(TAG, "Current command [" +command+ "]" );
      // Now we send commands to the IoT device
    }  }
在上述方法中,应用会提取命令,并根据此命令调用ESP8266来设置环形LED的颜色。 在此示例中,Android IoT语音应用处理了诸如红色,绿色,蓝色等简单命令。
如何从Android应用程序与ESP8266交换数据
在本项目的此步骤说明了如何使用语音向IoT设备发送命令的步骤,我们实现了网络通信。 到现在为止,我们可以假设ESP8266公开了Android应用调用以设置铃声的方法。 在这种情况下,我们可以假设ESP8266公开了RESTful API。 为了调用此API,该应用程序使用HTTP连接。 为此,必须创建一个名为IoTConnectionHandler的新类来处理所有网络详细信息。 该类如下所示:
 public class IoTConnectionHandler {
     private static IoTConnectionHandler me;
     private OkHttpClient client;
     private static final String TAG = IoTConnectionHandler. class .getName();
     private static final String IOT_URL =
           " http://192.168.1.9:8080/ring?param=0 " ;
     private IoTConnectionHandler() {
         client = new OkHttpClient();
     }
     public static IoTConnectionHandler getInstance() {
         if (me == null )
             me = new IoTConnectionHandler();
         return me;
     }
     public void sendData(String data) {
         Request req = new Request.Builder()
                       .url(IOT_URL + data)
                       .build();
         client.newCall(req).enqueue( new Callback() {
             @Override
             public void onFailure(Call call, IOException e) {
                 Log.e(TAG, "Connection error" , e);
             }
             @Override
             public void onResponse(Call call, Response response) throws IOException {
                 Log.i(TAG, "Command sent" );
             }
         });
     }  }
这非常简单,它使用OkHTTP库 。 请注意, data参数保存从语音命令检索的彩色十六进制代码。
下一部分将实现项目的IoT端,该端使用设备公开的API接收彩色十六进制代码并设置LED的颜色。
如何开发语音控制的物联网设备
在此语音控制的IoT设备的这一步骤中,我们将开发必要的代码以:
- 公开由Android应用程序调用的API
- 控制Neopixel RGB环
在深入研究IoT项目细节之前,了解如何将ESP8266连接到Neopixel RGB环非常有用: 
为了简化代码开发,IoT设备使用以下两个库:
- Adafruit Neopixel库
- 休息图书馆
第一个用于控制LED环,而第二个库对于将草图中的某些功能公开为API是必需的。 如果您不熟悉此库,则可以阅读我以前的文章, 该文章描述了如何将Arduino函数公开为API 。
下面的代码是草图:
 #include   #include   #include   #define PIN D2  #define NUMS 12  #define SERVER_PORT 8080  // Neopixel rings  Adafruit_NeoPixel pixels =
    Adafruit_NeoPixel( 12 , PIN, NEO_GRB + NEO_KHZ800);  aREST rest = aREST();  char *ssid = "xxxxx" ;  char *pwd = "xxx" ;  // Let us create the server  WiFiServer server(SERVER_PORT);  void setup() {
   Serial.begin( 9600 );
   pixels.begin();
   pixels.setBrightness( 85 );
   // Register the function
   rest.function( "ring" , setColor);
   WiFi.begin(ssid, pwd);
   Serial.println( "Connecting to WiFi..." );
   while (WiFi.status() != WL_CONNECTED) {
    delay( 1000 );
    Serial.println( "Try again...." );
   }
   Serial.println( "WiFi connected..." );
   // let us start the server
   server.begin();  }  void loop() {
   WiFiClient client = server.available();
   if (!client) {
     return ;
   }
   while (!client.available()) {
    delay( 1 );
   }
   rest.handle(client);  }  int setColor(String color) {
   Serial.println( "Hex color [" + color + "]" );
   long tmpColor = strtol( &( "#" + color)[ 1 ], NULL, 16 );
   Serial.println( "Int [" +String(tmpColor)+ "]" );
   int r = tmpColor << 16 ;
   int g = tmpColor << 8 & 0xFF ;
   int b = tmpColor & 0xFF ;
   Serial.print( "Red [" + String(r) + "]" );
   Serial.print( "Green [" + String(g) + "]" );
   Serial.println( "Blue [" + String(b) + "]" );
   for ( int i = 0 ; i < 12 ; i++)
     pixels.setPixelColor(i, pixels.Color(r,g,b));
   pixels.show();
   return 1 ;  }
详细来说,一开始,草图会尝试连接到WiFi网络。 为此,您必须提供WiFi ssid和密码。 建立连接后,草图将配置服务器及其端口。 而且,它声明了我们要导出为API的函数。
最后一部分是用于控制Neopixel环的方法。
一旦我们向IoT设备应用发送语音命令,就会显示以下日志:
摘要
在本文的结尾,您知道如何使用语音来控制IoT设备。 在更多详细信息中,您探索了如何将ESP8266与Android应用程序连接以及如何使用语音与之交互。
翻译自: https://www.javacodegeeks.com/2017/09/use-voice-control-iot-devices-using-android.html
