最近在准备做毕设,由于需要后台,所以得学习一下后台的相关知识。之前学过JavaWeb的servlet的那套,不过觉得它的配置太麻烦了,同时写起来也是非常的复杂,于是打算来简单学习SpringBoot + mybatis的知识。本文是入门的文章,大佬们请见谅。
编译环境:
- jdk 1.8.0_191
- intellij idea 2018 3.2
- gradle 4.10(我使用的是idea默认的gradle,所以是这个版本)
- mysql 8.0.1
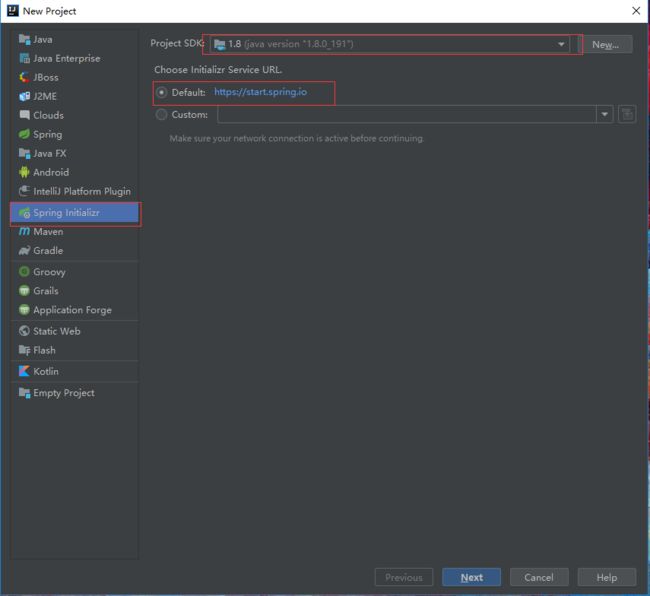
1. 创建创建一个基于gradle的SpringBoot工程
然后点击next
上面的配置,记得将type选择为gradle project,否则的话,默认创建的是一个maven project。我个人比较熟悉gradle,所以使用的是他。然后点击next。
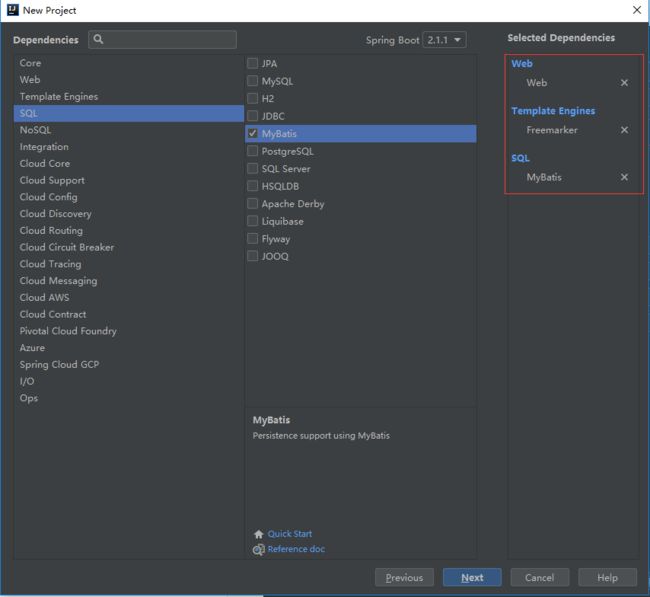
如上图,记得在web下选择web,在Template Engines 选择Freemarker,sql下选择myBatis。最终的效果如上图右侧。然后点击next和finish,一个工程创建完成了。
2. 基本的配置
首先我们来配置数据库的连接,数据库的配置主要是在application.properties文件里面。我们来看看:
spring.datasource.url=jdbc:mysql://localhost:3306/student?useUnicode=true&characterEncoding=utf-8&serverTimezone=GMT
spring.datasource.username=root
spring.datasource.password=
spring.datasource.driverClassName = com.mysql.cj.jdbc.Driver
这里需要注意两点:
- url后面必须跟serverTimezone=GMT,否则后面在进行数据库连接时会抛异常。这里有一个Stack Overflow的连接:https://stackoverflow.com/questions/26515700/mysql-jdbc-driver-5-1-33-time-zone-issue
- 到这里,你会发现
driverClassName爆红,是不是感觉错了。那是因为我们还没有配置导入jdbc,这样写没有问题的。
再来导入jdbc的依赖。在build.gradle的dependencies加入这一行就没毛病了。
compile group: 'mysql', name: 'mysql-connector-java', version: '8.0.13'
3. 简单的后台代码书写
这里一个简单的例子来了解SpringBoot +myBatis是怎么进行响应请求、访问数据库。
假设数据库中有student表,有id和name。我们来通过id来获取每个student的数据。
首先,我们来创建Java bean对象:
public class Student {
    private int id;
    private String name;

    public int getId() {
        return id;
    }

    public void setId(int id) {
        this.id = id;
    }

    public String getName() {
        return name;
    }

    public void setName(String name) {
        this.name = name;
    }
}
然后创建一个StudentDao,主要进行数据库请求。
@Mapper
public interface StudentDao {
    @Select("select * from student where id = #{id}")
    @Results({
            @Result(property = "id", column = "id"),
            @Result(property = "name", column = "name")
    })
    Student findStudentById(@Param("id") int id);
}
主要StudentDao有一个Mapper的注解。其中findStudentById方法的Select注解表示当前方法需要执行的sql语句,Results里面主要放的是查询的结果,property表示Student类成员变量名,column表示数据库的列名。
然后我们在创建一个Controller,这里我就取名为StudentController。
@RestController
@RequestMapping(value = "/studentController")
public class StudentController {

    @Autowired
    StudentDao studentDao;

    @GetMapping(value = "/findStudentById")
    public String findStudentById(@Param("id") int id){
       Student student =  studentDao.findStudentById(id);
       return  new Gson().toJson(student);
    }
}
这里需要注意的几点:
StudentController的注解是RestController,不要写成其他的。我在配置的时候就是因为写成了其他的,然后各种错误。StudentController的RequestMapping注解不是必须的。如果加上的话,那么访问当前Controller的所有API,路径必须加上/studentConteroller。就比如,如果我访问findStudentByIdAPI的话,访问url就是localhost:8080//studentConteroller/findStudentById
写完了,我们来简单的运行吧。
运行没有问题,我们来看看怎么将我们的代码运行在tomcat容器里面。
4. 运行在tomcat容器里面
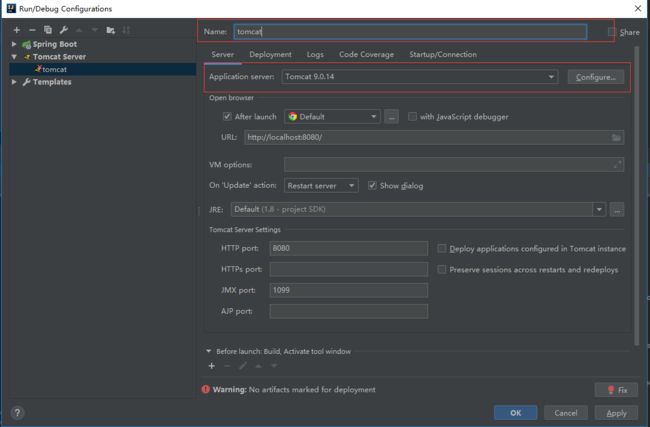
然后点击加号,添加一个tomcat local,如下图:
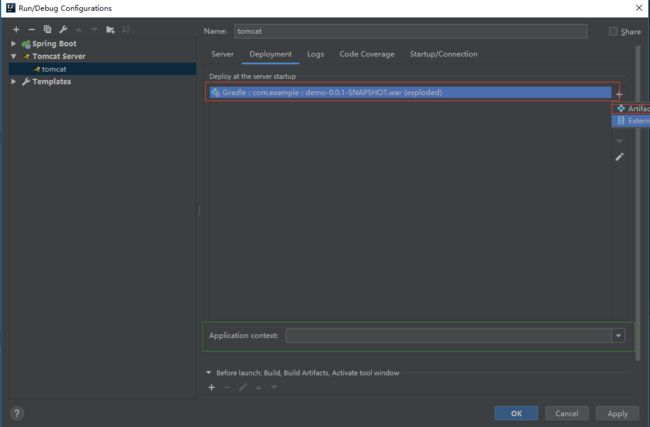
注意配置一下deployment,如下
通常来说,我们可以不用配置Application context。如果配置了的话,那么访问api的url就变成了localhost:8080/ + Application context + path。这里我们就不配置了。
配置完成之后,就可以运行了。注意运行环境选择tomcat:
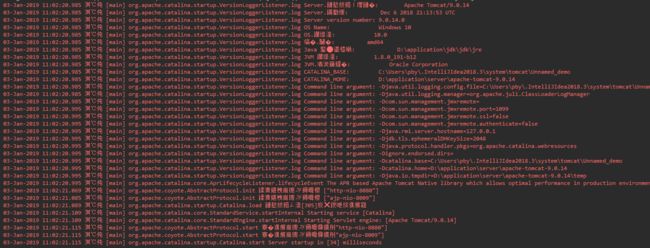
(1).乱码问题
在启动tomcat时,我们发现有乱码的问题,如图:
解决办法是在idea的安装目录下,找到bin目录下的
idea.exe.vmoptions和
idea64.exe.vmoptions,文件后面加上一行
-Dfile.encoding=UTF-8,然后重启idea就行了。
