OpenCV中文字的插入和字体的选择(包括大小)
opencv中提供了函数 cv::putText() 和 函数 cv::getTextSize() 来实现对文字的绘制。
函数 cv::putText():在图像中绘制制定文字
函数 cv::getTextSize():获取一个文字的宽度和高度等尺寸
1、cv::putText()函数
CV_EXPORTS_W void putText( Mat& img, const string& text, Point org,
int fontFace, double fontScale, Scalar color,
int thickness=1, int lineType=8,
bool bottomLeftOrigin=false );
参数解释:
. Mat& img: 要添加备注的图片
. const string& text: 要添加的文字内容
. Point org: 要添加的文字基准点或原点坐标,左上角(原点)还是左下角取决于最后一个参数bottomLeftOrigin的取值
. int fontFace: 文字的字体类型(Hershey字体集),可供选择的有
FONT_HERSHEY_SIMPLEX:正常大小无衬线字体
FONT_HERSHEY_PLAIN:小号无衬线字体
FONT_HERSHEY_DUPLEX:正常大小无衬线字体,比FONT_HERSHEY_SIMPLEX更复杂
FONT_HERSHEY_COMPLEX:正常大小有衬线字体
FONT_HERSHEY_TRIPLEX:正常大小有衬线字体,比FONT_HERSHEY_COMPLEX更复杂
FONT_HERSHEY_COMPLEX_SMALL:FONT_HERSHEY_COMPLEX的小译本
FONT_HERSHEY_SCRIPT_SIMPLEX:手写风格字体
FONT_HERSHEY_SCRIPT_COMPLEX:手写风格字体,比FONT_HERSHEY_SCRIPT_SIMPLEX更复杂
这些参数和FONT_ITALIC同时使用就会得到相应的斜体字
. double fontScale: 字体相较于最初尺寸的缩放系数。若为1.0f,则字符宽度是最初字符宽度,若为0.5f则为默认字体宽度的一半
. Scalar color: 很熟悉了,字体颜色
. int thickness = 1: 字体笔画的粗细程度,有默认值1
. int lineType = 8: 字体笔画线条类型,有默认值8
. bool bottomLeftOrigin = false: 如果取值为TRUE,则Point org指定的点为插入文字的左上角位置,如果取值为默认值false则指定点为插入文字的左下角位置.
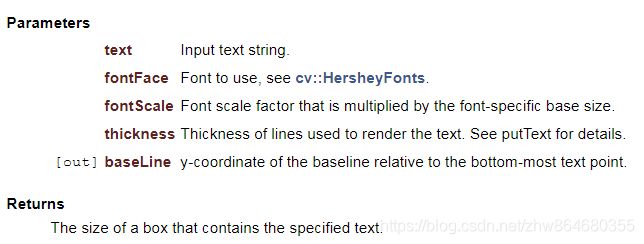
2、cv::getTextSize()函数
CV_EXPORTS_W Size getTextSize(const string& text, int fontFace,
double fontScale, int thickness,
CV_OUT int* baseLine);
参数解释:
. const string& text: 输入的文本文字
. int fontFace: 文字字体类型 ,可参考见cv::putText()函数中的字体类型
. double fontScale: 字体缩放系数
. int thickness: 字体笔画线宽
. CV_OUT int* baseLine: 文字最底部y坐标
3、示例代码
#include

using namespace cv;
using namespace std;

int main()
{
	Mat image = imread("D:/test.jpg");
	if (!image.data) {
		cout << "read image error" << endl;
		return -1;
	}
	imshow("Orignal", image);

	string text = "hello world";
	int fontFace = FONT_HERSHEY_SIMPLEX || FONT_HERSHEY_SIMPLEX;
	double fontScale = 2;
	int thickness = 3;
	int baseline = 0;

	Size textSize = getTextSize(text, fontFace, fontScale, thickness, &baseline);
	baseline += thickness;

	//center the text
	Point textOrg((image.cols - textSize.width) / 2, (image.rows + textSize.height) / 2);

	int lineType = 12;
	//draw the box
	rectangle(image, textOrg + Point(0, baseline), textOrg + Point(textSize.width, -textSize.height), Scalar(0, 0, 255), thickness, lineType);

	//draw the line
	line(image, textOrg + Point(0, thickness), textOrg + Point(textSize.width, thickness), Scalar(0, 0, 255), thickness, lineType);

	putText(image, text, textOrg, fontFace, fontScale, Scalar::all(255), thickness, lineType);
	imshow("text", image);

	waitKey(0);
	return 0;
}
演示效果:

