1. 花钱 申请一个新vps . e.g BWG
2. 选 新装 ubuntu 16.04 x86-64
3. 按 系统给的新密码 和端口 ,在本机的ubuntu 上的终端里,用ssh 登录
4, 登录后 ,安装
sudo apt-get update
这里如果失败 ,按照 系统画面给出的提示 ,
安装
sudo dpkg --configure -a
5, 安装
sudo apt-get upgrade (安装完上面的sudo dpkg --configure -a ,就可以 不报错的安装 upgrade了)
6, 安装 apache2
sudo apt-get install apache2
如何检查 : 3个方式
a) 直接使用apachectl -v命令
root@ubuntu:~# apachectl -v
Server version: Apache/2.4.18 (Ubuntu)
Server built: 2018-04-18T14:53:04
b) cd /etc/apache2/ 下 看修改 conf 文件
c) cd /var/www/html 下 有 index.html ,(另外安装完 apache2后 ,就可以 在浏览器中输入 : http://93.xx.xx.xx/ 看apache2的缺省界面
7, 安装合适的 wsgi
sudo apt-get install libapache2-mod-wsgi-py3
详见:https://www.jianshu.com/writer#/notebooks/19655835/notes/28703718
8, 安装 git 在 新 VPS上
--// 注意在 新的ubuntu的update /upgrade 后,git 已经包含在内了。
root@ubuntu:/var/www# sudo apt-get install git
Reading package lists... Done
Building dependency tree
Reading state information... Done
git is already the newest version (1:2.7.4-0ubuntu1.3).
9 , 生成 GIT ssh 在VPS的本地客户端, 然后 和远端的Github的setting 做设置连接 。
ssh-keygen -t rsa -C "ya??[email protected]"
root@ubuntu:~# ls -ah
. .. .bash_history .bashrc .cache .gitconfig .nano .profile .ssh
root@ubuntu:~# cd .ssh
root@ubuntu:~/.ssh# ls
id_rsa id_rsa.pub
root@ubuntu:~/.ssh# cat id_rsa.pub
output =
--blabla ---.....
--// 9-b ,If you get a permission denied error on trying to clone the Git repository, you
might need to take ownership of the /var/www directory for the Linux user that
you're using.
sudo chown -R tom(any username) /var/www
sudo chown –R tom(any username) /etc/apache2
10 ,在 https://github.com/settings/keys 这里 把 < your SSH key > fill in ,and finalize it .
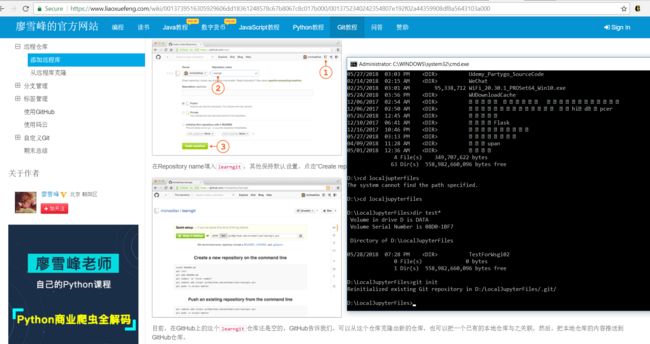
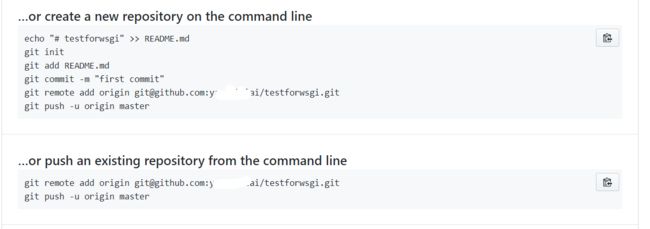
11. 在github 端 ,创建 新 repository ,e.g testforwsgi
参考网页:
https://www.liaoxuefeng.com/wiki/0013739516305929606dd18361248578c67b8067c8c017b000/0013752340242354807e192f02a44359908df8a5643103a000
然后 回到 *.py所在的pc 机 ,
D:\LocalJupyterFiles>git init
Reinitialized existing Git repository in D:/LocalJupyterFiles/.git/
然后再运行命令:
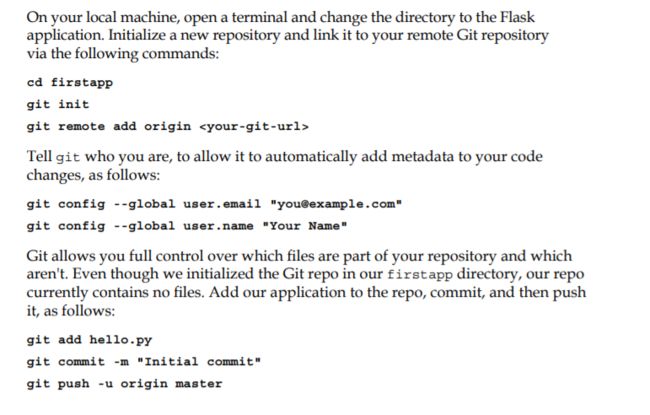


12 ,VPS 再 git pull 下来 ,(from github ),上述的*.py 文件 。

14, VPS 上安装 python3 和python3-pip
参考的网页: 非常好,值得反复阅读 --thumb up
http://flask.pocoo.org/docs/dev/installation/
依次输入的命令如下:
python3 -V
sudo apt-get install -y python3-pip
pip3 list
sudo apt-get install build-essential libssl-dev libffi-dev python3-dev
pip3 install --upgrade pip --// pip3的升级
虚拟环境
sudo apt-get install -y python3-venv
sudo apt-get install virtualenv
root@ubuntu:/var/www# ls
source venv/bin/activate
(venv) root@ubuntu:/var/www#
14 . VPS的路径 里面检验 *.py ,同时在 VPS的本地生成 *.wsgi 和 *.conf
不放在 github上
但是 pc的 本地 ,和 VPS的本地 都各放备份
nano hwforwsgi.wsgi
nano hwforwsgi.conf
(venv) root@ubuntu:/var/www/testwsgi# ls
hwforwsgi.conf hwforwsgi.py hwforwsgi.wsgi
15. 把 var/www/testwsgi 中的 *.wsgi 文件 拷贝到 /etc/apache2/sites-available/ 下面
(venv) root@ubuntu:/var/www# cd testwsgi
(venv) root@ubuntu:/var/www/testwsgi# ls
hwforwsgi.conf hwforwsgi.py hwforwsgi.wsgi
(venv) root@ubuntu:/var/www/testwsgi# cp -r hwforwsgi.conf /etc/apache2/sites-available/
16 . 替换 conf 在 sites-enabled中
sudo a2dissite 000-default.conf
sudo a2ensite hello.conf
sudo service apache2 reload
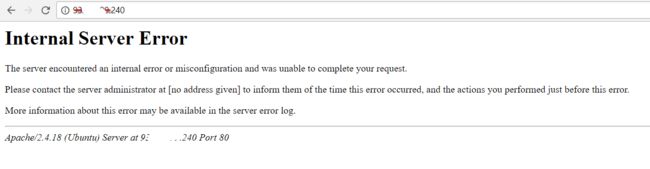
17. 首次运行失败 ,结果如下
18.但是 用python 加hwforwsgi.py ,做VPS的本地直接运行, 却可以 运行成功
(venv) root@ubuntu:/var/www/testwsgi# python hwforwsgi.py
* Serving Flask app "hwforwsgi" (lazy loading)
* Environment: production
WARNING: Do not use the development server in a production environment.
Use a production WSGI server instead.
* Debug mode: on
* Running on http://127.0.0.1:5000/ (Press CTRL+C to quit)
* Restarting with stat
* Debugger is active!
19 ,进入apache2 log 进行 调试错误。
By default, /var/log/apache2/error.log.
This can be configured in /etc/php5/apache2/php.ini.


20, 重写 了 hwforwsgi.wsgi 的第2行:
原来的是:
#execfile(activate_this, dict(__file__=activate_this))
新的支持py3下的mod-wsgi3的是 (语法见 上面19的问题 来源分析)
exec(compile(open(activate_this, "rb").read(), activate_this, 'exec'), dict(__file__=activate_this))
然后记得 重新load下 apache2
sudo service apache2 reload
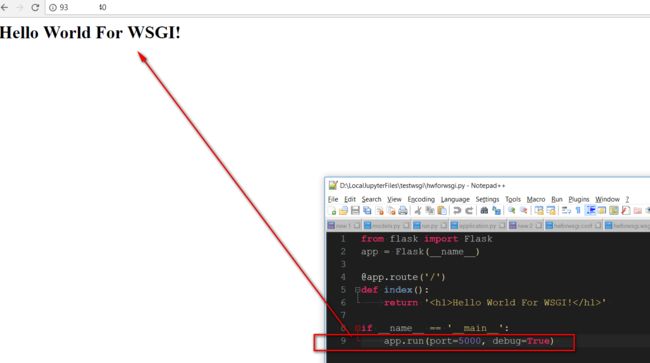
成功后的显示如下:

21. 继续验证 ,
apache2上的页面显示 成功与否 ,应该和 app.run(port=5000, debug=True) 无关
就是说 写 port=5000, debug=True 和写 debug =Flase ,都可以显示一样的效果(当然,还是关掉debuger在pdt env 比较好)
22. 还要留意的一个坑:
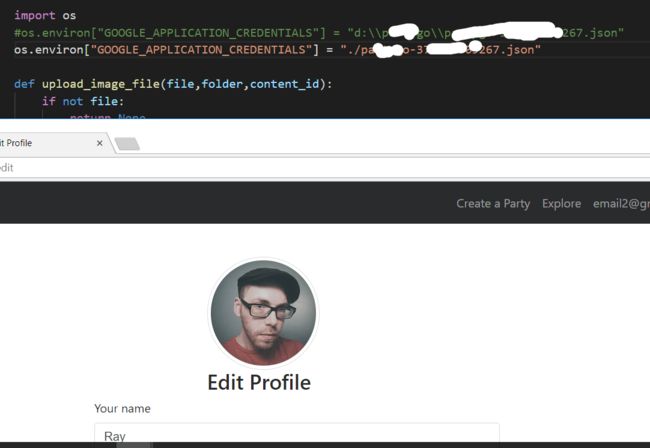
// 后继我用上面的0~21 来尝试上传近期的P.GO程序
但是因为里面 的python 代码 ,因为要+对google cloud platform的json验证 (当时 为了测试 添加 绝对地址“
使用了 d// ??//??.json的引用
但是 这里 即将要 上传到 VPS上,
所以 所有类似的带 这个 pc本地路径的代码,都要 用相对地址再写一遍
参考网页,
https://www.jianshu.com/p/fe0277542ecb
--// e.g. 实际的代码改动如下: