Android动画那些事儿---属性动画(Property Animation)
本文同步发布在掘金,转载请注明出处。
上篇文章详细讲解了视图动画,也提到了视图动画存在的先天不足,即补间动画不具有交互性。动画改变的只是显示效果,其响应事件却依然还在原来的位置。在Android3.0之后引入了属性动画,属性动画相比视图动画具有更强大的功能,不仅弥补了视图动画的先天不足,而且属性动画不仅仅可以作用于View,而是作用于任意对象。接下来,我们依然结合Android动画的结构图来看:
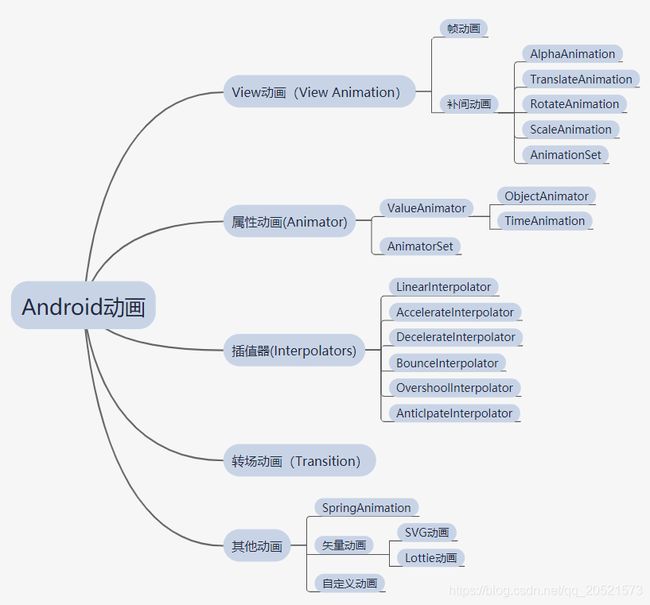
从图中可以看到,属性动画有ValueAnimator和AnimatorSet两个类,这两个类均继承自android.animation.Animator类,从名字上来看ValueAnimator叫数值动画,是一个动画类,它有两个子类分别是ObjectAnimator和TimeAnimator;而AnimatorSet从名字上也可以看得出来它是一个属性动画的集合类。因此我们就自上而下从Animator这个类开始逐步了解Android的属性动画。
1.Animator类
Animator类是一个抽象类,是ValueAnimator和AnimatorSet的父类,因此这个方法中一定声明了许多公共的方法:
| Method | Method description |
|---|---|
| void start() | Starts this animation. |
| void cancel() | Cancels the animation. |
| void end() | Ends the animation. |
| void pause() | Pauses a running animation. |
| void resume() | Resumes a paused animation |
| void addListener(AnimatorListener listener) | Adds a listener to the set of listeners that are sent events through the life of ananimation, such as start, repeat, and end. |
| setInterpolator(TimeInterpolator value) | The time interpolator used in calculating the elapsed fraction of theanimation. |
Animator中常用到的方法大概也就这么多,因为Animator是一个抽象类,因此这个类中的方法大多是抽象方法或者是空方法,具体的实现都在子类中,并且从方法的名字上就能看懂方法的用途,因此关于这个类没什么要说的,不过最后一个方法setInterpolator(TimeInterpolator value)可能会有些陌生,这个方法是为动画设置一个插值器,可以去控制动画的速率,关于插值器的知识暂且了解就好,后续会对插值器深入讲解。
2.ValueAnimator
ValueAnimator在属性动画中有着非常重要的作用,它是属性动画的核心。ValueAnimator本身并没有提供任何动画效果,它会接收一个初始值和结束值,在运行的过程中不断的改变数值的大小从而实现动画的变换。我们来看ValueAnimator中提供的API:
| Method | Method description |
|---|---|
| ValueAnimator ofInt(int… values) | Constructs and returns a ValueAnimator that animates between int values. |
| ValueAnimator ofFloat(float… values) | Constructs and returns a ValueAnimator that animates between float values. |
| ValueAnimator ofArgb(int… values) | Constructs and returns a ValueAnimator that animates between color values. |
| ValueAnimator ofPropertyValuesHolder(PropertyValuesHolder… values) | Constructs and returns a ValueAnimator that animates between the values specified in the PropertyValuesHolder objects. |
| ValueAnimator ofObject(TypeEvaluator evaluator, Object… values) | Constructs and returns a ValueAnimator that animates between Object values. |
| void setRepeatCount(int value) | Sets how many times the animation should be repeated. |
| setRepeatMode(@RepeatMode int value) | Defines what this animation should do when it reaches the end. |
| addUpdateListener(AnimatorUpdateListener listener) | Adds a listener to the set of listeners that are sent update events through the life of an animation. |
上面我们列出了ValueAnimator中常用的一些方法,前面我们提到ValueAnimator其实是一个数值生成器,那么ValueAnimator是如何产生一个变化的数值的呢?下面看一个例子:
ValueAnimator valueAnimator = ValueAnimator.ofFloat(0,1);
        valueAnimator.setDuration(200);
        valueAnimator.addUpdateListener(new ValueAnimator.AnimatorUpdateListener() {
            @Override
            public void onAnimationUpdate(ValueAnimator animation) {
                int animatedValue = (int) animation.getAnimatedValue();
                Log.e("ValueAnimator","animatedValue-------"+animatedValue);
            }
        });
        valueAnimator.start();
上述代码初始化了一个从0-1的数值是float类型的ValueAnimator,我们为其设置了200毫秒的动画时间,并为其添加了addUpdateListener来监听动画更新,并将日志打印出来:
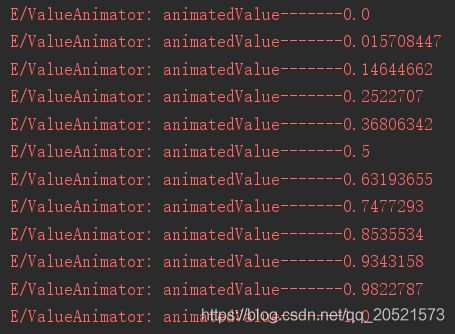
可以看到在动画的执行过程中控制台打印除了一系列个从0-1平滑过渡的浮点数值。有些小伙伴可能注意到ofFloag方法接收的是一个可变长度的参数,如果我们传入多个参数会怎样呢?可以试下如下代码:
ValueAnimator valueAnimator = ValueAnimator.ofFloat(0,1,0);
        valueAnimator.setDuration(200);
        valueAnimator.addUpdateListener(new ValueAnimator.AnimatorUpdateListener() {
            @Override
            public void onAnimationUpdate(ValueAnimator animation) {
                int animatedValue = (int) animation.getAnimatedValue();
                Log.e("ValueAnimator","animatedValue-------"+animatedValue);
            }
        });
        valueAnimator.start();
这次我们在ofFloat中传入了三个参数,来看控制台输出日志:

哈?原来如此!控制台上打印除了一些列从0-1再从1-0的浮点数值,现在我们应该明白了为什么ofFloat方法是一个可变长参数了吧。
我们应该注意到上述ValueAnimator提供的接口中除了ofFlot(float… values)之外还有ofInt(int… values)、ofArgb(int… values)、以及ofObject(Object… values)。其实明白了ofFloat后,其它的方法都与之类似,ofInt(int… values)方法会产生一系列的int类型的数值;而ofArgb(int… values)这个方法是在API 21之后才引入的,该方法可以生成一系列的颜色数值,方便我们去做颜色渐变。针对ofArgb(int… values)我们可以看一个例子:
        mCircleView = findViewById(R.id.circleView);
        valueAnimator = ValueAnimator.ofArgb(0xffff0000, 0xff00ff00);
        valueAnimator.setDuration(3000);
        valueAnimator.addUpdateListener(new ValueAnimator.AnimatorUpdateListener() {
            @Override
            public void onAnimationUpdate(ValueAnimator animation) {
                mCircleView.setCirCleColor((int) animation.getAnimatedValue());
            }
        });
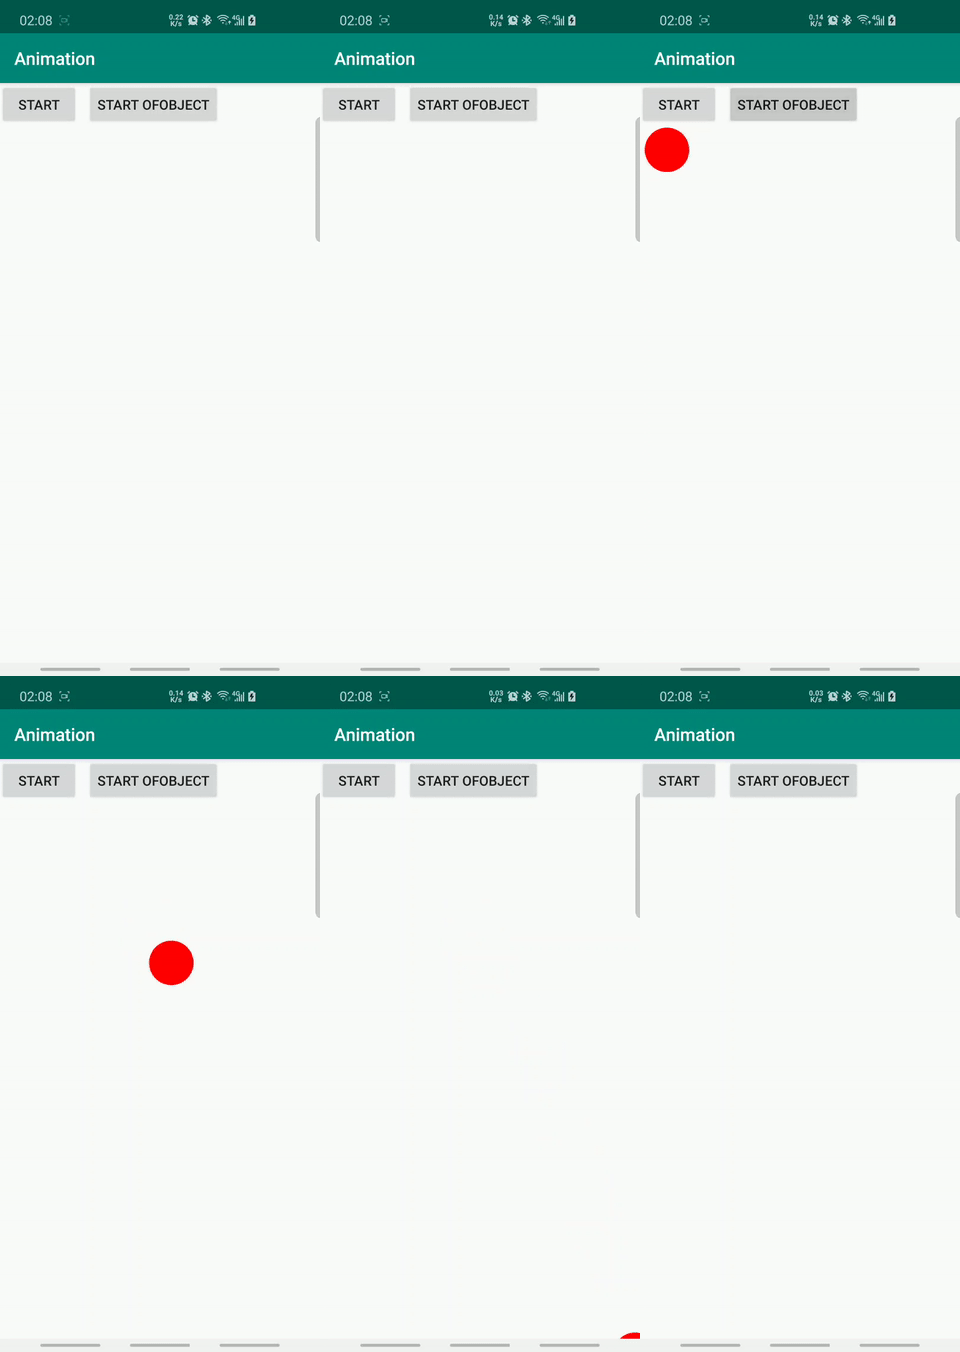
上边代码中初始化了一个从颜色值红色(#FFFF0000)到绿色(#FF00FF00)的ValueAnimator,并在addUpdateListener中为一个自定义的CircleView去设置颜色,我们来看效果图:

好了,上述的几个方法用起来都非常的简单,但是不要忘了上面我们还提到了一个ofObject(Object… values)的方法,现在你可能纳闷了!不管是ofFlot(float… values) 、ofInt(int… values)还是ofArgb(int… values)说到底都是数值类型,但ofObject(Object… values)应该怎么理解呢?难不成还能是一个Object的变换?莫方,我们接着看。
要说ofObject((Object… values)我们应该先从TypeEvaluator开始。TypeEvaluator是一个接口,官方文档是对他的解释是这么说的:
TypeEvaluator是一个用在setevaluator(typeevaluator)方法的接口,它允许开发者在任意属性类型上创建动画,允许开发者提供Android Animation system无法理解或者使用的TypeEvaluator。
看了文档也没懂什么意思?那可能是我英文太菜了,,,翻译不到位。。。。反正大概意思就是告诉我们这个接口用在setevaluator上,并且允许我们去自定义TypeEvaluator,我们还是结合一个例子来看。
首先我们来定义一个圆的坐标类:
public class CircleCenter {
    private float CenterX;
    private float CenterY;

    public CircleCenter(float centerX, float centerY) {
        CenterX = centerX;
        CenterY = centerY;
    }

    public float getCenterX() {
        return CenterX;
    }

    public void setCenterX(float centerX) {
        CenterX = centerX;
    }

    public float getCenterY() {
        return CenterY;
    }

    public void setCenterY(float centerY) {
        CenterY = centerY;
    }
}
然后来自定义一个TypeEvaluator
public class CircleCenterEvaluator implements TypeEvaluator {
    @Override
    public CircleCenter evaluate(float fraction, CircleCenter startValue, CircleCenter endValue) {
        // x方向匀速移动
        float centerX = startValue.getCenterX() + fraction * (endValue.getCenterX() - startValue.getCenterX());
        // y方向抛物线加速移动
        float centerY = startValue.getCenterY() + fraction * fraction * (endValue.getCenterY() - startValue.getCenterY());
        return new CircleCenter(centerX, centerY);
    }
}
接下来我们调用ofObject开启动画,并设置计算出来的圆的圆心坐标:
        CircleCenter startValue = new CircleCenter(0, 150);
        CircleCenter endValue = new CircleCenter(ScreenUtils.getScreenWidth(), ScreenUtils.getScreenHeight());
        valueAnimator = ValueAnimator.ofObject(new CircleCenterEvaluator(), startValue, endValue);
        valueAnimator.setDuration(3000);
        valueAnimator.setEvaluator(new CircleCenterEvaluator());
        valueAnimator.addUpdateListener(new ValueAnimator.AnimatorUpdateListener() {
            @Override
            public void onAnimationUpdate(ValueAnimator animation) {
                CircleCenter circleCenter = (CircleCenter) animation.getAnimatedValue();
                mCircleView.setX(circleCenter.getCenterX());
                mCircleView.setY(circleCenter.getCenterY());
                mCircleView.invalidate();
            }
        });
        valueAnimator.start();
我们通过自定义TypeEvaluator和ofObject方法完成了一个小球的抛物线动画,由此可见ofObject的强大之处了。
3.ObjectAnimator
上一节中我们认识了ValueAnimator,通过几个例子我们已经了解到了ValueAnimator有多么强大,但是接下来我们要讲到ObjectAnimator于ValueAnimator相比有着更强大的功能,可以说ObjectAnimator是属性动画中最重要最核心的一个类。
上面我们已经提到ObjectAnimator是继承自ValueAnimator,那么自然ObjectAnimator会具有很多ValueAnimator不具备的东西。我们先来看ObjectAnimator给我们提供的API:
| Method | Method description |
|---|---|
| ObjectAnimator ofInt(Object target, String propertyName, int… values) | Constructs and returns an ObjectAnimator that animates between int values. |
| ObjectAnimator ofMultiInt(Object target, String propertyName, int[][] values) | Constructs and returns an ObjectAnimator that animates over int values for a multiple parameters setter. |
| ObjectAnimator ofArgb(Object target, String propertyName, int… values) | Constructs and returns an ObjectAnimator that animates between color values. |
| ObjectAnimator ofFloat(Object target, String propertyName, float… values) | Constructs and returns an ObjectAnimator that animates between float values |
| ObjectAnimator ofMultiFloat(Object target, String propertyName, float[][] values) | Constructs and returns an ObjectAnimator that animates over float values for a multiple parameters setter. |
| ObjectAnimator ofObject(Object target, String propertyName, TypeEvaluator evaluator, Object… values) | Constructs and returns an ObjectAnimator that animates between Object values |
ObjectAnimator中常用的方法大概如此,但是这些方法有很多的重载方法并没有在此一一列出,如果想了解的可以直接查看ObjectAnimator的源码即可。限于篇幅,本节内容不会每个方法都讲解,而是挑选典型的ofFloat()方法来了解ObjectAnimato的特性,其余方法基本类似。
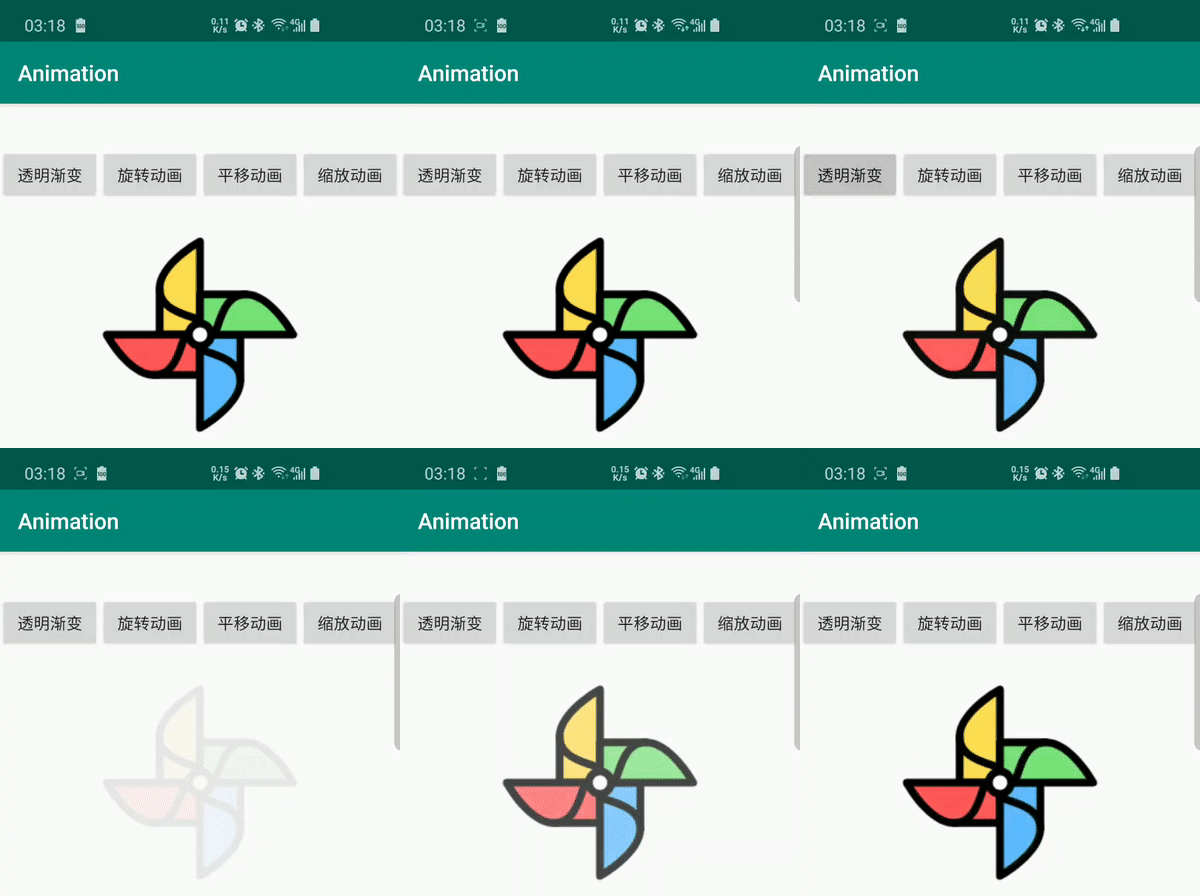
上篇文章我们讲到补间动画,通过补间动画我们可以对View进行平移、旋转、缩放等变换操作,文章开头我们也提到了属性动画相比补间动画有着更强大的功能。既然如此,那么通过属性动画对View进行平移、旋转、缩放一定是可行的。没错,这些动画变换就可以通过ObjectAnimator来实现。接下来我们就通过ObjectAnimator来实现View的变换操作。
ObjectAnimator实现透明度动画
        ObjectAnimator animator = ObjectAnimator.ofFloat(mImageView, "alpha", 1f, 0f, 1f);
        animator.setDuration(2000);
        animator.start();
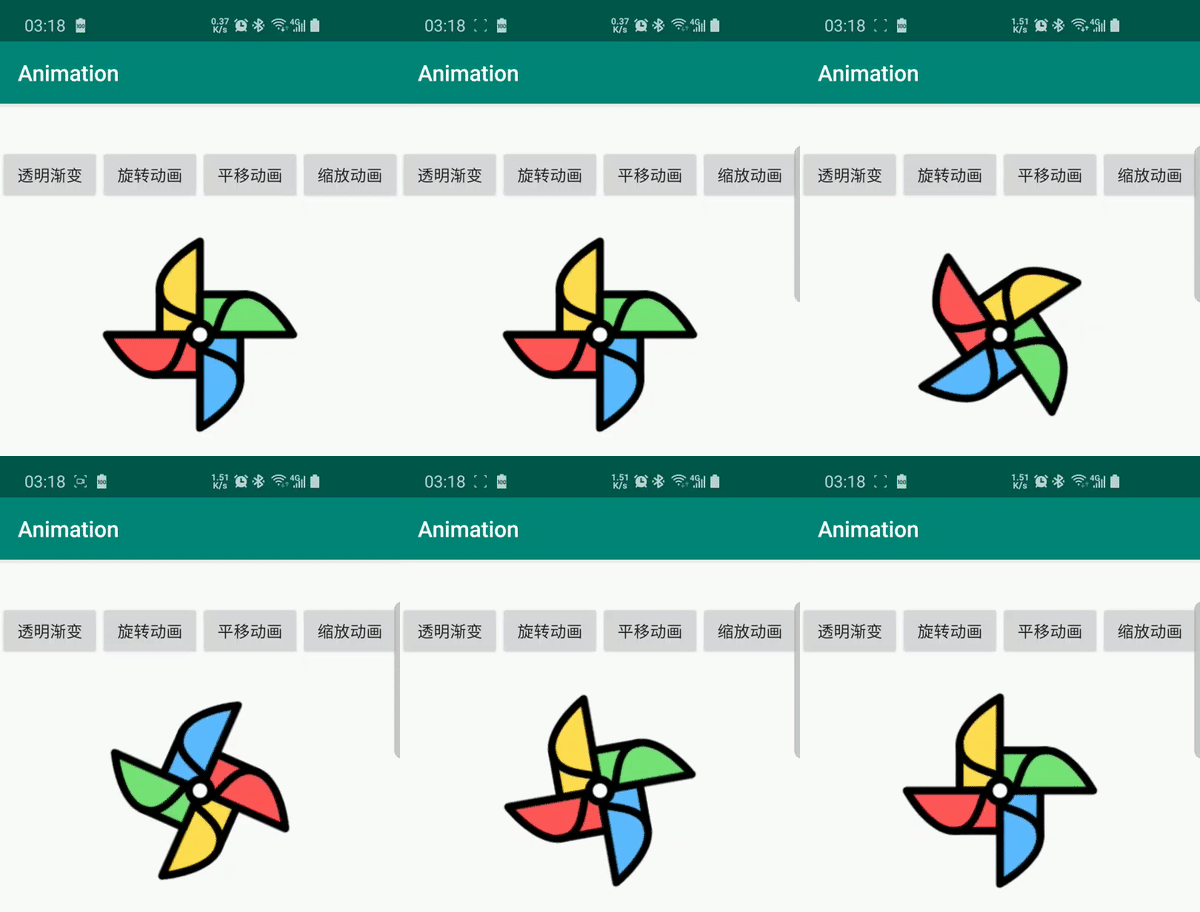
ObjectAnimator实现旋转动画
        ObjectAnimator animator = ObjectAnimator.ofFloat(mImageView, "rotation", 0f, 360f);
        animator.setDuration(2000);
        animator.start();
        float translationY = mImageView.getTranslationY();
        ObjectAnimator animator = ObjectAnimator.ofFloat(mImageView, "translationY", translationY, translationY + 400);
        animator.setDuration(2000);
        animator.start();
    ObjectAnimator animator = ObjectAnimator.ofFloat(mImageView, "scaleY", 1f, 2f, 1f);
    animator.setDuration(2000);
    animator.start();

ObjectAnimator如何实现View的变换?
通过上边几个例子我们发现使用ObjectAnimator实现View的变换操作是非常简单的。但是不知道大家有没有疑问,为什么调用ofFloat()方法时传入一个 "alpha"参数就可以实现View透明渐变了,而传入一个 "rotation"参数就可以对View进行旋转了?带着疑问我们可以来简单的做下源码分析。首先看View的源码,可以看到View中提供了众多View变换的方法,其中就有setAlpha与setRotation,其源码如下:
  public void setAlpha(@FloatRange(from=0.0, to=1.0) float alpha) {
        ensureTransformationInfo();
        if (mTransformationInfo.mAlpha != alpha) {
            setAlphaInternal(alpha);
            if (onSetAlpha((int) (alpha * 255))) {
                mPrivateFlags |= PFLAG_ALPHA_SET;
                // subclass is handling alpha - don't optimize rendering cache invalidation
                invalidateParentCaches();
                invalidate(true);
            } else {
                mPrivateFlags &= ~PFLAG_ALPHA_SET;
                invalidateViewProperty(true, false);
                mRenderNode.setAlpha(getFinalAlpha());
            }
        }
    }


 public void setRotation(float rotation) {
        if (rotation != getRotation()) {
            // Double-invalidation is necessary to capture view's old and new areas
            invalidateViewProperty(true, false);
            mRenderNode.setRotation(rotation);
            invalidateViewProperty(false, true);

            invalidateParentIfNeededAndWasQuickRejected();
            notifySubtreeAccessibilityStateChangedIfNeeded();
        }
    }
那么我们不禁猜想源码中是不是根据我们传入的参数来调用View中所对应的方法以此来达到变换的目的呢?为了验证我们的猜想,我们把"scaleY"改为"scaleZ",这时发现编译器报错了,并有如下提示:

哈哈,果然如此,编译器提示我们在ImageView中找不到setScaleZ这个方法!并且提示我们这个错误检查是由ObjectAnimator和PropertyValuesHolder确保的,那么我们还是来深入ObjectAnimator的源码来看吧,首先从ObjectAnimator.ofFloat(mImageView, “scaleY”, 0f, 360f)这个方法入手,点开后该方法如下:
 public static ObjectAnimator ofFloat(Object target, String propertyName, float... values) {
        ObjectAnimator anim = new ObjectAnimator(target, propertyName);
        anim.setFloatValues(values);
        return anim;
    }
propertyName被传入了ObjectAnimator的构造方法中,那么我们跟进ObjectAnimator的构造方法:
 private ObjectAnimator(Object target, String propertyName) {
        setTarget(target);
        setPropertyName(propertyName);
    }
挺简单,两行代码,但没有找到我们想要的内容,那就继续跟进setPropertyName(propertyName)方法:
 public void setPropertyName(@NonNull String propertyName) {
        // mValues could be null if this is being constructed piecemeal. Just record the
        // propertyName to be used later when setValues() is called if so.
        if (mValues != null) {
            PropertyValuesHolder valuesHolder = mValues[0];
            String oldName = valuesHolder.getPropertyName();
            valuesHolder.setPropertyName(propertyName);
            mValuesMap.remove(oldName);
            mValuesMap.put(propertyName, valuesHolder);
        }
        mPropertyName = propertyName;
        // New property/values/target should cause re-initialization prior to starting
        mInitialized = false;
    }
在此方法中我们看到上面错误提示中提到的PropertyValuesHolder , valuesHolder.setPropertyName将propertyName设置到了其内部,那么就来看这个类中如何去处理propertyName的吧。
public void setPropertyName(String propertyName) {
        mPropertyName = propertyName;
    }
赋值给了PropertyValuesHolder的成员变量mPropertyName,于是搜索mPropertyName后我们发现:
 private Method getPropertyFunction(Class targetClass, String prefix, Class valueType) {
        // TODO: faster implementation...
        Method returnVal = null;
        String methodName = getMethodName(prefix, mPropertyName);
        Class args[] = null;
        if (valueType == null) {
            try {
                returnVal = targetClass.getMethod(methodName, args);
            } catch (NoSuchMethodException e) {

            }
        } else {
          // ... 省略无关代码
        }

 		// ... 省略无关代码
        return returnVal;
    }
在这个方法中通过getMethodName(prefix, mPropertyName)获取到了一个方法名,并由该方法名通过反射得到了这个方法,我们来看哪个地方掉用了getPropertyFunction方法,搜索发现setupSetterOrGetter方法中调用,setupSetterOrGetter并将这个方法作为返回值返回,并赋值给了PropertyValuesHolder的成员变量mSetter,最终在setAnimatedValue方法中反射调用了这个方法,代码如下:
 void setAnimatedValue(Object target) {
        if (mProperty != null) {
            mProperty.set(target, getAnimatedValue());
        }
        if (mSetter != null) {
            try {
                mTmpValueArray[0] = getAnimatedValue();
                mSetter.invoke(target, mTmpValueArray);
            } catch (InvocationTargetException e) {
                Log.e("PropertyValuesHolder", e.toString());
            } catch (IllegalAccessException e) {
                Log.e("PropertyValuesHolder", e.toString());
            }
        }
    }
此时我们可能有些疑问,被反射调用的这个方法究竟是什么名字呢?我们追进getMethodName的源码:
getMethodName("set", mPropertyName);

 static String getMethodName(String prefix, String propertyName) {
        if (propertyName == null || propertyName.length() == 0) {
            // shouldn't get here
            return prefix;
        }
        char firstLetter = Character.toUpperCase(propertyName.charAt(0));
        String theRest = propertyName.substring(1);
        return prefix + firstLetter + theRest;
    }
此时,一切都明朗了,原来就是通过字符串拼接起来的方法名,prefix即为“set”,而mPropertyName就是我们传进来的那个参数( “alpha”),getMethodName方法中将"scaleY"首字母转成了大写,并最终拼接出了prefix + firstLetter + theRest,即:setScaleY。到这里我们终于明白了为什么在ObjectAnimator中传入一个字符串就可以改变ImageView的变换。
明白了ObjectAnimator如何实现View的变换,那么此时就有了一个问题,既然变换最终是通过set方法实现的,那么如果我们自己添加一个set方法是不是也应该能被调用到呢?猜测应该是可行的吧,心动不如行动,我们不妨来试试看。
首先来改造上述代码中的自定义CircleView,在该方法中添加setProgress方法,并添加一个startAnimate()的方法,最终代码如下:
public class CircleView extends View {
    private Paint mPaint;

    public CircleView(Context context) {
        this(context, null);
    }

    public CircleView(Context context, AttributeSet attrs) {
        this(context, attrs, 0);
    }

    public CircleView(Context context, AttributeSet attrs, int defStyleAttr) {
        super(context, attrs, defStyleAttr);
        mPaint = new Paint();
        mPaint.setColor(Color.parseColor("#FF0000"));
        mPaint.setAntiAlias(true);
    }

    public void setCirCleColor(int color) {
        mPaint.setColor(color);
        invalidate();
    }

    @Override
    protected void onDraw(Canvas canvas) {
        super.onDraw(canvas);
        int width = getWidth();
        int height = getHeight();
        float radius = Math.min(width, height) / 2f;
        canvas.drawCircle(width / 2f, height / 2f, radius, mPaint);
    }

    public void setProgress(float progress) {
        Log.e("CircleView", "progress---->" + progress);
    }

    public void startAnimate() {
        ObjectAnimator objectAnimator = ObjectAnimator.ofFloat(this, "progress", 0, 1f);
        objectAnimator.setDuration(200);
        objectAnimator.start();
    }
}
很棒!当我们在CircleView加了setProgress(float progress)方法后,再通过ObjectAnimator.ofFloat(this, “progress”, 0, 1f)去实例化ObjectAnimator,此时编译器并没有报错。接下来我们在Activity中调用startAnimate方法来看控制台是否能打印出progress的日志:
mCircleView.startAnimate();
果真,在调用mCircleView.startAnimate()方法后我们在控制台看到了如下日志:

那有人会问我们自己定义的属性有用吗?当然有用,在自定义View中我们以此来做出炫酷的动画,具体可以参考我之前写过的一篇文章自定义View之颜色渐变折线图
好了,到这里关于ObjectAnimator的相关知识差不都已经结束了。
4.AnimatorSet
从名字上就可以知道AnimatorSet是一个动画的集合类,它跟补间动画中的AnimationSet有些类似。使用也非常简单,举个例子如下:
 ObjectAnimator animator1 = ObjectAnimator.ofFloat(mImageView, "scaleY", 1f, 2f, 1f);
 ObjectAnimator animator2 = ObjectAnimator.ofFloat(mImageView, "rotation", 0f, 360f);
 ObjectAnimator animator3 = ObjectAnimator.ofFloat(mImageView, "alpha", 1f, 0f, 1f);
  AnimatorSet animatorSet = new AnimatorSet();
  animatorSet.setDuration(2000);
  animatorSet.playTogether(animator1, animator2, animator3);
  animatorSet.start();
animatorSet.playSequentially(animator1,animator2,animator3);

属性动画中除了AnimatorSet之外还提供了PropertyValuesHolder,这个类上边我们已经提到,它也可以实现同时播放多种动画,效果与AnimatorSet.playTogether()一样,其使用代码如下:
 PropertyValuesHolder alpha = PropertyValuesHolder.ofFloat("alpha", 1f, 0f, 1f);
 PropertyValuesHolder rotation = PropertyValuesHolder.ofFloat("rotation", 0f, 360f);
 PropertyValuesHolder scaleY = PropertyValuesHolder.ofFloat("scaleY", 1f, 2f, 1f);
ObjectAnimator.ofPropertyValuesHolder(mImageView, alpha, rotation, scaleY).setDuration(2000).start();
5.Animator的监听事件
Animator动画具有Start、Repeat、End以及Cancel事件。系统为我们提供了这些事件的监听,代码如下:
animator.addListener(new Animator.AnimatorListener() {
            @Override
            public void onAnimationStart(Animator animation) {
          	      // Animation Start
            }

            @Override
            public void onAnimationEnd(Animator animation) {
 				  // Animation End
            }

            @Override
            public void onAnimationCancel(Animator animation) {
 				  // Animation Cance
            }

            @Override
            public void onAnimationRepeat(Animator animation) {
 			 	 // Animation nRepea
            }
        });
如果只想监听某一个事件则可以:
animator.addListener(new AnimatorListenerAdapter() {
            @Override
            public void onAnimationEnd(Animator animation) {
                super.onAnimationEnd(animation);
            }
        });
这里AnimatorListenerAdapter是一个抽象类,我们监听时只重写了onAnimationEnd。
5.Interpolator
第一节中我们提到属性动画中由一个setInterpolator(TimeInterpolator value)的方法,这个方法是为动画设置一个插值器,可以去控制动画的速率,插值器的用法非常简单,系统给我们提供了setInterpolator(TimeInterpolator value)的方法,我们只需要传入一个插值器就可以了,我们来看一个例子:
ValueAnimator valueAnimator = ValueAnimator.ofFloat(150, ScreenUtils.getAppScreenHeight() - 700);
        valueAnimator.setDuration(1000);
        valueAnimator.addUpdateListener(new ValueAnimator.AnimatorUpdateListener() {
            @Override
            public void onAnimationUpdate(ValueAnimator animation) {
                float centerY = (float) animation.getAnimatedValue();
                mCircleView.setY(centerY);
                mCircleView.invalidate();
                }
            }
        valueAnimator.setInterpolator(new AccelerateInterpolator());
        valueAnimator.start();
注意上述代码我们为动画设置了一个加速插值器AccelerateInterpolator,来看动画效果,小球有一个加速下落的过程:
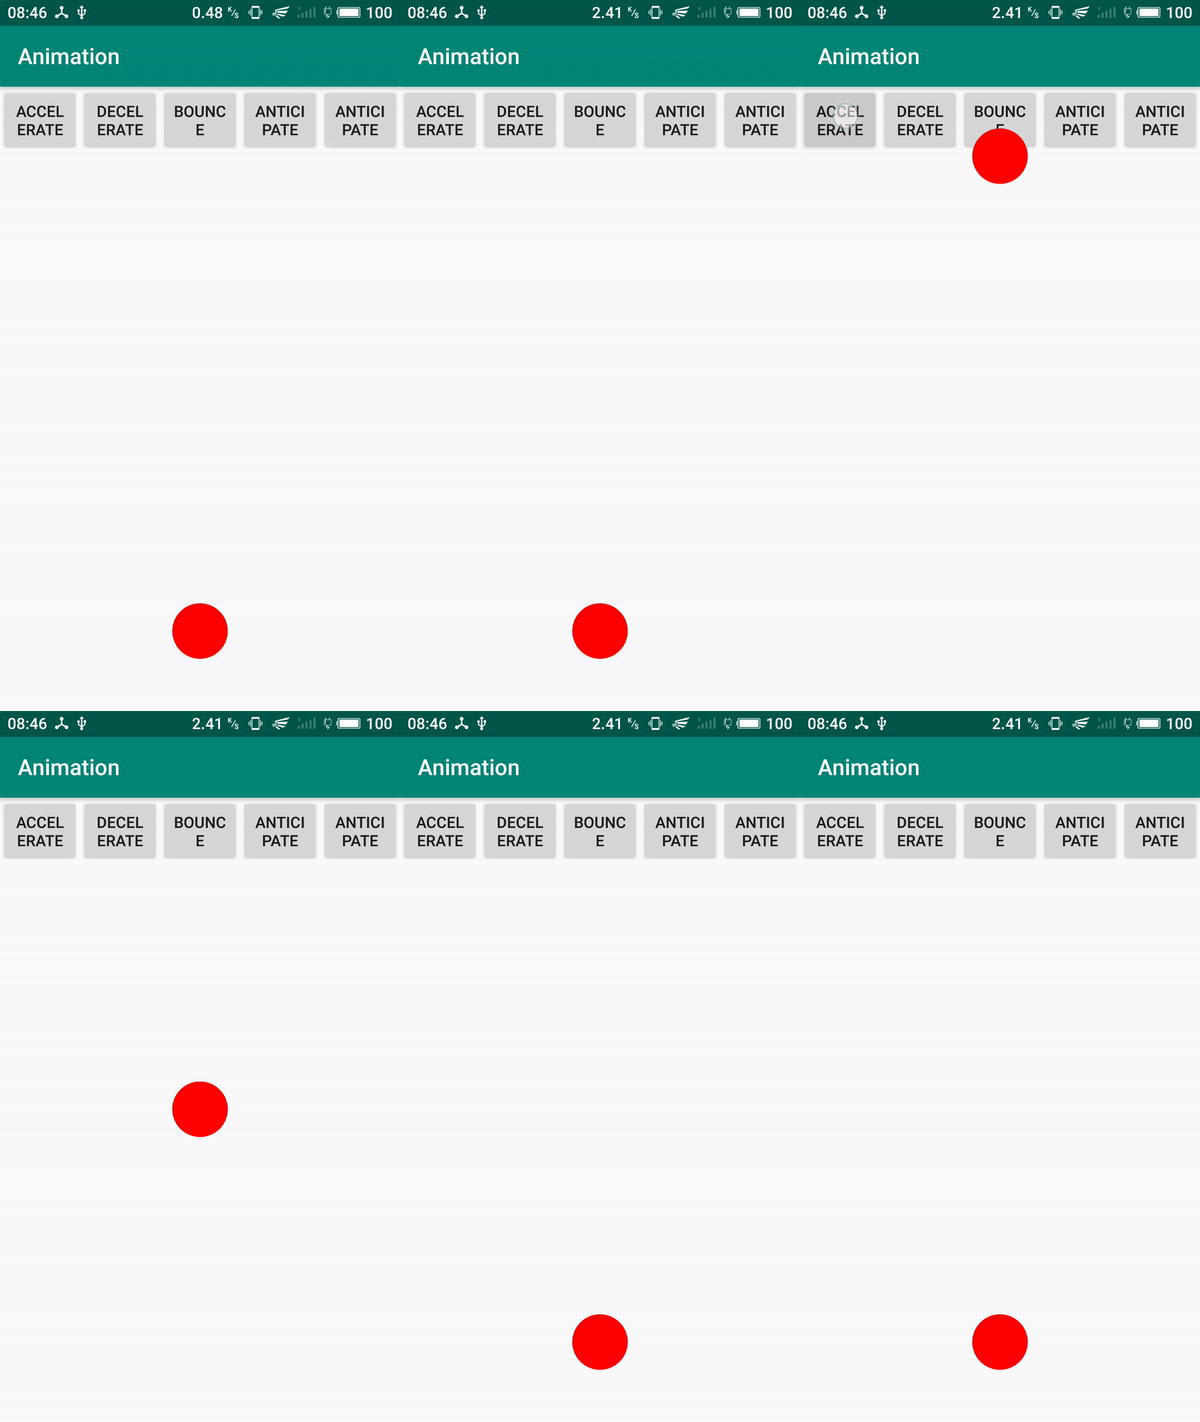
除了AccelerateInterpolator插值器之外,系统还提供了众多不同效果的插值器,如下图所示:
我们看到所有的插值器都继承自BaseInterpolator,而BaseInterpolator实现了TimeInterpolator接口。关于这些插值器的具体效果,大家可以自己尝试,在这里就不做演示了。
到这里关于属性动画的东西已经全部讲解完了,看完相信大家对属性动画一定有了比较深刻的认识。那么下篇文章我们将来讲解控制动画速率的Interpolator。
