electron-vue+electron-updater实现自动更新
目录
创建项目
安装electron-updater
electron-updater配置
主进程请求服务器更新
渲染进程显示更新进度
创建项目
1、安装 vue-cli 和 脚手架样板代码
npm install -g vue-cli2、创建项目
vue init simulatedgreg/electron-vue test

//vue init simulatedgreg/electron-vue固定写法,test为项目名称
3、安装依赖
cd test    进入项目根目录
yarn # 或者 npm install 或者 cnpm install
安装electron-updater
进入项目根目录执行如下命令
npm install electron-updater --save
electron-updater配置
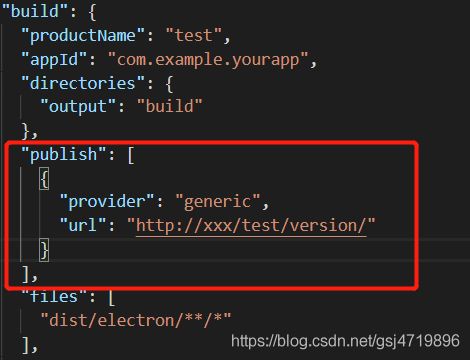
打开package.json文件在build标签下添加public配置,执行npm run build时,将会在build目录中生成latest.yml文件
以下是一个坑,本人折腾了几天找寻相关资料才解决:
vue init simulatedgreg/electron-vue test
//创建的项目使用的electron版本为2.0.4,比较低的版本

npm install electron-updater --save
//安装的updater的依赖版本是4.1.2,两者搭配使用会出现问题。
//this.app.whenReady() is not function 错误,解决办法是提高electron的版本。
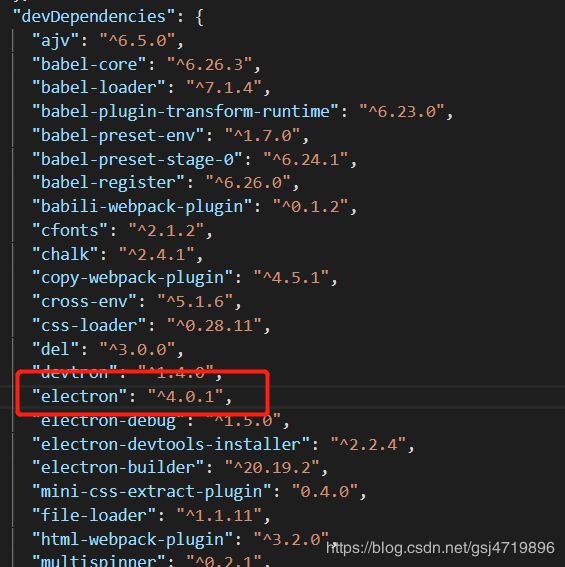
//this.app.whenReady() is not function 错误,解决办法是提高electron的版本。将electron修改为4.01,亲测有效,其他版本本人并未测试,不确定是否可以。
打开package.json,修改electron版本号,进入项目根目录删除node_modules目录,重新安装依赖。npm install
主进程请求服务器更新
将autoUpdater的通用逻辑提取成一个js文件,update.js。
import {
    autoUpdater
} from 'electron-updater'

import {
    ipcMain
} from 'electron'
let mainWindow = null;
export function updateHandle(window, feedUrl) {
    mainWindow = window;
    let message = {
        error: '检查更新出错',
        checking: '正在检查更新……',
        updateAva: '检测到新版本,正在下载……',
        updateNotAva: '现在使用的就是最新版本,不用更新',
    };
    //设置更新包的地址
    autoUpdater.setFeedURL(feedUrl);
    //监听升级失败事件
    autoUpdater.on('error', function (error) {
        sendUpdateMessage({
            cmd: 'error',
            message: error
        })
    });
    //监听开始检测更新事件
    autoUpdater.on('checking-for-update', function (message) {
        sendUpdateMessage({
            cmd: 'checking-for-update',
            message: message
        })
    });
    //监听发现可用更新事件
    autoUpdater.on('update-available', function (message) {
        sendUpdateMessage({
            cmd: 'update-available',
            message: message
        })
    });
    //监听没有可用更新事件
    autoUpdater.on('update-not-available', function (message) {
        sendUpdateMessage({
            cmd: 'update-not-available',
            message: message
        })
    });

    // 更新下载进度事件
    autoUpdater.on('download-progress', function (progressObj) {
        sendUpdateMessage({
            cmd: 'download-progress',
            message: progressObj
        })
    });
    //监听下载完成事件
    autoUpdater.on('update-downloaded', function (event, releaseNotes, releaseName, releaseDate, updateUrl) {
        sendUpdateMessage({
            cmd: 'update-downloaded',
            message: {
                releaseNotes,
                releaseName,
                releaseDate,
                updateUrl
            }
        })
        //退出并安装更新包
        autoUpdater.quitAndInstall();
    });

    //接收渲染进程消息,开始检查更新
    ipcMain.on("checkForUpdate", (e, arg) => {
        //执行自动更新检查
        // sendUpdateMessage({cmd:'checkForUpdate',message:arg})
        autoUpdater.checkForUpdates();
    })
}
//给渲染进程发送消息
function sendUpdateMessage(text) {
    mainWindow.webContents.send('message', text)
}
在main/index.js主进程中进行导入:
import {
  app,
  BrowserWindow
} from 'electron'
//引入update.js
import {updateHandle} from '../renderer/utils/Update.js';
const path = require('path')
/**
 * Set `__static` path to static files in production
 * https://simulatedgreg.gitbooks.io/electron-vue/content/en/using-static-assets.html
 */
if (process.env.NODE_ENV !== 'development') {
  global.__static = require('path').join(__dirname, '/static').replace(/\\/g, '\\\\')
}

let mainWindow
const winURL = process.env.NODE_ENV === 'development' ?
  `http://localhost:9080` :
  `file://${__dirname}/index.html`
console.log("__dirname==" + __dirname);
function createWindow() {
  console.log('createWindow');
  /**
   * Initial window options
   */
  mainWindow = new BrowserWindow({
    height: 650,
    useContentSize: true,
    width: 1080,
    resizable: false
  })
  mainWindow.loadURL(winURL)
  //开启调试
  mainWindow.webContents.openDevTools();
  mainWindow.setMenuBarVisibility(false);
  mainWindow.on('closed', () => {
    mainWindow = null
  });
  //设置版本更新地址,即将打包后的latest.yml文件和exe文件同时放在
   //http://xxxx/test/version/对应的服务器目录下,该地址和package.json的publish中的url保持一致
  let feedUrl = "http://xxxx/test/version/";
  //检测版本更新
  updateHandle(mainWindow,feedUrl);
}

app.on('ready', createWindow)

app.on('window-all-closed', () => {
  if (process.platform !== 'darwin') { //mac
    app.quit()
  }
})

app.on('activate', () => {
  if (mainWindow === null) {
    createWindow()
  }
});
渲染进程显示更新进度
以下是渲染进程的逻辑处理,本人是在App.vue中处理,根据需要其他地方也是同样的处理方法
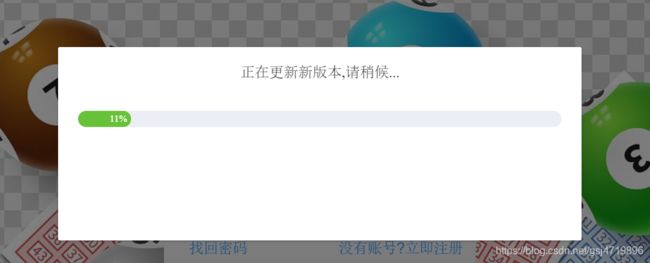
最后上效果图:


