Ubuntu16.04以太坊私有链开发和智能合约使用示例
下载和安装以太坊
sudo apt-get install software-properties-common
sudo add-apt-repository -y ppa:ethereum/ethereum
sudo apt-get update
sudo apt-get install ethereum
创建一条私有链
新建genesis.json文件,用于配置第一条区块链:
{
  "config": {
    "chainId": 6666,
    "homesteadBlock": 0,
    "eip155Block": 0,
    "eip158Block": 0
  },
  "alloc":{
  	"0xbb2cfef4e893521d5d25e4c62a1c914b6259f3c3":{"blance":"0"},
	  "0x07fb49206f6e2b36c2a138261773ce5555122127":{"blance":"10000000000000000"},
  	"0x3f6115a9d38e05d825402711ce31030f44f8c790":{"blance":"50000000000000000"}
  },
  "difficulty": "0x500",
  "gasLimit": "0x21000000",
  "mixhash": "0x0000000000000000000000000000000000000000000000000000000000000000",
  "parentHash": "0x0000000000000000000000000000000000000000000000000000000000000000",
  "timestamp": "0x00"
 }
根据genesis.json文件完成区块链初始化:geth init ./genesis.json --datadir=./data/
启动区块链:geth --datadir=./data --networkid 6666 console --port 30304,同时进入Ethereum控制台。
基本操作
新建账户:personal.newAccount("password"),之后会返回账户的address。
personal.newAccount("123456")
"0x15a70668f15d10177724379f1983baee631e5793"
"0xbb2cfef4e893521d5d25e4c62a1c914b6259f3c3"
"0x07fb49206f6e2b36c2a138261773ce5555122127"
"0x3f6115a9d38e05d825402711ce31030f44f8c790"
设置miner的账户:miner.setEtherbase("address")
miner.setEtherbase("0x15a70668f15d10177724379f1983baee631e5793")
因为目前就一个机器,也就是一个节点,所以目前暂时就指定一个miner。
查余额:eth.getBalance("address")
eth.getBalance("0x15a70668f15d10177724379f1983baee631e5793")
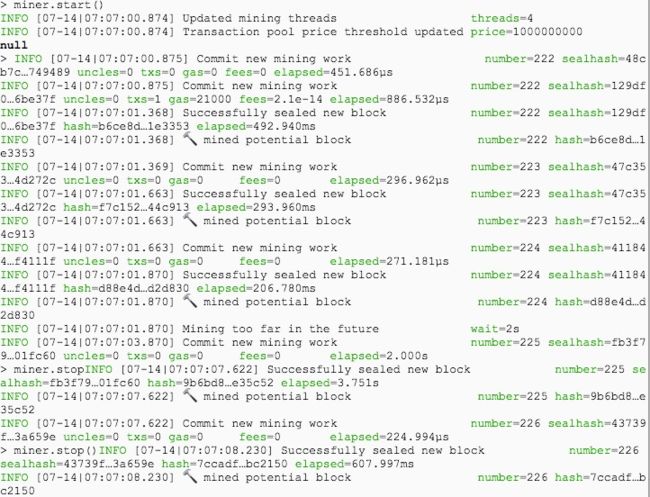
开始挖矿:miner.start()
停止挖矿:miner.stop()
查看用户列表:personal.listAccounts
转账之前,要先解锁账号:personal.unlockAccount("address")
personal.unlockAccount("0x07fb49206f6e2b36c2a138261773ce5555122127")
personal.unlockAccount("0x3f6115a9d38e05d825402711ce31030f44f8c790")
转账:eth.sendTransaction({from: sender, to: receiver, value: amount})
eth.sendTransaction({from: "0x07fb49206f6e2b36c2a138261773ce5555122127", to: "0x3f6115a9d38e05d825402711ce31030f44f8c790", value:web3.toWei(100, "wei")})
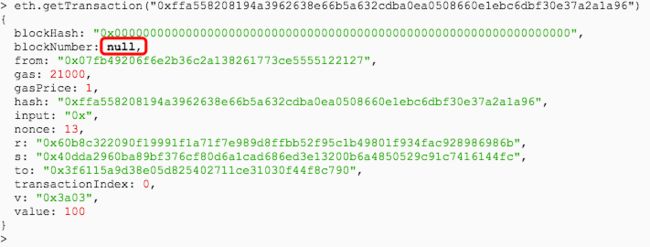
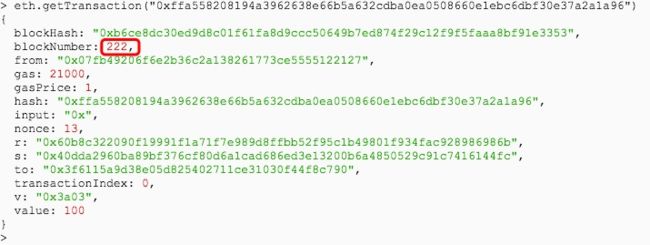
查询交易:eth.getTransaction("transaction_id")
eth.getTransaction("0xffa558208194a3962638e66b5a632cdba0ea0508660e1ebc6dbf30e37a2a1a96")
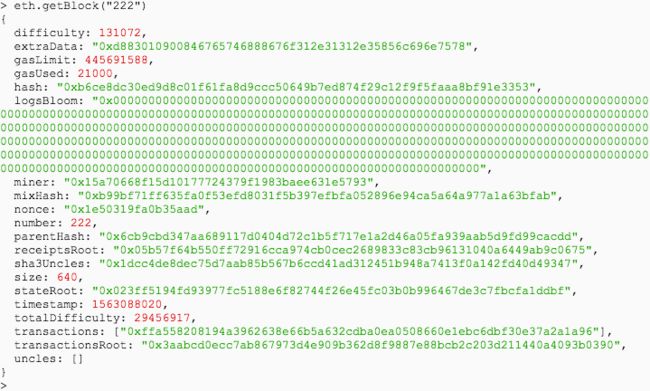
因为还没有miner去挖矿,也就是检验这笔交易,让miner挖一下之后,就有了:
编写一个简单的智能合约
本例子编写一个简单的智能合约,作用是累加转账的金额,代码如下:
pragma solidity >0.4.23 <0.6.0;

contract sum {
    uint256 public x;
    address public creator;
    constructor() public {
        x = 0;
        creator = msg.sender;
    }

    function addy(uint256 y) public {
        x = x + y;
    }
}
在 remix.ethereum.org 上面粘贴代码并编译,得到二进制代码和abi:
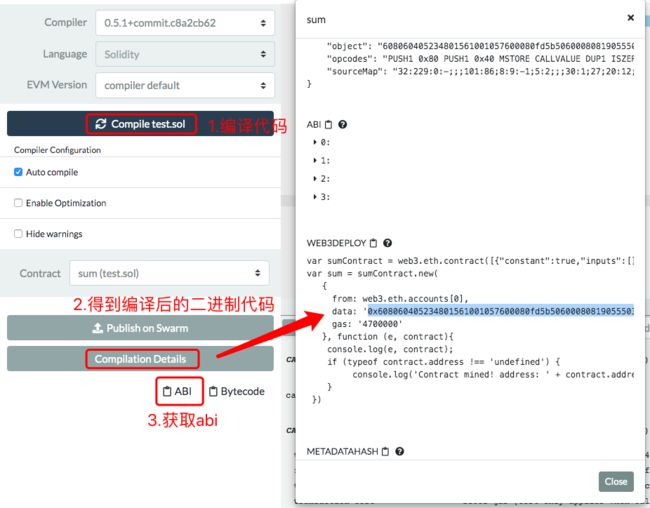
将智能合约部署上链:eth.sendTransaction({from:sender, data:"网页端拷贝下来的0x开头的二进制代码",gas:234000})
之后得到contract的id:0x17B912de902750C86C31aB1e191aB410884890a6
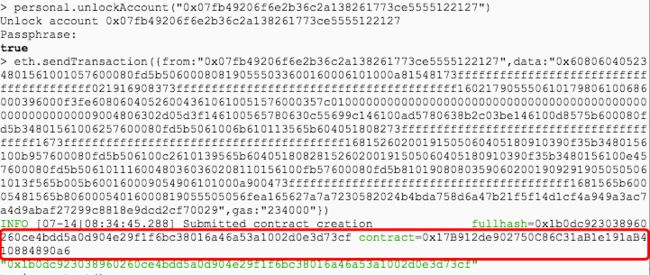
保险起见,使用miner.start()挖一下。
使用智能合约:
mycontract = web3.eth.contract(括号里面填上网页端拷贝下来的abi)
例如:
mycontract = web3.eth.contract([
... {
...... "constant": true,
...... "inputs": [],
...... "name": "creator",
...... "outputs": [
...... {
......... "name": "",
......... "type": "address"
......... }
...... ],
...... "payable": false,
...... "stateMutability": "view",
...... "type": "function"
...... },
... {
...... "constant": true,
...... "inputs": [],
...... "name": "x",
...... "outputs": [
...... {
......... "name": "",
......... "type": "uint256"
......... }
...... ],
...... "payable": false,
...... "stateMutability": "view",
...... "type": "function"
...... },
... {
...... "constant": false,
...... "inputs": [
...... {
......... "name": "y",
......... "type": "uint256"
......... }
...... ],
...... "name": "addy",
...... "outputs": [],
...... "payable": false,
...... "stateMutability": "nonpayable",
...... "type": "function"
...... },
... {
...... "inputs": [],
...... "payable": false,
...... "stateMutability": "nonpayable",
...... "type": "constructor"
...... }
... ])
firstcontract = mycontract.at("contrast_address")
例如:
firstcontract = mycontract.at("0x17B912de902750C86C31aB1e191aB410884890a6")
测试:
firstconstract.creator()
firstconstract.x()里面为0

转账100试一下:
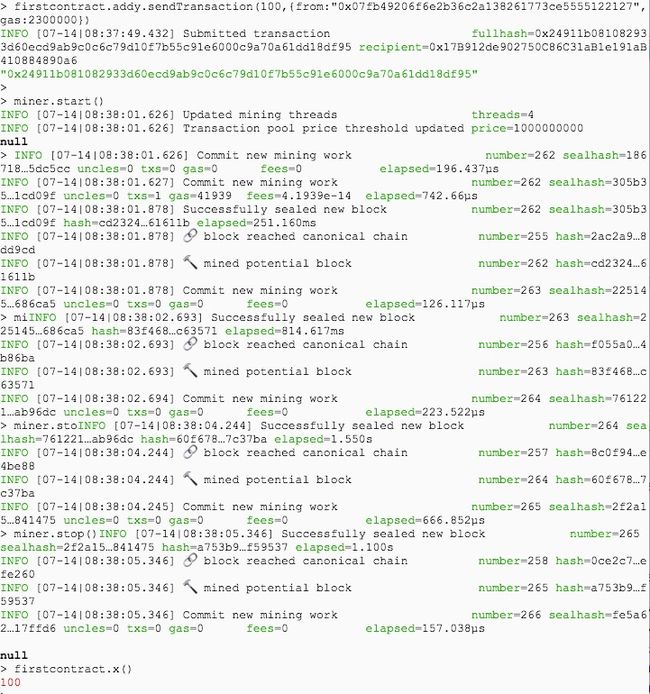
firstcontract.addy.sendTransaction(100,{from:"0x07fb49206f6e2b36c2a138261773ce5555122127",gas:2300000})
转完记得miner.start()挖一下
