在ubuntu中使用vscode进行C++调试
0、各种代码编辑器及IDE比较
Atom,sublime,vscode是当前主流的三大跨平台代码编辑器,其他的还有clion,kdevelop,Qt,vim等。
1、安装vscode(3种方法)
1)从Ubuntu Software安装(推荐)
2)从https://code.visualstudio.com/Download下载.deb文件,通过sudo dpkg -i code_1.42.1-1581432938_amd64.deb进行安装。
3)通过终端命令行安装
sudo add-apt-repository ppa:ubuntu-desktop/ubuntu-make
sudo apt-get update
sudo apt-get install ubuntu-make
umake web visual-studio-code
2、安装C/C++插件
VSCode只是一个纯文本编辑器(editor),不是集成开发环境(IDE),不含编译器(compiler),要进行C/C++的调试就需要在VSCode上安装C++插件,可在左边栏的扩展(Extensions)中查找安装。
3、设置项目文件夹
我的文件夹目录树为
vscode_test/
└── main.cc
main.cc内容为
#include

int main() {
    std::cout << "hello world !" << std::endl;
    return 0;
} 4、配置tasks.json文件(编译用)
tasks.json文件相当于vscode的.sh或.bat文件,用来记录一系列操作的宏,可以用来设置如何编译文件,如何运行文件,几乎.sh能干的都可以干。
按ctrl + shift + p打开vscode控制台,输入Tasks: Configure Task,再选择Create tasks.json file from templates,选择Others模板,就自动生成了一个tasks.json文件,这样你就可以在该文件中编写参数来调整设置。
{
    // See https://go.microsoft.com/fwlink/?LinkId=733558
    // for the documentation about the tasks.json format
    "version": "2.0.0",
    "tasks": [
        {
            "label": "task1", //你的设置文件名,可随便起
            "type": "shell", //运行task的平台,一般是shell
            "command": "bash ./build.sh", //普通的shell命令
            "args": [],
            "group": {
                "kind": "build", //设置为build组,这样当你在vscode中执行build命令时,
                                 //就能自动执行"command"中的命令了
                "isDefault": true
            }
        }
    ]
}5、配置launch.json文件(调试用)
launch.json文件主要用来设置如何调试。
直接点击左侧边栏的Run and Debug图标(Ctrl+Shirft+D),点击create a launch.json file,选择C++(GDB/LLDB),选择Default Configuration,就能自动生成launch.json文件。
一般地只需要改"program":部分内容改为项目路径下生成的执行文件即可。
如果需要调试前重新编译一遍,可以新增一条"preLaunchTask",里面的内容改为tasks.json中的'label'名称。
{
    // Use IntelliSense to learn about possible attributes.
    // Hover to view descriptions of existing attributes.
    // For more information, visit: https://go.microsoft.com/fwlink/?linkid=830387
    "version": "0.2.0",
    "configurations": [
        {
            "name": "(gdb) Launch",
            "type": "cppdbg",
            "request": "launch",
            "program": "${workspaceFolder}/bin/hello_world", //只改这里
            "args": [],
            "stopAtEntry": false,
            "cwd": "${workspaceFolder}",
            "environment": [],
            "externalConsole": false,
            "MIMode": "gdb",
            "setupCommands": [
                {
                    "description": "Enable pretty-printing for gdb",
                    "text": "-enable-pretty-printing",
                    "ignoreFailures": true
                }
            ],
            "preLaunchTask": "task1" //可以新增一条
        }
    ]
}6、编译调试(3种编译方法)
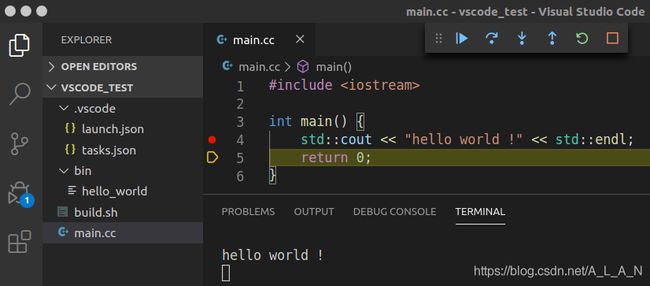
1)通过g++进行编译
工程目录下新建build.sh
build.sh内容:
#!/bin/bash
if [ ! -d "bin" ]; then
    mkdir bin
fi
g++ main.cc -g -o ./bin/hello_world  #默认为release模式,-g表示debud模式,如果编译c程序,g++改成gcc
只编译时,按快捷键是ctrl+shift+b,编译完在bin目录下生成hello_world可执行文件。
编译并调试时,先设置断点(在代码行号的左侧点一下会出现一个小红点),然后按F5就可以开始进行编译并调试了。
整个过程描述:
按F5 => 运行launch.json => 由于设置"preLaunchTask": "task1",先去运行tasks.json中的task1中的command => 运行build.sh => 调用g++将main.cc编译成可执行文件hello_world => 开始调试launch.json中program所指的可执行文件hello_world
2)通过cmake进行编译
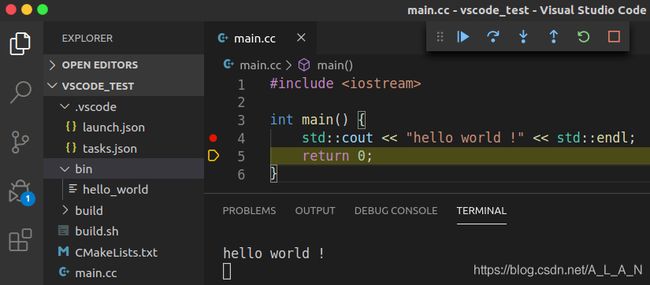
工程目录下新建build.sh和CMakeLists.txt
build.sh内容:
#!/bin/bash
if [ ! -d "build" ]; then
    mkdir build
else
    rm -rf build/*
fi
cd build
Local_Dir=$(cd "$(dirname "$0")"; pwd)
echo "Now work at Dir:$Local_Dir"
cmake ..
make
CMakeLists.txt内容:
cmake_minimum_required(VERSION 2.8)
project(hello_world)

set(CMAKE_BUILD_TYPE "Debug") # 默认是Release模式,设置为Debug才能调试
set(EXECUTABLE_OUTPUT_PATH ${PROJECT_SOURCE_DIR}/bin) # 设置可执行文件的输出目录

add_executable(hello_world main.cc)
按F5就可以开始进行编译并调试了。
(此外,也可以通过安装CMake、CMake Tools扩展来进行编译和调试)
整个过程描述:
按F5 => 运行launch.json => 由于设置"preLaunchTask": "task1",先去运行tasks.json中的task1中的command => 运行build.sh => 调用cmake并根据CMakeLists.txt文件编译出可执行文件hello_world => 开始调试launch.json中program所指的可执行文件hello_world。
3)通过bazel进行编译
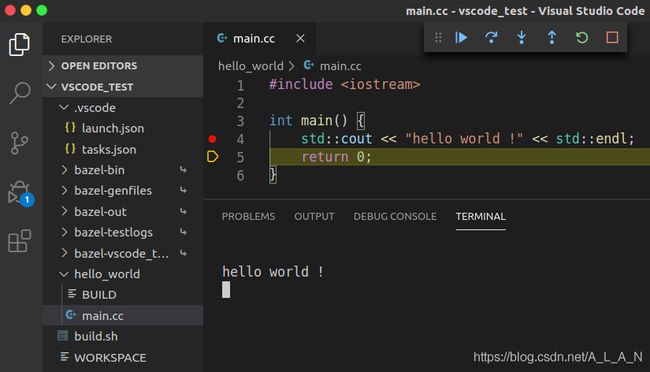
工程目录下新建build.sh和WORKSPACE(该文件所在的目录为工作空间),hello_world目录下新建BUILD(该文件所在的文件夹为一个包)
build.sh内容:
#!/bin/bash
bazel build ... --compilation_mode=dbg # release设置为--compilation_mode=opt
BUILD内容:
cc_binary(
    name = "hello_world",
    srcs = ["main.cc"],
)
launch.json内容:
{
    // Use IntelliSense to learn about possible attributes.
    // Hover to view descriptions of existing attributes.
    // For more information, visit: https://go.microsoft.com/fwlink/?linkid=830387
    "version": "0.2.0",
    "configurations": [
        {
            "name": "(gdb) Launch",
            "type": "cppdbg",
            "request": "launch",
            "program": "${workspaceFolder}/bazel-bin/hello_world/hello_world", //只改这里
            "args": [],
            "stopAtEntry": false,
            "cwd": "${workspaceFolder}",
            "environment": [],
            "externalConsole": false,
            "MIMode": "gdb",
            "setupCommands": [
                {
                    "description": "Enable pretty-printing for gdb",
                    "text": "-enable-pretty-printing",
                    "ignoreFailures": true
                }
            ],
            "preLaunchTask": "task1" //可以新增一条
        }
    ]
}
按F5就可以开始进行编译并调试了。
整个过程描述:
按F5 => 运行launch.json => 由于设置"preLaunchTask": "task1",先去运行tasks.json中的task1中的command => 运行build.sh => 调用bazel并根据BUILD文件编译出可执行文件hello_world => 开始调试launch.json中program所指的可执行文件hello_world。
编译后在工作空间下生成4个文件夹:bazel-bin、bazel-out、bazel-testlogs和bazel-vscode_test。
bazel clean --expunge # 清除编译产生的文件7、使用vscode进行远程开发:
需要安装 Remote Development 插件,安装完点击左下角的绿色图标,选择Remote-SSH:Conect to Host...,输入user@host,回车,输入密码,回车,打开远程机器上的工程目录,就可以同步远程机器上的代码,进行远程同步开发调试了。
配置免密登录
通过配置免密登录的方式避免每次打开远程连接时都需要重复输入密码
a)在本地机器生成公钥
ssh-keygen一路回车,生成 id_rsa.pub 文件
b)配置远程服务器
查看远程机器 ~/.ssh 目录下是否有一个名为authorized_keys的文件,如果没有就创建一个,然后把刚才生成的id_rsa.pub文件中的内容复制粘贴到authorized_keys文件中,并修改文件权限。
chmod -R 600 authorized_keys这样就完成了免密登录的配置。
8、vscode常用快捷键
Ctrl + 单击:跳转到变量或函数的声明或定义
Ctrl + Alt + -:navigate back(跳转返回)
Ctrl + Shift + -:nevigate forward
Ctrl + /:注释/取消注释
Ctrl + f:查找
设置tab缩进为2:File->Preferences->Settings / Commonly Used / Tab Size
9、其他好用的插件
TabNine
自动补全工具。TabNine更多的是偏向推理,它能够根据开发者前面输入的内容快速推理接下来要输入的代码,甚至参数、字符串、符号它都能够准确的推理并补全。
GitLens
版本管理。GitLens能够清晰地显示当前文件的修改时间、修改历史,能够可视化分支、作者、commit等信息,提供便捷而强大的对比功能。
Bookmarks
在开发过程中会经常进行跳转或者翻页,当经过一系列的跳转之后想回到最初的位置却发现无从下手了。Bookmarks能够通过Ctrl+Alt+K、Ctrl+Alt+J、Ctrl+Alt+L快捷键添加标签,并且可以快速跳转到指定标签位置。
TODO Highlight
在开发过程中常用的待办标记有TODO和FIXME。TODO Highlight能够突出显示还有哪些内容有待完善,能够避免我们检查代码过程中遇到的麻烦。
参考:
Ubuntu系统下使用VS Code编译调试C++程序并添加外部库
https://github.com/microsoft/vscode-cpptools
https://vector-of-bool.github.io/docs/vscode-cmake-tools/building.html
https://code.visualstudio.com/docs/languages/cpp
https://code.visualstudio.com/docs/editor/debugging


