Learn OpenCV Gender & Age Classification using OpenCV Deep Learning ( C++/Python )
In this tutorial, we will discuss an interesting application of Deep Learning applied to faces. We will estimate the age and figure out the gender of the person from a single image. The model is trained by Gil Levi and Tal Hassner. We will discuss in brief the main ideas from the paper and provide step by step instructions on how to use the model in OpenCV.
1. Gender and Age Classification using CNNs
The authors have used a very simple convolutional neural network architecture, similar to the CaffeNet and AlexNet. The network uses 3 convolutional layers, 2 fully connected layers and a final output layer. The details of the layers are given below.
- Conv1 : The first convolutional layer has 96 nodes of kernel size 7.
- Conv2 : The second conv layer has 256 nodes with kernel size 5.
- Conv3 : The third conv layer has 384 nodes with kernel size 3.
- The two fully connected layers have 512 nodes each.
They have used the Adience dataset for training the model.
1.1. Gender Prediction
They have framed Gender Prediction as a classification problem. The output layer in the gender prediction network is of type softmax with 2 nodes indicating the two classes “Male” and “Female”.
1.2. Age Prediction
Ideally, Age Prediction should be approached as a Regression problem since we are expecting a real number as the output. However, estimating age accurately using regression is challenging. Even humans cannot accurately predict the age based on looking at a person. However, we have an idea of whether they are in their 20s or in their 30s. Because of this reason, it is wise to frame this problem as a classification problem where we try to estimate the age group the person is in. For example, age in the range of 0-2 is a single class, 4-6 is another class and so on.
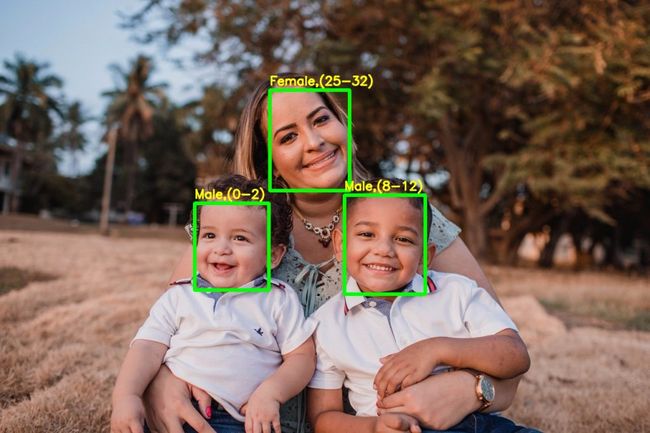
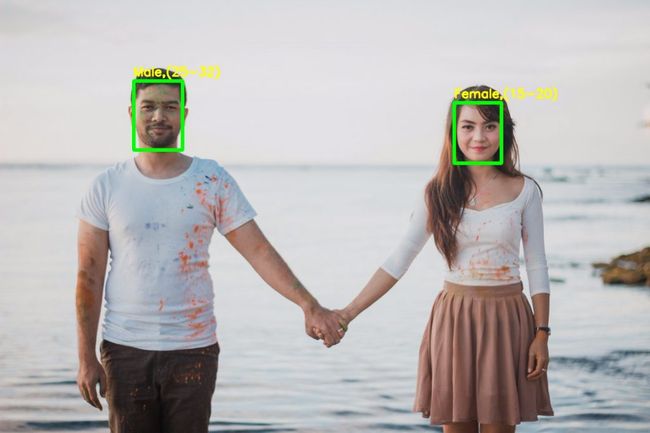
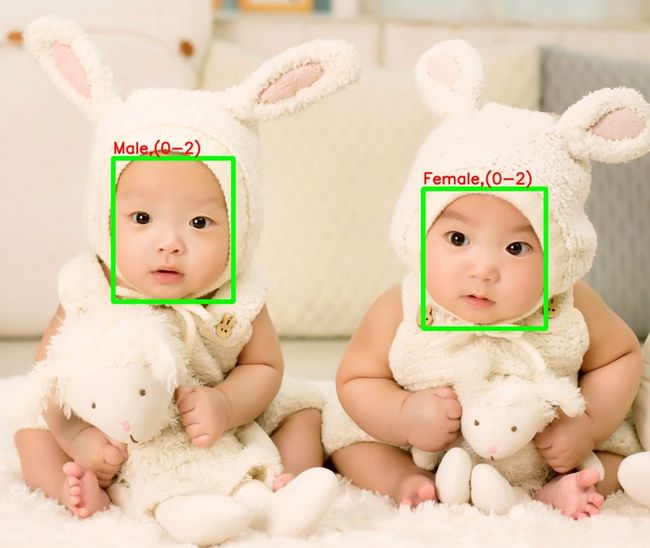
The Adience dataset has 8 classes divided into the following age groups [(0 – 2), (4 – 6), (8 – 12), (15 – 20), (25 – 32), (38 – 43), (48 – 53), (60 – 100)]. Thus, the age prediction network has 8 nodes in the final softmax layer indicating the mentioned age ranges.
It should be kept in mind that Age prediction from a single image is not a very easy problem to solve as the perceived age depends on a lot of factors and people of the same age may look pretty different in various parts of the world. Also, people try very hard to hide their real age!
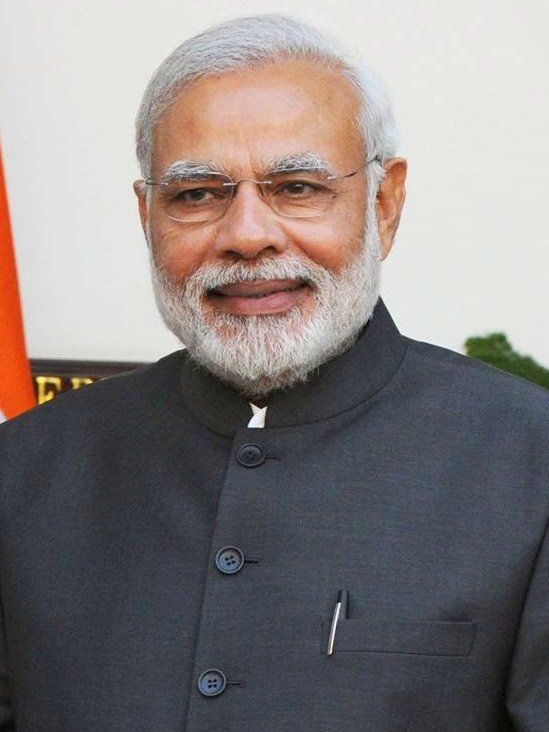
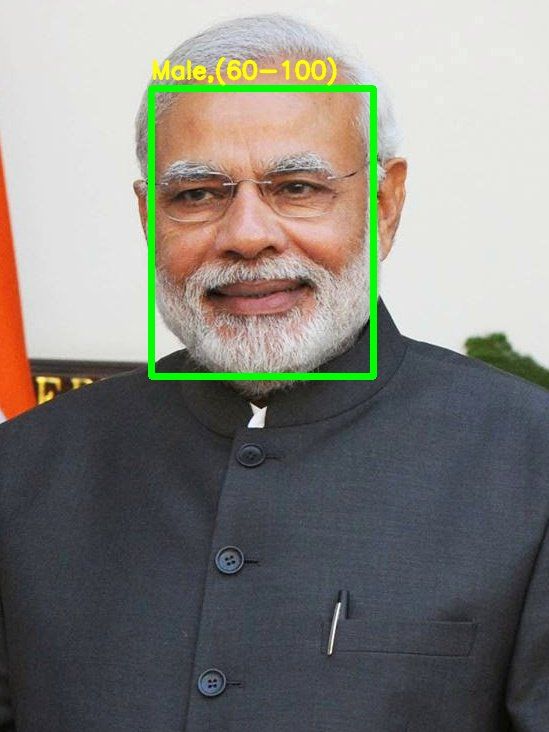
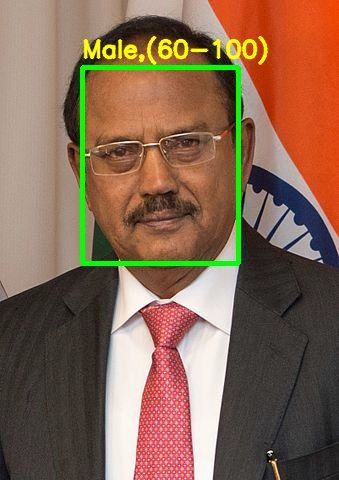
For example, can you guess the age of the two eminent personalities?
I can bet you’ll google it when I reveal their real age!
Narendra Modi is 68 and Ajit Doval is 74 years! Just imagine how hard it would be for a machine to correctly predict their age.
2. Code Tutorial
The code can be divided into four parts:
- Detect Faces
- Detect Gender
- Detect Age
- Display output
NOTE: Please download the model weights file ( Gender, Age ) which is not provided along with the code. Download the files and keep them along with the other code files given with this post.
After you have downloaded the code, you can run it using the sample image provided or using the webcam.
C++ Usage
| 1 2 |
|
Python Usage
| 1 2 |
|
Let us have a look at the code for gender and age prediction using the DNN module in OpenCV. Please download the code as the code snippets given below are only for the important parts of the code.
Download Code To easily follow along this tutorial, please download code by clicking on the button below. It's FREE!
DOWNLOAD CODE
2.1. Detect Face
We will use the DNN Face Detector for face detection. The model is only 2.7MB and is pretty fast even on the CPU. More details about the face detector can be found in our blog on Face Detection. The face detection is done using the function getFaceBox as shown below.
C++
| 1 2 3 4 5 6 7 8 9 10 11 12 13 14 15 16 17 18 19 20 21 22 23 24 25 26 27 28 29 30 31 32 33 34 35 36 37 38 |
|
Python
| 1 2 3 4 5 6 7 8 9 10 11 12 13 14 15 16 17 18 19 |
|
2.2. Predict Gender
We will load the gender network into memory and pass the detected face through the network. The forward pass gives the probabilities or confidence of the two classes. We take the max of the two outputs and use it as the final gender prediction.
C++
| 1 2 3 4 5 6 7 8 9 10 11 12 13 14 15 |
|
Python
| 1 2 3 4 5 6 7 8 9 10 11 12 |
|
2.3. Predict Age
We load the age network and use the forward pass to get the output. Since the network architecture is similar to the Gender Network, we can take the max out of all the outputs to get the predicted age group.
C++
| 1 2 3 4 5 6 7 8 9 10 |
|
Python
| 1 2 3 4 5 6 7 8 9 10 11 |
|
2.4. Display Output
We will display the output of the network on the input images and show them using the imshow function.
C++
| 1 2 3 |
|
Python
| 1 2 3 |
|
3. Results
We saw above that the network is able to predict both Gender and Age to high level of accuracy. Next, we wanted to do something interesting with this model. Many actors have portrayed the role of the opposite gender in movies.
We want to check what AI says about their looks in these roles and whether they are able to fool the AI.
We used images from this article which shows their actual photographs along with those from the movies in which they changed their gender. Let’s have a look.
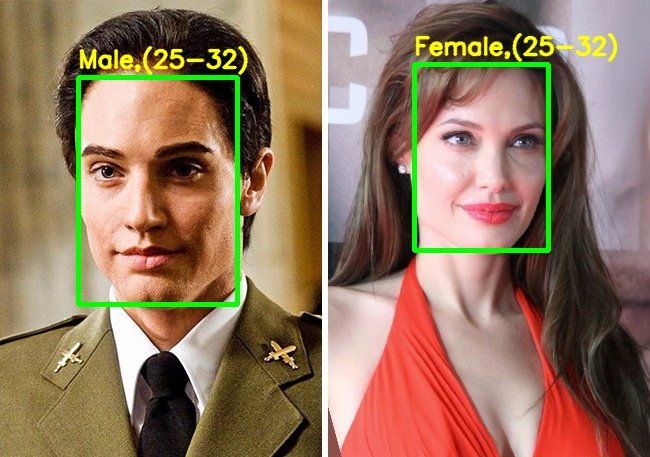
Angelina Jolie in Salt

Dustin Hoffman in Tootsie
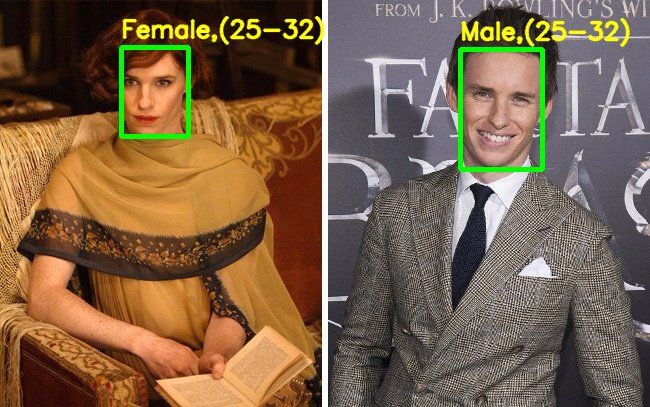
Eddie Redmayn in The Danish Girl
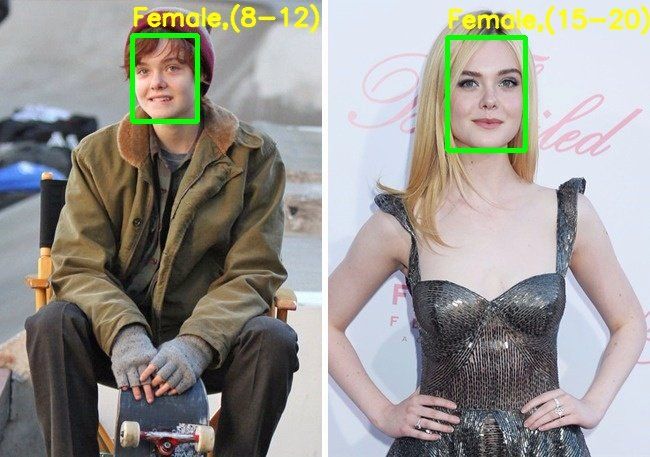
Elle Fanning in 3 Generations
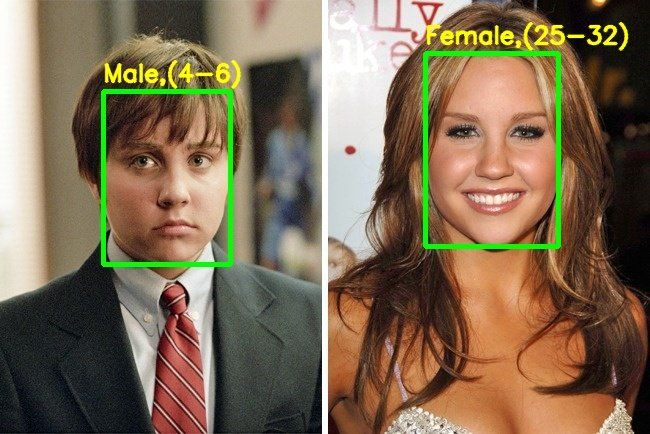
Amanda Bynes in She’s the Man
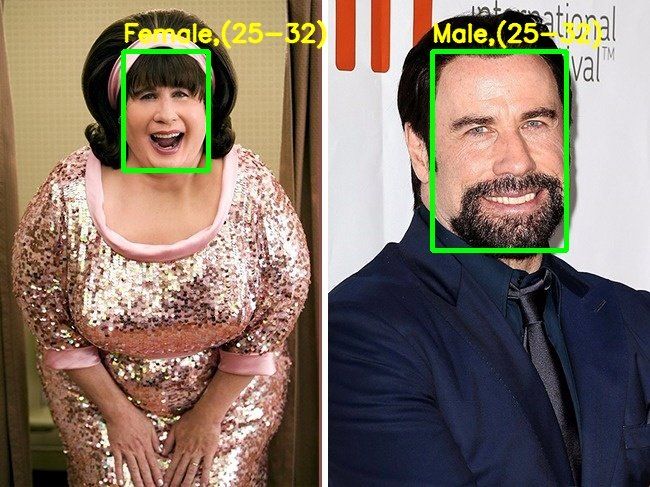
John Travolta in Hairspray
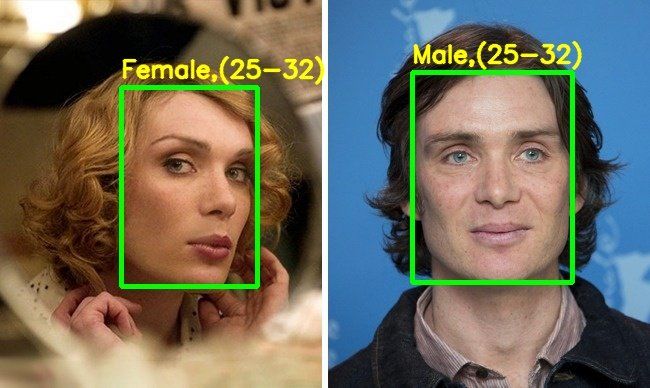
Cillian Murphy in Breakfast on Pluto,
It seems apart from Elle Fanning, everyone else was able to fool the AI with their looks in the opposite gender. Also, it is very difficult to predict the Age of celebrities just from images.
Finally, let’s see what our model predicts for the two example we took in the beginning of the post.
4. Observations
Even though the gender prediction network performed well, the age prediction network fell short of our expectation. We tried to find the answer in the paper and found the following confusion matrix for the age prediction model.
The following observations can be made from the above table :
- The age groups 0-2, 4-6, 8-13 and 25-32 are predicted with relatively high accuracy. ( see the diagonal elements )
- The output is heavily biased towards the age group 25-32 ( see the row belonging to the age group 25-32 ). This means that it is very easy for the network to get confused between the ages 15 to 43. So, even if the actual age is between 15-20 or 38-43, there is a high chance that the predicted age will be 25-32. This is also evident from the Results section.
Apart from this, we observed that the accuracy of the models improved if we use padding around the detected face. This may be due to the fact that the input while training were standard face images and not closely cropped faces that we get after face detection.
We also analysed the use of face alignment before making predictions and found that the predictions improved for some examples but at the same time, it became worse for some. It may be a good idea to use alignment if you are mostly working with non-frontal faces.
We discuss face alignment and other important applications on faces in our online course. Check out the link below.
Become an expert in Computer Vision, Machine Learning, and AIin 12-weeks! Check out our course
COMPUTER VISION COURSE
5. Conclusion
Overall, I think the accuracy of the models is decent but can be improved further by using more data, data augmentation and better network architectures.
One can also try to use a regression model instead of classification for Age Prediction if enough data is available.
6. References
- [Project Page]
- [Sample Image1]
- [Sample image2]
- [Cross Gender Acting Article]
Subscribe & Download Code
If you liked this article and would like to download code (C++ and Python) and example images used in this post, please subscribe to our newsletter. You will also receive a free Computer Vision ResourceGuide. In our newsletter, we share OpenCV tutorials and examples written in C++/Python, and Computer Vision and Machine Learning algorithms and news.
