最近在一个小项目上第一次使用vue2+spring boot进行web开发,下面来总结一下:
一. vue2 + spring boot实现前后端分离开发
在开发过程中,使用前后端进行了分离,来更好的进行项目的开发.
1. 搭建vue2前端项目
这个网上有许多教程,基本不用多说,使用vue-cli进行vue项目的搭建一个名为frontend的前端项目(下面是之前的一个学习的案例)
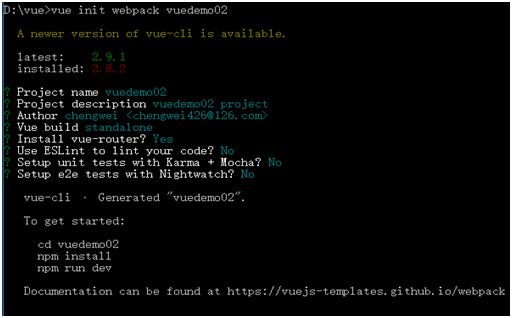
vue前端项目初始化好之后,下载你自己需要的各种vue相关插件等, 使用npm run dev进行启动. 就可以进行后台的搭建
2 spring boot搭架后台
这里主要使用Maven来开发后台的,网上也有许多教程,基本不介绍太多,我的后台项目名是GateGuard.
3 如何实现分离的前后进行通信
实现前后台的通信,需要对他们进行配置
vue2前端的配置: 在frontend项目文件下找到config文件夹下的index.js,开发阶段只设置dev就可以,build是部署时需要设置的
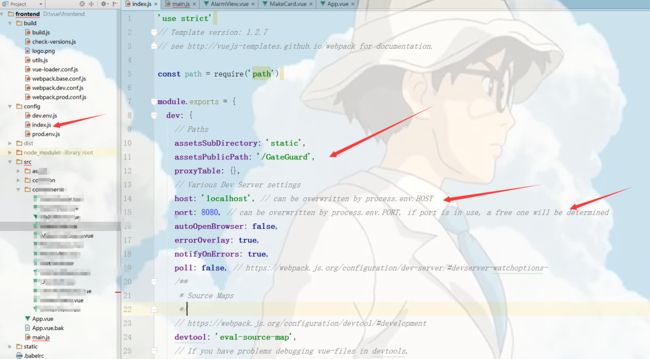
主要设置三个地方: 第一,设置项目根路径,这是所有网上教程几乎没提到过的问题,这里只需要将assetsPublicPath设置成你自己的项目名就可以了; 第二,将host设置为localhost; 第三, 修改port端口号,这个端口号不能和spring boot的端口相同.
其他的都不用修改....
顺便说一下我的main.js的设置,基本跟网上一样的
// The Vue build version to load with the `import` command
// (runtime-only or standalone) has been set in webpack.base.conf with an alias.
import Vue from 'vue'
import VueRouter from 'vue-router'
import VueResource from 'vue-resource'
import ElementUI from 'element-ui'
import App from './App'

import 'element-ui/lib/theme-chalk/index.css'

Vue.config.productionTip = false;

Vue.use(VueRouter);
Vue.use(VueResource);
Vue.use(ElementUI);

/* eslint-disable no-new */
new Vue({
  el: '#app',
  render: h => h(App)
});
在写具体业务逻辑时,前台要进行页面的跳转和数据的展示, 后台只提供数据, 所以他们之间的通信全部是异步的
(1). 前台
那么前台如何向后台发送请求获取数据呢? 主要是通过vue-resource或者vue-axios来向后台发送请求,这里主要是这个URL如何设置的问题,其实这个URL的设置, 和浏览器上访问网页的写法是一样的,没有区别, 这主要是开发阶段, 部署的时候是需要改的
created: function () {
      this.$http.get('http://localhost:8090/GateGuard/treeNodesJson').then((response) => {
          this.treeNodesJson = response.body;
          this.nodeInfo = {id: 110, pId: 11};
      });
    }
所有的URL都是http://ip:port/项目名/请求地址
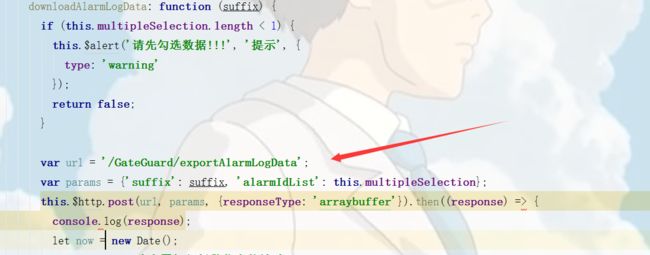
使用vue来开发,在文件下载的时候比较坑爹, 网上说的不是很多,但是仔细找还是能找到解决办法的. 我这里也是参考网上来写的. 文件的下载必须下载js-file-download这个插件(或者file-saver,没使用过),直接贴一下代码吧!
downloadMakeCardData: function (suffix) {
        if (this.multipleSelection.length < 1) {
          this.$alert('请先勾选数据!!!', '提示', {
            type: 'warning'
          });
          return false;
        }

        var url = '/GateGuard/exportMakeCardData';
        var params = {'id': this.nodeInfo.id, 'suffix': suffix, 'userIdList': this.multipleSelection};
        this.$http.post(url, params, {responseType: 'blob'}).then((response) => {
          if (this.multipleSelection.length < 1) {
            this.$alert('请先勾选数据!!!', '提示', {
              type: 'warning'
            });
            return false;
          }

          console.log(response.headers);
          //let fileName = response.headers['Content-Disposition'].match(/filename="(.*).xls"/)[1];
          let now = new Date();
          let fileName = '制卡统计_' + formatDate(now, 'yyyy-MM-dd') + '.' + suffix;
          fileDownload(response.data, fileName);
          this.$message({
            message: '数据导出成功!!!',
            type: 'success'
          });
        }).catch(function (response) {
          this.$message({
            message: '数据导出失败!!!',
            type: 'error'
          });
        });
      }
注意responseType设置为blob或者arraybuffer, 不然不能实现下载 但这里我使用不能通过response.headers获取后来设置的文件名(console.log()打印确实没找到,是浏览器版本太高的问题吗?),只能在前台设置了.在文件下载这一块会发送请求给后台失败,这主要是跨域的问题,稍后解决.
以上是前台开发的一些配置和遇到的问题.
(2). 后台
在后台需要设置项目的根路径和端口号, 端口号不能和前端设置的相同. 下面是我在application.properties中的设置:
server.context-path=/GateGuard
server.port=8090
解决跨域问题,使用如下代码就可以了:
package com.lhcc.filter;

import org.springframework.context.annotation.Bean;
import org.springframework.context.annotation.Configuration;
import org.springframework.web.servlet.config.annotation.CorsRegistry;
import org.springframework.web.servlet.config.annotation.WebMvcConfigurer;
import org.springframework.web.servlet.config.annotation.WebMvcConfigurerAdapter;

import static org.springframework.web.cors.CorsConfiguration.ALL;

/**
 * 跨越访问过滤器
 * CORS configuration
 */
@Configuration
public class CORSConfig {

    @Bean
    public WebMvcConfigurer corsConfigurer() {
        return new WebMvcConfigurerAdapter() {
            @Override
            public void addCorsMappings(CorsRegistry registry) {
                registry.addMapping("/**")
                        .allowedOrigins(ALL)
                        .allowedMethods(ALL)
                        .allowedHeaders(ALL)
                        .allowCredentials(true);
            }
        };
    }

}
以上后台的配置就算完成了,接下来就是具体的开发业务逻辑了.
注意前后都启动,浏览器的访问的端口号是前端设置的端口号, 我这里是8080, 不是8090
二. 整合前后台,进行项目部署
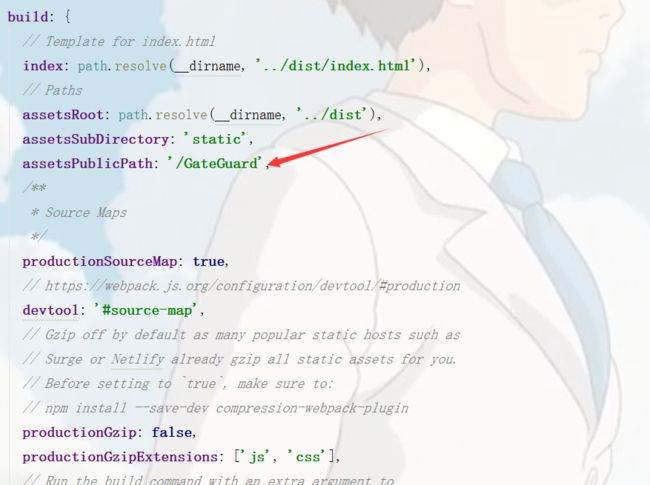
将前后台整合在一起进行项目部署,需要进行额外的设置. 首先是进行前端的设置,将config文件夹下的build那段代码的assetsPublicPath改成项目路径就可以了, 其余不要动, 之前设置的dev的那段代码不用管.
接着就是业务中访问后的URL要进行修改, 可以这用替换的方法, 将http://localhost:8090去掉就可以了
前端修改完之后, 就可以使用npm run build进行打包, 将dist文件夹下的static和index.html拷贝到spring boot的resources下即可(此时没有static文件夹), 注意index.html修改成规范格式(不规范会报错), 标签要闭合, 内容要用双引号抱起来.

后端spring boot要配置静态文件的访问路径和乱码的配置, 代码如何:
package com.lhcc.config;

import org.springframework.context.annotation.Bean;
import org.springframework.context.annotation.Configuration;
import org.springframework.http.converter.HttpMessageConverter;
import org.springframework.http.converter.StringHttpMessageConverter;
import org.springframework.web.servlet.config.annotation.ContentNegotiationConfigurer;
import org.springframework.web.servlet.config.annotation.ResourceHandlerRegistry;
import org.springframework.web.servlet.config.annotation.WebMvcConfigurerAdapter;

import java.nio.charset.Charset;
import java.util.List;

/** 资源文件无法访问
 * Created by chengwei on 2017/12/25.
 */
@Configuration
public class WebMvcConfig extends WebMvcConfigurerAdapter {
    /**
     * 配置静态文件路径
     * @param registry
     */
    @Override
    public void addResourceHandlers(ResourceHandlerRegistry registry) {
        registry.addResourceHandler("/static/**").addResourceLocations("classpath:/static/");
    }

    /**
     * 防止出现乱码
     * @return
     */
    @Bean
    public HttpMessageConverter responseBodyConverter() {
        StringHttpMessageConverter converter = new StringHttpMessageConverter(
                Charset.forName("UTF-8"));
        return converter;
    }

    @Override
    public void configureMessageConverters(List> converters) {
        super.configureMessageConverters(converters);
        converters.add(responseBodyConverter());
    }

    @Override
    public void configureContentNegotiation(ContentNegotiationConfigurer configurer) {
        configurer.favorPathExtension(false);
    }

}
在application.properties还需要加入其它的配置:
spring.thymeleaf.prefix=classpath:/
spring.thymeleaf.mode =HTML5
spring.thymeleaf.cache=true
spring.thymeleaf.content-type=text/html
#spring.mvc.static-path-pattern=/**
spring.http.encoding.force=true
spring.http.encoding.charset=UTF-8
spring.http.encoding.enabled=true
server.tomcat.uri-encoding=UTF-8
#spring.resources.static-locations=classpath:/resources/,classpath:/static/
最后还要写个controller, 首次访问定位到首页index.html:
    // vue拷贝到resources下的index.html,需要在设置进入入口
    @RequestMapping(value = "/", method =RequestMethod.GET)
    public String index() {
        System.out.println("进入项目首页....");
        return "/index";
    }
这样vue2 + spring boot整合的一些配置就完成了, 两者之间的交流就不需要http://localhost了, 部署还涉及spring boot的一些配置,不是涉及两者之间,就不叙述了,网上都有....