Observability: 如何为 APM 定制 transactions 及 spans
如果你对 Elastic APM 还不是很熟悉的话,请参阅我之前的文章 “Solutions:应用程序性能监控/管理(APM)实践”。今天我将以 nodejs 为例来展示如何定制 transactions 及 spans.
用于 Node.js 的 Elastic APM 代理通过将传入的 HTTP 请求分组到逻辑存储桶中来检测你的应用程序。 每个 HTTP 请求都记录在我们所谓的 transaction 中。如果你想了解 nodejs 是如何进行 APM 操作的,请参阅我之前的文章 “Solutions:为Nodejs微服务提供APM功能”。 但是,如果你的应用程序不是常规的 HTTP 服务器或数据库访问,则 Node.js 代理将无法知道 transaction 应在何时开始和何时结束。
例如,如果你的应用程序是后台作业处理程序或仅接受 WebSocket,则需要手动开始和结束 transaction。同样地,如果要跟踪和计时在 transactions 中应用程序中发生的自定义事件,则可以向现有的 transaction 中添加新的 spans。
准备工作
nodejs
我今天使用的例子在地址: https://github.com/liu-xiao-guo/custom-apm-transactions。这是一个 nodejs 的应用。它提供如下的两个 API 接口:
-
/upload-avatar
-
/upload-photos
这两个接口分别用来上传一个或多个文件到服务器端。今天,我将展示如何在 /upload-avatar 这个接口中定制 transactions 并使用 Elastic APM 来追踪每个代码执行所需要的时间。
Elastic Stack 安装
在今天的测试中,我们将使用 docker 来安装 Elastic Stack。我们首先要启动 docker。然后在如下的地址下载所需要的 docker-compose.yml 文件:
https://github.com/elastic/apm-contrib/tree/master/stack等我们下载完 docker-compose.yml 文件后,我们在 docker-compose.yml 文件所在的目录下打入如下的命令:
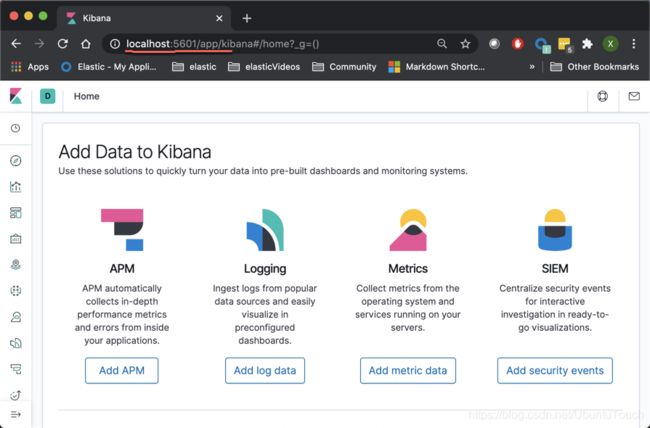
docker-compose up等完全启动后,docker 将启动 Elasticsearch, Kibana 及 APM server。我们可以在浏览器中启动 Kibana:
添加定制的 transactions 及 spans
我们首先打开 nodejs 中的 index.js 文件:
index.js
// Add this to the VERY top of the first file loaded in your app
var apm = require('elastic-apm-node').start({
    // Override service name from package.json
    // Allowed characters: a-z, A-Z, 0-9, -, _, and space
    serviceName: 'fileupload2',

    // Use if APM Server requires a token
    secretToken: '',

    // Set custom APM Server URL (default: http://localhost:8200)
    serverUrl: ''
  })

const express = require('express');
const fileUpload = require('express-fileupload');
const cors = require('cors');
const bodyParser = require('body-parser');
const morgan = require('morgan');
const _ = require('lodash');

const app = express();

// enable files upload
app.use(fileUpload({
    createParentPath: true
}));

//add other middleware
app.use(cors());
app.use(bodyParser.json());
app.use(bodyParser.urlencoded({extended: true}));
app.use(morgan('dev'));

//start app
const port = process.env.PORT || 3000;

app.get('/', function (req, res) {
    res.send('This is so cool!')
})

function runSubTask (name, type, cb) {
    console.log("Staring span: " + name);
    var span = apm.startSpan(name)
    setTimeout(function () {
        if (span) {
            console.log("ending span");
            span.end()
        }
        cb()
    }, Math.random() * 1000).unref()
}

app.post('/upload-avatar', async (req, res) => {
    var name = 'upload-avatar';
    var type = 'avatar';
    console.log("Starting transaction");
    var transaction = apm.startTransaction(name, type);

    try {
        if(!req.files) {
            res.send({
                status: false,
                message: 'No file uploaded'
            });
        } else {
            console.log("Running fake span");
            // Simulate a task doing something
            runSubTask("fake span", type, function() {
                //Use the name of the input field (i.e. "avatar") to retrieve the uploaded file
                let avatar = req.files.avatar;

                console.log("Staring span: Saving pictures");
                var span = apm.startSpan('Saving pictures')
                //Use the mv() method to place the file in upload directory (i.e. "uploads")
                avatar.mv('./uploads/' + avatar.name);
                if (span) {
                    console.log("ending span");
                    span.end()
                }

                //send response
                res.send({
                    status: true,
                    message: 'File is uploaded',
                    data: {
                        name: avatar.name,
                        mimetype: avatar.mimetype,
                        size: avatar.size
                    }
                });

                if (transaction) {
                    console.log("end transaction");
                    transaction.end();
                }
            })
        }
    } catch (err) {
        res.status(500).send(err);
        console.log("Capturing error");
        apm.captureError(err);
    }
});

app.post('/upload-photos', async (req, res) => {
    try {
        if(!req.files) {
            res.send({
                status: false,
                message: 'No file uploaded'
            });
        } else {
            let data = [];

            //loop all files
            _.forEach(_.keysIn(req.files.photos), (key) => {
                let photo = req.files.photos[key];

                //move photo to uploads directory
                photo.mv('./uploads/' + photo.name);

                //push file details
                data.push({
                    name: photo.name,
                    mimetype: photo.mimetype,
                    size: photo.size
                });
            });

            //return response
            res.send({
                status: true,
                message: 'Files are uploaded',
                data: data
            });
        }
    } catch (err) {
        res.status(500).send(err);
        apm.captureError(err);
    }
});


app.listen(port, () =>
  console.log(`App is listening on port ${port}.`)
);
其实这个代码非常简单。为了使得 Elastic APM 能对我们的 nodejs 应用进行 APM,我们首先需要添加如下的这个部分,而且这个部分必须是出现在 index.js 的最开始的部分:
// Add this to the VERY top of the first file loaded in your app
var apm = require('elastic-apm-node').start({
    // Override service name from package.json
    // Allowed characters: a-z, A-Z, 0-9, -, _, and space
    serviceName: 'fileupload2',

    // Use if APM Server requires a token
    secretToken: '',

    // Set custom APM Server URL (default: http://localhost:8200)
    serverUrl: ''
  })
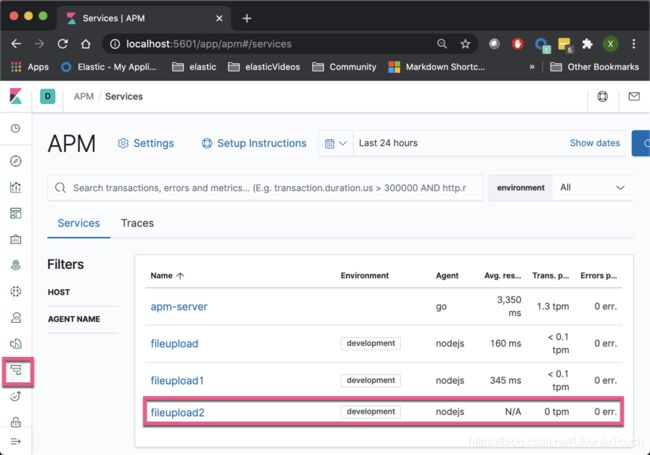
在这里,我们定义了一个叫做 fileupload2 的 service 名字。这个将在 APM 的界面看到。
为了能够模拟一个运行一个任务的代码,我创建了如下的一个方法:
function runSubTask (name, type, cb) {
    console.log("Staring span: " + name);
    var span = apm.startSpan(name)
    setTimeout(function () {
        if (span) {
            console.log("ending span");
            span.end()
        }
        cb()
    }, Math.random() * 1000).unref()
}
当这个代码被执行时,它将延迟一段时间,并回调 cb。在上面的代码中,它也使用了 apm.startSpan() 来创建一个定制的 span。这个将被用来测量这个代码执行的时间。
我们接下来查看如下的代码:
app.post('/upload-avatar', async (req, res) => {
    var name = 'upload-avatar';
    var type = 'avatar';
    console.log("Starting transaction");
    var transaction = apm.startTransaction(name, type);

    try {
        if(!req.files) {
            res.send({
                status: false,
                message: 'No file uploaded'
            });
        } else {
            console.log("Running fake span");
            // Simulate a task doing something
            runSubTask("fake span", type, function() {
                //Use the name of the input field (i.e. "avatar") to retrieve the uploaded file
                let avatar = req.files.avatar;

                console.log("Staring span: Saving pictures");
                var span = apm.startSpan('Saving pictures')
                //Use the mv() method to place the file in upload directory (i.e. "uploads")
                avatar.mv('./uploads/' + avatar.name);
                if (span) {
                    console.log("ending span");
                    span.end()
                }

                //send response
                res.send({
                    status: true,
                    message: 'File is uploaded',
                    data: {
                        name: avatar.name,
                        mimetype: avatar.mimetype,
                        size: avatar.size
                    }
                });

                if (transaction) {
                    console.log("end transaction");
                    transaction.end();
                }
            })
        }
    } catch (err) {
        res.status(500).send(err);
        console.log("Capturing error");
        apm.captureError(err);
    }
});
当借口 /upload-avatar 被调用时,我们通过如下的方法:
    var name = 'upload-avatar';
    var type = 'avatar';
    console.log("Starting transaction");
    var transaction = apm.startTransaction(name, type);
来创建一个 transaction。我们在如下的代码中创建另外一个 span:
            runSubTask("fake span", type, function() {
                //Use the name of the input field (i.e. "avatar") to retrieve the uploaded file
                let avatar = req.files.avatar;

                console.log("Staring span: Saving pictures");
                var span = apm.startSpan('Saving pictures')
                //Use the mv() method to place the file in upload directory (i.e. "uploads")
                avatar.mv('./uploads/' + avatar.name);
                if (span) {
                    console.log("ending span");
                    span.end()
                }

                //send response
                res.send({
                    status: true,
                    message: 'File is uploaded',
                    data: {
                        name: avatar.name,
                        mimetype: avatar.mimetype,
                        size: avatar.size
                    }
                });

                if (transaction) {
                    console.log("end transaction");
                    transaction.end();
                }
在上传文件的那个部分,我也创建了一个 叫做 Saving pictures 的 span。这样我也可以测量保存文件所需要的时间。等文件被上传完后,我们调用:
                if (transaction) {
                    console.log("end transaction");
                    transaction.end();
                }
来结束这个 transaction。
在本练习中,我没有针对接口 //upload-photos 进行改造。这个练习就留给你了。
接下来,我们就可以开始运行我们的代码:
npm install
node index.js
nodejs 运行于端口 3000 上。
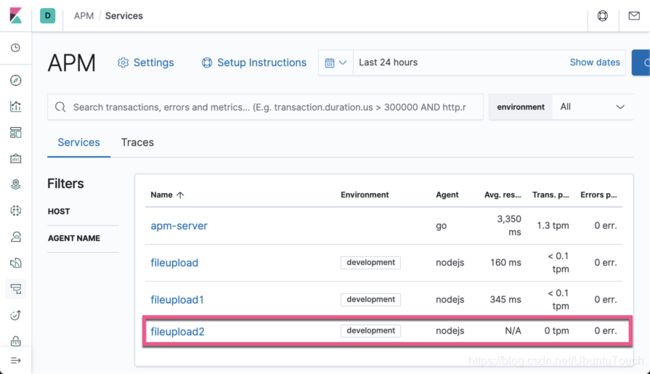
这样,我们就可以在 Kibana 中的 APM 界面中可以看到:
我们可以看到有一个叫做 fileupload2 的 service 出现了。
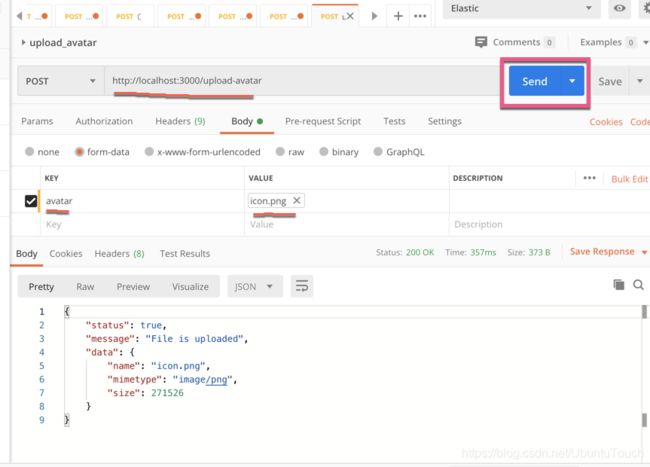
为了能够调用,我们可以使用 Postman 来访问 /upload-avatar 这个接口:
我们可以选择好自己的图片,并点击 Send 按钮。这时在 nodejs 运行的界面中,我们可以看到:
我们的代码已经被正确执行,而且图片已经被成功上传。
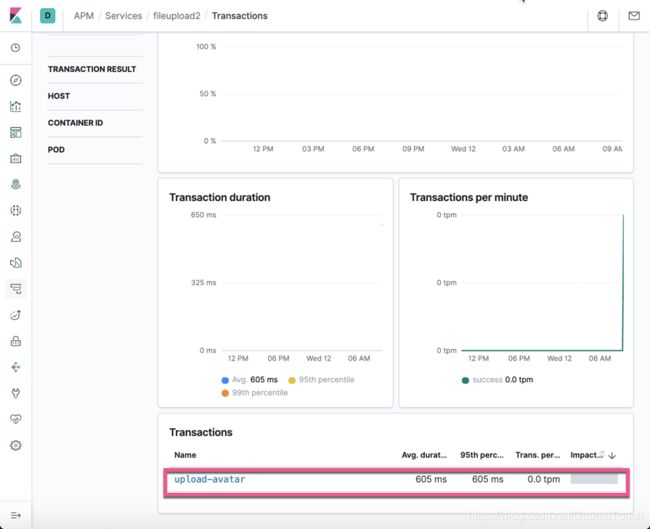
我们回到 Elastic APM 的界面,点击 fileupload2 这个 service:
我们可以看到一个叫 upload-avatar 的这么一个 transaction:
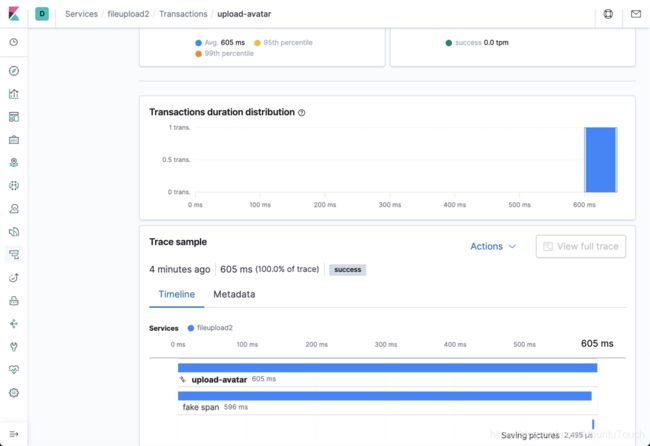
显然这个是我们之前在 nodejs 里定义的那个 transaction 的名字。点击上面的 upload-avatar 超链接:
上面显示的这个 transaction 里含有两个 span: fake span 及 Saving pictures。它们分别执行的时间也显示在上面。
总结
在今天的练习中,我们展示了如何为我们的 nodejs 来定制自己的 transactions 及 span。这种情况可以针对非 HTTP 请求或者 数据库访问而作的性能监控。对于优化我们的应用有非常多的好处。当然, Elastic APM 也针对其它的语言也有相应的定制机制。请你参考 Elastic 的相关技术文档。
参考:
【1】https://www.elastic.co/guide/en/apm/agent/nodejs/current/custom-transactions.html
【2】https://www.elastic.co/guide/en/apm/agent/nodejs/current/custom-spans.html
