搭建Nexus Repository 3.6.0-02和配置apache-maven-3.5.2和本地的local Repository以及项目的pom.xml(IDEA 打包等)
本文主要目的: 为了让Maven管理项目的所有依赖包,Release和Snapshot .
本文涉及如下三点:
1.windows 下搭建Nexus Repository 3.6.0-02(linux下思路一样)
2.配置apache-maven-3.5.2中的settings和本地的local Repository
3.配置项目的pom.xml (介绍maven的插件,IDEA 打包[依赖包和项目包]等)
第一步:windows 下搭建Nexus Repository 3.6.0-02
1.1 进去官网 Apache Maven 点击打开链接下载 Nexus Repository Manager OSS 3.x - Windows 我下载的版本是 nexus-36.0.02-win64解压完后是下图两文件
下载完Nexus3.6.0后解压,得到如下目录结构: ![]()
看下官网对这两个文件夹的描述: 
After you extract the repository manager archive, two directories will appear:

Installation directory
----------------------

    This directory is contains the Nexus Repository Manager application and all the required additional components such as Java libraries and configuration files. The name of the directory by default uses nexus- and is appended with the version name. In this section, and throughout the book, it is referred to as $install-dir in any code segments.

Data directory
--------------

This directory contains all the repositories, components and other data that are stored and managed by the repository manager. The default location of the data directory is ../sonatype-work/nexus3 relative to the installation directory. In this section, and throughout the book, it is referred to as $data-dir in any code segments.- 1
- 2
- 3
- 4
- 5
- 6
- 7
- 8
- 9
- 10
- 11
解压压缩文件后,得到两个文件夹:
安装目录
这个目录包含了Nexus仓库管理软件和所有必需的组件,例如Java库和配置文件等。这个目录默认以nexus-开始且后跟版本名,也就是nexus-3.6.0-02。在文档中,它就是 $install-dir的值。
数据目录
这个目录包含所有需要被Nexus仓库进行管理的的代理仓库,组件和数据。数据的默认位置是在/sonatype-work/nexus3下,在文档中,它就是 $data-dir的值。
关于这两个目录下的文件夹的说明情况:https://help.sonatype.com/display/NXRM3/Directories
启动Nexus3.6.0
需要的JAVA环境:Nexus Repository Manager requires a Java 8 Runtime Environment (JRE) from Oracle.
在控制台进入nexus-3.6.0-02\bin下,执行:nexus.exe /run,会下载很多东西,当你看到 
则表明你的Nexus3.6.0启动成功。
Nexus的默认服务端口为8081,打开浏览器,输入:localhost:8081即可进入Nexus管理系统。
如果你的8081端口被占用,则进入nexus-3.6.0-02\etc下找到nexus-default.properties文件,打开修改端口号,保存,重新执行:nexus.exe /run
如果端口号没有被占用,则会看到如下界面: 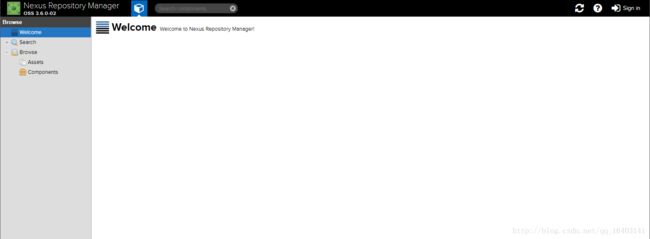
点击右上角的Sign in,默认的用户名是:admin,密码:admin123。
官方文档描述如下: 
关于这个私服环境的介绍,推荐这篇博客http://blog.csdn.net/fygkchina/article/details/62976387
注册Nexus3.6.0服务
官方文档说明地址:https://help.sonatype.com/display/NXRM3/Run+as+a+Service
进入nexus-3.6.0-02\bin下执行:
nexus.exe /install <optional-service-name>- 1
optional-service-name是服务名称,可以随便起。
完成后就可以在任务管理器中找到该服务: ![]()
我这里取名为nexus3.6。
可以通过执行:
nexus.exe /uninstall <optional-service-name>- 1
来注销服务,我试过了,好像并不能注销,妈蛋!
成功注册服务之后,启动Nexus3.6.0就有两种办法了:
(1)通过任务管理器来启动和关闭服务 (我喜欢安装成Windows的服务方便【我取名MyNexus】)
(2)通过在G:\nexus-3.6.0-02-win64\nexus-3.6.0-02\bin下执行:nexus.exe /start nexus3.6和nexus.exe /stop nexus3.6来启动和关闭该服务。
至此所有的nexus的本地搭建完成。后续项目通过nexus私服下载的jar包,都会缓存在sonatype-work的文件里
第二步:配置apache-maven-3.5.2和本地的local Repository
2.1 下载apache-maven-3.5.2
进入Apache Maven 官网 点击打开链接下载 然后解压,并且在conf目录下复制一份settings-defineName.xml
接下来就是配置settings-mengxp的配置。
2.2 配置settings-mengxp.xml
首先配置两个属性
2.2.1
localRepository是项目需要的jar包保留在本地的maven-repo库的路径,自己定义一个文件夹即可.
2.2.2
配置第一步中搭建的Nexus私服的地址。其中mirrorOf(默认值* 即可) url 很重要。
-
*
匹配所有远程仓库。
-
repo1,repo2
匹配仓库repo1和repo2,使用逗号分隔多个远程仓库。
-
*,!repo1
匹配所有远程仓库,repo1除外,使用感叹号将仓库从匹配中排除
Url:是2.1搭建的nexus私服地址。下图中的maven-public是建立的一个group,一个组能够存在多个Repository仓库。
其他的具体参数可以参考 点击打开链接
第三步:配置项目的pom.xml 主要两种 单模块的Maven Pro和多模块的Maven Pro
当IDEA集成的maven插件,第一次运行时,需要将相关的插件plugins jar包下载在本地的local repo中。
3.1 单模块的maven项目的pom.xml,包含了所有常用的plugin插件的配置。
默认会在项目src同级目录下生成Target文件。里面存在着生成的lib conf bin 等文件夹。
bin:src/main/scripts 目录下的脚本copy到bin目录下。
conf:src/main/resources目录下的配置文件
lib:本项目的依赖包和项目jar()包都会存在lib目录下。
这里需要注意的是 lib下的会生成两个jar 第一个是jar包(*.class),第二个是源码包(里面是*.java)
FirstMavenProo-1.0-SNAPSHOT.jar 项目的jar包,不是依赖包(jar-with-dependencies)但是这个lib下存在他的依赖包。
下面3.2会配置打成依赖包的方式。
    4.0.0
    FirstMavenPro
    FirstMavenPro
    pom
    all


            org.elasticsearch.client
            transport
            5.6.4


            org.apache.logging.log4j
            log4j-core
            2.9.1


        src/main/java


                src/main/resources
                ${project.build.directory}/conf


                lib
                ${project.build.directory}/lib


                src/main/scripts

                    *.sh
                    *.bat

                ${project.build.directory}/bin


                org.apache.maven.plugins
                maven-compiler-plugin
                3.1

                    true
                    1.8
                    1.8
                    UTF-8


                org.apache.maven.plugins
                maven-jar-plugin
                2.6


                    ${project.build.directory}/lib


                            true
                            lib/


                        *.xml
                        *.properties


                org.apache.maven.plugins
                maven-dependency-plugin
                2.10


                        copy-dependencies
                        package

                            copy-dependencies


                            ${project.build.directory}/lib


                org.apache.maven.plugins
                maven-resources-plugin
                2.7

                    UTF-8


                maven-source-plugin
                2.4

                    true

                    ${project.build.directory}/lib


                        compile

                            jar


                org.apache.maven.plugins
                maven-javadoc-plugin
                2.10.2

                    true


                        attach-javadocs

                            jar
3.2 是maven多模块的Pro 的pom.xml的配置
首先看大图我的项目存在两个模块
项目一的pom.xml 截图和具体的配置如下。 采用maven-assembly-plugin 配置满足了打成依赖包的方式 (jar-with-dependencies )
        maven-mult-modules
        maven-mult-modules
        1.0

    4.0.0
    OneModule


            org.elasticsearch.client
            transport
            5.6.4


            org.apache.logging.log4j
            log4j-core
            2.9.1


                maven-assembly-plugin
                2.4


                        jar-with-dependencies


                        make-assembly
                        package

                            single
项目二 采用maven-assembly-plugin
会将bin conf lib(包含了项目的依赖包和项目本身的jar(不是依赖包)) 包打成一个tar.gz 或者zip格式的压缩包,更加方便。
需要配置两个文件
1.src\main\assembly\assembly.xml
    all

        tar.gz
        dir


            true
            lib


            /

                README.txt


            src/main/scripts
            /bin
            0777


            src/main/resources
            /config

                base.conf

            0644
2.pom的配置
        maven-mult-modules
        maven-mult-modules
        1.0

    4.0.0

    TwoModule


            org.elasticsearch.client
            transport
            5.6.4


            org.apache.logging.log4j
            log4j-core
            2.9.1


                maven-assembly-plugin


                        src/main/assembly/assembly.xml


                        make-assembly
                        package

                            single


                org.apache.maven.plugins
                maven-compiler-plugin

                    1.8
                    1.8
至此一般的基本的maven相关的项目应该都没有问题了。
后续的文章会继续写下去,介绍google 的protocolBuffer 和Hbase的协处理器具体的代码。
希望和大家一起进步。