Zabbix 结合企业微信实现微信报警功能
Zabbix 结合企业微信实现微信报警功能
- 一、Zabbix 概述
- 二、部署 Zabbix 结合企业微信报警
-
- 1.注册企业微信
- 2.配置企业微信
-
- 1)创建部门
- 2)添加成员
- 3.创建应用
- 4.配置监控脚本
-
- 1)修改 Zabbix_server 配置文件
- 2)安装 simplejson 软件
- 3)配置监控脚本
- 4)报警测试
- 5.Zabbix Web 界面配置
-
- 1)配置报警媒介
- 2)把媒介贴到用户上
- 3)创建动作
- 4)设置报警消息
- 5)设置恢复报警消息
- 三、测试 Zabbix 结合企业微信报警
-
- 1.被监控机配置
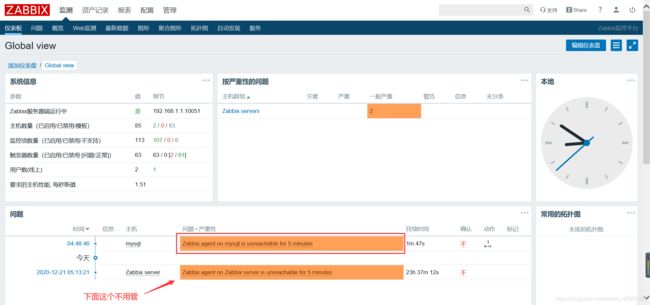
- 2.通过 Zabbix Web管理界面来对 MySQL 服务器进行监控
- 3.关闭 MySQL 服务器的Agent
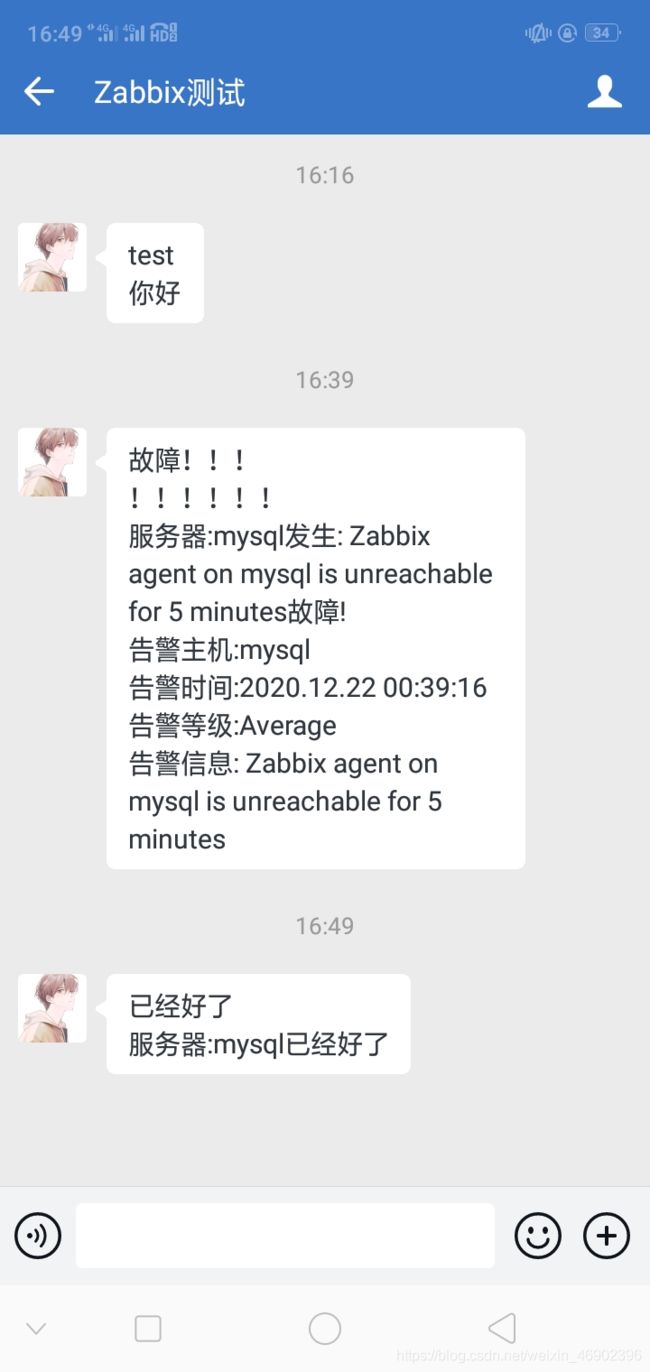
- 4.验证
一、Zabbix 概述
Zabbix 可以通过多种方式把告警信息发送到指定人,常用的有邮件,短信报警方式,但是越来越多的企业开始使用 Zabbix 结合微信作为主要的告警方式,这样可以及时有效的把告警信息推送到接收人,方便告警的及时处理。
二、部署 Zabbix 结合企业微信报警
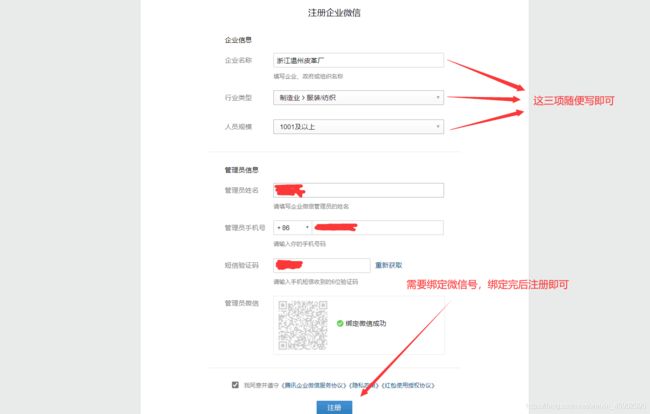
1.注册企业微信
注册地址: https://work.weixin.qq.com
2.配置企业微信
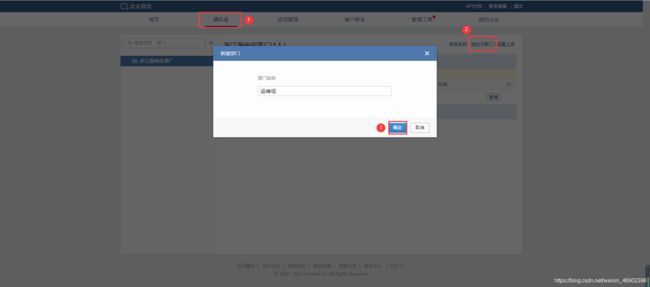
1)创建部门
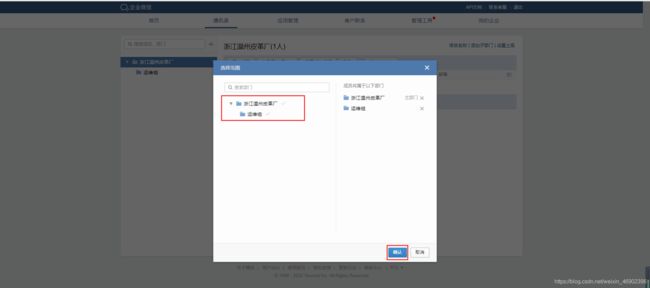
2)添加成员
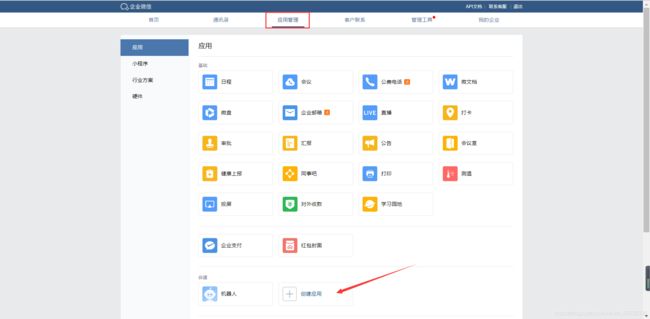
3.创建应用
4.配置监控脚本
- 注意:如果未部署 Zabbix 监控平台需看:分布式部署 Zabbix 监控平台 来进行部署。
1)修改 Zabbix_server 配置文件
[root@zabbix ~]# vim /usr/local/zabbix/etc/zabbix_server.conf
在最后面添加:
AlertScriptsPath=/usr/local/zabbix/share/zabbix/alertscripts
[root@zabbix ~]# systemctl restart zabbix_server
2)安装 simplejson 软件
- simplejson 软件包从这个连接下载:https://pan.baidu.com/s/1YGqHn4bDLZZrW6X6YApHLQ
- 提取码:x3r0
[root@zabbix ~]# cd /usr/local/zabbix/share/zabbix/alertscripts/
[root@zabbix alertscripts]# ls
[root@zabbix alertscripts]# ls
simplejson-3.8.2.tar.gz
[root@zabbix alertscripts]# tar zxf simplejson-3.8.2.tar.gz
[root@zabbix alertscripts]# cd simplejson-3.8.2
[root@zabbix simplejson-3.8.2]# python setup.py build && python setup.py install
3)配置监控脚本
- 下面图片中划线的东西,和下面脚本文件中对应写。
touser


toparty
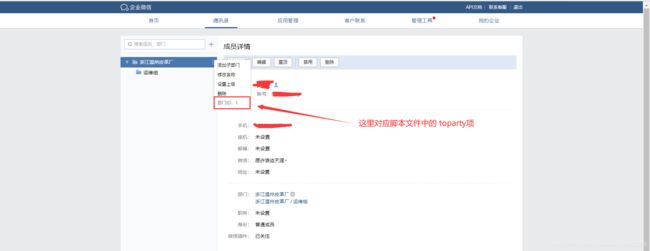
agentid

corpid

corpsecret

[root@zabbix simplejson-3.8.2]# cd ..
[root@zabbix alertscripts]# vim testzabbix.py
#!/usr/bin/python
#_*_coding:utf-8 _*_


import urllib,urllib2
import json
import sys
import simplejson

reload(sys)
sys.setdefaultencoding('utf-8')


def gettoken(corpid,corpsecret):
    gettoken_url = 'https://qyapi.weixin.qq.com/cgi-bin/gettoken?corpid=' + corpid + '&corpsecret=' + corpsecret
#    print  gettoken_url
    try:
        token_file = urllib2.urlopen(gettoken_url)
    except urllib2.HTTPError as e:
        print e.code
        print e.read().decode("utf8")
        sys.exit()
    token_data = token_file.read().decode('utf-8')
    token_json = json.loads(token_data)
    token_json.keys()
    token = token_json['access_token']
    return token

def senddata(access_token,user,subject,content):

    send_url = 'https://qyapi.weixin.qq.com/cgi-bin/message/send?access_token=' + access_token
    send_values = {

        "touser":'zhangsan',       #企业号中的用户帐号.
        "toparty":"1",             #企业号中的部门id.
        "msgtype":"text",
        "agentid":"1000002",       #企业号中的应用id.
        "text":{

            "content":subject + '\n' + content
           },
        "safe":"0"
        }
#    send_data = json.dumps(send_values, ensure_ascii=False)
    send_data = simplejson.dumps(send_values, ensure_ascii=False).encode('utf-8')
    print(send_data)
    send_request = urllib2.Request(send_url, send_data)
    response = json.loads(urllib2.urlopen(send_request).read())
    print str(response)


if __name__ == '__main__':
    user = str(sys.argv[1])
    subject = str(sys.argv[2])
    content = str(sys.argv[3])
    corpid =  'ww849e7d6548123bc4'      #企业号的标识ID.
    corpsecret = 'ipzr_M5MpAKeao2IZROFwqQFuadWCNmQGyYujb12345'    #应用程序的密钥.
    accesstoken = gettoken(corpid,corpsecret)
    senddata(accesstoken,user,subject,content)
4)报警测试
[root@zabbix simplejson-3.8.2]# chmod +x testzabbix.py
[root@zabbix alertscripts]# chmod +x testzabbix.py
[root@zabbix alertscripts]# ./testzabbix.py 1 test 你好
5.Zabbix Web 界面配置
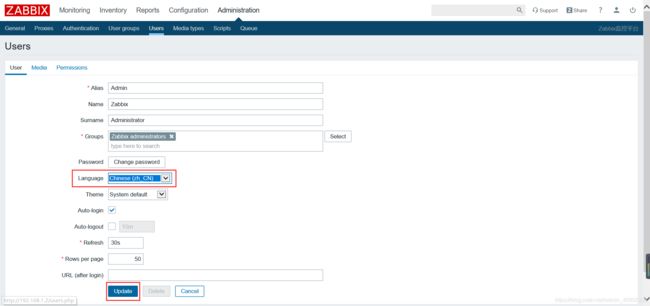
- 切换到中文
- 更新后刷新一下页面即可
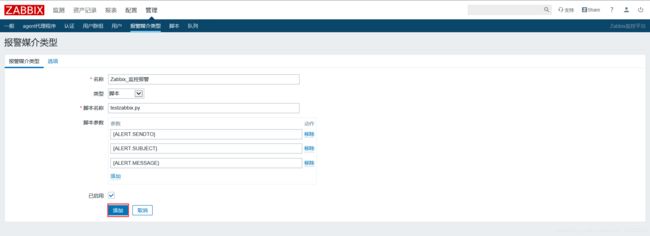
1)配置报警媒介
- 脚本参数添加如下即可
{
     ALERT.SENDTO}
{
     ALERT.SUBJECT}
{
     ALERT.MESSAGE}
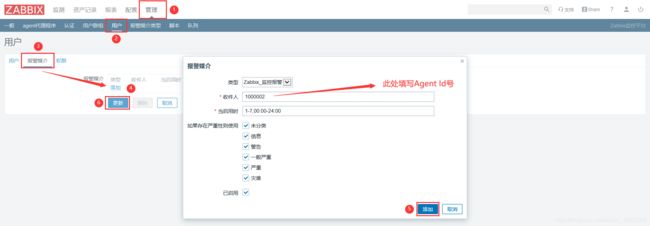
2)把媒介贴到用户上
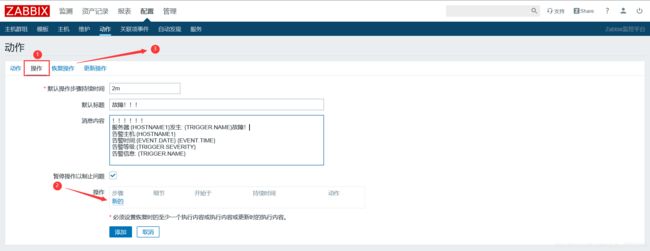
3)创建动作
4)设置报警消息
!!!!!!
服务器:{
     HOSTNAME1}发生: {
     TRIGGER.NAME}故障!
告警主机:{
     HOSTNAME1}
告警时间:{
     EVENT.DATE} {
     EVENT.TIME}
告警等级:{
     TRIGGER.SEVERITY}
告警信息: {
     TRIGGER.NAME}
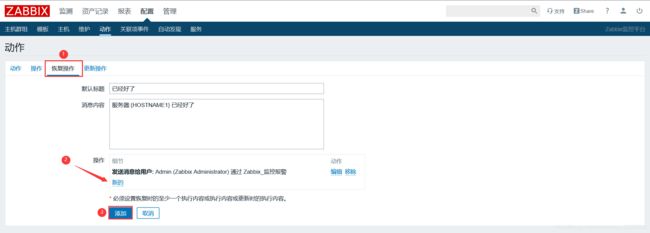
5)设置恢复报警消息
三、测试 Zabbix 结合企业微信报警
1.被监控机配置
[root@mysql ~]# ls
anaconda-ks.cfg  zabbix-4.2.6.tar.gz  zabbix-agent-3.2.6-1.el7.x86_64.rpm
[root@mysql ~]# rpm -ivh zabbix-agent-3.2.6-1.el7.x86_64.rpm
[root@mysql ~]# vim /etc/zabbix/zabbix_agentd.conf
95 Server=192.168.1.1
136 ServerActive=192.168.1.1
147 Hostname=mysql
[root@mysql ~]# systemctl start zabbix-agent
2.通过 Zabbix Web管理界面来对 MySQL 服务器进行监控
- 上面的
"配置"然后"主机",创建主机,左边的群组记得选"所有",点击"创建主机"
- 点击
"模板"界面,链接指示器,选择如下的模板
3.关闭 MySQL 服务器的Agent
[root@mysql ~]# systemctl stop zabbix-agent
4.验证
注意:需要等待大概5~6分钟,这个消息比较慢。
[root@mysql ~]# systemctl start zabbix-agent
