【TensorFlow 2 gpu 安装】步骤3 -抽取Tensfolow Docker 镜像
点这里查看步骤2
运行&安装TensorFlow镜像
来源:https://tensorflow.google.cn/install/docker#gpu_support
-GPU支持
检查 GPU 是否可用:
lspci | grep -i nvidia
验证 nvidia-docker 安装效果:
docker run --gpus all --rm nvidia/cuda nvidia-smi
下载运行支持 GPU 的TensorFlow映像:
docker run --gpus all -it --rm tensorflow/tensorflow:latest-gpu \
   python -c "import tensorflow as tf; print(tf.reduce_sum(tf.random.normal([1000, 1000])))"
运行结果:

红线处,device:GPU:0 第1个GPU来运行的,后面有GPU的信息
最后一行显示运算结果。
至此,安装完成!
运行.py程序
创建一个Python程序,“Tensorflow.py”,代码:
import tensorflow as tf

print("Num GPUs Available: ", len(tf.config.experimental.list_physical_devices('GPU')))

tf.debugging.set_log_device_placement(True)

# Create some tensors
a = tf.constant([[1.0, 2.0, 3.0], [4.0, 5.0, 6.0]])
b = tf.constant([[1.0, 2.0], [3.0, 4.0], [5.0, 6.0]])
c = tf.matmul(a, b)

print(c)
tf.config.experimental.list_physical_devices(‘GPU’) 可以确认 TensorFlow 使用的是 GPU。
在同目录下创建一个文件,“Dockerfile”,输入以下内容:
FROM tensorflow/tensorflow:latest-gpu

# Set the working directory to /app
WORKDIR /app

# Copy the current directory contents into the container at /app
COPY . /app

# Run app.py when the container launches
CMD ["python3", "/app/TensorFlow.py"]
定位到 “Dockerfile” 目录下
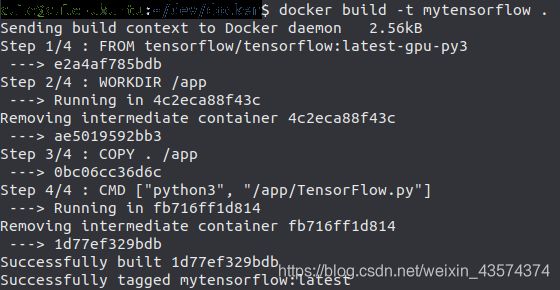
创建镜像,“mytensorflow”,名称要用小写!
docker build -t mytensorflow .
运行容器
docker run --runtime=nvidia --rm mytensorflow
运行结果:
 第一条红线,显示GPU信息
第二条红线,显示张量计算在GPU上运行
之后有显示的结果
更多使用GPU信息,点这里:https://tensorflow.google.cn/guide/gpu?hl=zh-cn
至此完成.py文件,利用 TensorFlow-gpu 在终端中的运行
绑定安装 bind mount
每次修改. py 文件,都要运行两行命令:
docker build -t mytensorflow .
docker run --runtime=nvidia --rm mytensorflow
较蠢。
而将主机中的文件/文件夹绑定入一个容器中,就可以省略建镜像的步骤。
方法:
- 删除 Dockerfile 文件中的 “COPY . /app” 命令。因为要绑定本地文件夹,而非复制过去。
- 修改 TensorFlow.py 文件
- 打开终端,运行定位到 TensorFlow.py 文件的文件夹,运行下面命令,即可
docker run --runtime=nvidia -v $(pwd):/app --rm mytensorflow
参考:https://josehoras.github.io/tensorflow-with-gpu-using-docker-and-pycharm/ (科学)
