python3学习
这里写目录标题
- 入门
-
-
- 查看版本:
- 打开python shell :
- 快捷键
- 打印:
- 字符串相加:
-
- 序列
-
- 共同函数
-
- len
- max和min
- sum
- sorted
- reversed
- enumerate 枚举
- zip
- 断言 assert
- 条件分支
-
- 三元操作符
- 循环
-
- while
-
- 无限循环
- for
-
- range()
- 引入模块
-
- 随机数
- 数据类型
-
- 整型
-
- 字符串转整形
- 浮点型转整形
- 浮点型
-
- 字符转浮点
- 布尔类型
- e记法
- 字符串
-
- 转义字符
- 原字符串
- 长字符串
- format
- 数字转字符
- 各种函数
-
- 首字母大写capitalize
- 大写转为小写casefold
- 居中 center
- 计数 count
- 编码 encode
- 判断特定字符串结束endswith
- 还有很多,不写了
- 获得变量的类型
-
- type
- isinstance
- 运算符号
-
- 除法变化
-
- 运算除 /
- 地板除 //
- 取余
- 幂运算 **
- 逻辑操作符
-
- 3<4<5
- 优先级总结
- 列表 List
-
- 添加元素
-
- 添加单个元素 append
- 多个元素 extend
- 指定位置插入 insert
- 访问元素
- 删除元素
-
- remove
- del
- pop
- 列表分片 slice
- 列表操作符
-
- 比较操作符
- 逻辑操作符
- 连接操作符
- 重复操作符
- 成员关系操作符
- 其他函数
-
- count
- index
- reverse
- sort
- 元组 Tuples
-
- 访问
- 创建
- 更新
- 删除
- 函数
-
- 简单使用
-
- 单参
- 多参
- return
- 函数文档
-
- 关键字参数
- 默认参数
- 收集参数
-
- 收集参数和关键字参数共存
- 函数与过程
- 返回多个值
- 局部变量
-
- 更改无效
- global
- 内嵌函数
- 闭包closure
- nonlocal
- lambda表达式
-
- 多参
- 筛选filter
- 使用lambda表达式简化
- 映射map
- 递归
-
- 汉诺塔
- 字典 dict
-
- 创建字典
-
- 方式1 {}
- 方式2 mapping 元组和列表
- 方式3 关键字形式
- 添加
- 修改字典
-
- 直接修改
- update()
- fromkeys()
- 访问字典
-
- for 循环
- get()
- in / not in (判断键)
- 删除
- 拷贝 copy
- 抛出
-
- pop和popitem
- 集合 set
-
- 增删查
-
- 创建集合
- 添加 add
- 删除 remove
- 访问集合
- 不可变集合 frozenset
- 文件
-
- 文件函数
-
- close()
- read()
- readline()
- tell()
- seek
- 文件内容转化为列表
- write
- OS
-
- 简单OS的函数
- 多样的系统信息
- OS.path
- pickle 泡菜
- time 模块
- 异常 Exception
-
- 异常类型
- 异常处理 try
-
- try-except 语句
- try-finally 语句
- raise语句
- else语句
-
- if else
- while break else
- try except else
- with
- 图形用户界面 EasyGui
-
- 下载安装
-
- 方法1:
- 方法2:
- 对象
-
- self ==>this
- `__init__(self)` ==>构造函数
- 公有和私有
-
- 伪私有
- 继承
-
- 方法覆盖
- 子类使用父类的构造函数
-
- 1. 调用未绑定的父类方法
- 2. 使用supper
- 多重继承
- 其他
- 相关BIF (内置函数)
- 魔法方法
-
- `__init__`
- `__new__`
- `__del__`
- 算数运算
- 反运算
- 其他运算
-
- 增量赋值运算
- 一元操作符
- 类型转换
- 属性访问
-
- property
- get/set /delattr
- 编程陷阱
- 描述符
-
- 自我实现property
- 温度程序
- 定制容器(定制序列)
-
- 协议(protocols)
- 不可变容器
- 迭代器
- 生成器
-
- 列表推导式
- 字典推导式
- 集合推导式
- 生成器推导式
- 模块
-
- 命名空间
- 导入模块
- `__main__`
-
- 问题引出
- 搜索路径
-
- 添加搜索路径
- 包(package)
- 像极客一样思考
-
- 日常使用 以计时 timeit为例
-
- 查找文档
- 快速掌握
入门
查看版本:
python --version
打开python shell :
python
快捷键
上一条命令 Alt+P
下一条命令 Alt+N
打印:
>>> print("I love you");
I love you
字符串相加:
>>> print("a"+" b")
a b
>>> print("a"*8)
aaaaaaaa
序列
字符串,list 和元组的共同点
- 都可以通过索引查找
- 默认值从0开始
- 可以分片获取
- 有共同的操作符,包括 重复操作符、拼接操作符、成员关系操作符
共同函数
len
>>> a=[1,2,3]
>>> len(a)
3
>>> a=(1,2,3)
>>> len(a)
3
>>> a="1234"
>>> len(a)
4
max和min
>>> a=[1,2,3] #list
>>> max(a)
3
>>> a=(1,2,3) # tuple
>>> max(a)
3
>>> a='abc' #str
>>> max(a)
'c'
>>>
sum
>>> a=[1,2,3]
>>> b=(1,2,3)
>>> sum(a)
6
>>> sum(b)
6
sorted
字符串和元组排序后返回 List类型,但原本的不变
>>> a=[3,2,1]
>>> b=(3,2,1)
>>> c="bca"
>>> sorted(a)
[1, 2, 3]
>>> sorted(b)
[1, 2, 3]
>>> sorted(c)
['a', 'b', 'c']

>>> a
[3, 2, 1]
>>> b
(3, 2, 1)
>>> c
'bca'
reversed
单单reversed()是返回迭代器对象。需要简洁的转换为list
[1, 2, 3]
>>> list(reversed(a))
[3, 2, 1]
enumerate 枚举
>>> a=[2,13,45]
>>> list(enumerate(a))
[(0, 2), (1, 13), (2, 45)]
zip
>>> a=[1,2,3,4,5,6,7,8]
>>> b=[4,5,6,7]
>>> list(zip(a,b))
[(1, 4), (2, 5), (3, 6), (4, 7)]
断言 assert
assert后面为假时,就会崩溃
assert 3>4 #这样程序就会崩溃
条件分支
>、<、>=、<=、==、!=
if 条件:
	操作1
elif :
	操作2
else :
	操作3
>>> 3>2
True
>>> 3>2 and 4>5
False
三元操作符
if x等价于
small=x if x循环
while
while a!=0 :
	print("你好")
	a=a-1
无限循环
while 1 :
for
语法:
for 目标 in 表达式:
	循环体
>>> favourite='fishC'
>>> for i in favourite:
	print(i,end= ' ');


f i s h C
>>>
range()
>>> for i in range(5):
	print(i)


0
1
2
3
4
>>> for i in range(2,9):
	print(i)


2
3
4
5
6
7
>>> for i in range(1,10,2):
	print(i)


1
3
5
7
9
引入模块
随机数
import random
secret=random.randint(1,10)
数据类型
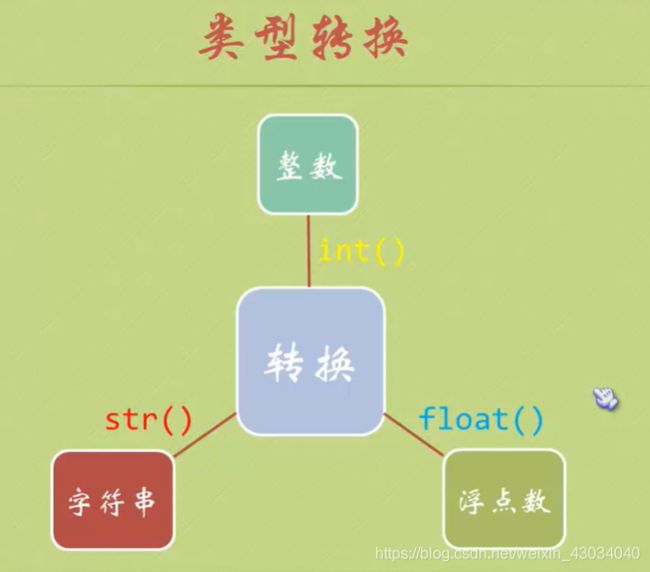
整型
字符串转整形
>>> a='520'
>>> b=int(a)
>>> b
520
浮点型转整形
>>> a=5.99
>>> b=int(a)
>>> b
5
浮点型
字符转浮点
>>> c
'5.2'
>>> c=float(c)
>>> c
5.2
布尔类型
True=1
False=0
e记法
这个和浮点型是一样的
表示特别大和特别小的数。
15000=1.5e10=15e3
>>> c=float('15e3')
>>> c
15000.0
字符串
python只有字符串,没有字符。(一个字符不就是长度为1 的字符串嘛)
转义字符
>>> teacher="C:\now"
>>> print(teacher)
C:
ow

>>> teacher="C:\\now"
>>> print(teacher)
C:\now
原字符串
前面加上 r即可
>>> teacher=r"C:\now"
>>> print(teacher)
C:\now
长字符串
使用 ‘’’ ‘’’ 或者""" “”"
>>> str='''
... I
... love
... you '''
>>> str
'\nI\nlove\nyou '
>>> print(str)

I
love
you
format
文档在6.1.3
>>> "{0} love {1},{2}".format('I','you','com')
'I love you,com'

>>> "{a} love {b},{c}".format(a='I',b='you',c='com')
'I love you,com'
想要打印 {},就要用{}括起来
冒号:表示格式化域的开始。
小数点前:表示一共占多少位。
小数点后:表示保留小数点后几位。
f:代表浮点数。
>>> '{0:.1f}{1}'.format(27.658,'GB')
'27.7GB'
要使用元组
%c 字符
%s 字符串
%d 数字
%o 转化为8进制
%x 十六进制
%X 十六进制 大写
%f 浮点数
%e 科学计数法
%E 科学计数法 大写
%g 根据大小决定使用%f还是%e
%G 根据大小决定使用%f还是%E
负号 表示左对齐(默认右对齐)
正号 表示显示正负号
#表示在8进制前显示0o,在16进制前显示0X
>>> '%c %c %c'%(97,98,99)
'a b c'

>>> '%s' % 'I love you'
'I love you'

>>> '%d + %d= %d' %(4 ,5 ,4+5)
'4 + 5= 9'

>>> '%5.1f' % 27.658
' 27.7'

>>> '%.2e' % 27.658
'2.77e+01'

>>> '%-10d' %5
'5         '

>>> '%#o' %10
'0o12'
>>>
>>> '%#x' %108
'0x6c'
数字转字符
#整数转字符
>>> a=55
>>> b=str(a)
>>> b
'55'
#浮点数转字符
>>> c=str(5.2)
>>> c
'5.2'

#科学计数转字符
>>> c=str(5e19)
>>> c
'5e+19'
各种函数
参考文档 4.7.1
首字母大写capitalize
str.capitalize()
>>> str2='we'
>>> str2.capitalize()
'We'
大写转为小写casefold
str.casefold()
>>> str='ABc'
>>> str.casefold()
'abc'
居中 center
str.center(width[, fillchar])
>>> str.center(10)
'   ABc    '
计数 count
str.count(sub[, start[, end]])
>>> str='123123'
>>> str.count('12')
2
编码 encode
str.encode(encoding=“utf-8”, errors=“strict”)
判断特定字符串结束endswith
str.endswith(suffix[, start[, end]])
>>> str='zhang'
>>> str.endswith('ng')
True
还有很多,不写了
获得变量的类型
type
>>> type(2)
<class 'int'>
>>> type(2.5)
<class 'float'>
>>> type('12')
<class 'str'>
>>> type(True)
<class 'bool'>
isinstance
判断是否是相同的类型
>>> isinstance(4,int)
True
运算符号
>>> a=5
>>> a=a+3
>>> a
8
>>> a+=3
>>> a
11
>>> a=b=c=d=10
>>> a
10
>>> d/=8
>>> d
1.25
除法变化
运算除 /
>>> d=10
>>> d/=8
>>> d
1.25
地板除 //
>>> 10//8
1
>>> 10.0//8
1.0
>>>
取余
>>> 10%8
2
幂运算 **
>>> 3 ** 2
9
>>> -3 ** 2 #等价于-(3**2)
-9
逻辑操作符
and or not 这就不用解释了吧
3<4<5
以下两个式子等价
>>> 3<4<5
True
>>> (3<4)and(4<5)
True
优先级总结

列表 List
列表是一个打了激素的数组
>>> mix=[1,'小甲鱼',3.14,[1,2,3]]
>>> mix
[1, '小甲鱼', 3.14, [1, 2, 3]]
>>> empty=[]
>>> empty
[]

>>> b='I love you.com'
>>> b=list(b)
>>> b
['I', ' ', 'l', 'o', 'v', 'e', ' ', 'y', 'o', 'u', '.', 'c', 'o', 'm']
添加元素
添加单个元素 append
>>> member
['小甲鱼', '小布丁', '黑夜']
>>> member.append("葫芦娃")
>>> member
['小甲鱼', '小布丁', '黑夜', '葫芦娃']
多个元素 extend
>>> member.extend([1,12,123])
>>> member
['小甲鱼', '小布丁', '黑夜', '葫芦娃', 1, 12, 123]
>>>
指定位置插入 insert
>>> member.insert(0,'牡丹')
>>> member
['牡丹', '小甲鱼', '小布丁', '黑夜', '葫芦娃', 1, 12, 123]
访问元素
>>> member[1]
'小甲鱼'
删除元素
remove
根据数组的值删除。
如果数组中有多个相同值,则删除第一个。
>>> member
['牡丹', '小甲鱼', '小布丁', '黑夜', '葫芦娃', 1, 12, 123]
>>> member[1]
'小甲鱼'
>>> member.remove('小甲鱼')
>>> member
['牡丹', '小布丁', '黑夜', '葫芦娃', 1, 12, 123]
>>>
del
根据数组的下标删除。
既可以删除数组中的个别元素,也可以删除整个数组。
>>> member
['牡丹', '小布丁', '葫芦娃', 1, 12, 123, '黑夜']
>>> del member[1]
>>> member
['牡丹', '葫芦娃', 1, 12, 123, '黑夜']
pop
python的列表是使用栈实现的。
pop()默认抛出最后的一个值,并在列表中删除。
pop(i)表示抛出特定位置的元素。
>>> member
['牡丹', '葫芦娃', 1, 12, 123, '黑夜']
>>> member.pop()
'黑夜'
>>> name=member.pop()
>>> name
123
>>> member.pop(1)
'葫芦娃'
>>> member
['牡丹', 1, 12]
列表分片 slice
一次性获取多个元素。
memer[i,j]代表从i开始,包括i。到j结束,不包含j。一共有(j-i)位。
>>> member
['牡丹', 1, 12, '那你', 'ji', 'zhang']
>>> member[1:3]
[1, 12]

>>> member[:3] #默认从0开始
['牡丹', 1, 12]

>>> member[1:]#默认到结尾结束
[1, 12, '那你', 'ji', 'zhang']

>>> member[:] #列表的拷贝
['牡丹', 1, 12, '那你', 'ji', 'zhang']
列表操作符
比较操作符
先比较第一个,第一个相同再比较第二个,依次类推
>>> list1=[1,2,3]
>>> list2=[2,1,0]
>>> list1 < list2
True
逻辑操作符
>>> list1=[123,456]
>>> list2=[234,123]
>>> list3=[123,456]
>>> (list1<list2)and (list1==list3)
True
连接操作符
语法:list1 += list2
加号左右的类型是一致的。
>>> list4=list1+list2
>>> list4
[123, 456, 234, 123]
>>> list4+=['xiaojiyu']
>>> list4
[123, 456, 234, 123, 'xiaojiyu']
重复操作符
语法 list *= n
>>> list3
[123, 456]
>>> list3*=3
>>> list3
[123, 456, 123, 456, 123, 456]
>>> list1
[123, 456]
>>> 8*list1
[123, 456, 123, 456, 123, 456, 123, 456, 123, 456, 123, 456, 123, 456, 123, 456]
成员关系操作符
元素 in list
元素 not in list
>>> list3
[123, 456, 123, 456, 123, 456]
>>> 123 in list3
True

>>> 1 not in list3
True
其他函数
count
计算list中某个元素出现的次数。
>>> list3
[123, 456, 123, 456, 123, 456]
>>> list3.count(123)
3
index
返回元素在列表中的位置。
index 第一个元素指要查找的元素,第二个是启始位置,第三个是结束的位置(包含它)。
>>> list3
[123, 456, 123, 456, 123, 456]
>>> list3.index(123)
0
>>> list3.index(123,1,4)
2
reverse
倒转。
>>> list3
[123, 456, 123, 456, 123, 456]
>>> list3.reverse()
>>> list3
[456, 123, 456, 123, 456, 123]
sort
排序,默认使用归并。
正序:
>>> list3
[456, 123, 456, 123, 456, 123]
>>> list3.sort()
>>> list3
[123, 123, 123, 456, 456, 456]
逆序:
>>> list3.sort(reverse=True)
>>> list3
[456, 456, 456, 123, 123, 123]
元组 Tuples
元组和列表的区别是元组不可改变。
访问
>>> temp[0]
1
>>> tuple1=(1,2,3,4,5,6,7,8)
>>> tuple1[1] # index访问
2
>>> tuple1[5:] #裁剪
(6, 7, 8)
>>> tuple1[:5]
(1, 2, 3, 4, 5)
>>> tuple2=tuple1[:]
>>> tuple2[1]=0 #不可更改,更改失败
Traceback (most recent call last):
File "" , line 1, in <module>
tuple2[1]=0
TypeError: 'tuple' object does not support item assignment
>>> b
['I', ' ', 'l', 'o', 'v', 'e', ' ', 'y', 'o', 'u', '.', 'c', 'o', 'm']
>>> b=tuple(b)# 列表 --> 元组
>>> b
('I', ' ', 'l', 'o', 'v', 'e', ' ', 'y', 'o', 'u', '.', 'c', 'o', 'm')
>>>
创建
#方式1
>>> temp2= 2,3,4,5
>>> type(temp2)
<class 'tuple'>
#方式2
>>> temp=()
>>> type(temp)
<class 'tuple'>
#方式3
>>> temp=(1,)
>>> type(temp)
<class 'tuple'>
#错误方式
>>> temp=(1)
>>> type(temp)
<class 'int'>
更新
>>> temp=('小甲鱼','黑夜','迷途','天宇')
>>> temp=temp[:2]+('zhejiang',)+temp[2:] #拆分,创建了新的tuple。前面的temp还是在的,一段时间后会自动回收
>>> temp
('小甲鱼', '黑夜', 'zhejiang', '迷途', '天宇')
删除
一般不用del删除元组,因为python有自动回收机制,只要不指向temp的实际地址,就会被回收。
>>> del temp
函数
>>> def MyFirstFunction(): #不带参函数
	print('这是我创建的第一个函数!')
	print('感谢各位')


>>> MyFirstFunction()
这是我创建的第一个函数!
感谢各位
简单使用
单参
>>> def MySecondFunction(name):# 带单参函数
	print(name+'我爱你')


>>> MySecondFunction('xiaojiyu')
xiaojiyu我爱你
>>>
多参
>>> def add(num1,num2):# 带多参函数
	result=num1+num2
	print(result)


>>> add(1,2)
3
return
>>> def add(num1,num2):
	return num1+num2

>>> sum=add(2,3)
>>> sum
5
函数文档
>>> def add(num1,num2):
	'输入两个数字'   #这就是文档
	#将得到他们的和。
	print('得到的值是:',(num1+num2))


>>> add(1,2)
得到的值是: 3


>>> add.__doc__  #输出文档方式1
'输入两个数字'

>>> help(add)#输出文档方式2
Help on function add in module __main__:

add(num1, num2)
    输入两个数字

>>> print.__doc__ #输出文档方式3
"print(value, ..., sep=' ', end='\\n', file=sys.stdout, flush=False)\n\nPrints the values to a stream, or to sys.stdout by default.\nOptional keyword arguments:\nfile:  a file-like object (stream); defaults to the current sys.stdout.\nsep:   string inserted between values, default a space.\nend:   string appended after the last value, default a newline.\nflush: whether to forcibly flush the stream."
>>>
关键字参数
函数调用时,添加关键字参数,避免参数混乱
>>> def YourName(first,second):
	print('your name is '+first+' '+ second)


>>> YourName('张','文迪')
your name is 张 文迪

>>> YourName(second='文迪',first='张') # 添加关键字参数
your name is 张 文迪
>>>
默认参数
>>> def yourName(first='张',last='文迪'):
	print(first+last)


>>> yourName()
张文迪
收集参数
将参数转化为元组
>>> def test(*param):
	print('参数的长度是:',len(param))
	print('第二个参数是:',param[1]);


>>> test(1,'小鲫鱼',4.14,5,6,7)
参数的长度是: 6
第二个参数是: 小鲫鱼
可以发现,print函数就是收集参数的。
收集参数和关键字参数共存
>>> def test(*param,exp):
	print('参数的长度是:',len(param),exp)
	print('第二个参数是:',param[1]);


>>> test(1,'小鲫鱼',4.14,5,6,7,exp='张文迪')
参数的长度是: 6 张文迪
第二个参数是: 小鲫鱼
函数与过程
函数function 是有返回值的
过程procedure是没有返回值的
返回多个值
返回多个值,整合成元组
>>> def test():
	return 1,2,3

>>> test()
(1, 2, 3)
>>> def test():
	return [1,2,3]

>>> test()
[1, 2, 3]
局部变量
不扯。
函数可以访问全局变量。函数内部更改后,不影响外部的全局变量。
>>> name='zhang'
>>> def yourName():
	print(name) #访问全局变量

>>> yourName()
zhang
更改无效
>>> def yourName():
	name='12'
	print(name)

>>> name #原全局变量
'zhang'
>>> yourName() #函数内部更改全局变量
12
>>> name #原全局变量不变
'zhang'
global
>>> def yourName():
	global name #更改为global
	name='12'
	print(name)

>>> name
'zhang'
>>> yourName()
12
>>> name #修改全局变量成功
'12'
内嵌函数
也叫内部函数。函数内部可以再写函数。
>>> def fun1():
	print('fun1()正在被调用...')
	def fun2():
		print('fun2()正在被调用...')
	fun2()


>>> fun1()
fun1()正在被调用...
fun2()正在被调用...
闭包closure
如果内部函数引用外部函数的变量,并且返回函数。
>>> def FunX(x):
	def FunY(y):
		return x*y
	return FunY #返回函数

>>> i=FunX(8)
>>> i
<function FunX.<locals>.FunY at 0x0000019EADFF41E0>
>>> type(i)
<class 'function'> #表明返回值是函数
>>> i(5)
40
>>> FunX(8)(5)
40
nonlocal
可以修改外部函数变量值
 >>> def Fun1():
	x=5
	def Fun2():
		nonlocal x #申明x是非本地。这样内部函数就可以访问并修改x
		x *=x
		return x
	return Fun2()

>>> Fun1()
25
>>>
lambda表达式
简单函数可以改造为lambda表达式
语法: 冒号前表示参数,冒号后是运算
>>> lambda x:2*x+1
<function <lambda> at 0x0000019EADFF4730>
>>> g=lambda x: 2*x+1 #lambda表达式
>>> g(5) #
11
多参
>>> g=lambda x,y:x+y
>>> g(3,4)
7
筛选filter
默认是筛选出1和True
>>> filter(None,[1,0,False,True])
<filter object at 0x0000019EAE00BC50>
>>> list(filter(None,[1,0,False,True]))
[1, True]
带筛选函数
>>> def odd(x): #筛选函数
	'用于筛选奇数'
	return x%2

>>> temp=range(10)
>>> show=filter(odd,temp)
>>> list(show)
[1, 3, 5, 7, 9]
使用lambda表达式简化
list(filter(lambda x: x%2,range(10)))
映射map
>>> list(map(lambda x: x*2,range(10)))
[0, 2, 4, 6, 8, 10, 12, 14, 16, 18]
递归
汉诺塔
 def hanoi(n,x,y,z):
    if n==1:
        print(x,'-->',z)
    else:
        hanoi(n-1,x,z,y)# n-1个盘子从x柱借助z柱移到y柱
        print(x,'-->',z)
        hanoi(n-1,y,x,z)

n=int(input('输入层数:'))
hanoi(n,'X','Y','Z')
字典 dict
创建字典
字典是映射类型
方式1 {}
# key 为字符串
>>> dict1={
     '李宁':'一切皆有肯','耐克':'Just do it','阿迪达斯':'Impossible is nothing','鱼C工作室':'让编程改变世界'}
>>> print('李宁的口号是:',dict1['李宁'])
李宁的口号是: 一切皆有肯
# key 为数字
>>> dict2={
     1:'one',2:'two',3:'three'}
>>> dict2
{
     1: 'one', 2: 'two', 3: 'three'}
# 空字典
>>> dict3={
     }
>>> dict3
{
     }
方式2 mapping 元组和列表
>>> dict3=dict((('好兄弟',3),('zhang',6),('huang',66),('miao',666)))
>>> dict3
{
     '好兄弟': 3, 'zhang': 6, 'huang': 66, 'miao': 666}
>>> dict3=dict([('好兄弟',3),('zhang',6),('huang',66),('miao',666)])
>>> dict3
{
     '好兄弟': 3, 'zhang': 6, 'huang': 66, 'miao': 666}
方式3 关键字形式
>>> dict4=dict(小甲鱼='你好',张文迪='你好啊')
>>> dict4
{
     '小甲鱼': '你好', '张文迪': '你好啊'}
添加
方式1:
如果有键存在,则修改值。如果没有键存在,则添加。
>>> dict4
{
     '小甲鱼': '最近不好', '张文迪': '你好啊'}
>>> dict4['爱迪生']='还是张文迪厉害'
>>> dict4
{
     '小甲鱼': '最近不好', '张文迪': '你好啊', '爱迪生': '还是张文迪厉害'}
方式2:
>>> dict4
{
     '小甲鱼': '最近不好', '张文迪': '你好啊', '爱迪生': '还是张文迪厉害'}
>>> dict4.setdefault('小白') #添加{‘小白’:None}
>>> dict4
{
     '小甲鱼': '最近不好', '张文迪': '你好啊', '爱迪生': '还是张文迪厉害', '小白': None}
>>> dict4.setdefault('小白2','在的') #添加{‘小白2’:'在的'}
'在的'
>>> dict4
{
     '小甲鱼': '最近不好', '张文迪': '你好啊', '爱迪生': '还是张文迪厉害', '小白': None, '小白2': '在的'}
>>> dict4.setdefault('小白','在的a')# 尝试修改 无效
>>> dict4
{
     '小甲鱼': '最近不好', '张文迪': '你好啊', '爱迪生': '还是张文迪厉害', '小白': None, '小白2': '在的'}
修改字典
直接修改
>>> dict4=dict(小甲鱼='你好',张文迪='你好啊')
>>> dict4['小甲鱼']
'你好'
>>> dict4['小甲鱼']='最近不好'
>>> dict4
{
     '小甲鱼': '最近不好', '张文迪': '你好啊'}
update()
使用另一个字典对本字典进行更新。
>>> dict1={
     1:'one',2:'two',3:None}
>>> dict1
{
     1: 'one', 2: 'two', 3: None}
>>> dict2={
     2:'er',3:'three'}
>>> dict1.update(dict2)
>>> dict1
{
     1: 'one', 2: 'er', 3: 'three'}
fromkeys()
>>> dict1.fromkeys((1,2,3)) # 默认为None
{
     1: None, 2: None, 3: None}
>>> dict1.fromkeys((1,2,3),'Number') #给定值为Number
{
     1: 'Number', 2: 'Number', 3: 'Number'}
>>> dict1.fromkeys((1,2,3),('one','two','three')) #并不会一一对应
{
     1: ('one', 'two', 'three'), 2: ('one', 'two', 'three'), 3: ('one', 'two', 'three')}
>>> dict1.fromkeys((1,3),'数字') # 并不会修改部分
{
     1: '数字', 3: '数字'}
访问字典
for 循环
>>> dict1=dict1.fromkeys(range(5),'赞') #赋值
>>> dict1
{
     0: '赞', 1: '赞', 2: '赞', 3: '赞', 4: '赞'}

>>> for eachkey in dict1.keys(): #获取key
	print(eachkey)


0
1
2
3
4
>>> for eachvalue in dict1.values():#获取value
	print(eachvalue)


赞
赞
赞
赞
赞
get()
get方法访问时,当不存在时,不会报错,只会返回null
>>> dict1=dict((('文迪','你好'),('张','hello')))
>>> dict1
{
     '文迪': '你好', '张': 'hello'}
>>> dict1.get(0) #不存在key为0,返回null
>>> dict1.get('文迪')
'你好'
>>> dict1.get('赵XX','她不想理你') #添加默认返回值
'她不想理你'
in / not in (判断键)
- 只能查找键。
- 字典查找键效率比序列快。
>>> dict1
{
     '文迪': '你好', '张': 'hello'}
>>> '张' in dict1
True
>>> '赵' not in dict1
True
>>> '赵' in dict1
False
删除
方法1:clear() 推荐
>>> dict1.clear()
>>> dict1
{
     }
方法2:
>>> dict1={
     }
两者的区别:
方法二是真正的清空,方法一只是指向了另一个地址。
>>> a={
     1:'one'}
>>> b=a
>>> b
{
     1: 'one'}
>>> a={
     } #a清空了
>>> a
{
     }
>>> b #b并未清空
{
     1: 'one'}
>>> a={
     1:'one'}
>>> b=a
>>> a.clear()
>>> a
{
     }
>>> b
{
     }
拷贝 copy
这里的拷贝是浅拷贝。
>>> a={
     1:'one'}
>>> b=a #b的地址和a一样
>>> c=a.copy()#c的地址和a不一样


>>> id(a)
2817957536896
>>> id(b)
2817957536896
>>> id(c)
2817957519224
抛出
字典里面是没有顺序的。
pop和popitem
>>> a={
     1:'one',2:'two',3:'three'}
>>> a.pop(2)  #根据key进行pop
'two'
>>> a
{
     1: 'one', 3: 'three'}
>>> a.popitem()#只能随机的pop一个item.因为是没有顺序的。
(3, 'three')
>>> a
{
     1: 'one'}
集合 set
>>> num={
     } #字典
>>> type(num)
<class 'dict'>
>>> num={
     1,2,3} #集合
>>> type(num)
<class 'set'>
集合的特点是唯一、无序。
- 唯一指会删除相同的元素
- 无序指无法使用下标访问
>>> num={
1,2,3,4,5,1,2,5,4,3}
>>> num
{
1, 2, 3, 4, 5}
>>> num[0] #下标访问失败,不支持索引
Traceback (most recent call last):
File "" , line 1, in <module>
num[0]
TypeError: 'set' object does not support indexing
增删查
创建集合
方法1:
>>> num={
     1,2,3} #集合
方法2:
>>> set1=set([1,2,3,4,5,5])
>>> set1
{
     1, 2, 3, 4, 5}
添加 add
>>> set1
{
     1, 2, 3, 4, 5}
>>> set1.add(6)
>>> set1
{
     1, 2, 3, 4, 5, 6}
删除 remove
>>> set1
{
     1, 2, 3, 4, 5, 6}
>>> set1.remove(6)
>>> set1
{
     1, 2, 3, 4, 5}
访问集合
方法1:使用 in/not in来判断。
方法2:for 循环
不可变集合 frozenset
>>> num3=frozenset([1,2,3,4,5]) # 定义不可变集合
>>> num3
frozenset({
1, 2, 3, 4, 5})
>>> num3.add(0) #尝试修改,失败
Traceback (most recent call last):
File "" , line 1, in <module>
num3.add(0)
AttributeError: 'frozenset' object has no attribute 'add'
文件
打开方式,默认‘rt’

>>> f=open('G:\\python\\day1\\1.txt')
>>> f
<_io.TextIOWrapper name='G:\\python\\day1\\1.txt' mode='r' encoding='cp936'>
文件函数
close()
f.close() 关闭文件
read()
read(size) size是字符数,一个中文是一个字符,一个英文或者标点也是一个字符。
读取全部。
>>> f.read()# 一次性读完

'浣犲ソ123abc'
>>> f.read() # 再次读的话,就没了

''
读取部分。
>>> f=open('G:\\python\\day1\\1.txt')

>>> f.read(2)

'浣犲'
readline()
>>> f=open('G:\\python\\day1\\1.txt',encoding='UTF-8') #设置编码格式。

>>> f.readline()

'你好123abc\n'
>>> f.readline()

'在吗你?'
>>> f.readline

<built-in method readline of _io.TextIOWrapper object at 0x000002901B5011F8>
>>> f.readline()
tell()
一个中文占用2个字节。
>>> f=open('G:\\python\\day1\\1.txt')

>>> f.read(2)

'浣犲'
>>> f.tell() #一共两个中文,一个中文2字节,共4字节。

4
seek
f.seek(offset, from) offset是偏移几个字节,from 0从开始处,1从当前处,2从末尾处。
>>> f.seek(0,0)

0
>>> f.seek(1,0)

1
文件内容转化为列表
每一行是列表中的一个元素。
>>> f.seek(0,0)

0
>>> list(f)

['你好123abc\n', '在吗你?']
打印每一行
- 方式1:
>>> f.seek(0,0)
0
>>> lines=list(f)
>>> lines
['你好123abc\n', '在吗你?']
>>> for eachline in lines:
	print(eachline)

你好123abc

在吗你?
- 方式2:(推荐)
>>> f=open('G:\\python\\day1\\1.txt',encoding='UTF-8')
>>> for eachline in f:
	print(eachline)


你好123abc

在吗你?
>>>
write
>>> f=open('G:\\python\\day1\\1.txt',mode='w',encoding='UTF-8')
>>> f.write('张文迪\n 买不起房!')
10
>>> f.close()
OS
>>> import os
>>> os.getcwd()
'C:\\Program Files (x86)\\Microsoft Visual Studio\\Shared\\Python36_64'
简单OS的函数
具体在文档16.1.5
| 函数名 | 作用 |
|---|---|
| getcwd() | 返回当前目录 |
| chdir(path) | 切换路径 |
| listdir(path=’.’) | 显示当前目录下文件 当前目录 : ‘.’ 上一级目录:’…’ |
| mkdir(path) | 创建单层文件夹 |
| makedirs(path) | 创建多层目录 |
| remove(path) | 删除文件 |
| rmdir(path) | 删除单层空目录,非空目录无法删除 |
| removedirs(path) | 删除多级空目录,遇到文件会报错 |
| rename(old,new) | 重命名文件 |
| system(command) | 运行系统的shell命令 |
多样的系统信息
文档具体位置:16.1.8. Miscellaneous System Information
>>> os.listdir(os.curdir)
['DLLs', 'Doc', 'include']
| 名称 | 信息 |
|---|---|
| curdir | 当前目录 ‘.’ |
| pardir | 上一级目录 ‘.’ |
| sep | 路径分隔符,Win为’\’,Linux为’/’ |
| linesep | 行终止符,Win为’\r\n’,Linux为’\n’ |
| name | 当前操作系统,posix->Linux,nt->Win,mac,os2,ce,java |
OS.path
>>> import os
>>> os.path.basename('E://A//B//C//1.txt')
'1.txt'

>>> os.path.join('C:\\','A','B')
'C:\\A\\B'

>>> os.path.split('E://A//B//C//1.txt')
('E://A//B//C', '1.txt')

>>> os.path.splitext('E://A//B//C//1.txt')
('E://A//B//C//1', '.txt')


>>> import time
>>> time.gmtime(os.path.getatime('G:\\python\\day1\\1.txt'))
time.struct_time(tm_year=2020, tm_mon=5, tm_mday=24, tm_hour=2, tm_min=52, tm_sec=30, tm_wday=6, tm_yday=145, tm_isdst=0)
>>> time.localtime(os.path.getatime('G:\\python\\day1\\1.txt'))
time.struct_time(tm_year=2020, tm_mon=5, tm_mday=24, tm_hour=10, tm_min=52, tm_sec=30, tm_wday=6, tm_yday=145, tm_isdst=0)
| 函数名 | 使用方法 |
|---|---|
| basename(path) | 返回单独文件名 |
| dirname(path) | 去掉文件名,单独返回目录路径 |
| join(path1,path2…) | 将路径合并,除了根目录,其他的会自动加‘ |
| \’ | |
| split(path) | 分割路径和文件名 |
| splitext(path) | 分离文件名和扩展名 |
| getsize(file) | 返回文件的大小,单位字节 |
| getatime(file) | 返回最近访问时间 |
| getctime(file) | 返回文件创建时间 |
| getmtime(file) | 返回文件最近修改时间 |
| 以下函数返回True或False | |
| exists(path) | 判断目录或文件是否存在 |
| isabs(path) | 判断路径是否为绝对路径 |
| isdir(path) | 判断路径 是否是目录 |
| isfile(path) | 判断路径 是否是文件 |
| islink(path) | 判断是否是符号链接 (快捷方式) |
| ismount(path) | 是否是挂载点 |
| samefile(path1,path2) | 判断两个路径是否指向同一个文件(有时,不同的快捷键指向同一个文件) |
pickle 泡菜
>>> import os
>>> import pickle
>>> os.chdir('G:\\python\\day1') #切换路径,C盘无法写入数据
>>> os.getcwd()
'G:\\python\\day1'
>>> my_list=[123,3.14,'zhang',['another list','list2']]

>>> pickle_file=open('zhang_list.pkl','wb') #没有文件,创建。以二进制形式打开写。
>>> pickle.dump(my_list,pickle_file) # 写入数据
>>> pickle_file.close() #关闭文件。
>>> pickle_file=open('zhang_list.pkl','rb') #打开文件
>>> my_list2=pickle.load(pickle_file) #加载数据
>>> my_list2
[123, 3.14, 'zhang', ['another list', 'list2']]
time 模块
import time
| 函数名 | 作用 |
|---|---|
| gmtime | 格林天文台标准时间 |
| localtime | 本地时间 |
异常 Exception
异常类型
详见文档
| 异常名 | 含义 |
|---|---|
| AssertionError | 断言语句assert 异常 |
| AttributeError | 尝试访问未知对象属性 |
| IndexError | 越界 |
| KeyError | 字典中不存在键 |
| NameError | 尝试访问不存在的变量 |
| OSError | 操作系统异常 (包含很多异常) |
| SyntaxError | 语法错误 |
- AssertionError
>>> a=2
>>> assert a<1
Traceback (most recent call last):
File "" , line 1, in <module>
assert a<1
AssertionError
- AttributeError
>>> list1=[]
>>> list1.append(1)
>>> list1.appendmore(1)
Traceback (most recent call last):
File "" , line 1, in <module>
list1.appendmore(1)
AttributeError: 'list' object has no attribute 'appendmore'
异常处理 try
try-except 语句
一旦出现异常,接下来的代码会不会执行。
try:
	检测范围
except Exception[ as reason]:
	出现异常(exception)后的处理代码
简单错误处理
try:
    f=open('我要打开文件.txt')
    print(f.read())
    f.close()
except OSError:
    print('文件出错了T_T')
#结果输出
====================== RESTART: G:\python\day1\test.py ======================
文件出错了T_T
具体错误查明
try:
    f=open('我要打开文件.txt')
    print(f.read())
    f.close()
except OSError as reason:
    print('文件出错了T_T\n错误的原因是:'+str(reason))
#结果输出
====================== RESTART: G:\python\day1\test.py ======================
文件出错了T_T
错误的原因是:[Errno 2] No such file or directory: '我要打开文件.txt'
多个except
遇到错误,就会去找对应的except.
方法1:
try:
    sum=1+'1'
    f=open('我要打开文件.txt')
    print(f.read())
    f.close()
except OSError as reason:
    print('文件出错了T_T\n错误的原因是:'+str(reason))
except TypeError as reason:
    print('类型出错了T_T\n错误的原因是:'+str(reason))


#结果输出
====================== RESTART: G:\python\day1\test.py ======================
类型出错了T_T
错误的原因是:unsupported operand type(s) for +: 'int' and 'str'
方法2:
try:

    sum=1+'1'
    f=open('我要打开文件.txt')
    print(f.read())
    f.close()
except (OSError,TypeError) :
    print('文件出错了T_T')
找不到指定的异常
try:
    int('abc') #未处理异常
    sum=1+'1'
    f=open('我要打开文件.txt')
    print(f.read())
    f.close()
except OSError as reason:
    print('文件出错了T_T\n错误的原因是:'+str(reason))
except TypeError as reason:
    print('类型出错了T_T\n错误的原因是:'+str(reason))

#结果
====================== RESTART: G:\python\day1\test.py ======================
Traceback (most recent call last):
  File "G:\python\day1\test.py", line 2, in <module>
    int('abc')
ValueError: invalid literal for int() with base 10: 'abc'
防止找不到异常
try:
    int('abc')
    sum=1+'1'
    f=open('我要打开文件.txt')
    print(f.read())
    f.close()
except OSError as reason:
    print('文件出错了T_T\n错误的原因是:'+str(reason))
except TypeError as reason:
    print('类型出错了T_T\n错误的原因是:'+str(reason))
except Exception as reason: #作为收尾处理
    print('类型出错了T_T\n错误的原因是:'+str(reason))
try-finally 语句
try:
	检测范围
except Exception[ as reason]:
	出现异常后的代码
finally:
	无论如何都会执行的代码
try:
    f=open('我要打开文件.txt','w')
    print(f.write('我存在了!'))
    sum=1+'1'
except (OSError,TypeError):
    print('文件出错了T_T')
finally:
    f.close()

#结果
====================== RESTART: G:\python\day1\test.py ======================
5 #表示返回5个字符
文件出错了T_T
raise语句
程序员主动抛出异常。
# 默认
>>> raise
Traceback (most recent call last):
File "" , line 1, in <module>
raise
RuntimeError: No active exception to reraise
# 1/0 异常
>>> 1/0
Traceback (most recent call last):
File "" , line 1, in <module>
1/0
ZeroDivisionError: division by zero
# raise指定异常(1/0)
>>> raise ZeroDivisionError
Traceback (most recent call last):
File "" , line 1, in <module>
raise ZeroDivisionError
ZeroDivisionError
# raise指定异常 加 原因
>>> raise ZeroDivisionError('张大帅的除数写为0了')
Traceback (most recent call last):
File "" , line 1, in <module>
raise ZeroDivisionError('张大帅的除数写为0了')
ZeroDivisionError: 张大帅的除数写为0了
else语句
python里的else被附加了更多的功能。不是那么简单的
if else
这个很简答
if 条件:
	操作1
else:
	操作2
while break else
while 条件1:
	if 条件2:
		执行代码段1
		break
	执行代码段2
else:
	执行代码段3
def showMaxFactor(num):
    count=num//2
    while count >1:
        if num % count==0:
            print('%d最大的约数是%d'%(num,count))
            break #执行这条语句后就不执行else了
        count -=1
    else:
        print('%d是素数'%num)

num=int(input('请输入一个数:'))
showMaxFactor(num)
try except else
try:
    int('abc')
except ValueError as reason:
    print('出错了:'+str(reason))
else: #没有异常,则执行
    print('没有任何异常!')
with
每次出现异常都需处理finally,有点麻烦。
例如下面的代码每次都需要关闭文件,使用with改造
try:
    with open('data.txt','w') as f:
        for each_line in f:
            print(each_line)
except OSError as reason:
    print('出错了:'+str(reason))
图形用户界面 EasyGui
下载安装
https://blog.csdn.net/qq_41556318/article/details/84433698
方法1:
唉,说起来都是泪。
1.先下载0.97版本。本人觉得0.97版本安装最简单。https://sourceforge.net/projects/easygui/
2.解压
3.将easygui文件夹里的easygui.py复制到C:\Program Files (x86)\Microsoft Visual Studio\Shared\Python36_64\Lib\site-packages
方法2:
- 命令行下载
它会自动下载。如果不知道下载到了那里,可以再次下载,系统会提示已下载,并且显示下载地址。
C:\WINDOWS\system32>pip install easygui
2.复制
我的默认下载地址是:
E:\Anaconda\installed\Lib\site-packages。鬼知道为何。
将easygui整个文件夹复制到
C:\Program Files (x86)\Microsoft Visual Studio\Shared\Python36_64\Lib\site-packages
对象
# 类
class Turtle: #python 中类名推荐大写开头
    #属性
    color='grean'


    #方法
    def clim(self):
        print('我要更加努力')

# 对象
>>> tt=Turtle()
>>> tt.clim()
我要更加努力
>>> tt.color
'grean'
self ==>this
python的self相当于C++的this指针。
# 类
class Ball:

    #方法
    def setName(self,name):
       self.name=name
    def kick(self):
    	print('我叫%s',%self.name)
__init__(self) ==>构造函数
类似C++的构造函数。默认会自带一个self参数。
只会自动返回None
# 类
class Ball:
    def __init__(self,name):
        self.name=name

    def kick(self):
        print('我叫%s' %self.name)

# 对象
>>> b=Ball('A')
>>> b.kick()
我叫A
公有和私有
私有只需在变量和函数名前面加上:__
>>> class Person: #类
__name='张NN' #私有变量
>>> p=Person()
>>> p.__name #对象访问失败
Traceback (most recent call last):
File "" , line 1, in <module>
p.__name
AttributeError: 'Person' object has no attribute '__name'
正确访问方法:通过函数访问
>>> class Person:
	__name='张者'
	def getName(self):
		return self.__name


>>> p=Person()
>>> p.getName()
'张者'

>>> p._Person__name #伪私有
'张者'
伪私有
python是伪私有的,他只是把私有变量的名字改了一下。改为_类名__变量名
>>> p._Person__name #伪私有
'张者'
继承
>>> class Parent:
	def hello(self):
		print('正在调用父类的方法...')


>>> class Child(Parent):
	pass

>>> p=Parent()
>>> p.hello()
正在调用父类的方法...
>>> c=Child()
>>> c.hello()
正在调用父类的方法...
方法覆盖
子类方法和父类相同时,会覆盖父类的方法。
>>> class Child(Parent):
	def hello(self): #方法覆盖
		print('调用子类的方法')


>>> c=Child()
>>> c.hello()
调用子类的方法
子类使用父类的构造函数
由于紫烈自定义构造函数会覆盖掉父类的构造函数。如果父类早构造函数里self.name=‘zhang’,子类时没有name这个属性的。解决方法有两种,一种是调用父类.__init__(self),另一种是使用super().__init__()
1. 调用未绑定的父类方法
在子类的__init__(self) 内部第一行添加 父类.__init__(self)
>>> class Parent: #父类
	def __init__(self):
		self.leg=2
	def printLeg(self):
		print('has %d' %self.leg)

>>> class Child(Parent):#子类
	def __init__(self):
		Parent.__init__(self) #关键代码
		self.hand=2


>>> c=Child()
>>> c.printLeg()
has 2
2. 使用supper
在子类的__init__(self) 内部第一行添加 super().__init__()
>>> class Child(Parent): #子类
	def __init__(self):
		super().__init__()  #关键代码
		self.hand=2


>>> c=Child()
>>> c.printLeg()
has 2
多重继承
多继承会造成代码混乱,不建议使用。
>>> class C(Parent1,Parent2,Parent3): #多继承
		pass
其他
- 类中定义了变量。对象中更改后会覆盖类中的变量。
- 类中的属性名和方法名相同时,属性会覆盖方法。
>>> class C:
def x(self):
print('你哈皮')
>>> c=C()
>>> c.x()
你哈皮
>>> c.x=1 #属性覆盖了方法。
>>> c.x()
Traceback (most recent call last):
File "" , line 1, in <module>
c.x()
TypeError: 'int' object is not callable
- self实现绑定,很有趣,很好玩。
>>> class CC:
	def setXY(self,x,y):
		self.x=x
		self.y=y


>>> dd=CC()
>>> dd.__dict__ #对象拥有的属性是空的!!!!!
{
     }
>>> CC.__dict__ #类自身拥有的属性
mappingproxy({
     '__module__': '__main__', 'setXY': <function CC.setXY at 0x0000027DE5AA5AE8>, '__dict__': <attribute '__dict__' of 'CC' objects>, '__weakref__': <attribute '__weakref__' of 'CC' objects>, '__doc__': None})
>>> dd.setXY(4,5) #等价于dd.setXY(self,4,5)
>>> dd.__dict__
{
     'x': 4, 'y': 5}
>>> CC.__dict__ #dd对CC没有影响
mappingproxy({
     '__module__': '__main__', 'setXY': <function CC.setXY at 0x0000027DE5AA5AE8>, '__dict__': <attribute '__dict__' of 'CC' objects>, '__weakref__': <attribute '__weakref__' of 'CC' objects>, '__doc__': None})
- 类被删除,就不能再申请对象。但原来就在的对象依旧可以照常使用。
相关BIF (内置函数)
| 函数名 | 含义 |
|---|---|
| issubclass(class,classinfo) | 判断class 是否是classinfo的子类。注意:1.自身是自身的子类;2.classinfo可以是元组 |
| isinstance(object, classinfo) | 判断object是否是classinfo 的实例对象。classinfo可以是元组 |
| hasattr(object, ‘name’) | 判断是否有叫name的属性 , |
| getattr(object, name[, default]) | 从object中获取名字为name的属性值,若该属性不存在,返回default |
| setattr(object, name, value) | 更改对象的属性。若属性不存在,则添加属性 |
| delattr(object, name) | 删除对象中的属性 ,不存在会抛出异常 |
| property(fget=None, fset=None, fdel=None, doc=None) | 使用属性来设置属性 |
魔法方法
- 魔法方法总是被下划线包围,例如
__init__ - 魔法方法是面向对象的python的一切,非常强大
- 魔力之处在于他们总能在适当的时候被自动调用。
__init__
这个之前就讲过
__new__
new是创建对象时第一个执行的。(不是__init__)
#自动将所有的字母改为大写
>>> class CapStr(str):
	def __new__(cls,string):
		string=string.upper()
		return str.__new__(cls,string)


>>> a=CapStr("I Love FishC.com")
>>> a
'I LOVE FISHC.COM'
__del__
__init__称为构造器,那么 __del__ 则称为析构器。垃圾回收机制自动执行。我们无法主动执行。
>>> class C:
	def __init__(self):
		print('我是__init__方法,我被调用了...')
	def __del__(self):
		print('我是__del__方法,我被调用了...')


>>> c1=C()
我是__init__方法,我被调用了...
>>> c2=c1
>>> del c1
>>> del c2
我是__del__方法,我被调用了...
算数运算
object.__add__(self, other) 			+
object.__sub__(self, other)				-
object.__mul__(self, other)				*
object.__matmul__(self, other)
object.__truediv__(self, other)			 /
object.__floordiv__(self, other) 		// 整数除
object.__mod__(self, other)				%
object.__divmod__(self, other)  		divmod
object.__pow__(self, other[, modulo]) 	**
object.__lshift__(self, other)			<<
object.__rshift__(self, other)			>>
object.__and__(self, other)				&
object.__xor__(self, other)				^
object.__or__(self, other)				|
>>> a=int('123')
>>> b=int('456')
>>> a+b #其实是两个类在做加法
579

>>> class New_int(int):
	def __add__(self,other):#重写加运算 当a+b时,自动调用
		return int.__sub__(self,other)
	def __sub__(self,other):#重写减算法 当a-b时,自动调用
		return int.__add__(self,other)


>>> a=New_int(3)
>>> b=New_int(5)
>>> a+b
-2
>>> a-b
8
反运算
反的意思是更改了主动关系。
例如:
之前的a+b是a主动
反运算的a+b是b主动的。
运算是先"正运算"的,如果正运算找不到,就执行反运算。
object.__radd__(self, other)
object.__rsub__(self, other)
object.__rmul__(self, other)
object.__rmatmul__(self, other)
object.__rtruediv__(self, other)
object.__rfloordiv__(self, other)
object.__rmod__(self, other)
object.__rdivmod__(self, other)
object.__rpow__(self, other)
object.__rlshift__(self, other)
object.__rrshift__(self, other)
object.__rand__(self, other)
object.__rxor__(self, other)
object.__ror__(self, other)
>>> class Nint(int):
	def __radd__(self,other):
		return int.__sub__(self,other)


>>> a=Nint(5)
>>> b=Nint(3)
>>> a+b
8
>>> a-b
2
>>> 1+b #1没有 add的方法,所以由b执行radd。self 指的是b
2
>>> b+1
4
其他运算
增量赋值运算
object.__iadd__(self, other)			+=
object.__isub__(self, other)			-=
object.__imul__(self, other)			*=
object.__imatmul__(self, other)
object.__itruediv__(self, other)		/=
object.__ifloordiv__(self, other)		//=
object.__imod__(self, other)			%=
object.__ipow__(self, other[, modulo])	**=
object.__ilshift__(self, other)			<<=
object.__irshift__(self, other)			>>=
object.__iand__(self, other)			&=
object.__ixor__(self, other)			^=
object.__ior__(self, other)				|=
一元操作符
object.__neg__(self)			+
object.__pos__(self)			-
object.__abs__(self)
object.__invert__(self)		~  按位取反
类型转换
object.__complex__(self)
object.__int__(self)
object.__float__(self)
object.__round__(self[, ndigits])
object.__trunc__(self)
object.__floor__(self)
object.__ceil__(self)
属性访问
property
>>> class C:
	def __init__(self,size=10):
		self.size=size
	def getSize(self):
		return self.size
	def setSize(self,value):
		self.size=value
	def delSize(self):
		del self.size
	x=property(getSize,setSize,delSize)

>>> c=C()
>>> c.x=1
>>> c.x
1
>>> c.size
1
>>> del c.x
>>> c.x
AttributeError: 'C' object has no attribute 'size'
>>> c.size
AttributeError: 'C' object has no attribute 'size'
get/set /delattr
| 函数名 | 作用 |
|---|---|
| object.getattr(self, name) | 定义当用户尝试获取一个不存在的属性时的行为 |
| object.getattribute(self, name) | 定义当该类的属性被访问时的行为 |
| object.setattr(self, name, value) | 定义当一个属性被设置时的行为 |
| object.delattr(self, name) | 定义当一个属性被删除时的行为 |
>>> class C:
	def __getattribute__(self,name):
		print("getattribute")
		return super().__getattribute__(name)
	def __getattr__(self,name):
		print("getattr")
	def __setattr__(self,name,value):
		print("setattr")
		super().__setattr__(name,value)
	def __delattr__(self,name):
		print("delattr")
		super().__delattr__(name)


>>> c=C()
>>> c.x #c.x 不存在
getattribute  #首先尝试获取
getattr #获取不到,再来到getattr
>>> c.x=1
setattr
>>> c.x
getattribute
1
>>> del c.x
delattr
编程陷阱
#死循环代码
class Rectangle:
    def __init__(self,width=0,height=0):
        self.width=width   #设置属性,调用__setattr__()
        self.height=height

    def __setattr__(self,name,value):
        if name== 'square' :
            self.width=value
            self.height=value
        else :
            self.name=value  #设置属性,调用__setattr__(),一直调用自身,死循环了

    def getArea(self):
        return self.width * self.height
更改方法1:使用super (推荐)
上面的代码改为:
    def __setattr__(self,name,value):
        if name== 'square' :
            self.width=value #
            self.height=value
        else :
            super().__setattr__(name,value)
更改方法2:使用 __dict__
使用__dict__不会触发__setattr__,但会触发__getattribute__
    def __setattr__(self,name,value):
        if name== 'square' :
            self.width=value #
            self.height=value
        else :
            self.__dict__[name]=value
描述符
描述符就是将某种特殊类型的类的实例指派给另一个类的属性。
| 方法 | 含义 |
|---|---|
| object.get(self, instance, owner) | 用于访问属性,返回属性值 |
| object.set(self, instance, value) | 将在属性分配操作中调用,不返回任何内容 |
| object.delete(self, instance) | 控制删除操作,不返回任何内容 |
>>> class MyDecriptor:
	def __get__(self,instance,owner):
		print("geting...",self,instance.owner)


>>> class MyDecriptor:
	def __get__(self,instance,owner): # self 是MyDecriptor对象;instance 是Test对象;owner是Test类
		print("geting...",self,instance,owner)
	def __set__(self,instance,value):
		print("setting...",self,instance,value)
	def __delete__(self,instance):
		print("deleting...",self,instance)


>>> class Test:
	x=MyDecriptor()


>>> test=Test()
>>> test.x
geting... <__main__.MyDecriptor object at 0x0000017EA5B1DF60> <__main__.Test object at 0x0000017EA5B1DBA8> <class '__main__.Test'>
>>> test.x='X-man'
setting... <__main__.MyDecriptor object at 0x0000017EA5B1DF60> <__main__.Test object at 0x0000017EA5B1DBA8> X-man
>>> del test.x
deleting... <__main__.MyDecriptor object at 0x0000017EA5B1DF60> <__main__.Test object at 0x0000017EA5B1DBA8>
自我实现property
>>> class MyProperty:
	def __init__(self,fget=None,fset=None,fdel=None):
		self.fget=fget
		self.fset=fset
		self.fdel=fdel

	def __get__(self,instance,owner):
		return self.fget(instance)

	def __set__(self,instance,value):
		self.fset(instance,value)

	def __delete__(self,instance):
		self.fdel(instance)


>>> class C:
	def __init__(self):
		self._x=None
	def getX(self):
		return self._x
	def setX(self,value):
		self._x=value
	def delX(self):
		del self._x
	x=MyProperty(getX,setX,delX) #使用自己的Property


>>> c=C()
>>> c.x='X-man'
>>> c.x
'X-man'
温度程序
>>> class Celsius:
	def __init__(self,value=26.0): #只需对Temperature对象的cel进行初始化
		self.value=float(value)
	def __get__(self,instance,owner):
		return self.value
	def __set__(self,instance,value):
		self.value=float(value)

>>> class Fahrenheit: #使用的是instance.cel即Temperature对象的数据
	def __get__(self,instance,owner):
		return instance.cel*1.8+32
	def __set__(self,instance,value):
		instance.cel=float((value-32)/1.8)

>>> class Temperature:
	cel=Celsius()
	fah=Fahrenheit()

>>> t=Temperature()
>>> t.cel
26.0
>>> t.cel=27.5
>>> t.cel
27.5
>>> t.fah
81.5
>>> t.fah=100
>>> t.fah
100.0
定制容器(定制序列)
协议(protocols)
在其他语言中,协议指有哪些方法必须要定义。但在python中,协议更像是一种指南。
- 如果定制的容器不可变,只需定义
object.__len__(self)和object.__getitem__(self, key) - 想要容器是可变的话,还需要定义
object.__setitem__(self, key, value)和object.__delitem__(self, key) - 还有其他的,
object.__iter__(self)、object.__contains__(self, item)和object.__reversed__(self)
不可变容器
class CountList():
    def __init__(self,*args):
        self.values=[x for x in args]
        self.count={
     }.fromkeys(range(len(self.values)),0)

    def __len__(self):
        return len(self.values)

    def __getitem__(self,key):
        self.count[key]+=1
        return self.values[key]

==================== RESTART: G:\python\day1\CountList.py ====================
>>> c1=CountList(1,2,3,4)
>>> c2=CountList(2,4,6,8,10)
>>> c1[2]
3
>>> c1[1]+c2[1]
6
>>> c1.count
{
     0: 0, 1: 1, 2: 1, 3: 0}
>>>
迭代器
>>> people={
     'first':'张','second':'文','third':'迪'}
>>> for each in people:
	print("%s -> %s" %(each,people[each]))


first -> 张
second -> 文
third -> 迪
迭代器有两个内置函数,iter()和next()。
对应的魔法方法是__iter__() 和__next__()
# 案例一:iter和next
>>> string="fishc"
>>> it=iter(string)
>>> next(it)
'f'
>>> next(it)
'i'
>>> next(it)
's'
>>> next(it)
'h'
>>> next(it)
'c'
>>> next(it)
Traceback (most recent call last):
File "" , line 1, in <module>
next(it)
StopIteration
# 案例二:使用while实现迭代
>>> string="fishc"
>>> it=iter(string)
>>> while True:
try:
each=next(it)
except StopIteration:
break
print(each)
f
i
s
h
c
# 案例三:斐波那契数列
>>> class Fibs:
def __init__(self):
self.a=0
self.b=1
def __iter__(self):
return self
def __next__(self):
self.a,self.b=self.b,self.a+self.b
return self.a
>>> fibs=Fibs()
>>> for each in fibs: #each是__next__()获得
if each<20: #类外设置迭代范围
print(each)
else:
break
1
1
2
3
5
8
13
# 案例四:设置迭代范围
>>> class Fibs:
def __init__(sel,n=10):#默认范围是10
self.a=0
self.b=1
self.n=n
def __iter__(self):
return self
def __next__(self):
self.a,self.b=self.b,self.a+self.b
if self.a >self.n
raise StopIteration
return self.a
生成器
一旦函数内部出现yield意味着该函数是生成器。
>>> def myGen():
print("生成器被执行")
yield 1 #第一个next执行到这里
yield 2 #第二个next
>>> myGen()
<generator object myGen at 0x000002A2F182D308>
>>> myG=myGen()
>>> next(myG)
生成器被执行
1
>>> next(myG)
2
>>> next(myG) #第三次会报错
Traceback (most recent call last):
File "" , line 1, in <module>
next(myG)
StopIteration
>>> for i in myGen():
print(i)
生成器被执行
1
2
#斐波那契数列
>>> def libs():
a=0
b=1
while True:
a,b=b,a+b
yield a
>>> for each in libs():
if each >100:
break
print(each,end=' ')
1 1 2 3 5 8 13 21 34 55 89
列表推导式
>>> a=[i for i in range(100) if not(i%2) and i%3]
>>> a
[2, 4, 8, 10, 14, 16, 20, 22, 26, 28, 32, 34, 38, 40, 44, 46, 50, 52, 56, 58, 62, 64, 68, 70, 74, 76, 80, 82, 86, 88, 92, 94, 98]
字典推导式
>>> b={
     i:i%2==0 for i in range(10)}
>>> b
{
     0: True, 1: False, 2: True, 3: False, 4: True, 5: False, 6: True, 7: False, 8: True, 9: False}
集合推导式
集合和字典的区别是字典有冒号
>>> c={
     i for i in [1,1,2,2,5,5,9]}
>>> c
{
     1, 2, 5, 9}
生成器推导式
诶,好玩的来了。
加上for i in 列表后
[]是列表推导式
{:}是字典推导式
{}是集合推导式
那么,有元组推到式吗? 诶,既然有了列表推导式,还要元组推导式干啥?不都一样嘛。
其实不是元组推导式,而是变成了生成器推导式。
>>> e=(i for i in range(10)) #生成器推导式
>>> e
<generator object <genexpr> at 0x000002A2F1842A98>
>>> next(e)
0
>>> next(e)
1
>>> for each in e:
	print(each)


2
3
4
5
6
7
8
9
生成器作为函数的参数时,可以直接写推导式,无需加()
>>> sum(i for i in range(100) if i%2)
2500
模块
容器 -> 数据的分装
函数 -> 语句的分装
类 -> 方法和函数的分装
命名空间
hello就是hi()的命名空间,hello.hi()只写hello的话,找不到hi()

导入模块
# 第一种
import 模块名

# 第二种 不推荐,这样失去了命名空间的优势
from 模块名 import 函数名

#第三种
import 模块名 as 新名字
>>> import hello
>>> hello.hi()
你好,模块

>>> from hello import hi
>>> hi()
你好,模块
__main__
一般在模块的内部会有测试函数。
测试部分代码写在:
if __name__=='__main__' :
	测试代码
问题引出
模块1:TemperatureConversion.py
def c2f(cel):
    fah=cel*1.8+32
    return fah

def f2c(fah):
    cel=(fah-32)/1.8
    return cel

def test():
    print("测试,0摄氏度 = %.2f华氏度"%c2f(0))
    print("测试,0华氏度= %.2f摄氏度" %f2c(0))

test() #执行测试代码
模块2:calc.py
import TemperatureConversion as tc
print('32摄氏度 = %.2f华氏度'%tc.c2f(32))
print('99华氏度 = %.2f摄氏度'%tc.f2c(99))
运行模块2结果:
====================== RESTART: G:\python\day1\calc.py ======================
测试,0摄氏度 = 32.00华氏度
测试,0华氏度= -17.78摄氏度
32摄氏度 = 89.60华氏度 #发现,他把模块1 里的测试代码也打印出来了。
99华氏度 = 37.22摄氏度

>>> __name__
'__main__'
>>> tc.__name__
'TemperatureConversion'
所以需要对模块1进行修改
def c2f(cel):
    fah=cel*1.8+32
    return fah

def f2c(fah):
    cel=(fah-32)/1.8
    return cel

def test():
    print("测试,0摄氏度 = %.2f华氏度"%c2f(0))
    print("测试,0华氏度= %.2f摄氏度" %f2c(0))

if __name__=="__main__" :  #增加部分
    test()
运行结果:
====================== RESTART: G:\python\day1\calc.py ======================
32摄氏度 = 89.60华氏度
99华氏度 = 37.22摄氏度
搜索路径
使用sys.path可以查看当前的搜索路径。
>>> import sys
>>> sys.path
['G:\\python\\day1', 'C:\\Program Files (x86)\\Microsoft Visual Studio\\Shared\\Python36_64\\Lib\\idlelib', 'C:\\Program Files (x86)\\Microsoft Visual Studio\\Shared\\Python36_64\\python36.zip', 'C:\\Program Files (x86)\\Microsoft Visual Studio\\Shared\\Python36_64\\DLLs', 'C:\\Program Files (x86)\\Microsoft Visual Studio\\Shared\\Python36_64\\lib', 'C:\\Program Files (x86)\\Microsoft Visual Studio\\Shared\\Python36_64', 'C:\\Users\\Willian\\AppData\\Roaming\\Python\\Python36\\site-packages', 'C:\\Program Files (x86)\\Microsoft Visual Studio\\Shared\\Python36_64\\lib\\site-packages']
最佳的存放路径是site-packages
添加搜索路径
#只能临时更改,无法保存更改
>>> sys.path.append("G:\\python\\day1")
>>> import TemperatureConversion
>>> TemperatureConversion.c2f(32)
89.6
包(package)
创建包的过程:
- 创建一个文件夹,文件夹的名字就是包的名字。
- 包内创建一个名为“
__init__.py”的空文件,目的是告诉python这是一个包 - 将模块放入到包中
包的使用:
##包名.模块名
import M1.TemperatureConversion as tc
print('32摄氏度 = %.2f华氏度'%tc.c2f(32))
print('99华氏度 = %.2f摄氏度'%tc.f2c(99))
像极客一样思考
英文文档(推荐)
 中文文档
中文文档

python爱好者发布的第三方模块
https://pypi.python.org/pypi
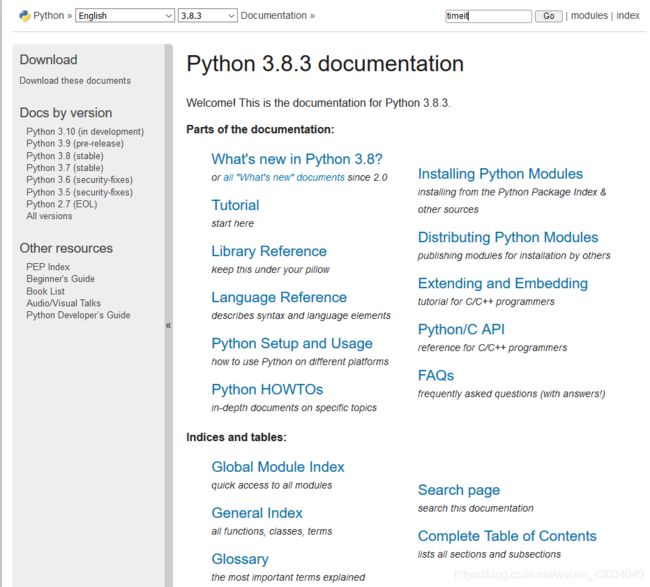
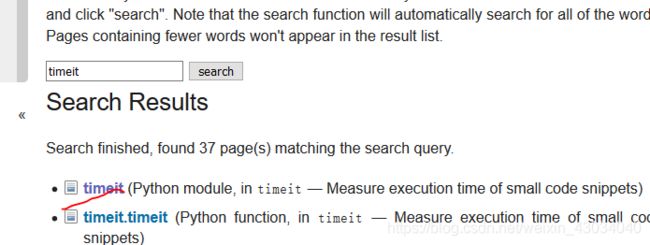
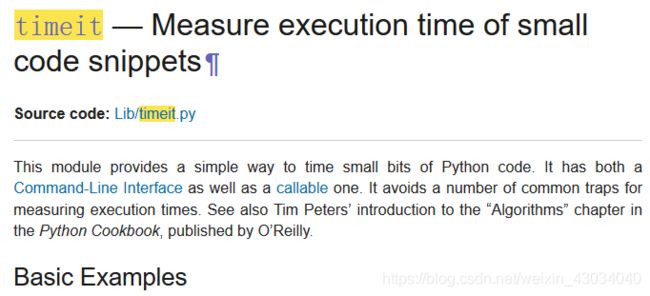
日常使用 以计时 timeit为例
查找文档
优点,很详细。缺点,太详细。

快速掌握
=============================== RESTART: Shell ===============================
>>> import timeit
>>> timeit.__doc__ #不好,打印出来太乱
>>> print(timeit.__doc__) #推荐,有缩进,有换行

>>> dir(timeit) #查看有哪些属性和方法,并不是所有的属性和方法我们都有用

>>> timeit.__all__ #用来查看我们能够使用的东西
#不是所有的模块都有__all__属性

>>> help(timeit)
- 有
__all__时,使用from timeit import *时,只会导入__all__中的属性和方法到命名空间。否则所有都会导过来。
以后自己写时,建议把想要对外提供的接口都写到__all__中 __file__属性,查看源码所在文件位置,自我提高必选之路