使用yolov3训练识别围棋死活题和围棋局面
我的知名围棋APP忘忧围棋的开发者(www.gog361.com),一直想做一个可以通过手机拍摄识别死活题的功能,前后经过了半年时间的折腾,终于上线这个功能。这个过程很艰辛,并且踩了还不少的坑,所以记录下这个过程。
应用的场景有以下几种
1. 小孩子在学围棋的时候,家长是不懂围棋的,老师给的题目在书本上,家长可以拍照识别题目并通过AI解题
2. 在现实中下棋的时候,棋局结束的时候数子,或者棋局中间的时候形势判断,都可以拿起手机拍照后数子后进行形势判断,AI推荐,AI分析,AI复盘等
3. 即使在线上下棋也可以拍照识别后进行形势判断,AI推荐,AI分析,AI复盘。
。
第一阶段,试图通过传统OpenCV来识别围棋盘,最终失败
由于围棋是比较规则的,所以第一阶段试图通过传统的OpenCV识别完成,这个过程采用了OpenCV识别直线,识别圆形,识别角点等各种方法,都无法获得一个很好的效果。这个过程也发现对于完整棋局来说,找到四个棋盘四个角的位置至关重要。
1. 直线识别失败的原因是,棋盘外面会出现直线,导致很难区分那条线是棋盘的线,那条线是棋盘上的线,并且特殊情况,棋子完整的占满了棋盘后,也没有直线可以识别。
2. 识别圆形失败的原因是,不同的白棋子很难识别出来
3. 通过harris角点取得了一些效果,可以找到棋盘上的一些关键点,但是能解决一部分棋盘,但是有些棋盘根本无法解决。
4. findContours方法获得结果,有时候会把棋子分割成出来
5. 综合以上的方法合并起来,虽然能解决一些CASE但是几乎没有什么通用性。
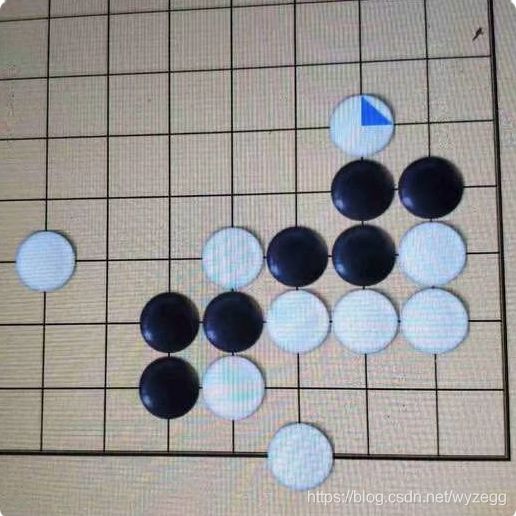
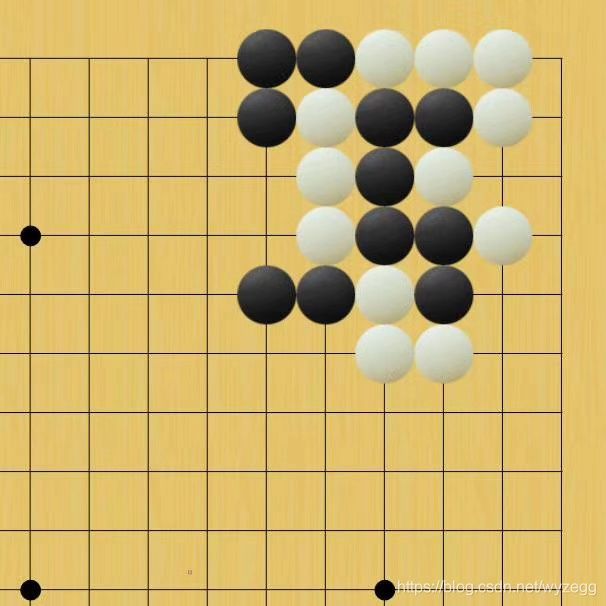
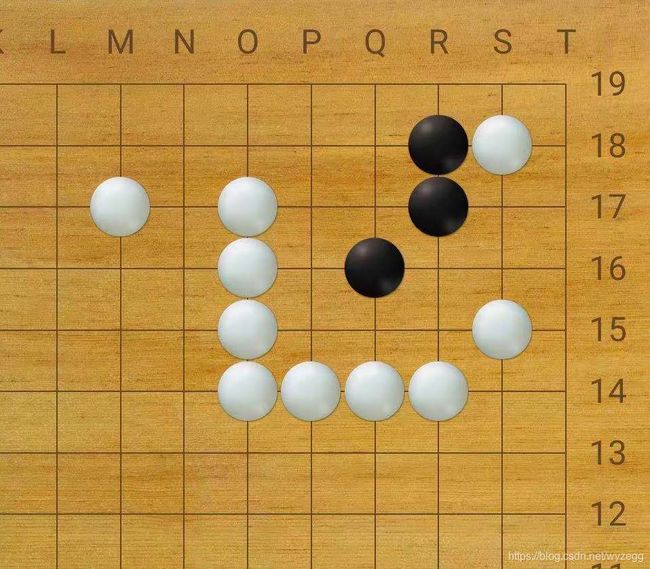
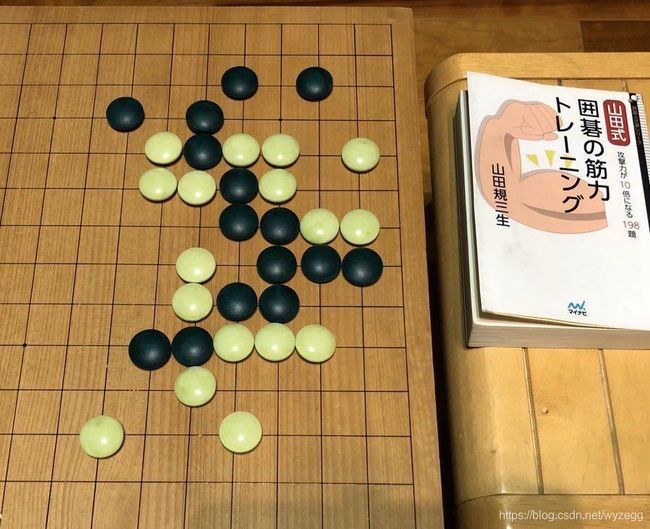
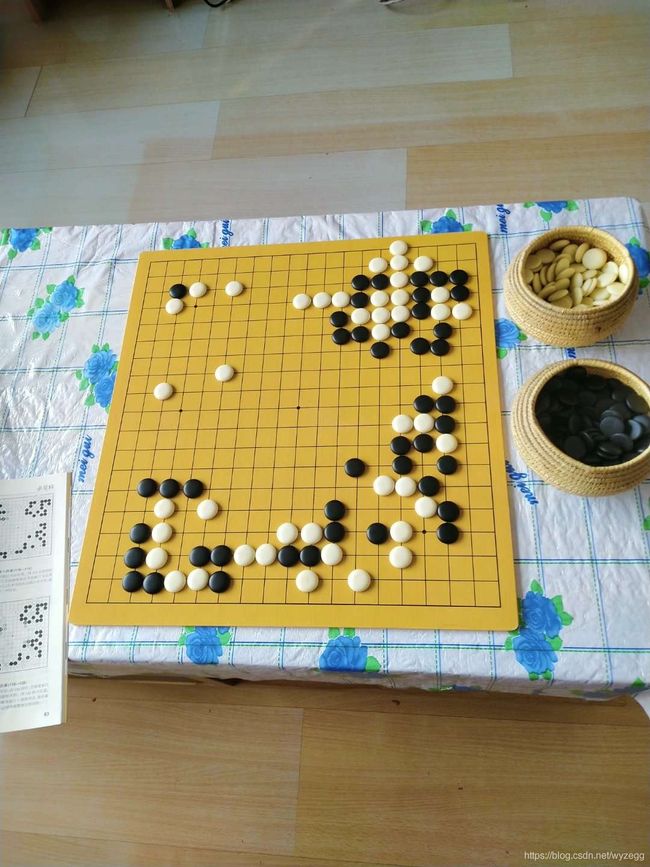
第一阶段主要用的棋盘案例
第二阶段,转向深度学习来解决问题
经过第一阶段摸索后,确认了传统的识别方法是无法实现想要的效果的,决定转向深度学习方法。刚开始使用caffe SSD没有取的很好的效果,后来在公司AI大牛的建议下换到了YOLOV3,这里要特别感谢我的搭档易博士在训练方面的大力帮助,并且亲自使用自己的机器帮忙训练。下面记录下实现这个产品功能的详细过程。
1. 训练数据的准备
由于围棋棋盘上的棋子很多,一个一个手工标注是一个痛苦的过程,所以采用手工加程序帮忙的方式。
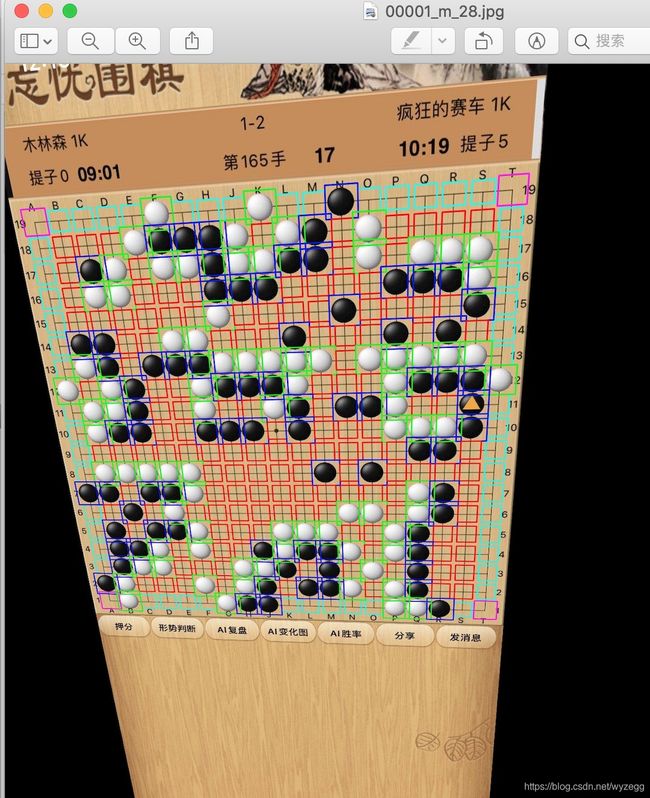
训练目标是要识别出,黑子,白子,角(无棋子角),边线(无棋子的边线)和空位置。如下图所示:
对于全局棋盘,首先只记录四个角的坐标,然后通过传统的方法计算出所有的元素并生成训练的VOC数据,这里主要用python实现
全局棋盘的角坐标用一个文本文件表示内容如下:
#顺序是lefttop,righttop,leftbottom,rightbottom, not solid whitestone
00001,50,364,1034,364,50,1348,1034,1348,0
00002,50,364,1034,364,50,1348,1034,1348,0
00003,50,364,1034,364,50,1348,1034,1348,0
00004,66,472,1014,472,66,1420,1014,1420,0
00005,66,472,1014,472,66,1420,1014,1420,0
00006,36,410,1044,410,36,1420,1044,1420,0
00007,36,410,1044,410,36,1420,1044,1420,0
在棋盘倾斜的情况下,如何用四个角的坐标计算整个棋盘19X19的位置坐标,这里用到OpenCV的透视变换,代码如下:
def PointPerspectiveTransform(self, src, h):
u=src[0];
v=src[1];
x=(h[0][0]*u+h[0][1]*v+h[0][2])/(h[2][0]*u+h[2][1]*v+h[2][2]);
y=(h[1][0]*u+h[1][1]*v+h[1][2])/(h[2][0]*u+h[2][1]*v+h[2][2]);
return [x,y]
def getBoardGird(self):
src = np.array([[0,0],[1800,0],[0,1800],[1800,1800]],np.float32)
dst = np.array([self.lefttop,self.righttop,self.leftbottom,self.rightbottom],np.float32)
h = cv2.getPerspectiveTransform(src,dst)
for x in range(0, WY_BOARD_LINES):
for y in range(0, WY_BOARD_LINES):
src=[x*100,y*100]
des=self.PointPerspectiveTransform(src,h)
#print(des)
self.boardgrid[x][y]=des
函数getBoardGird就是通过一个规则的棋盘透视变换到四个角然后再反过来计算出棋盘所有19X19位置的坐标。
然后根据坐标的位置判断出是黑子还是白子。最后输出为VOC格式的XML
这里还有一个关键点是,为了增加更多的训练样本,根据这些图片本身的变换角度,应用在其他的图片上,自动生成更多角度的图片,代码如下:
def CreateMorePerspective(self):
self.org_lefttop=self.lefttop
self.org_righttop=self.righttop
self.org_leftbottom=self.leftbottom
self.org_rightbottom=self.rightbottom
for x in range(0, WY_BOARD_LINES):
for y in range(0, WY_BOARD_LINES):
self.org_boardgrid[x][y]=self.boardgrid[x][y]
plist=self.corner_datas_need_p['plist']
count=len(plist)
print("corner_datas_need_p len is:", count)
for i in range(0,count):
#temp=random.random()*10000
#print("rang temp=,",temp,int(temp%10))
#if int(temp%10)<=1:
corners=plist[i]
lefttop=[int(corners[0]),int(corners[1])]
righttop=[int(corners[2]),int(corners[3])]
leftbottom=[int(corners[4]),int(corners[5])]
rightbottom=[int(corners[6]),int(corners[7])]
self.CreateNewImage(i,lefttop,righttop,leftbottom,rightbottom)
corner_datas_need_p 记录了所有不是正方形的棋盘的数据,然后任何一张图片都按照这个比例进行透视变换以生成更多的训练图片。
def CreateNewImage(self,index,lefttop,righttop,leftbottom,rightbottom):
self.lefttop=lefttop;
self.righttop=righttop
self.leftbottom=leftbottom
self.rightbottom=rightbottom
src = np.array([self.org_lefttop,self.org_righttop,self.org_leftbottom,self.org_rightbottom],np.float32)
dst = np.array([lefttop,righttop,leftbottom,rightbottom],np.float32)
h_perspective = cv2.getPerspectiveTransform(src,dst)
temp=GetDistance(self.lefttop,self.rightbottom)*1.2
temp2=GetDistance(self.org_lefttop,self.org_rightbottom)*1.2
if temp/temp2<0.5: #太小的就不转换了
return
if temp
self.img_perspective = cv2.warpPerspective(self.org_bgr, h_perspective, (int(temp), int(temp)))
self.bgr=self.img_perspective.copy()
for x in range(0, WY_BOARD_LINES):
for y in range(0, WY_BOARD_LINES):
src=self.org_boardgrid[x][y]
des=self.PointPerspectiveTransform(src,h_perspective)
#print(des)
self.boardgrid[x][y]=des
self.OutputToXML_CreateNewImg(index)
#在生成一个左上角1/4棋盘的图片
they=int(self.boardgrid[9][9][1])
thex=int(self.boardgrid[9][9][0])
self.bgr=self.bgr[0:they, 0:thex]
self.OutputToXML_CreateNewImg_Quarter(index)
以上是生成全局棋盘的训练数据。
对于死活题目的数据,这个要复杂很多,所以需要手工录入更多的数据以来定位,死活题目就不需要再识别黑白子了,直接采用录用的方法,原始数据的格式如下:
这里记录下四个顶点位置的围棋坐标和像素坐标,以及黑白子的围棋坐标,仍然通过openCV的透视变化去定位棋盘上的坐标。
{
"imglist":
[
{
"imgno" : 10000,
"lefttop": [0,11,42,33],
"righttop": [8,11,539,32],
"rightbottom": [8,18,539,468],
"leftbottom": [0,18,42,468],
"blackstones":[0,16,1,16,2,16,3,16,4,17,3,18],
"whitestones":[0,15,1,15,2,15,3,15,4,16,5,16,5,17,5,18],
"addposition": []
},
{
"imgno" : 10001,
"lefttop": [0,12,124,111],
"righttop": [5,12,961,108],
"rightbottom": [5,18,874,918],
"leftbottom": [0,18,222,989],
"blackstones": [0,16,1,16,2,16,3,16,4,17,3,18],
"whitestones": [0,15,1,15,2,15,3,15,4,16,5,16,5,17,5,18],
"addposition": [6,18]
},
{
"imgno" : 10002,
"lefttop": [0,12,229,71],
"righttop": [6,12,1073,292],
"rightbottom": [6,18,795,1014],
"leftbottom": [0,18,173,746],
"blackstones": [0,16,1,16,2,16,3,16,4,17,3,18],
"whitestones": [0,15,1,15,2,15,3,15,4,16,5,16,5,17,5,18],
"addposition": [7,18,7,17,7,16]
}。
对于死活题目,也全局棋盘一样的,通过透视变换生成更多的训练数据。
def CreateMorePerspective(self):
self.org_lefttop=self.lefttop_pos
self.org_righttop=self.righttop_pos
self.org_leftbottom=self.leftbottom_pos
self.org_rightbottom=self.rightbottom_pos
for x in range(0, WY_BOARD_LINES):
for y in range(0, WY_BOARD_LINES):
self.org_boardgrid[x][y]=self.boardgrid[x][y]
plist=self.corner_datas_need_p['plist']
count=len(plist)
print("corner_datas_need_p len is:", count)
for i in range(0,count):
corners=plist[i]
#temp=random.random()*10000
#print("rang temp=,",temp,int(temp%10))
#if int(temp%10)<=1:
lefttop=[int(corners[0]),int(corners[1])]
righttop=[int(corners[2]),int(corners[3])]
leftbottom=[int(corners[4]),int(corners[5])]
rightbottom=[int(corners[6]),int(corners[7])]
self.CreateNewImage(i,lefttop,righttop,leftbottom,rightbottom)
def CreateNewImage(self,index,lefttop,righttop,leftbottom,rightbottom):
self.lefttop=lefttop;
self.righttop=righttop
self.leftbottom=leftbottom
self.rightbottom=rightbottom
src = np.array([self.org_lefttop,self.org_righttop,self.org_leftbottom,self.org_rightbottom],np.float32)
dst = np.array([lefttop,righttop,leftbottom,rightbottom],np.float32)
h_perspective = cv2.getPerspectiveTransform(src,dst)
temp=GetDistance(self.lefttop,self.rightbottom)*1.2
temp2=GetDistance(self.org_lefttop,self.org_rightbottom)*1.2
if temp/temp2<0.5: #太小的就不转换了
return
if temp
self.img_perspective = cv2.warpPerspective(self.org_bgr, h_perspective, (int(temp), int(temp)))
self.bgr=self.img_perspective.copy()
for x in range(0, WY_BOARD_LINES):
for y in range(0, WY_BOARD_LINES):
src=self.org_boardgrid[x][y]
des=self.PointPerspectiveTransform(src,h_perspective)
#print(des)
self.boardgrid[x][y]=des
self.OutputToXML_CreateNewImg(index)
2. 数据准备好后就开始训练
接下来就是训练的过程了,把所有全局棋盘的数据和死活题目的数据整合起来生成VOC数据集合。
训练的关键点在cfg文件里设置
angle=45
classes=5
filters=30
max=400
详情可参考yolov3的训练相关文档
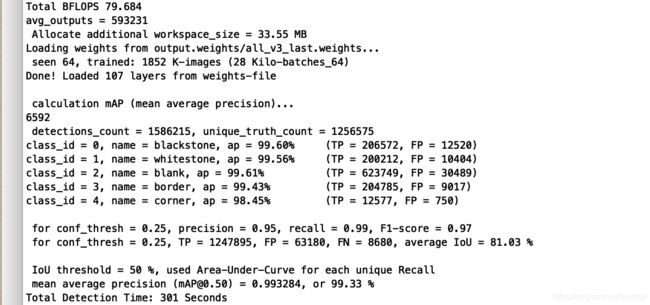
训练的结果如下图
整体的map达到99.3%,黑子99.6%,白子99.56%,空99.6%,边线99.4%,角98.45%。
3. 训练好的网络的应用
由于要持续改进识别效果所以识别是放在服务器端进行的,用户上传照片到服务器端,服务器识别后把结果返回。所以服务采用c++实现。
训练好的网络只是返回了各个对象的位置,并且还存在可能性会丢失一些对象,所以服务器是采用网络和OpenCV混合的模式进行的,下面简要的写一下大致的过程:
首先要加载网络:
void CBoardDetect::LoadNet()
{
clock_t start, finish;
start = clock();
string modelConfiguration = "/opt/goimage/model/all_v4.cfg";
string modelWeights = "/opt/goimage/model/all_v4.weights";
// Load names of classes 读取分类类名
string classesFile = "/opt/goimage/model/all.names";
ifstream ifs_all(classesFile.c_str());
string line;
while (getline(ifs_all, line))
{
m_classes_all.push_back(line);
}
// Load the network 导入网络
CBoardDetect::m_net_all = readNetFromDarknet(modelConfiguration, modelWeights);
finish = clock();
cout << "LoadNet time is " << double(finish - start) / CLOCKS_PER_SEC << endl;
//
}
然后通过网络前向读取识别的结果
int CBoardDetect::All_Net_Forward(Mat& src)
{
m_width=m_bgr.cols;
m_height=m_bgr.rows;
m_smalledge=m_width>m_height?m_height:m_width;
int a=time(NULL);
clock_t start, finish;
start = clock();
Mat inputBlob = dnn::blobFromImage(src, 1.0/255, Size(416,416), NULL, true, false);//这里因为训练时对图像做了归一化,所以在推理的时候也要对图像进行归一化
CBoardDetect::m_net_all.setInput(inputBlob);
vector
std::vector
CBoardDetect::m_net_all.forward(outs, outNames);
PostProcess_All(src, outs, CBoardDetect::m_net_all, mythresh, mynms);
finish = clock();
int b=time(NULL);
cout << "All_Net_Forward time is " << double(finish - start) / CLOCKS_PER_SEC << endl;
return 0;
}
void CBoardDetect::PostProcess_All(Mat& frame, const std::vector
{
static std::vector
static std::string outLayerType = net.getLayer(outLayers[0])->type;
std::vector
std::vector
std::vector
if (outLayerType == "Region")
{
for (size_t i = 0; i < outs.size(); ++i)
{
//网络输出的数据是一个NxC矩阵向量,N是检测到的目标数量,C的类别数 + 4
//开始的4个数据是[center_x, center_y, width, height]
float* data = (float*)outs[i].data;
for (int j = 0; j < outs[i].rows; ++j, data += outs[i].cols)
{
Mat scores = outs[i].row(j).colRange(5, outs[i].cols);
Point classIdPoint;
double confidence;
minMaxLoc(scores, 0, &confidence, 0, &classIdPoint);
if (confidence > mythresh)
{
/* if(classIdPoint.x==1) // this is board
{
m_vectBorder_Points.push_back(cv::Point2f(data[0] * frame.cols,data[1] * frame.rows));
if(m_object_min_width>data[2] * frame.cols)
{
m_object_min_width=data[2] * frame.cols;
}
}*/
int centerX = (int)(data[0] * frame.cols);
int centerY = (int)(data[1] * frame.rows);
int width = (int)(data[2] * frame.cols);
int height = (int)(data[3] * frame.rows);
int left = centerX - width / 2;
int top = centerY - height / 2;
classIds.push_back(classIdPoint.x);
confidences.push_back((float)confidence);
boxes.push_back(Rect(left, top, width, height));
}
}
}
std::vector
NMSBoxes(boxes, confidences, mythresh, mynms, indices);
m_vectAllBoxs.clear();
for (size_t i = 0; i < indices.size(); ++i)
{
int idx = indices[i];
Rect box = boxes[idx];
NNBoxInfo boxinfo;
boxinfo.id=m_vectAllBoxs.size();
boxinfo.classid=classIds[idx];
float confidence=confidences[idx];
boxinfo.confidence=confidence;
if(boxinfo.classid>1) //box 1.5 times larger
{
int centerX = box.x+box.width/2;
int centerY = box.y+box.height/2;
int width=box.width*3/2;
int height=box.height*3/2;
box=Rect(centerX-width/2,centerY-height/2,width,height);
boxinfo.box=box;
}
else
{
boxinfo.box=box;
}
m_vectAllBoxs.push_back(boxinfo);
/* DrawPrediction(CBoardDetect::m_classes_all, classIds[idx], confidences[idx], box.x, box.y,
box.x + box.width, box.y + box.height, frame);*/
}
}
/* string strtemp=m_strFilePath+"-yolo_all.jpg";
strtemp=replace(strtemp,"imgtest","testoutput");
printf("output file %s\n",strtemp.c_str());
imwrite(strtemp.c_str(),frame);*/
}
最后把数据存入一个NNBoxInfo的数据结构,这个数据结构会建立一个位置的关系,NNBoxInfo的定义如下
class NNBoxInfo
{
public:
NNBoxInfo()
{
fDist_Base=0.0;
classid=-1;
neighbor_count=0;
left=NULL;
lefttop=NULL;
top=NULL;
righttop=NULL;
right=NULL;
rightbottom=NULL;
bottom=NULL;
leftbottom=NULL;
x=INVALID_COORD;
y=INVALID_COORD;
}
~NNBoxInfo()
{
}
int id;
Rect box;
int classid;
float confidence;
int neighbor_count;
NNBoxInfo * left;
NNBoxInfo * lefttop;
NNBoxInfo * top;
NNBoxInfo * righttop;
NNBoxInfo * right;
NNBoxInfo * rightbottom;
NNBoxInfo * bottom;
NNBoxInfo * leftbottom;
float fDist_Base;
int x;
int y;
NNBoxInfo * neighbor[MAX_NEIGHBOR];
然后通过一系列的运算后建立一个位置的关系,最后计算出棋盘各个位置棋子的颜色。通过还通过OpenCV的线条来校验计算的结果,并且通过OpenCV的EMD算法对比棋子,找到可能没有发现的棋子。
另外补充一点通过算法来区分是全局棋谱,死活题,9路还是13路围棋。
客户端的实现,小程序下的代码:
scanProcess(imgpath)
{
console.log("imgpath=",imgpath);
wx.showLoading({
title: '识别中...',
})
var that=this;
let posturl="https://app.gog361.com/flask/v1/app/ai/scanimage/"+app.globalData.userid;
wx.uploadFile({
url: posturl,
filePath: imgpath,
name: 'file',
header: { "Content-Type": "multipart/form-data" },
formData: {
//和服务器约定的token, 一般也可以放在header中
'userid': app.globalData.userid,
'sessionkey': app.globalData.sessionkey,
'session_token': wx.getStorageSync('session_token')
},
success: function (res) {
console.log(res);
if (res.statusCode != 200) {
wx.showModal({
title: '提示',
content: '上传失败',
showCancel: false
})
return;
}
var data = JSON.parse(res.data);
if(data.code>=0)
{
that.startresult(data);
}
else
{
wx.showModal({
title: '提示',
content: '可能因为光线原因识别失败,请稍微换个角度重拍',
showCancel: false,
success: function(res)
{
that.start_rescan();
}
})
}
return;
},
fail: function (e) {
console.log(e);
wx.showModal({
title: '提示',
content: '上传失败',
showCancel: false
})
},
complete: function () {
wx.hideLoading();
}
})
}
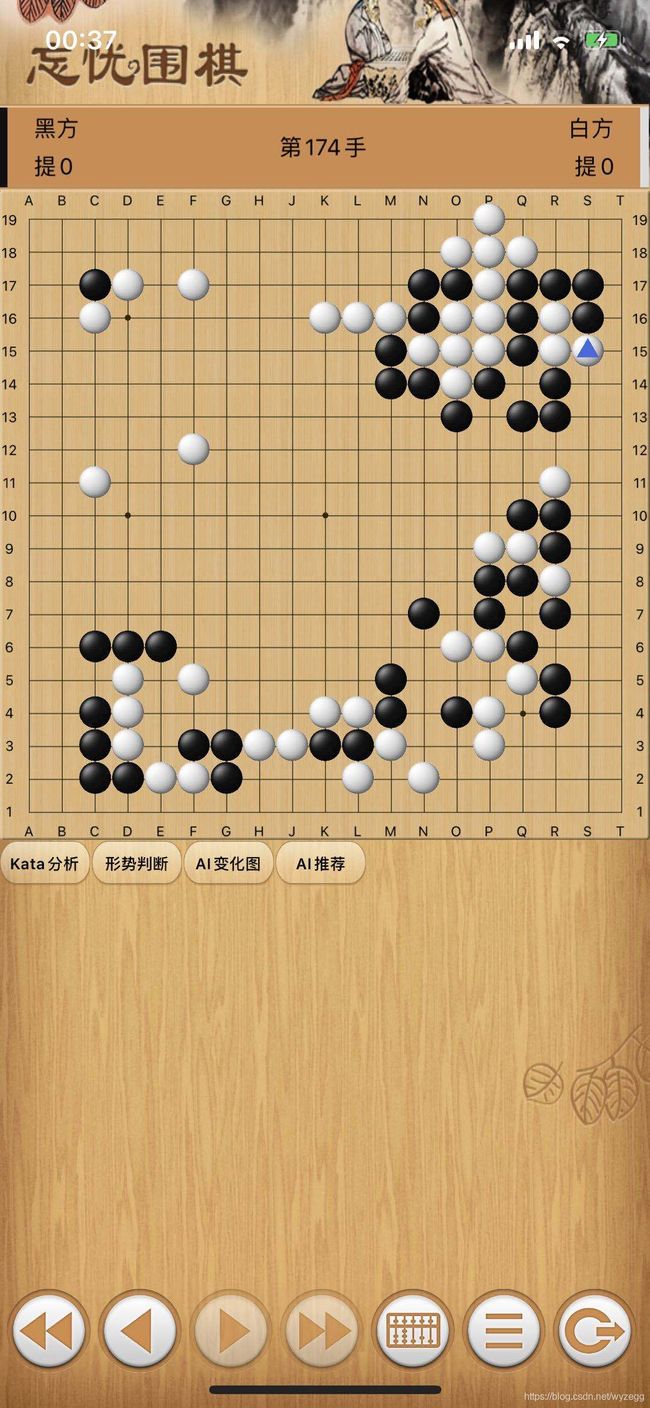
最后对比下原图和拍照识别后的结果
总结:目前对全局棋盘识别的效果比较好,对死活题识别的效果要差一些,需要收集更多的死活题目,进行新一轮的训练来改进效果。
想象空间,有机会做到使用普通的围棋盘可以做到智能棋盘的效果,在普通棋盘上面架一个手机通过识别后能够使用普通棋盘进行任何的线上对弈,人机对弈做死活题等功能, 保护视力。
最后有兴趣的朋友可以去微信搜索小程序"忘忧围棋题库”或者去苹果Appstore以及安卓市场下载“忘忧围棋”体验。

