一、Login校验规则
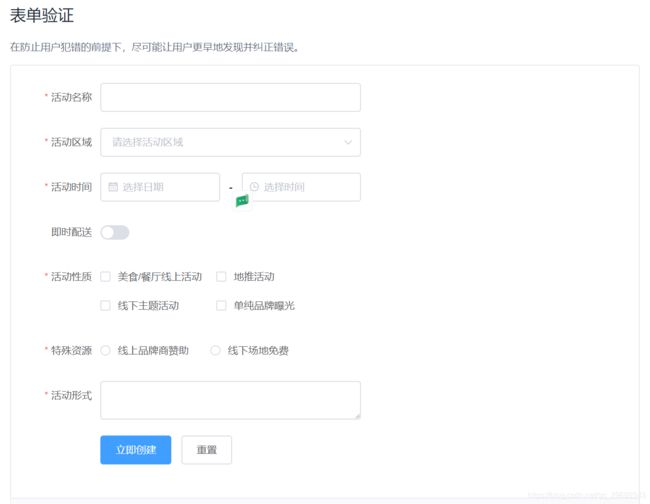
1、校验规则写法可参考Element-ui官网文档
https://element.eleme.cn/#/zh-CN/component/form
2、Login.vue页面

提交 重置
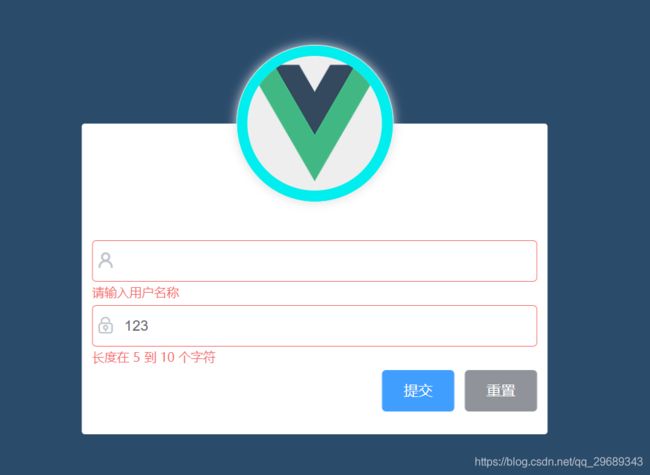
3、运行结果
思考:
Element UI作为一个CSS框架,竟然能够进行表单验证,我想这肯定内部封装了JS;
二、实现登录和重置事件
1、在main.js中导入axios
import Vue from 'vue'
import App from './App.vue'
import router from './router'
import './plugins/element.js'
//导入全局样式
import './assets/css/global.css'
//引入图标
import './assets/font/iconfont.css'
//导入axios
import axios from 'axios'

//挂载
Vue.prototype.$http = axios
//设置访问根路径
axios.defaults.baseURL = "http://localhost:9000"


Vue.config.productionTip = false

new Vue({
	router,
	render: h => h(App)
}).$mount('#app')
2、在Login页面编写对应方法
(注意登录方法和重置方法的绑定和在下面的编写)

提交 重置
3、创建Home.vue页面
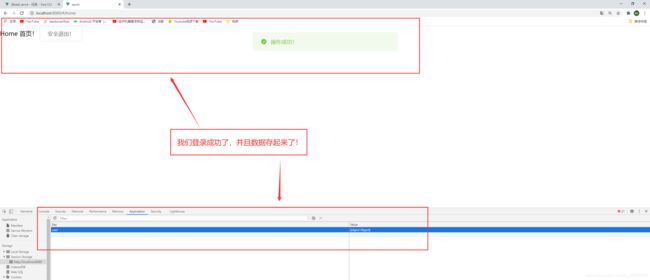
(这里我们把安全退出也写进去了,安全退出是将自己登录之后的账户信息也清除掉了,安全退出之前还有一些工作要做,因为这些东西改动的地方多而杂,搬来就不想继续做笔记了,但是想想,确实里面也有很多新的知识点,还是硬着头皮来吧)
Home 首页!安全退出!
4、在index.js中引入home组件,并配置路由
(创建的.vue页面被称为组件,创建之后引入才能用,再配置路由进行页面的分发;关于路由,我本来并不懂这个概念,但当我知道了他的写法和功能再加上对WiFi路由器的联想,意思也许就是负责页面分发吧,暂时就不去细查了)
import Vue from 'vue'
import VueRouter from 'vue-router'
//引入login组件
import Login from '../components/Login.vue'
//引入home组件
import Home from '../components/Home.vue'

Vue.use(VueRouter)

const routes = [
 {
  path:"/",
  //将首页“/”重定向到“/login”
  redirect:"/login"
 },{
  //将上面引入的Login与“/login”访问路径进行绑定
  path:"/login",
  component:Login
 },{
  //将上面引入的Home与“/home”访问路径进行绑定
  path:"/home",
  component:Home
 }
]

const router = new VueRouter({
 routes
})

export default router
5、登录方法详述(注释说明)
 //登录
			login(){
				//表单验证
				this.$refs.loginFormRef.validate(async valid =>{
					if(!valid){
						return;
					}
					//这里我们发起post请求,传入表单数据,将服务器返回值传给res对象
					const {data:res} = await this.$http.post("login",this.loginForm);//访问后台
					console.log(res.flag);
					//如果res的flag是一个ok的话,就说明我们请求成功,并通过了用户验证!
					if(res.flag == "ok"){
						this.$message.success("操作成功!");
						// up主是这么写的,this.$router.push({"/home"}});
						this.$router.push("/home");//页面路由跳转
						console.log(res.user);
						//这个是将user数据传递给全局变量,方便在其他地方获取
						window.sessionStorage.setItem("user",res.user);
					}else{
						this.$message.success("操作失败!");
					}
				});
			}
6、在后台(spring boot项目)创建user对象
(我使用了lombok,第一次用了之后就离不开了)
package com.zibo.sport.bean;

import lombok.AllArgsConstructor;
import lombok.Data;
import lombok.NoArgsConstructor;

@Data
@NoArgsConstructor
@AllArgsConstructor
public class User {
  private int id;
  private String username;
  private String password;
  private String email;
  private String role;
  private boolean state;

}
7、编写UserDao
package com.zibo.sport.dao;

import com.zibo.sport.bean.User;
import org.apache.ibatis.annotations.Param;
import org.springframework.stereotype.Repository;

@Repository
public interface UserDao {
  User getUserByMessage(@Param("username") String username, @Param("password") String password);
}
8、编写UserDao.xml
9、编写LoginController
(这里需要说明一下,我们使用JSON工具将map对象转换成了JOSN字符串,具体坐标见下面的pom.xml)
package com.zibo.sport.controller;

import com.alibaba.fastjson.JSON;
import com.zibo.sport.bean.User;
import com.zibo.sport.dao.UserDao;
import org.springframework.beans.factory.annotation.Autowired;
import org.springframework.web.bind.annotation.RequestBody;
import org.springframework.web.bind.annotation.RequestMapping;
import org.springframework.web.bind.annotation.RestController;

import java.util.HashMap;
import java.util.Map;

@RestController
public class LoginController {

  @Autowired
  UserDao userDao;

  @RequestMapping("/login")
  public String login(@RequestBody User user){
    String flag = "error";
    System.out.println("user:" + user);
    User user1 = userDao.getUserByMessage(user.getUsername(), user.getPassword());
    System.out.println("user1:" + user1);
    if(user1!=null){
      flag = "ok";
    }
    Map map = new HashMap<>();
    map.put("flag",flag);
    map.put("user",user1);
    return JSON.toJSONString(map);
  }

}
10、修改启动类SportApplication,使其能够扫描dao
package com.zibo.sport;

import org.mybatis.spring.annotation.MapperScan;
import org.springframework.boot.SpringApplication;
import org.springframework.boot.autoconfigure.SpringBootApplication;

@MapperScan("com.zibo.sport.dao")//扫描dao
@SpringBootApplication
public class SportApplication {

  public static void main(String[] args) {
    SpringApplication.run(SportApplication.class, args);
  }

}
11、pom.xml
  4.0.0

    org.springframework.boot
    spring-boot-starter-parent
    2.3.4.RELEASE


  com.zibo
  sport
  0.0.1-SNAPSHOT
  sport
  Demo project for Spring Boot


    1.8


      com.alibaba
      fastjson
      1.2.74


      org.projectlombok
      lombok


      org.springframework.boot
      spring-boot-starter-jdbc


      org.springframework.boot
      spring-boot-starter-web


      org.mybatis.spring.boot
      mybatis-spring-boot-starter
      2.1.3


      mysql
      mysql-connector-java
      runtime


      org.springframework.boot
      spring-boot-starter-test
      test


          org.junit.vintage
          junit-vintage-engine


        org.springframework.boot
        spring-boot-maven-plugin
12、数据库中的数据
创建表:
CREATE TABLE `zb`.`user` (
 `id` int(0) NOT NULL AUTO_INCREMENT COMMENT '主键',
 `username` varchar(255) CHARACTER SET utf8 COLLATE utf8_general_ci NOT NULL,
 `password` varchar(255) CHARACTER SET utf8 COLLATE utf8_general_ci NOT NULL,
 `email` varchar(255) CHARACTER SET utf8 COLLATE utf8_general_ci NOT NULL,
 `role` varchar(255) CHARACTER SET utf8 COLLATE utf8_general_ci NOT NULL,
 `state` tinyint(0) NOT NULL DEFAULT 0,
 PRIMARY KEY (`id`) USING BTREE
) ENGINE = InnoDB AUTO_INCREMENT = 10 CHARACTER SET = utf8 COLLATE = utf8_general_ci ROW_FORMAT = Dynamic;
插入数据:
INSERT INTO `user`(`id`, `username`, `password`, `email`, `role`, `state`) VALUES (1, 'admin', '123456', '[email protected]', '超级管理员', 1);
INSERT INTO `user`(`id`, `username`, `password`, `email`, `role`, `state`) VALUES (2, 'naughty', '888888', '[email protected]', '普通管理员', 0);
INSERT INTO `user`(`id`, `username`, `password`, `email`, `role`, `state`) VALUES (3, 'flysky01', '987654', '[email protected]', '普通用户', 1);
INSERT INTO `user`(`id`, `username`, `password`, `email`, `role`, `state`) VALUES (4, 'anglybirds', '321654', '[email protected]', '普通用户', 0);
INSERT INTO `user`(`id`, `username`, `password`, `email`, `role`, `state`) VALUES (7, 'admin003', 'q123456', '[email protected]', '普通用户', 1);
INSERT INTO `user`(`id`, `username`, `password`, `email`, `role`, `state`) VALUES (8, 'admin005', '123456', '[email protected]', '普通用户', 0);
INSERT INTO `user`(`id`, `username`, `password`, `email`, `role`, `state`) VALUES (9, 'admin007', '123456', '[email protected]', '普通用户', 0);
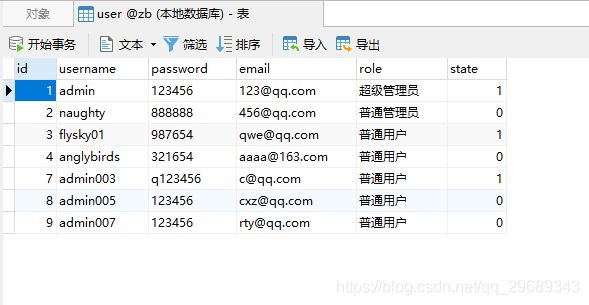
表展示:
13、演示
(前后端项目要同时启动,因为我们已经绑定了http://localhost:9000,是向后台获取数据)
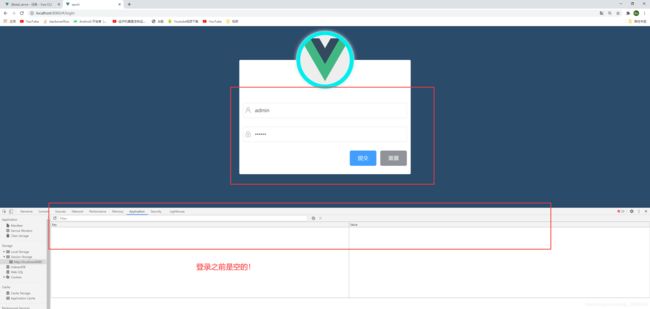
登录之前:
点击“提交”按钮之后:
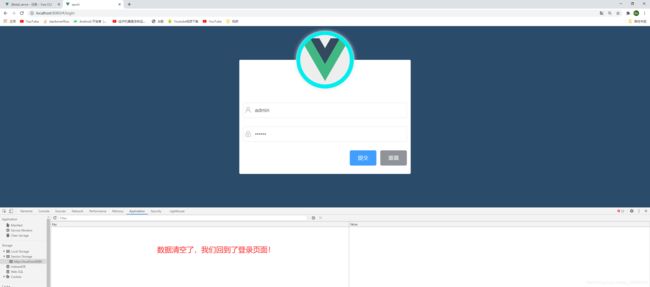
安全退出:
(重置事件太简单了,是vue实现的,只需调用一个方法即可,见代码!)
(我们暂时就演示到这里!)
到此这篇关于SpringBoot+Vue开发之Login校验规则、实现登录和重置事件的文章就介绍到这了,更多相关spring boot vue实现登录和重置事件内容请搜索脚本之家以前的文章或继续浏览下面的相关文章希望大家以后多多支持脚本之家!
