使用python+opencv和pillow以及numpy对图像进行旋转,以及解决图像旋转过程中出现的黑边问题
文章目录:
- 1 使用pillow对图像进行旋转
-
- 1.1 pillow对图像进行旋转
- 1.2 解决使用pillow旋转过程中出现的黑边问题
- 2 使用opencv对图像进行旋转
-
- 2.1 opencv对图像进行旋转
- 2.2 解决使用opencv旋转过程中出现的黑边问题
- 3 使用numpy实现图像的旋转
1 使用pillow对图像进行旋转
1.1 pillow对图像进行旋转
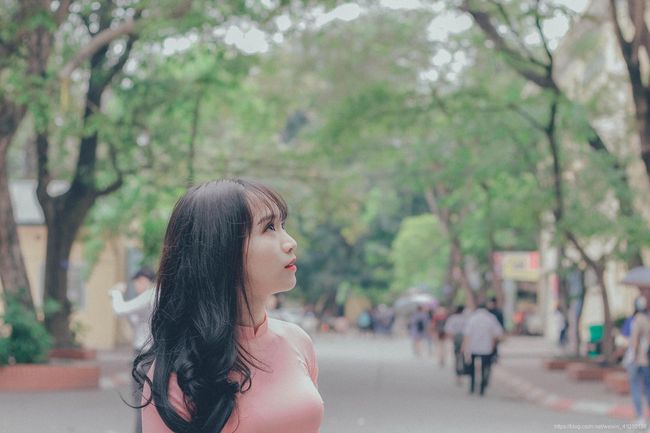
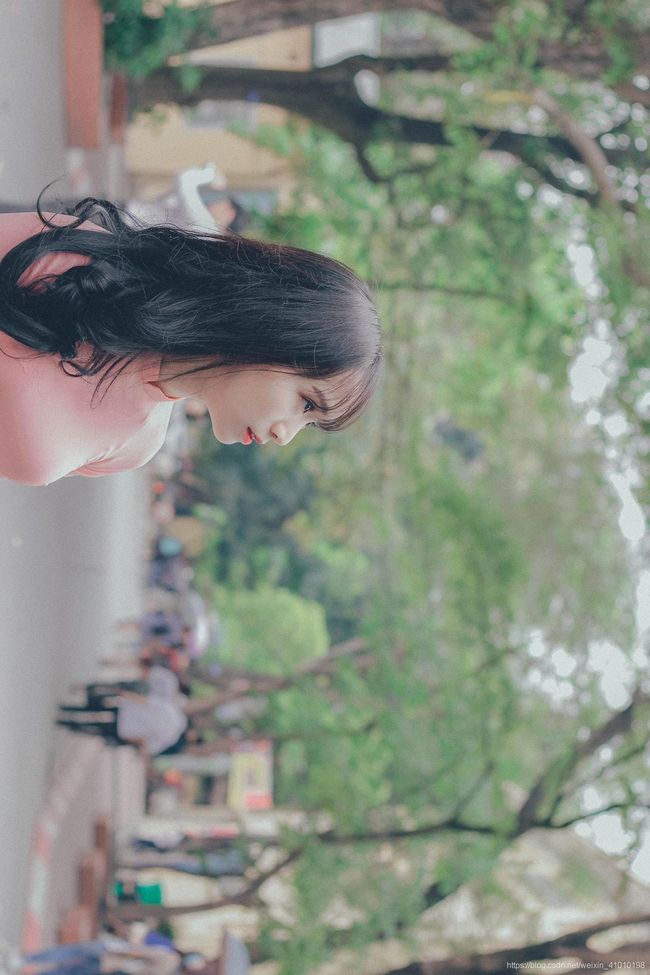
1、下面使用如下这张图作为原图grilfriend1.jpg
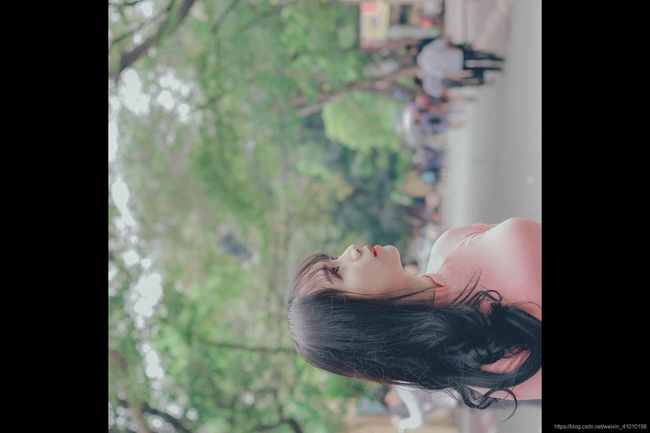
2、逆时针旋转90度
使用rotate(rotate_angle)函数使用:
- rotate_angle取值范围为:
0~360 - rotate_angle为
正值,表示逆时针旋转 - rotate_angle为
负值,表示顺时针旋转 - 通过这种方法旋转的图像,如果
宽和高不相等,则会出现黑边的情况
# 使用PIL的rotate进行旋转,如果长宽不相等,通过这种方法旋转之后会出现黑边
def pil_rotate(img_path, rotate_angel):
    image = Image.open(img_path)
    print(f"image size: {image.size}")  # image size: (1920, 1280)   w=1920  h=1280
    # 正值表示逆时针旋转90度,如果-90则表示顺时针旋转90度
    image_rotate = image.rotate(90)
    print(f"image_rotate size: {image_rotate.size}")  # image_rotate size: (1920, 1280)
    image_rotate.show()
    image_rotate.save("./rotate_girlfriend1.jpg")


if __name__ == '__main__':
    img_path = 'girlfriend1.jpg'
    pil_rotate(img_path, 90)
输出结果:
image size: (1920, 1280)
image_rotate size: (1920, 1280)
3、旋转后的结果
从上面可以发现:
- 旋转之后的图像还是
保持原来的尺寸 - 旋转之后,原始图像两侧的信息是有部分丢失的
1.2 解决使用pillow旋转过程中出现的黑边问题
其实我们要得结果是把(w=1920, h=1280)逆时针旋转90度之后,尺寸变为(w=1280, h=1920),这样才可以保证旋转后的图像不出现黑边,同时没有信息丢失,在pillow中有一个转置函数transpose可以实现这样的旋转,下面让我们来一起get一下!
1、Image.transpose(method)函数说明
Image.transpose(method)转置图像只能实现镜像flip和以90度为单位的旋转
- 参数:method镜像或旋转的方法
PIL.Image.FLIP_LEFT_RIGHT:0图像左右镜像翻转PIL.Image.FLIP_TOP_BOTTOM:1图像上下镜像翻转PIL.Image.ROTATE_90:2图像逆时针旋转90度PIL.Image.ROTATE_180:3图像逆时针旋转180度PIL.Image.ROTATE_270:4图像逆时针旋转270度PIL.Image.TRANSPOSE:5相当于先左右镜像,然后再逆时针旋转90度
- 返回值:返回原始图像镜像或旋转之后的一份拷贝copy
注意:
你可以填写旋转的变量名,也可以用指定的序号代替,效果都是一样的,例如,左右镜像翻转:transpose(PIL.Image.FILP_LEFT_RIGHT) 或 transpose(0)
2、Image.transpose(method)的具体使用
# 使用PIL的transpose实现旋转和镜像,这种方法旋转之后的图像不会出现黑边,图像的尺寸会发生变化
def pil_transpose(img_path):
    '''
    - PIL.Image.FLIP_LEFT_RIGHT:0 左右镜像翻转
	- PIL.Image.FLIP_TOP_BOTTOM:1 上下镜像翻转
	- PIL.Image.ROTATE_90:2 逆时针旋转90度
	- PIL.Image.ROTATE_180:3 逆时针旋转180度
	- PIL.Image.ROTATE_270 :4 逆时针旋转270度
	-  PIL.Image.TRANSPOSE:5 相当于像左右镜像翻转,然后再逆时针旋转90度
    :param img_path:
    :return:
    '''
    methods = [Image.FLIP_LEFT_RIGHT, Image.FLIP_TOP_BOTTOM, Image.ROTATE_90,
               Image.ROTATE_180, Image.ROTATE_270, Image.TRANSPOSE]

    image = Image.open(img_path)
    print(f"image size: {image.size}")
    for idx, method in enumerate(methods):
        print(f"method: {method}")
        transpose_img = image.transpose(method)
        print(f"After transpose method {idx} image size: {transpose_img.size}")
        transpose_img.show()
        transpose_img.save("./transpose_" + str(idx) + ".jpg")


if __name__ == '__main__':
    img_path = 'girlfriend1.jpg'
    pil_transpose(img_path)
输出结果:
image size: (1920, 1280)
method: 0
After transpose method 0 image size: (1920, 1280)
method: 1
After transpose method 1 image size: (1920, 1280)
method: 2
After transpose method 2 image size: (1280, 1920)
method: 3
After transpose method 3 image size: (1920, 1280)
method: 4
After transpose method 4 image size: (1280, 1920)
method: 5
After transpose method 5 image size: (1280, 1920)
3、输出图片结果
PIL.Image.FLIP_LEFT_RIGHT:0图

PIL.Image.FLIP_TOP_BOTTOM:1
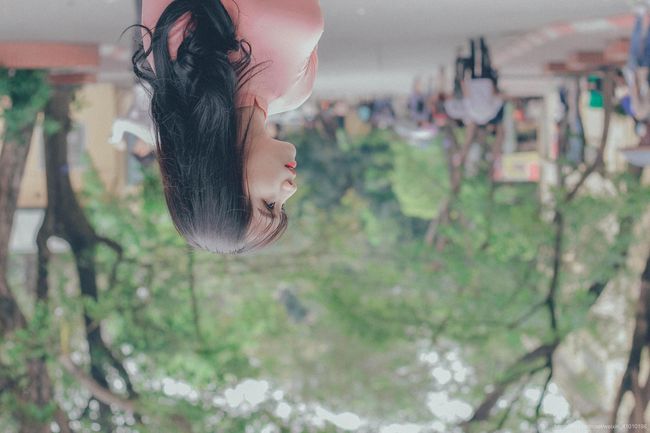
PIL.Image.ROTATE_90:2
PIL.Image.ROTATE_180:3

PIL.Image.ROTATE_270:4
PIL.Image.TRANSPOSE:5

2 使用opencv对图像进行旋转
2.1 opencv对图像进行旋转
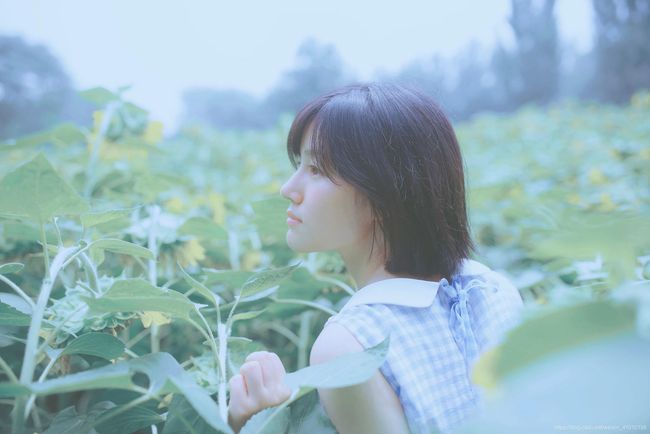
1、下面是使用这张图作为原图grilfriend2.jpg
2、使用opencv对图像进行旋转
使用如下的方法:
- 可以
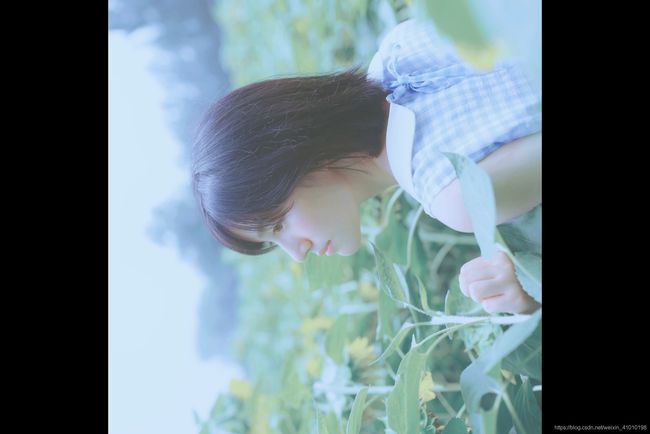
旋转任意的角度 - 如果图像的宽和高不相等,同样旋转后会出现黑边的现象
- 旋转后图像的
尺寸不发生变化,这也是出现黑边的原因 - 图像信息会部分丢失
正值表示逆时针旋转,负值表示顺时针旋转`
# 使用opencv旋转图片,这种旋转方法,当宽和高不相等时,同样会出现黑边
def opencv_rotate(img_path, rotate_angle):
    # 获取图片尺寸并计算图片中心点
    image = cv2.imread(img_path)
    print(f"image shape: {image.shape}")  # image shape: (1281, 1920, 3)
    (h, w) = image.shape[:2]
    center = (w / 2, h / 2)

    # 将图像旋转180度
    M = cv2.getRotationMatrix2D(center, rotate_angle, 1.0)
    rotated = cv2.warpAffine(image, M, (w, h))
    print(f"rotated image shape: {rotated.shape}")  # rotated image shape: (1281, 1920, 3)
    cv2.imshow("rotated", rotated)
    cv2.imwrite("./opencv_rotate_girlfriend2.jpg", rotated)
    cv2.waitKey(0)


if __name__ == '__main__':
    img_path = './girlfriend1.jpg'
    img_path2 = './girlfriend2.jpg'
    # pil_rotate(img_path, 90)
    # pil_transpose(img_path)
    opencv_rotate(img_path2, 90)
输出结果:
image shape: (1281, 1920, 3)
rotated image shape: (1281, 1920, 3)
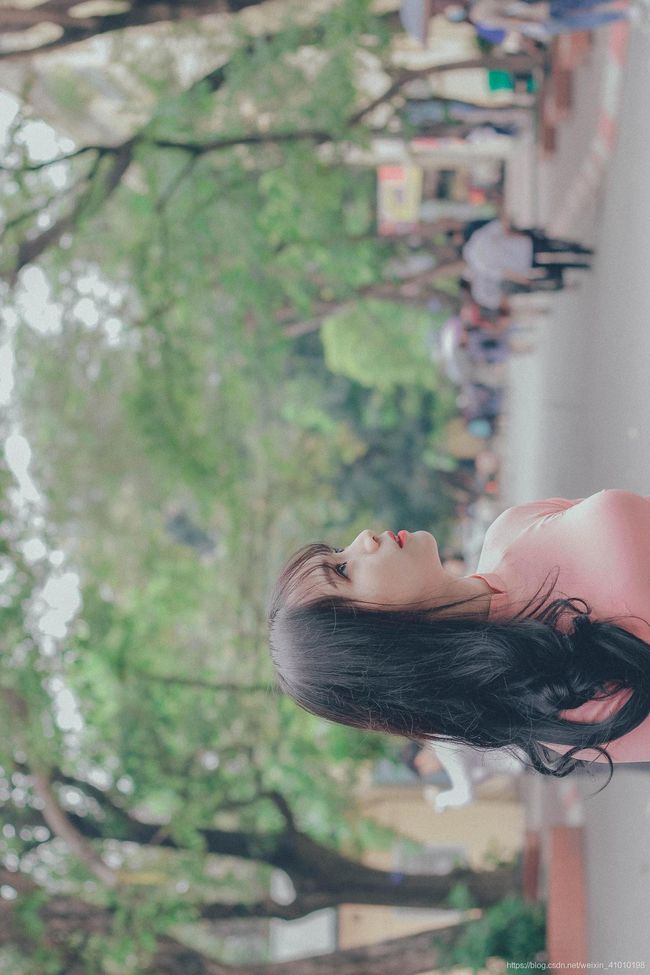
3、逆时针旋转90度后的结果
2.2 解决使用opencv旋转过程中出现的黑边问题
1、通过转置和镜像实现旋转,这种方法不会出现黑边的现象的出现:
# 使用opencv逆时针旋转90度,这种方法没有黑边
def opencv_transpose(img_path):
    '''
    cv2.flip(src, flipCode) 其中 flipCode取值 1,0,-1,分别对应着水平翻转、垂直翻转、水平垂直翻转
    :param img_path:
    :return:
    '''
    image = cv2.imread(img_path)
    print(f"image shape: {image.shape}")  # image shape: (1281, 1920, 3)
    transpose_img = cv2.transpose(image)
    print(f"transpose image shape: {transpose_img.shape}")  # transpose image shape: (1920, 1281, 3)
    image_rotate_90 = cv2.flip(transpose_img, 0)
    print(f"rotate image shape: {image_rotate_90.shape}")  # rotate image shape: (1920, 1281, 3)
    cv2.imshow("rotate", image_rotate_90)
    cv2.imwrite("opencv_rotate_90_grilfrind2.jpg", image_rotate_90)
    cv2.waitKey(0)
    return image_rotate_90


if __name__ == '__main__':
    img_path = './girlfriend1.jpg'
    img_path2 = './girlfriend2.jpg'
    opencv_transpose(img_path2)
输出结果:
image shape: (1281, 1920, 3)
transpose image shape: (1920, 1281, 3)
rotate image shape: (1920, 1281, 3)
2、逆时针旋转90度后的图片

3 使用numpy实现图像的旋转
1、numpy.rot90函数说明
numpy实现旋转一般是使用numpy.rot90对图像进行90度倍数的旋转操作
官方介绍:
numpy.rot90(m, k=1, axes=(0, 1))[source]

Rotate an array by 90 degrees in the plane specified by axes.

Rotation direction is from the first towards the second axis.

k: Number of times the array is rotated by 90 degrees.
关键参数k表示旋转90度的倍数:
- k取
正值1、2、3,分别表示逆时针旋转90度、180度、270度 - k取
负数-1、-2、-3,分别表示顺时针旋转90度、180度、270度
2、具体使用
# 使用numpy把图片逆时针旋转90度,没有黑边
def numpy_rotate(img_path):
    '''
    * k的取值一般为1、2、3,分别表示`顺时针`旋转90度、180度、270度;
    * k也可以取负数-1、-2、-3。k取正数表示`逆时针`旋转,取负数表示顺时针旋转。
    :param img_path:
    :return:
    '''
    image = cv2.imread(img_path)
    print(f"image shape: {image.shape}")
    # np.rot90(img, 1) 逆时针旋转90度
    image_rotate_90 = np.rot90(image, 1)
    print(f"image rotate shape: {image_rotate_90.shape}")
    cv2.imshow("rotate", image_rotate_90)
    cv2.imwrite("numpy_rotate_90_girlfriend2.jpg", image_rotate_90)
    cv2.waitKey(0)
    return image_rotate_90


if __name__ == '__main__':
    img_path = './girlfriend1.jpg'
    img_path2 = './girlfriend2.jpg'
    numpy_rotate(img_path2)
输出结果:
image shape: (1281, 1920, 3)
image rotate shape: (1920, 1281, 3)
3、旋转后的图片结果

参考1:https://blog.csdn.net/uncle_ll/article/details/106855945 # 好文
参考1:https://blog.csdn.net/qq_37674858/article/details/80708393
参考1:https://www.jianshu.com/p/40206f0a6658