爬虫之scrapy中间件的使用
爬虫之scrapy中间件的使用
1. scrapy中间件的分类和作用
1.1 scrapy中间件的分类
根据scrapy运行流程中所在位置不同分为:【中间件离哪个模块近就称为什么中间件】
- 下载中间件
- 爬虫中间件
1.2 scrapy中间的作用:预处理request和response对象
- 对header以及cookie进行更换和处理
- 使用代理ip等
- 对请求进行定制化操作,
但在scrapy默认的情况下 两种中间件都在middlewares.py一个文件中 【平时主要用下载中间件】
爬虫中间件使用方法和下载中间件相同,且功能重复,通常使用下载中间件
2. 下载中间件的使用方法:
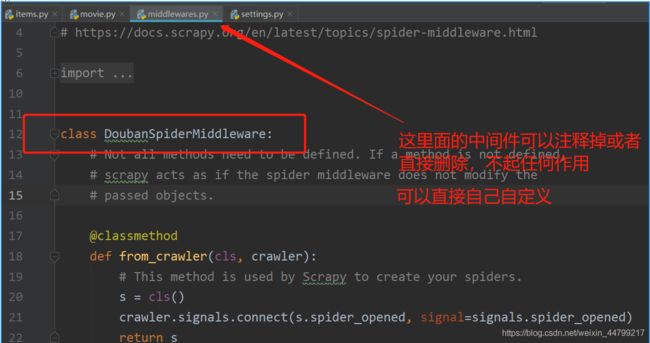
通过下载中间件来学习如何使用中间件 编写一个Downloader Middlewares和我们编写一个pipeline一样,定义一个类,然后在setting中开启
Downloader Middlewares默认的方法:
-
process_request(self, request, spider):【此方法是用的最多的】
- 当每个request通过下载中间件时,该方法被调用。
- 返回None值:没有return也是返回None,该request对象传递给下载器,或通过引擎传递给其他权重低的process_request方法 【如果所有的下载器中间件都返回为None,则请求最终被交给下载器处理】
- 返回Response对象:不再请求,把response返回给引擎 【如果返回为请求,则将请求交给调度器】
- 返回Request对象:把request对象通过引擎交给调度器,此时将不通过其他权重低的process_request方法 【将响应对象交给spider进行解析】
-
process_response(self, request, response, spider):
- 当下载器完成http请求,传递响应给引擎的时候调用
- 返回Resposne:通过引擎交给爬虫处理或交给权重更低的其他下载中间件的process_response方法 【如果返回为请求,则将请求交给调度器】
- 返回Request对象:通过引擎交给调取器继续请求,此时将不通过其他权重低的process_request方法 【将响应对象交给spider进行解析】
-
在settings.py中配置开启中间件,权重值越小越优先执行 【同管道的注册使用】
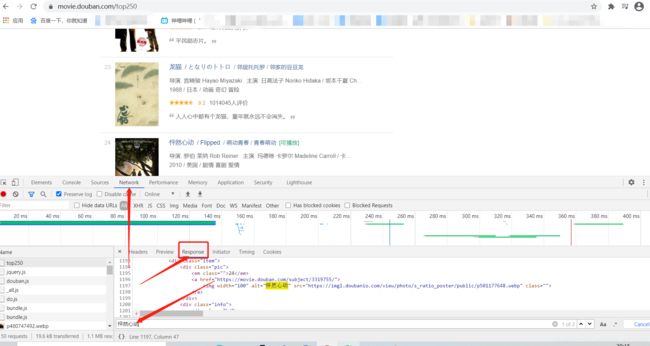
运行爬虫观察现象
此时示例代码:
import scrapy


class MovieSpider(scrapy.Spider):
    name = 'movie'
    allowed_domains = ['douban.com']
    start_urls = ['https://movie.douban.com/top250']

    def parse(self, response):
        li = response.xpath('//*[@class="info"]')
        print(len(li))
运行效果:
解决这个错误:
再次运行效果:
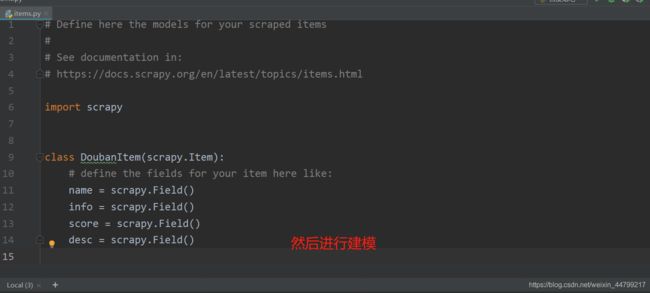
修改爬虫代码
示例代码:
import scrapy
from douban.items import DoubanItem

class MovieSpider(scrapy.Spider):
    name = 'movie'
    allowed_domains = ['douban.com']
    start_urls = ['https://movie.douban.com/top250']

    def parse(self, response):
        el_list = response.xpath('//*[@class="info"]')
        print(len(el_list))
        for el in el_list:
            item = DoubanItem()

            item['name'] = el.xpath('./div[1]/a/span[1]/text()').extract_first()
            item['score'] = el.xpath('./div[2]/div/span[2]/text()').extract_first()
            #  ......
            print(item)

        url = response.xpath('//span[@class="next"]/a/@href').extract_first()
        if url != None:
            url = response.urljoin(url)
            yield scrapy.Request(
                url=url
            )
运行效果:
3. 定义实现随机User-Agent的下载中间件
3.1 在middlewares.py中完善代码
import random
from Tencent.settings import USER_AGENTS_LIST # 注意导入路径,请忽视pycharm的错误提示

class UserAgentMiddleware(object):
    def process_request(self, request, spider):
        user_agent = random.choice(USER_AGENTS_LIST)
        request.headers['User-Agent'] = user_agent
        # 不写return

class CheckUA:
    def process_response(self,request,response,spider):
        print(request.headers['User-Agent'])
        return response # 不能少!
3.2 在settings中设置开启自定义的下载中间件,设置方法同管道
DOWNLOADER_MIDDLEWARES = {
   'Tencent.middlewares.UserAgentMiddleware': 543, # 543是权重值
   'Tencent.middlewares.CheckUA': 600, # 先执行543权重的中间件,再执行600的中间件
}
3.3 在settings中添加UA的列表
USER_AGENTS_LIST = [
    "Mozilla/5.0 (compatible; MSIE 9.0; Windows NT 6.1; Win64; x64; Trident/5.0; .NET CLR 3.5.30729; .NET CLR 3.0.30729; .NET CLR 2.0.50727; Media Center PC 6.0)",
    "Mozilla/5.0 (compatible; MSIE 8.0; Windows NT 6.0; Trident/4.0; WOW64; Trident/4.0; SLCC2; .NET CLR 2.0.50727; .NET CLR 3.5.30729; .NET CLR 3.0.30729; .NET CLR 1.0.3705; .NET CLR 1.1.4322)",
    "Mozilla/4.0 (compatible; MSIE 7.0b; Windows NT 5.2; .NET CLR 1.1.4322; .NET CLR 2.0.50727; InfoPath.2; .NET CLR 3.0.04506.30)",
    "Mozilla/5.0 (Windows; U; Windows NT 5.1; zh-CN) AppleWebKit/523.15 (KHTML, like Gecko, Safari/419.3) Arora/0.3 (Change: 287 c9dfb30)",
    "Mozilla/5.0 (X11; U; Linux; en-US) AppleWebKit/527+ (KHTML, like Gecko, Safari/419.3) Arora/0.6",
    "Mozilla/5.0 (Windows; U; Windows NT 5.1; en-US; rv:1.8.1.2pre) Gecko/20070215 K-Ninja/2.1.1",
    "Mozilla/5.0 (Windows; U; Windows NT 5.1; zh-CN; rv:1.9) Gecko/20080705 Firefox/3.0 Kapiko/3.0",
    "Mozilla/5.0 (X11; Linux i686; U;) Gecko/20070322 Kazehakase/0.4.5"
]
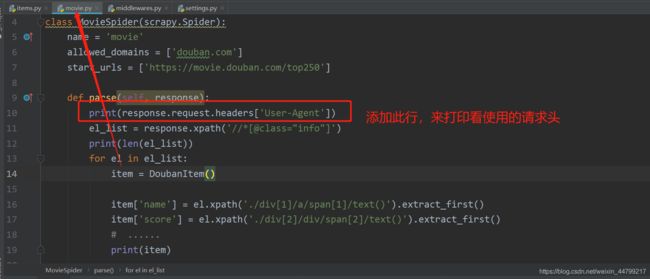
详细思路分析:
写在setting中:
示例代码:
from scrapy import signals
import random
from douban.settings import USER_AGENTS_LIST

# useful for handling different item types with a single interface
from itemadapter import is_item, ItemAdapter

#  定义一个中间件类
class RandomUserAgent(object):

    def process_request(self, request, spider):
        # print(request.headers['User-Agent'])
        pass
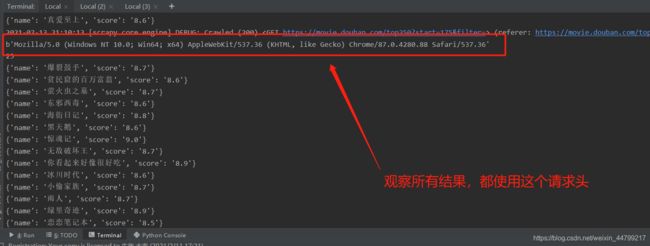
运行效果:
修改完善代码:
示例代码:
from scrapy import signals
import random
from douban.settings import USER_AGENTS_LIST

# useful for handling different item types with a single interface
from itemadapter import is_item, ItemAdapter

#  定义一个中间件类
class RandomUserAgent(object):

    def process_request(self, request, spider):
        # print(request.headers['User-Agent'])
        ua = random.choice(USER_AGENTS_LIST)
        request.headers['User-Agent'] = ua
运行效果:
4. 代理ip的使用
4.1 思路分析
- 代理添加的位置:request.meta中增加
proxy字段 - 获取一个代理ip,赋值给
request.meta['proxy']- 代理池中随机选择代理ip
- 代理ip的webapi发送请求获取一个代理ip
4.2 具体实现
免费代理ip:
class ProxyMiddleware(object):
    def process_request(self,request,spider):
        # proxies可以在settings.py中,也可以来源于代理ip的webapi
        # proxy = random.choice(proxies)

        # 免费的会失效,报 111 connection refused 信息!重找一个代理ip再试
        proxy = 'https://1.71.188.37:3128'

        request.meta['proxy'] = proxy
        return None # 可以不写return
收费代理ip:
# 人民币玩家的代码(使用abuyun提供的代理ip)
import base64

# 代理隧道验证信息  这个是在那个网站上申请的
proxyServer = 'http://proxy.abuyun.com:9010' # 收费的代理ip服务器地址,这里是abuyun
proxyUser = 用户名
proxyPass = 密码
proxyAuth = "Basic " + base64.b64encode(proxyUser + ":" + proxyPass)

class ProxyMiddleware(object):
    def process_request(self, request, spider):
        # 设置代理
        request.meta["proxy"] = proxyServer
        # 设置认证
        request.headers["Proxy-Authorization"] = proxyAuth
4.3 检测代理ip是否可用
在使用了代理ip的情况下可以在下载中间件的process_response()方法中处理代理ip的使用情况,如果该代理ip不能使用可以替换其他代理ip
class ProxyMiddleware(object):
    ......
    def process_response(self, request, response, spider):
        if response.status != '200':
            request.dont_filter = True # 重新发送的请求对象能够再次进入队列
            return requst
在settings.py中开启该中间件
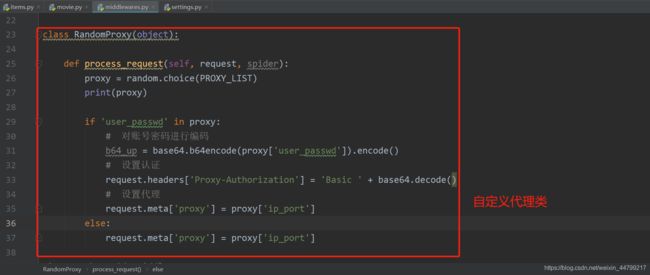
示例代码:
from scrapy import signals
import random
from douban.settings import USER_AGENTS_LIST, PROXY_LIST
import base64
class RandomProxy(object):

    def process_request(self, request, spider):
        proxy = random.choice(PROXY_LIST)
        print(proxy)

        if 'user_passwd' in proxy:
            #  对账号密码进行编码
            b64_up = base64.b64encode(proxy['user_passwd']).encode()
            #  设置认证
            request.headers['Proxy-Authorization'] = 'Basic ' + base64.decode()
            #  设置代理
            request.meta['proxy'] = proxy['ip_port']
        else:
            request.meta['proxy'] = proxy['ip_port']
5. 在中间件中使用selenium
以github登陆为例
5.1 完成爬虫代码
import scrapy

class Login4Spider(scrapy.Spider):
    name = 'login4'
    allowed_domains = ['github.com']
    start_urls = ['https://github.com/1596930226'] # 直接对验证的url发送请求

    def parse(self, response):
        with open('check.html', 'w') as f:
            f.write(response.body.decode())
5.2 在middlewares.py中使用selenium
import time
from selenium import webdriver


def getCookies():
    # 使用selenium模拟登陆,获取并返回cookie
    username = input('输入github账号:')
    password = input('输入github密码:')
    options = webdriver.ChromeOptions()
    options.add_argument('--headless')
    options.add_argument('--disable-gpu')
    driver = webdriver.Chrome('/home/worker/Desktop/driver/chromedriver',
                              chrome_options=options)
    driver.get('https://github.com/login')
    time.sleep(1)
    driver.find_element_by_xpath('//*[@id="login_field"]').send_keys(username)
    time.sleep(1)
    driver.find_element_by_xpath('//*[@id="password"]').send_keys(password)
    time.sleep(1)
    driver.find_element_by_xpath('//*[@id="login"]/form/div[3]/input[3]').click()
    time.sleep(2)
    cookies_dict = {cookie['name']: cookie['value'] for cookie in driver.get_cookies()}
    driver.quit()
    return cookies_dict

class LoginDownloaderMiddleware(object):

    def process_request(self, request, spider):
        cookies_dict = getCookies()
        print(cookies_dict)
        request.cookies = cookies_dict # 对请求对象的cookies属性进行替换
配置文件中设置开启该中间件后,运行爬虫可以在日志信息中看到selenium相关内容
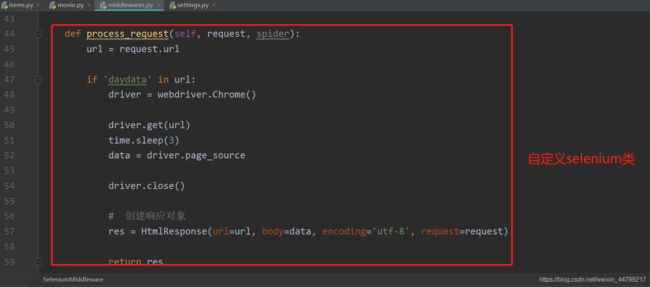
示例代码:
import time
from selenium import webdriver
from scrapy.http import HtmlResponse
class SeleniumMiddleware(object):

    def process_request(self, request, spider):
        url = request.url

        if 'daydata' in url:
            driver = webdriver.Chrome()

            driver.get(url)
            time.sleep(3)
            data = driver.page_source

            driver.close()

            #  创建响应对象
            res = HtmlResponse(url=url, body=data, encoding='utf-8', request=request)

            return res
小结
中间件的使用:
-
完善中间件代码:
-
process_request(self, request, spider):
- 当每个request通过下载中间件时,该方法被调用。
- 返回None值:没有return也是返回None,该request对象传递给下载器,或通过引擎传递给其他权重低的process_request方法
- 返回Response对象:不再请求,把response返回给引擎
- 返回Request对象:把request对象通过引擎交给调度器,此时将不通过其他权重低的process_request方法
-
process_response(self, request, response, spider):
- 当下载器完成http请求,传递响应给引擎的时候调用
- 返回Resposne:通过引擎交给爬虫处理或交给权重更低的其他下载中间件的process_response方法
- 返回Request对象:通过引擎交给调取器继续请求,此时将不通过其他权重低的process_request方法
-
-
需要在settings.py中开启中间件 DOWNLOADER_MIDDLEWARES = { 'myspider.middlewares.UserAgentMiddleware': 543, }
