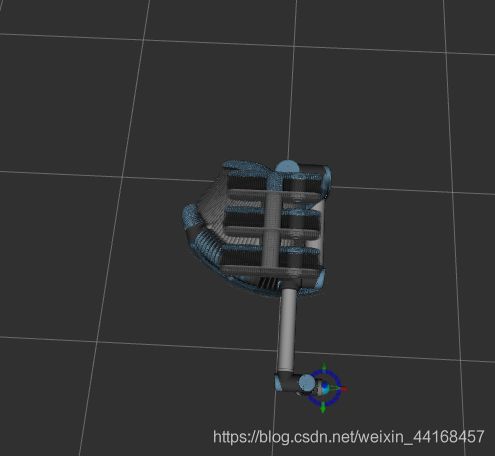
以下引用:摘自两个月前我的笔记
但是我已经都不记得啥了,加上我当时仿真用的是UR5,但是我现在仅有一台UR10,你可以先将前言部分划过,往下看。
我本篇blog主要内容是:ROS下Rviz联合Momeit实现UR10机器人的直线和圆弧轨迹规划
如果你在实现过程出现bug,可以去看我上边的笔记摘抄,应该有大部分bug的处理方法,希望今天我不会再一次处理他们。
2020/12月轨迹规划学习笔记
一、直线轨迹规划的实现
1.思路:通过moveit的官方文档,实现ur5机器人在rviz+moveit下的笛卡尔空间的直线和圆弧轨迹规划,我想做平面的
2.运行panda机器人的c++文件
roslaunch panda_moveit_config demo.launch
roslaunch moveit_tutorials move_group_interface_tutorial.launch
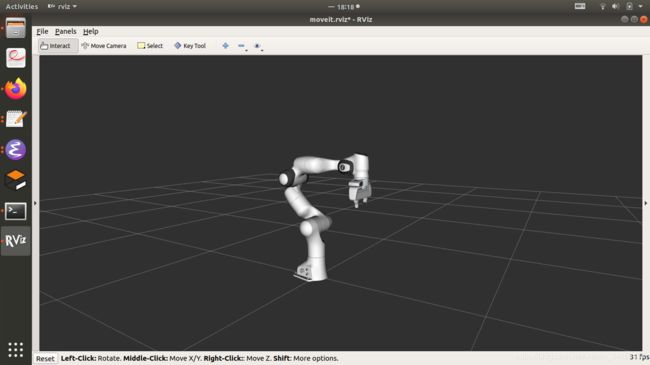
3.更改.cpp文件move_group_interface_tutorial.cpp
①中间若是目标节点不在工作空间,会出现轨迹规划失败
②四元数的定义
个四元数可以表示为q = w + xi + yj + zk, 给定一个单位长度的旋转轴(x, y, z)和一个角度θ。对应的四元数为:q=((x,y,z)sinθ2, cosθ2)
③这个.cpp文件实现蛮多功能的呢
PTP(两种实现方法)→路径限制的PTP →cartesian 路径规划 →抓取或者松开物体 →避障碍物规划
4.根据panda的c++控制文件写一个ur5的
新建文件路径为ws_moveit/src/moveit_tutorials/doc/move_group_interface
①先把ur5_e_moveit_config功能包弄过来,看看是不是可以正常运行
报错:No such file or directory: /opt/ros/melodic/share/ur_description/urdf/ur5.urdf.xacro
原因:之前的share处的ur5描述文件被我更改过
解决:cd /opt/ros/melodic/share/
sudo rm -rf ur_description/
sudo cp -rf ~/catkin_UR/src/universal_robot/ur_description/* /opt/ros/melodic/share
(注意这行代码是把ur_description下的文件夹复制到share路径下,所以我稍微手动处理了一部分)
备注:这个部位我应该误删除了share下的文件,导致出现以下报错(catkin build 失败)
CMake Error at /opt/ros/melodic/share/kdl_parser/cmake/kdl_parserConfig.cmake:197 (find_package):
Could not find a package configuration file provided by “urdf” with any of
the following names:urdfConfig.cmake urdf-config.cmake Add the installation prefix of "urdf" to CMAKE_PREFIX_PATH or set
“urdf_DIR” to a directory containing one of the above files. If
“urdf” provides a separate development package or SDK, be sure it
has been installed.解决:由于这个ROS我越处理出现的问题越多,我最后决定重装ROS正好温习一下(微笑) 会把安装ROS以及各个插件的流程放在“二、”中
②上文中①我把/opt/ros/melodic改出问题来了,所以重新装了ros和moveit 运行ur5的demo.launch
要先确保安装了ur机器人,这样share文件夹下可以找到ur_description②添加c++文件,用moveit控制ur5做直线轨迹规划
添加ws_moveit/src/moveit_tutorials/doc/move_group_interface/launch/move_group_interface_ur5.launch
添加ws_moveit/src/moveit_tutorials/doc/move_group_interface/src/move_group_interface_ur5.cpp
修改ws_moveit/src/moveit_tutorials/doc/move_group_interface/Cmake.lists
在结尾加上三行 基于.cpp生成devel和build下的可执行文件 catkin build 运行c++的可执行文件:
roslaunch ur5_moveit_config demo.launch
二、卸载和安装ROS
1.卸载 sudo apt-get remove ros-*
2.安装 1)安装ROS设置源: sudo sh -c ‘. /etc/lsb-release && echo “deb
http://mirrors.ustc.edu.cn/ros/ubuntu/ $DISTRIB_CODENAME main” >
/etc/apt/sources.list.d/ros-latest.list’ 设置秘钥:sudo apt-key adv
–keyserver keyserver.ubuntu.com --recv-keys F42ED6FBAB17C654 安装ROS: sudo apt-get update sudo apt-get install ros-melodic-desktop-full
初始化rosdep: sudo apt install python-rosdep2 sudo rosdep init
如果这个位置还是报错打不开网页 尝试: #打开hosts文件 sudo gedit /etc/hosts #在文件末尾添加
151.101.84.133 raw.githubusercontent.com #保存后退出再尝试 rosdep update 安装rosinstall: sudo apt-get install python-rosinstall
python-rosinstall-generator python-wstool build-essential添加环境配置 echo
“source /opt/ros/melodic/setup.bash” >> ~/.bashrc source ~/.bashrc
备注:注意要是想打开bashrc 命令为 gedit ~/.bashrc 更改之后要生效需要source ~/.bashrc sudo
apt-get install ros-melodic-desktop 测试:roscore 2)安装moveit
安装catkin的build系统: sudo apt-get install ros-melodic-catkin
python-catkin-tools 安装moveit: sudo apt install ros-melodic-moveit
打开你的工作空间: cd ~/ws_moveit/src rosdep install -y --from-paths .
–ignore-src --rosdistro melodiccd ~/ws_moveit catkin config --extend /opt/ros/${ROS_DISTRO}
–cmake-args -DCMAKE_BUILD_TYPE=Release catkin build
1.1先下载catkin_UR功能包和ws_moveit功能包(我希望你是一个懂得很多道理的人儿了,比如怎么下载这两个功能包)
1.2检测ws_moveit功能包是否正常
roslaunch panda_moveit_config demo.launch
roslaunch moveit_tutorials move_group_interface_tutorial.launch
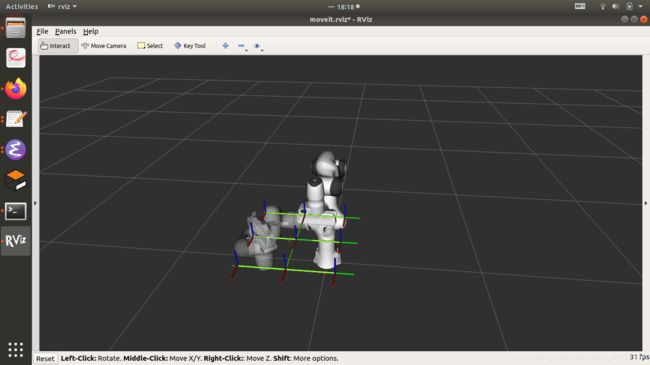
我这个代码我改过(所以我的运行结果是写王字),我把他原来的官方教程网址放在下边,你要是还没接触,并且以后要用moveit的话可以先学一下
http://docs.ros.org/en/melodic/api/moveit_tutorials/html/doc
1.3.添加UR10机器人功能包
这个地方我们用了两个官方教程
1)UR功能包,使用rviz的面板控制ur机器人的运动
2)moveit功能包,提供了C++和Python借口控制panda机器人做轨迹规划
因为目标是实现moveit的c++借口控制UR10机器人实现直线和圆弧轨迹规划
所以进行如下操作
①要先确保安装了ur机器人功能包,这样share文件夹下可以找到ur_description
将ur10_moveit_config复制到ws_moveit/src下
②添加c++文件,用moveit控制ur10做直线轨迹规划
添加ws_moveit/src/moveit_tutorials/doc/move_group_interface/launch/move_group_interface_ur10.launch
<launch>
<node name="move_group_interface_ur10" pkg="moveit_tutorials" type="move_group_interface_ur10" respawn="false" output="screen">
</node>
</launch>
③添加ws_moveit/src/moveit_tutorials/doc/move_group_interface/src/move_group_interface_ur10.cpp
#include
#include
#include
#include
#include
#include
#include
int main(int argc, char** argv)
{
ros::init(argc, argv, "move_group_interface_ur10");
ros::NodeHandle node_handle;
ros::AsyncSpinner spinner(1);
spinner.start();
//initialize
static const std::string PLANNING_GROUP = "manipulator";
moveit::planning_interface::MoveGroupInterface move_group(PLANNING_GROUP);
moveit::planning_interface::PlanningSceneInterface planning_scene_interface;
const robot_state::JointModelGroup* joint_model_group =
move_group.getCurrentState()->getJointModelGroup(PLANNING_GROUP);
// Visualization
// ^^^^^^^^^^^^^
namespace rvt = rviz_visual_tools;
moveit_visual_tools::MoveItVisualTools visual_tools("fixed_base");
visual_tools.deleteAllMarkers();
visual_tools.loadRemoteControl();
Eigen::Isometry3d text_pose = Eigen::Isometry3d::Identity();
text_pose.translation().z() = 1.75;
visual_tools.publishText(text_pose, "MoveGroupInterface Demo", rvt::WHITE, rvt::XLARGE);
// Batch publishing is used to reduce the number of messages being sent to RViz for large visualizations
visual_tools.trigger();
// Getting Basic Information
// ^^^^^^^^^^^^^^^^^^^^^^^^^
//
// We can print the name of the reference frame for this robot.
ROS_INFO_NAMED("tutorial", "Planning frame: %s", move_group.getPlanningFrame().c_str());
// We can also print the name of the end-effector link for this group.
ROS_INFO_NAMED("tutorial", "End effector link: %s", move_group.getEndEffectorLink().c_str());
// We can get a list of all the groups in the robot:
ROS_INFO_NAMED("tutorial", "Available Planning Groups:");
std::copy(move_group.getJointModelGroupNames().begin(), move_group.getJointModelGroupNames().end(),
std::ostream_iterator<std::string>(std::cout, ", "));
// Start the demo
// ^^^^^^^^^^^^^^^^^^^^^^^^^
visual_tools.prompt("Press 'next' in the RvizVisualToolsGui window to start the demo");
moveit::core::RobotStatePtr current_state = move_group.getCurrentState();
cartesian path
robot_state::RobotState start_state(*move_group.getCurrentState());
geometry_msgs::Pose start_pose2;
/*start_pose2.orientation.w= 1.0;
start_pose2.position.x = 0.81724;
start_pose2.position.y = 0.109157;
start_pose2.position.z = -0.005;*/
start_pose2.orientation.w= 1.0;
start_pose2.position.x = 0.67253;
start_pose2.position.y = 0.10914;
start_pose2.position.z = 0.5;
start_state.setFromIK(joint_model_group, start_pose2);
move_group.setStartState(start_state);
std::vector<geometry_msgs::Pose> waypoints;
//waypoints.push_back(start_pose2);
geometry_msgs::Pose target_pose3 = start_pose2;
/code core
target_pose3.orientation.w= 1.0;
target_pose3.position.x = 0.67253;
target_pose3.position.y = 0.10914;
target_pose3.position.z =0.5;
waypoints.push_back(target_pose3);// 1
// Cartesian motions are frequently needed to be slower for actions such as approach and retreat
// grasp motions. Here we demonstrate how to reduce the speed of the robot arm via a scaling factor
// of the maxiumum speed of each joint. Note this is not the speed of the end effector point.
move_group.setMaxVelocityScalingFactor(0.1);
// We want the Cartesian path to be interpolated at a resolution of 1 cm
// which is why we will specify 0.01 as the max step in Cartesian
// translation. We will specify the jump threshold as 0.0, effectively disabling it.
// Warning - disabling the jump threshold while operating real hardware can cause
// large unpredictable motions of redundant joints and could be a safety issue
moveit_msgs::RobotTrajectory trajectory;
const double jump_threshold = 0.0;
const double eef_step = 0.01;
double fraction = move_group.computeCartesianPath(waypoints, eef_step, jump_threshold, trajectory);
ROS_INFO_NAMED("tutorial", "Visualizing plan 4 (Cartesian path) (%.2f%% acheived)", fraction * 100.0);
// Visualize the plan in RViz
// visual_tools.deleteAllMarkers();
visual_tools.publishText(text_pose, "Joint Space Goal", rvt::WHITE, rvt::XLARGE);
visual_tools.publishPath(waypoints, rvt::LIME_GREEN, rvt::SMALL);
for (std::size_t i = 0; i < waypoints.size(); ++i)
visual_tools.publishAxisLabeled(waypoints[i], "pt" + std::to_string(i), rvt::SMALL);
visual_tools.trigger();
visual_tools.prompt("Press 'next' in the RvizVisualToolsGui window to continue the demo");
// END_TUTORIAL
ros::shutdown();
return 0;
}
④修改ws_moveit/src/moveit_tutorials/doc/move_group_interface/Cmake.lists 在结尾加上三行 基于.cpp生成devel和build下的可执行文件
add_executable(move_group_interface_ur10 src/move_group_interface_ur10.cpp)
target_link_libraries(move_group_interface_ur10 ${
catkin_LIBRARIES} ${
Boost_LIBRARIES})
install(TARGETS move_group_interface_ur10 DESTINATION ${
CATKIN_PACKAGE_BIN_DESTINATION})
install(DIRECTORY launch DESTINATION ${
CATKIN_PACKAGE_SHARE_DESTINATION})
⑤终端输入
cd ~/ws_moveit
source ./devel/setup.bash
catkin build
⑥以上搭建完通信了
检验一下
cd ~/ws_moveit
source ./devel/setup.bash
roslaunch ur10_moveit_config demo.launch
打开一个新的tab
cd ~/ws_moveit
source ./devel/setup.bash
roslaunch moveit_tutorials move_group_interface_tutorial.launch
修改ws_moveit/src/moveit_tutorials/doc/move_group_interface/src/move_group_interface_ur10.cpp代码如下
#include
#include
#include
#include
#include
#include
#include
int main(int argc, char** argv)
{
ros::init(argc, argv, "move_group_interface_ur10");
ros::NodeHandle node_handle;
ros::AsyncSpinner spinner(1);
spinner.start();
//initialize
static const std::string PLANNING_GROUP = "manipulator";
moveit::planning_interface::MoveGroupInterface move_group(PLANNING_GROUP);
moveit::planning_interface::PlanningSceneInterface planning_scene_interface;
const robot_state::JointModelGroup* joint_model_group =
move_group.getCurrentState()->getJointModelGroup(PLANNING_GROUP);
// Visualization
// ^^^^^^^^^^^^^
namespace rvt = rviz_visual_tools;
moveit_visual_tools::MoveItVisualTools visual_tools("fixed_base");
visual_tools.deleteAllMarkers();
visual_tools.loadRemoteControl();
Eigen::Isometry3d text_pose = Eigen::Isometry3d::Identity();
text_pose.translation().z() = 1.75;
visual_tools.publishText(text_pose, "MoveGroupInterface Demo", rvt::WHITE, rvt::XLARGE);
// Batch publishing is used to reduce the number of messages being sent to RViz for large visualizations
visual_tools.trigger();
// // Getting Basic Information
// ^^^^^^^^^^^^^^^^^^^^^^^^^
//
// We can print the name of the reference frame for this robot.
ROS_INFO_NAMED("tutorial", "Planning frame: %s", move_group.getPlanningFrame().c_str());
// We can also print the name of the end-effector link for this group.
ROS_INFO_NAMED("tutorial", "End effector link: %s", move_group.getEndEffectorLink().c_str());
// We can get a list of all the groups in the robot:
ROS_INFO_NAMED("tutorial", "Available Planning Groups:");
std::copy(move_group.getJointModelGroupNames().begin(), move_group.getJointModelGroupNames().end(),
std::ostream_iterator<std::string>(std::cout, ", "));
// Start the demo
// ^^^^^^^^^^^^^^^^^^^^^^^^^
visual_tools.prompt("Press 'next' in the RvizVisualToolsGui window to start the demo");
moveit::core::RobotStatePtr current_state = move_group.getCurrentState();
cartesian path
robot_state::RobotState start_state(*move_group.getCurrentState());
geometry_msgs::Pose start_pose2;
start_pose2.orientation.w = 1.0;
start_pose2.position.x = 0.35;
start_pose2.position.y = -0.05;
start_pose2.position.z = 0.6;
start_state.setFromIK(joint_model_group, start_pose2);
move_group.setStartState(start_state);
std::vector<geometry_msgs::Pose> waypoints;
waypoints.push_back(start_pose2);
geometry_msgs::Pose target_pose3 = start_pose2;
/code core
target_pose3.position.y += 0.2;
waypoints.push_back(target_pose3); // 1
target_pose3.position.y -= 0.4;
waypoints.push_back(target_pose3); //2
target_pose3.position.y += 0.2;
waypoints.push_back(target_pose3); // 3
target_pose3.position.x += 0.2;
waypoints.push_back(target_pose3); // 4
target_pose3.position.y += 0.2;
waypoints.push_back(target_pose3); // 5
target_pose3.position.y -= 0.4;
waypoints.push_back(target_pose3); //6
target_pose3.position.y += 0.2;
waypoints.push_back(target_pose3); //7
target_pose3.position.x += 0.2;
waypoints.push_back(target_pose3); // 8
target_pose3.position.y += 0.2;
waypoints.push_back(target_pose3); // 9
target_pose3.position.y -= 0.4;
waypoints.push_back(target_pose3); //10
target_pose3.position.y += 0.2;
waypoints.push_back(target_pose3); //11
// Cartesian motions are frequently needed to be slower for actions such as approach and retreat
// grasp motions. Here we demonstrate how to reduce the speed of the robot arm via a scaling factor
// of the maxiumum speed of each joint. Note this is not the speed of the end effector point.
move_group.setMaxVelocityScalingFactor(0.1);
// We want the Cartesian path to be interpolated at a resolution of 1 cm
// which is why we will specify 0.01 as the max step in Cartesian
// translation. We will specify the jump threshold as 0.0, effectively disabling it.
// Warning - disabling the jump threshold while operating real hardware can cause
// large unpredictable motions of redundant joints and could be a safety issue
moveit_msgs::RobotTrajectory trajectory;
const double jump_threshold = 0.0;
const double eef_step = 0.01;
double fraction = move_group.computeCartesianPath(waypoints, eef_step, jump_threshold, trajectory);
ROS_INFO_NAMED("tutorial", "Visualizing plan 4 (Cartesian path) (%.2f%% acheived)", fraction * 100.0);
// Visualize the plan in RViz
visual_tools.deleteAllMarkers();
visual_tools.publishText(text_pose, "Joint Space Goal", rvt::WHITE, rvt::XLARGE);
visual_tools.publishPath(waypoints, rvt::LIME_GREEN, rvt::SMALL);
for (std::size_t i = 0; i < waypoints.size(); ++i)
visual_tools.publishAxisLabeled(waypoints[i], "pt" + std::to_string(i), rvt::SMALL);
visual_tools.trigger();
visual_tools.prompt("Press 'next' in the RvizVisualToolsGui window to continue the demo");
// END_TUTORIAL
ros::shutdown();
return 0;
}
(这个坑我明天会填的,会的~)