入坑区块链 - java简单模拟实现PoW(工作量证明机制)
入坑区块链 - java简单模拟实现PoW
-
- 什么是PoW?
- 工作流程
- java简单实现
什么是PoW?
PoW工作量证明机制(Proof Of Work) :系统出一道难于计算易于验证的证明题,证明者提交答案,任何人通过验证这个答案就可以获得奖励。
所谓的证明题一般使用的都是完成一次符合条件的hash碰撞。
可以说挖矿所做的事情就是在PoW.
关于哈希函数,这里就不讲解了,默认懂。
工作流程
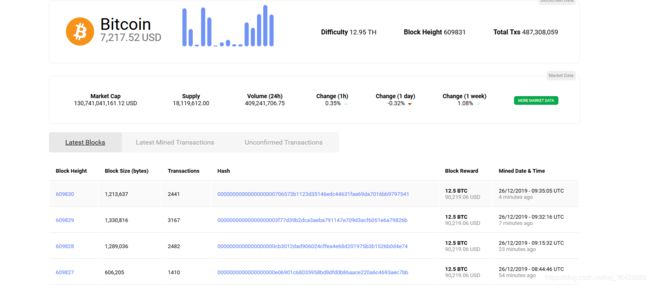
这里我们以比特币的挖矿为例子,来了解区块链的PoW机制,首先说一下挖矿的基本流程:
假设我想去挖矿,这中间我做了哪些事情呢?
- PoW机制去挖矿
- 将生成的区块放入链中
- 数据的持久化
- 在广域网中进行广播
本文暂且模拟实现前两步。
java简单实现
首先我们简单的实现一下数据层,区块链这个词分为:区块和链,我们首先实现区块Block:
在区块中我们需要一下几个属性:
| 属性 | 说明 |
|---|---|
| preHash | 前一个区块的hash值 |
| hashCode | 当前区块hash |
| timestamp | 时间戳 |
| diff | 网络难度系数,前导0个数 |
| data | 存交易信息 |
| index | 区块高度 |
| nonce | 随机值 |
这里着重说明一下diff这个值,这个值是用来做难度系数的确定,下一个区块生成的时候会根据当前的挖矿的人数等信息决定此次挖矿的难度。这个难度值就是diff。也称为前导0的个数。意思是:如果通过随机值nonce生成的hash值的前{diff}位是0,那么就挖矿成功。比如比特币的区块大约每十分钟就要生成一个,那么对于不同的算力,我们怎么保证十分钟就能挖矿成功呢,就是用这个diff控制的。这里我们不对这个值做计算,我们可以看一下一般计算它的公式:
首先我们就实现一个区块类:
Block.java
public class Block {

    /**
     * 上一个区块hash
     */
    private String preHash;
    /**
     * 当前区块hash
     */
    private String hashCode;

    private Timestamp timestamp;
    /**
     * 网络难度系数,前导0个数
     */
    private int diff;
    /**
     * 存交易信息
     */
    private String data;
    /**
     * 区块高度
     */
    private int index;
    /**
     * 随机值
     */
    private int nonce;

    public void setNonce(int nonce) {
     this.nonce = nonce; }

    public int getNonce() {
     return nonce;}

    public void setPreHash(String preHash) {
     this.preHash = preHash;}

    public String getHashCode() {
     return hashCode; }

    public void setHashCode(String hashCode) {
     this.hashCode = hashCode;}

    public void setTimestamp(Timestamp timestamp) {
     this.timestamp = timestamp;}

    public int getDiff() {
     return diff;}

    public void setDiff(int diff) {
     this.diff = diff;}

    public void setData(String data) {
     this.data = data;}

    public int getIndex() {
     return index; }

    public void setIndex(int index) {
     this.index = index;}

    @Override
    public String toString() {

        return "{" +
                "preHash='" + preHash + '\'' +
                ", hashCode='" + hashCode + '\'' +
                ", timestamp=" + timestamp +
                ", diff=" + diff +
                ", data='" + data + '\'' +
                ", index=" + index +
                ", nonce=" + nonce +
                '}';
    }
}
紧接着我们首先要创建第一个区块,
创世区块,直接在这个Block中写:
   /**
     * 生成创世区块
     * @param data
     * @return Block
     */
    public Block generateFirstBlock(String data){

        this.preHash = "0";
        this.timestamp = new Timestamp(System.currentTimeMillis());
        this.diff = 4;
        this.data = data;
        this.index = 1;
        this.nonce = 0;
        //用sha256算一个hash
        this.hashCode = this.generationHashCodeBySha256();
        return this;
    }
其中由于是第一个区块,没有前一个区块,我们就暂且把preHash 设为0吧。为了方便实现演示,diff难度系数我们这边直接设定死了。随机值这边也就简单的用一个递增的值代替了。
然后我们得先将创世区块的hashCode给计算出来。由于是创世区块,我们直接将其信息转为hash就好,不用计算的。
  public String generationHashCodeBySha256(){

        String hashData = ""+this.index+this.nonce+this.diff+this.timestamp;
        return Encryption.getSha256(hashData);
    }
这里采用的是SHA256加密方式(到目前为止,还没有出现对SHA256算法的有效攻击),java的话可以使用java.security.MessageDigest来完成这个工作。
import java.security.MessageDigest;
import java.security.NoSuchAlgorithmException;

public class Encryption {


    /**
     * 传入文本内容,返回 SHA-256 串
     */
    public static String getSha256(final String strText) {

        return encryption(strText, "SHA-256");
    }

    /**
     * 传入文本内容,返回 SHA-512 串
     */
    public static String getSha512(final String strText) {

        return encryption(strText, "SHA-512");
    }

    /**
     * 传入文本内容,返回 MD5串
     */
    public static String getMd5(String data){

        return encryption(data,"MD5");
    }

    /**
     * 字符串 加密
     */
    private static String encryption(final String strText, final String strType) {


        String result = null;
        if (strText != null && strText.length() > 0) {

            try {

                MessageDigest messageDigest = MessageDigest.getInstance(strType);
                messageDigest.update(strText.getBytes());
                byte[] byteBuffer = messageDigest.digest();
                StringBuilder strHexString = new StringBuilder();
                for (byte aByteBuffer : byteBuffer) {

                    String hex = Integer.toHexString(0xff & aByteBuffer);
                    if (hex.length() == 1) {

                        strHexString.append('0');
                    }
                    strHexString.append(hex);
                }
                result = strHexString.toString();
            } catch (NoSuchAlgorithmException e) {

                e.printStackTrace();
            }
        }
        return result;
    }

}
这样我们就可以生成一个创世区块了。测试一下:
 public static void main(String[] args) {

        Block block = new Block();
        block.generateFirstBlock("第一个区块");
        System.out.println(block.toString());
    }
输出:{preHash=‘0’, hashCode=‘d8c957a55ae58dd0a625fcf6805ed65cb7c88d085b5bc6463c42fd9a5de33268’, timestamp=2019-12-26 15:08:45.598, diff=4, data=‘第一个区块’, index=1, nonce=0}
接下来我们矿工要开始挖矿了,生成第二个区块:
    /**
     * 生成新的区块
     * @param data
     * @param oldBlock
     * @return Block
     */
    public Block generateNextBlock(String data,Block oldBlock){

        Block newBlock = new Block();
        newBlock.setTimestamp(new Timestamp(System.currentTimeMillis()));
        //规定前导0为4
        newBlock.setDiff(4);
        newBlock.setData(data);
        newBlock.setIndex(oldBlock.getIndex()+1);
        newBlock.setPreHash(oldBlock.getHashCode());
        //由矿工调整
        newBlock.setNonce(0);
        newBlock.setHashCode(PowAlgorithm.pow(newBlock.getDiff(),newBlock));
        return newBlock;
    }
我们暂且规定前导0为4吧,高度是上一个区块+1,preHash也就是上个区块的hash
关于新区块的hash怎么确定呢?这里就用到了我们的PoW证明机制。对于这个机制,我们需要传入刚刚的新区块和diff值。
public class PowAlgorithm {


    /**
     * 工作量证明机制
     * @param diff 前导0
     * @param block 区块
     * @return 区块hash
     */
    public static String pow(int diff, Block block){

        String prefix0 = getPrefix0(diff);
        String hash = block.generationHashCodeBySha256();
        while(true){

            System.out.println(hash);

            assert prefix0 != null;
            if(hash.startsWith(prefix0)){

                System.out.println("挖矿成功");
                return hash;
            }else {

                block.setNonce(block.getNonce()+1);
                hash = block.generationHashCodeBySha256();
            }
        }
    }

     private static String getPrefix0(int diff){

        if(diff<=0){

            return null;
        }
        return String.format("%0"+diff+"d", 0);
    }
}
这里简单的模拟一下这个机制,首先getPrefix0根据diff获取前导0的个数将其转为前缀字符串,以方便匹配到正确的hash。接着我们就死循环的利用不同的随机值去得到信息hash值。判断这个hash值符不符合要求,符合就返回这个hash。
接着我们测试一下:
    public static void main(String[] args) {

        Block firstBlock = new Block();
        firstBlock.generateFirstBlock("第一个区块");
        System.out.println(firstBlock.toString());
        Block secondBlock = firstBlock.generateNextBlock("第二个区块",firstBlock);
        System.out.println(secondBlock.toString());
    }
由于diff是4,大约几万次hash就能碰撞到了,计算机执行也就1-2秒。如果你认为这是巧合你就错了,无论你怎么执行都只是这样,原因在于我们每次生成hash只改了一个随机值,并且我这的随机值只是一个递增的整数。其实真正设计不会是这样,而是要更加的复杂。要注意,这里只是模拟,以帮助理解。
输出:挖矿成功
{preHash=‘3012930ae2d63e48641049163231af9778c5b20d46b327a3c4eb157b38254279’, hashCode=‘0000f8847f1a2211753ba5a6c18ac073866a376cef79e2a5cf0fed48dae4a733’, timestamp=2019-12-26 15:16:54.901, diff=4, data=‘第二个区块’, index=2, nonce=43485}
新的hashCode的前四位就是0,接着我们就要将其放入链中,所以接下来实现链的部分:
这里我们就简单一点使用链表结构就好,数据结构如下,我们在这个类中实现生成头节点和增加节点,查看节点的功能:
BlockChain .java
public class BlockChain {


    public class Node{

        public Node next;
        public Block data;
    }

    /**
     * 创建头节点
     * @param data 创世区块
     * @return Node 初始节点
     */
    public Node createHeaderNode(Block data){

        Node headerNode = new Node();
        headerNode.next = null;
        headerNode.data = data;
        return headerNode;
    }

    /**
     * 添加节点
     * @param data 新区块
     * @param oldNode 上个节点
     * @return 新节点
     */
    public Node addNode(Block data,Node oldNode){

        Node newNode = new Node();
        newNode.next = null;
        newNode.data = data;
        oldNode.next = newNode;
        return newNode;
    }

    /**
     * 显示一下当前节点数据
     * @param node 节点
     */
    public void showNode(Node node){

        Node temp = node;
        while(temp.next != null){

            System.out.println(temp.data.toString());
            temp = temp.next;
        }
        System.out.println(temp.data.toString());
    }
}
我们再进行测试:将生成的区块加入链中。
   public static void main(String[] args) {

        Block firstBlock  = new Block();
        System.out.println(firstBlock.generateFirstBlock("创世区块"));

        BlockChain blockChain = new BlockChain();
        BlockChain.Node headerNode = blockChain.createHeaderNode(firstBlock);

        Block secondBlock = firstBlock.generateNextBlock("第二个区块",firstBlock);
        System.out.println(secondBlock.toString());
        blockChain.addNode(secondBlock,headerNode);
        blockChain.showNode(headerNode);
    }
好了,今天就学到这里了。尽管这个例子比较简单,做了简化处理,自己动手实现一遍的话,起码也能稍微理解一点关于PoW工作量证明机制这里要做点什么事,怎么做的,以及挖矿的过程,实践中之后再看理论就能很快接受了。
