Spring MVC 自学杂记(四) -- Spring+SpringMVC+WebSocket
1、WebSocket简介
WebSocket是HTML5提供的一种全双工通信的协议,通常是浏览器(或其他客户端)与Web服务器之间的通信。这使得它适合于高度交互的Web应用程序,如及时通讯聊天等。
WebSocket协议是基于TCP的一种新的网络协议。它实现了浏览器与服务器全双工(full-duplex)通信——可以通俗的解释为服务器主动发送信息给客户端。
WebSocket首次在HTML5规范中被引用为TCP连接,作为基于TCP的套接字API的占位符。[1] WebSocket通信协议于2011年被IETF定为标准RFC 6455,并被RFC7936所补充规范。
摘抄来自:百度百科-websocket
2、Spring+websocket
spring4.0已经就支持websocket了,可以去查看官网。
官网:spring websocket
注:这个spring+websocket,自己也不是很熟悉,只是最近使用到了,学习了一下,记录处理了,方便以后避免走更多的绕路。
3、配置环境
3.1、环境:
	spring-4.0.2.RELEASE
	java1.7
	apache-tomcat-7.0.75
maven构建工程:
POM.xml:
<dependency>
    <groupId>com.fasterxml.jackson.coregroupId>
    <artifactId>jackson-coreartifactId>
    <version>2.3.0version>
dependency>
<dependency>
    <groupId>com.fasterxml.jackson.coregroupId>
    <artifactId>jackson-databindartifactId>
    <version>2.3.0version>
dependency>
SpringMVC:
		<dependency>
			<groupId>org.springframeworkgroupId>
			<artifactId>spring-webmvcartifactId>
			<version>4.0.2.RELEASEversion>
		dependency>

		<dependency>
			<groupId>org.springframeworkgroupId>
			<artifactId>spring-context-supportartifactId>
			<version>4.0.2.RELEASEversion>
		dependency>
WebSocket:
		<dependency>
		   <groupId>org.springframeworkgroupId>
		   <artifactId>spring-websocketartifactId>
		   <version>4.0.2.RELEASEversion>
		dependency>

		<dependency>
		   <groupId>org.springframeworkgroupId>
		   <artifactId>spring-messagingartifactId>
		   <version>4.0.2.RELEASEversion>
		dependency>
3.2、Servlet-api
servlet-api必须是3.0+,才支持websocket,所以如果不是,则要更新jar包。
	<dependency>
        <groupId>javax.servletgroupId>
        <artifactId>javax.servlet-apiartifactId>
        <version>3.1.0version>
    dependency>
3.3、web.xml配置
并且 web.xml的namespace也要确保是3.0+,
web.xml
<web-app xmlns:xsi="http://www.w3.org/2001/XMLSchema-instance"
        xmlns="http://java.sun.com/xml/ns/javaee"
        xmlns:web="http://java.sun.com/xml/ns/javaee/web-app_3_0.xsd"
        xsi:schemaLocation="http://java.sun.com/xml/ns/javaee http://java.sun.com/xml/ns/javaee/web-app_3_0.xsd"
        version="3.0">


  <absolute-ordering />
web-app>
代码:
并且必须将所以的filter和servlet都要添加异步:
<async-supported>trueasync-supported>
如:springMVC在web.xml中的配置也要添加:
   <servlet>
    <servlet-name>springMVCservlet-name>
    <servlet-class>org.springframework.web.servlet.DispatcherServletservlet-class>
    <init-param>
    	<param-name>contextConfigLocationparam-name>
    	<param-value>classpath:springMVC.xmlparam-value>
    init-param>
    <load-on-startup>1load-on-startup>
    <async-supported>trueasync-supported>
  servlet>

  <servlet-mapping>
    <servlet-name>springMVCservlet-name>
    <url-pattern>/url-pattern>
  servlet-mapping>
4、service服务端的具体实现
4.1、首先创建websocket的处理类
MyWebSocketHandler.java
package com.cuit.secims.mw.ws;

import java.util.ArrayList;
import java.util.Map;

import org.apache.log4j.Logger;
import org.springframework.web.socket.CloseStatus;
import org.springframework.web.socket.TextMessage;
import org.springframework.web.socket.WebSocketHandler;
import org.springframework.web.socket.WebSocketMessage;
import org.springframework.web.socket.WebSocketSession;

import com.google.common.reflect.TypeToken;
import com.google.gson.Gson;


public class MyWebSocketHandler implements WebSocketHandler{


	private static final Logger log = Logger.getLogger(MyWebSocketHandler.class);

	// 保存所有的用户session
	private static final ArrayList<WebSocketSession> users = new ArrayList<WebSocketSession>();


	// 连接 就绪时
	@Override
	public void afterConnectionEstablished(WebSocketSession session)
			throws Exception {


		log.info("connect websocket success.......");

		users.add(session);

	}


	// 处理信息
	@Override
	public void handleMessage(WebSocketSession session,
			WebSocketMessage<?> message) throws Exception {


		Gson gson = new Gson();

		// 将消息JSON格式通过Gson转换成Map
		// message.getPayload().toString() 获取消息具体内容
		Map<String, Object> msg = gson.fromJson(message.getPayload().toString(),
				new TypeToken<Map<String, Object>>() {
     }.getType());

		log.info("handleMessage......."+message.getPayload()+"..........."+msg);

//		session.sendMessage(message);

		// 处理消息 msgContent消息内容
		TextMessage textMessage = new TextMessage(msg.get("msgContent").toString(), true);
		// 调用方法(发送消息给所有人)
		sendMsgToAllUsers(textMessage);


	}


	// 处理传输时异常
	@Override
	public void handleTransportError(WebSocketSession session,
			Throwable exception) throws Exception {

		// TODO Auto-generated method stub

	}


	// 关闭 连接时
	@Override
	public void afterConnectionClosed(WebSocketSession session,
			CloseStatus closeStatus) throws Exception {


		log.info("connect websocket closed.......");

		users.remove(session);

	}


	@Override
	public boolean supportsPartialMessages() {

		// TODO Auto-generated method stub
		return false;
	}


	// 给所有用户发送 信息
	public void sendMsgToAllUsers(WebSocketMessage<?> message) throws Exception{


		for (WebSocketSession user : users) {

			user.sendMessage(message);
		}

	}

}
处理类可以实现WebSocketHandler最基本的接口,也可以实现具体的接口
如:

处理类就是处理:连接开始、关闭、处理信息等方法
4.2、创建握手(handshake)接口/拦截器
HandshakeInterceptor .java
package com.cuit.secims.mw.ws;

import java.util.Map;

import org.springframework.http.server.ServerHttpRequest;
import org.springframework.http.server.ServerHttpResponse;
import org.springframework.web.socket.WebSocketHandler;
import org.springframework.web.socket.server.support.HttpSessionHandshakeInterceptor;


public class HandshakeInterceptor extends HttpSessionHandshakeInterceptor{


	// 握手前
	@Override
	public boolean beforeHandshake(ServerHttpRequest request,
			ServerHttpResponse response, WebSocketHandler wsHandler,
			Map attributes) throws Exception {

		System.out.println("++++++++++++++++ HandshakeInterceptor: beforeHandshake  ++++++++++++++"+attributes);

		return super.beforeHandshake(request, response, wsHandler, attributes);
	}


	// 握手后
	@Override
	public void afterHandshake(ServerHttpRequest request,
			ServerHttpResponse response, WebSocketHandler wsHandler,
			Exception ex) {


		System.out.println("++++++++++++++++ HandshakeInterceptor: afterHandshake  ++++++++++++++");


		super.afterHandshake(request, response, wsHandler, ex);
	}

}
这个的主要作用是可以在握手前做一些事,把所需要的东西放入到attributes里面,然后可以在WebSocketHandler的session中, 取到相应的值,具体可参考HttpSessionHandshakeInterceptor,这儿也可以实现HandshakeInterceptor 接口。
4.3、注册处理类及握手接口
这个有两种方式:
- 创建一个类来实现注册
- 使用xml配置文件实现
4.3.1、创建类MyWebSocketConfig
package com.cuit.secims.mw.ws;

import org.springframework.context.annotation.Bean;
import org.springframework.context.annotation.Configuration;
import org.springframework.web.servlet.config.annotation.EnableWebMvc;
import org.springframework.web.servlet.config.annotation.WebMvcConfigurerAdapter;
import org.springframework.web.socket.WebSocketHandler;
import org.springframework.web.socket.config.annotation.EnableWebSocket;
import org.springframework.web.socket.config.annotation.WebSocketConfigurer;
import org.springframework.web.socket.config.annotation.WebSocketHandlerRegistry;


@Configuration
@EnableWebMvc
@EnableWebSocket
public class MyWebSocketConfig extends WebMvcConfigurerAdapter implements WebSocketConfigurer {


	    @Override
	    public void registerWebSocketHandlers(WebSocketHandlerRegistry registry) {


	    	//前台 可以使用websocket环境
	        registry.addHandler(myWebSocketHandler(),"/websocket").addInterceptors(new HandshakeInterceptor());


	      //前台 不可以使用websocket环境,则使用sockjs进行模拟连接
	        registry.addHandler(myWebSocketHandler(), "/sockjs/websocket").addInterceptors(new HandshakeInterceptor())
	                .withSockJS();
	    }


	    // websocket 处理类
	    @Bean
	    public WebSocketHandler myWebSocketHandler(){

	        return new MyWebSocketHandler();
	    }


}
注意:不要忘记在springmvc的配置文件中配置对此类的自动扫描
4.3.2、xml配置方式
spring-WebSocket.xml
<beans xmlns="http://www.springframework.org/schema/beans"
	xmlns:xsi="http://www.w3.org/2001/XMLSchema-instance"
	xmlns:mvc="http://www.springframework.org/schema/mvc"
	xmlns:context="http://www.springframework.org/schema/context"
	xmlns:aop="http://www.springframework.org/schema/aop"
	xmlns:tx="http://www.springframework.org/schema/tx"
	xmlns:websocket="http://www.springframework.org/schema/websocket"
	xsi:schemaLocation="
			http://www.springframework.org/schema/beans
			http://www.springframework.org/schema/beans/spring-beans-4.0.xsd
			http://www.springframework.org/schema/mvc
			http://www.springframework.org/schema/mvc/spring-mvc-4.0.xsd
			http://www.springframework.org/schema/context
			http://www.springframework.org/schema/context/spring-context-4.0.xsd
			http://www.springframework.org/schema/aop
			http://www.springframework.org/schema/aop/spring-aop-4.0.xsd
			http://www.springframework.org/schema/tx
			http://www.springframework.org/schema/tx/spring-tx-4.0.xsd
			http://www.springframework.org/schema/websocket
        	http://www.springframework.org/schema/websocket/spring-websocket-4.0.xsd">


			<bean id="myHandler" class="com.cuit.secims.mw.ws.MyWebSocketHandler"/>


			<bean id="myInterceptor" class="com.cuit.secims.mw.ws.HandshakeInterceptor"/>

			<websocket:handlers >
			    <websocket:mapping path="/websocket" handler="myHandler"/>
			    <websocket:handshake-interceptors>
			    	<ref bean="myInterceptor"/>
			    websocket:handshake-interceptors>
			websocket:handlers>


			<websocket:handlers>
				<websocket:mapping path="/sockjs/websocket" handler="myHandler"/>
			    <websocket:handshake-interceptors>
			    	<ref bean="myInterceptor"/>
			    websocket:handshake-interceptors>
			    <websocket:sockjs />
			websocket:handlers>

beans>
其中
注意:xml的namespace中要添加spring对websocket的支持:
<beans xmlns="http://www.springframework.org/schema/beans"
	xmlns:xsi="http://www.w3.org/2001/XMLSchema-instance"
	xmlns:websocket="http://www.springframework.org/schema/websocket"
	xsi:schemaLocation="
			http://www.springframework.org/schema/beans
			http://www.springframework.org/schema/beans/spring-beans-4.0.xsd
			http://www.springframework.org/schema/websocket
        	http://www.springframework.org/schema/websocket/spring-websocket-4.0.xsd">
5、client客户端的实现
5.1、页面展示
index.html
首页
5.2、JS-客户端主要的实现
index.js
$(function() {


	var websocket;


	// 首先判断是否 支持 WebSocket
	if('WebSocket' in window) {

		websocket = new WebSocket("ws://localhost:8080/SECIMS/websocket");
	} else if('MozWebSocket' in window) {

		websocket = new MozWebSocket("ws://localhost:8080/SECIMS/websocket");
	} else {

		websocket = new SockJS("http://localhost:8080/SECIMS/sockjs/websocket");
	}

	// 打开时
	websocket.onopen = function(evnt) {

		console.log("  websocket.onopen  ");
	};


	// 处理消息时
	websocket.onmessage = function(evnt) {

		$("#msg").append("(" + evnt.data + ")");
		console.log("  websocket.onmessage   ");
	};


	websocket.onerror = function(evnt) {

		console.log("  websocket.onerror  ");
	};

	websocket.onclose = function(evnt) {

		console.log("  websocket.onclose  ");
	};


	// 点击了发送消息按钮的响应事件
	$("#TXBTN").click(function(){


		// 获取消息内容
		var text = $("#tx").val();

		// 判断
		if(text == null || text == ""){

			alert(" content  can not empty!!");
			return false;
		}

		var msg = {

			msgContent: text,
			postsId: 1
		};

		// 发送消息
		websocket.send(JSON.stringify(msg));

	});


});
客户端的主要API就是 创建websocket、监听打开、关闭、发送信息、处理信息等方法。
websocket = new WebSocket("ws://localhost:8080/SECIMS/websocket");
如果环境不支持websocket,则使用sockJS来模拟连接实现
websocket = new SockJS("http://localhost:8080/SECIMS/sockjs/websocket");
其中:SECIMS是工程名,而/websocket是环境支持,则请求的连接。而/sockjs/websocket,则是不支持websocket,使用sockJS模拟实现的连接。
6、效果展现
用户A:
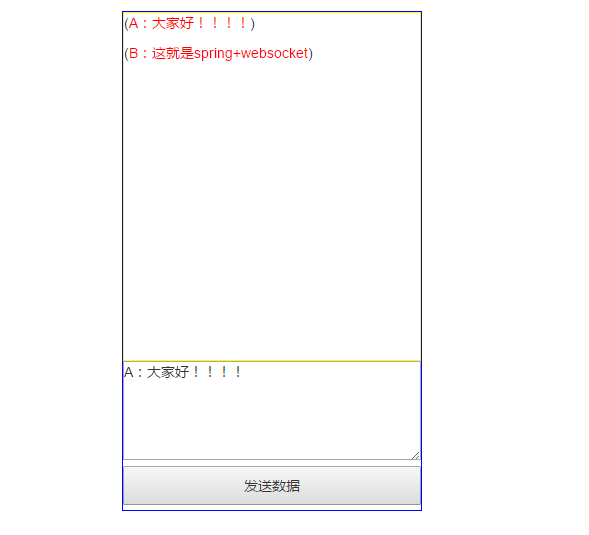
用户B:

7、项目地址
项目GIT地址: https://gitee.com/tianwyam/SpringMVC_WebSocket.git
刚开始写微信公众号,请多多关注,欢迎,多谢!
微信公众号:《Java学习积累》
