React(八)- ReactUI组件库及Redux的使用
React(八)- ReactUI组件库及Redux的使用
- 前言
- 一. ReactUI组件库
-
- 1.1 antd样式的基本使用步骤
- 1.2 antd样式的按需引入
- 1.3 antd自定义主题
- 二. Redux的使用
-
- 2.1 Redux的核心概念
-
- 2.1.1 求和案例(纯React版)
- 2.1.2 求和案例(Redux精简版)
- 2.1.3 求和案例(Redux完整版)
- 2.1.4 求和案例(异步Action版)
- 总结
- 2.2 对Redux的理解
-
- 2.2.1 连接容器组件和UI组件
- 2.2.2 案例优化
React系列文章导航
前言
先来看下上一篇文章中,做的项目的相关页面:
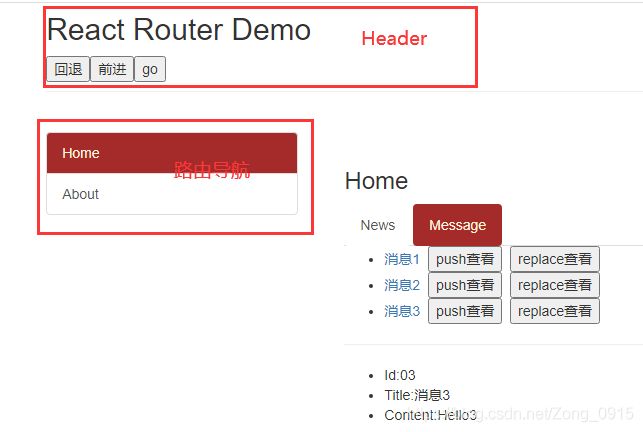
诸如这种,我们的Header组件都是手写的,同时还需要手动引入第三方css文件bootstrap.css。
需求:有没有一个已存在的库,可以让我们快速搭建起这样的组件呢,并且里面的样式也不用我们去添加。
那么国内比较流行的ReactUI组件库就是Ant Design,简称antd。
antd官方文档
一. ReactUI组件库
1.1 antd样式的基本使用步骤
1.安装对应的antd库:
npm install antd
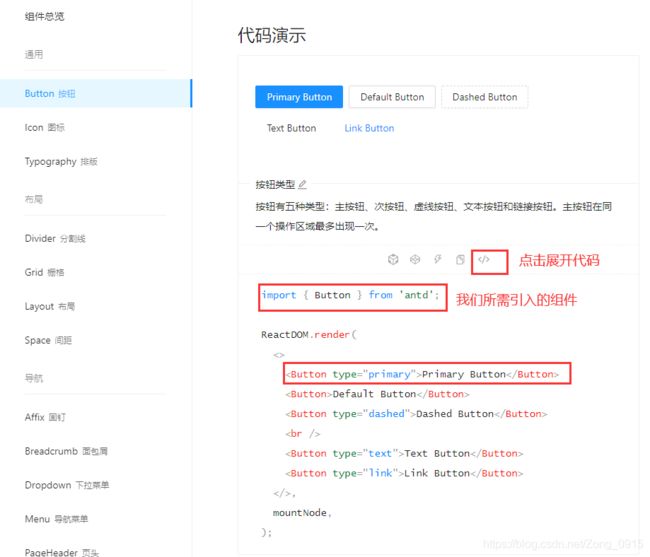
2.去官网上选择自己想要的样式,比如一个Button按钮,展开代码,引入对应的组件,复制自己想要的样式即可。
3.App组件:
import React, {
      Component } from 'react';
import {
      Button } from 'antd';
// 需要我们手动引入,否则样式不会显示
import 'antd/dist/antd.css'

class App extends Component {

    render() {

        return (
            <div>
                ................<Button type="primary">点击</Button>
                <hr/>
            </div>
        );
    }
}
export default App;
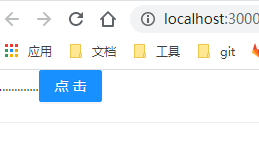
4.实际效果如下:

1.2 antd样式的按需引入
上述案例中,有一个瑕疵,请看:
import 'antd/dist/antd.css'
这里我们将antd.css的所有内容全部引入进来了,其实很多的样式我们并不会用到,因此我们需要按需引入。则需要对create-react-app的默认配置进行自定义。
解决方案:
1.引入react-app-rewired 来修改package.json里面的配置,此外,还需要安装customize-cra。
npm install react-app-rewired customize-cra
2.修改对应的package.json里面的配置:
/* package.json */
"scripts": {

  "start": "react-app-rewired start",
  "build": "react-app-rewired build",
  "test": "react-app-rewired test",
  "eject": "react-scripts eject"
},
3.安装babel-plugin-import,一个用于按需加载组件代码和样式的 babel 插件
npm install babel-plugin-import
4.在根目录创建一个config-overrides.js文件(和package.json文件同目录),用于修改默认配置:
// 配置具体的修改规则
const {
      override, fixBabelImports } = require('customize-cra');

module.exports = override(
    fixBabelImports('import', {
      // 需要做按需引入
        libraryName: 'antd', // 做antd的按需引入
        libraryDirectory: 'es', // antd里面用了es的模块化规范
        style: 'css', // 按需引入的是css样式
    }),
);
5.删除App.jsx中原有的样式引入:
import 'antd/dist/antd.css'
6.重启项目后观察样式是否依旧存在,若存在,那么按需引入成功:
1.3 antd自定义主题
自定义主题需要用到less变量覆盖功能,我们可以引入customize-cra中提供的less相关的函数addLessLoader来帮助加载less样式,同时修改config-overrides.js。
1.安装less-loader(版本太高会报错)以及less:
npm install less less-loader@7.0.0
2.修改配置:
// 配置具体的修改规则
const {
      override, fixBabelImports, addLessLoader } = require('customize-cra');

module.exports = override(
    fixBabelImports('import', {

        libraryName: 'antd',
        libraryDirectory: 'es',
        style: true,
    }),
    addLessLoader({

        javascriptEnabled: true,
        modifyVars: {
      '@primary-color': 'green' },
    }),
);
3.最后页面效果如下:
![]()
二. Redux的使用
Redux是一个专门用于做状态管理的JS库。用来集中式管理React应用中多个组件共享的状态。
什么情况下需要使用Redux?
- 某个组件的状态需要让其他组件可以随时拿到。(共享)
- 一个组件需要改变另外一个组件的状态。(通信)
- 总体原则:能不用就不要用。
2.1 Redux的核心概念
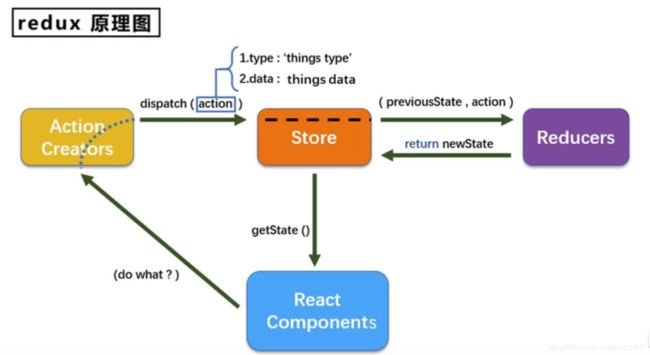
其中的几个核心概念:
Action:
- 表示动作的对象。
- 包含2个属性:
1.
type:标识属性,值为字符串,唯一,必要属性。
2.data:数据属性,值类型任意,可选属性。
- 例子:
{type:'ADD_STUDENT',data:{name:'tom',age:20}}
Reducer:
- 用于初始化状态、加工状态。
- 加工时,根据旧的
state和action,产生新的state的纯函数。
Store:
- 将
state、action、reducer联系在一起的对象。
2.1.1 求和案例(纯React版)
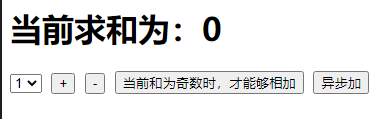
页面效果:

项目结构:
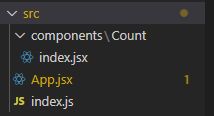
Count组件:
import React, {
Component } from 'react';
class Count extends Component {
state = {
count: 0 }
// 加法
increment = () => {
const {
value } = this.selectNumber
const {
count } = this.state
this.setState({
count: count + value * 1 })
}
decrement = () => {
const {
value } = this.selectNumber
const {
count } = this.state
this.setState({
count: count - value * 1 })
}
incrementIfOdd = () => {
const {
value } = this.selectNumber
const {
count } = this.state
if (count % 2 !== 0) {
this.setState({
count: count + value * 1 })
}
}
incrementAsync = () => {
const {
value } = this.selectNumber
const {
count } = this.state
setTimeout(() => {
this.setState({
count: count + value * 1 })
}, 500);
}
render() {
return (
<div>
<h1>当前求和为:{
this.state.count}</h1>
<select ref={
c => this.selectNumber = c}>
<option value="1">1</option>
<option value="2">2</option>
<option value="3">3</option>
</select>
<button onClick={
this.increment}>+</button>
<button onClick={
this.decrement}>-</button>
<button onClick={
this.incrementIfOdd}>当前和为奇数时,才能够相加</button>
<button onClick={
this.incrementAsync}>异步加</button>
</div>
);
}
}
export default Count;
App组件:
import React, {
      Component } from 'react';
import Count from './components/Count'

class App extends Component {

    render() {

        return (
            <div>
                <Count/>
            </div>
        );
    }
}
export default App;
入口文件:
import React from 'react'
import ReactDOM from 'react-dom'
import App from './App'

ReactDOM.render(<App />, document.getElementById('root'))
2.1.2 求和案例(Redux精简版)
安装redux:
npm install redux
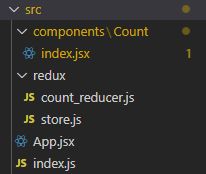
项目结构:
Count组件:去除了Count组件中自身的状态。
import React, {
Component } from 'react';
// 引入store,用于获取状态
import store from '../../redux/store'
class Count extends Component {
// 加法
increment = () => {
const {
value } = this.selectNumber
// 通知redux
store.dispatch({
type: 'increment', data: value * 1 })
}
decrement = () => {
const {
value } = this.selectNumber
store.dispatch({
type: 'decrement', data: value * 1 })
}
incrementIfOdd = () => {
const {
value } = this.selectNumber
const count = store.getState()
if (count % 2 !== 0) {
store.dispatch({
type: 'increment', data: value * 1 })
}
}
incrementAsync = () => {
const {
value } = this.selectNumber
setTimeout(() => {
store.dispatch({
type: 'increment', data: value * 1 })
}, 500);
}
render() {
return (
<div>
<h1>当前求和为:{
store.getState()}</h1>
<select ref={
c => this.selectNumber = c}>
<option value="1">1</option>
<option value="2">2</option>
<option value="3">3</option>
</select>
<button onClick={
this.increment}>+</button>
<button onClick={
this.decrement}>-</button>
<button onClick={
this.incrementIfOdd}>当前和为奇数时,才能够相加</button>
<button onClick={
this.incrementAsync}>异步加</button>
</div>
);
}
}
export default Count;
store.js:暴露store对象,并提供许多API。
- 通过引入redux中的
createStore函数,来创建一个store。 createStore函数调用的时候需要传入一个为其服务的reducer。- 最后一定要将
store对象暴露出去,export default createStore(xxx)。
/**
 * 改文件专门用来暴露一个store对象,整个应用只有一个store对象
 */
// 引入createStore,专门用于创建redux中最为核心的store对象
import {
      createStore } from 'redux'
// 引入为Count组件服务的reducer
import countReducer from './count_reducer'
// 暴露store
export default createStore(countReducer)
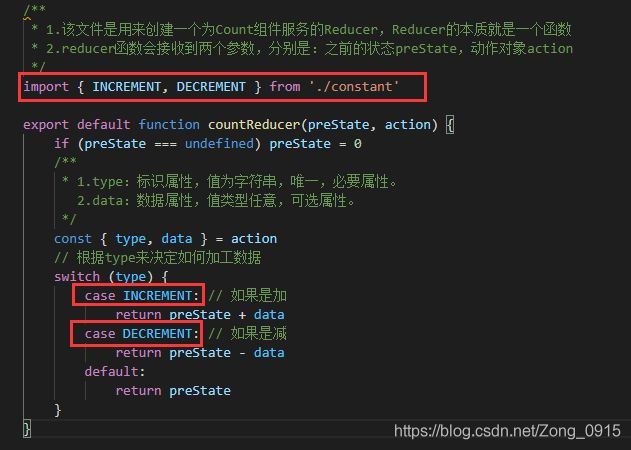
count_reducer.js:本质上是一个函数,定义处理逻辑。
reducer本质是一个函数,接收两个属性:preState,action,返回加工后的状态。reducer有两个作用:初始化状态和加工状态。reducer被第一次调用的时候,是store自动触发的,传递的preState是undefined。- 文件命名格式最好是:
xxx_reducer.js,表明是哪个组件的reducer。
/**
 * 1.该文件是用来创建一个为Count组件服务的Reducer,Reducer的本质就是一个函数
 * 2.reducer函数会接收到两个参数,分别是:之前的状态preState,动作对象action
 */

export default function countReducer(preState, action) {

    if (preState === undefined) preState = 0
    /**
     * 1.type:标识属性,值为字符串,唯一,必要属性。
       2.data:数据属性,值类型任意,可选属性。
     */
    const {
      type, data } = action
    // 根据type来决定如何加工数据
    switch (type) {

        case 'increment': // 如果是加
            return preState + data
        case 'decrement': // 如果是减
            return preState - data
        default:
            return preState
    }
}
index.js:
- 检测
store中状态的改变,一旦发生改变重新渲染App。 - redux只负责管理状态,至于状态的改变如何驱动页面的渲染,这必须得靠我们自己写。
import React from 'react'
import ReactDOM from 'react-dom'
import App from './App'
import store from './redux/store'

ReactDOM.render(<App />, document.getElementById('root'))
// 检测redux中状态的变化,只要变化,就调用render重新渲染
store.subscribe(()=>{

    ReactDOM.render(<App />, document.getElementById('root'))
})
页面效果:
点击添加按钮:

2.1.3 求和案例(Redux完整版)
在redux精简版的基础上进行修改:

Count组件:
// 引入actionCreator,专门用于创建action对象
import {
      createIncrementAction, createDecrementAction } from '../../redux/count_action'
	// 加法
    increment = () => {

        const {
      value } = this.selectNumber
        // 通知redux
        store.dispatch(createIncrementAction(value * 1))
    }

    decrement = () => {

        const {
      value } = this.selectNumber
        store.dispatch(createDecrementAction(value * 1))
    }

    incrementIfOdd = () => {

        const {
      value } = this.selectNumber
        const count = store.getState()
        if (count % 2 !== 0) {

            store.dispatch(createIncrementAction(value * 1))
        }
    }

    incrementAsync = () => {

        const {
      value } = this.selectNumber
        setTimeout(() => {

            store.dispatch(createIncrementAction(value * 1))
        }, 500);
    }
constant.js:
/**
 * 用于action对象中type类型的常量值
 */
export const INCREMENT ='increment'
export const DECREMENT ='decrement'
count_action.js:
/**
 1. 改文件专门为Count组件生成action对象
*/
import {
      INCREMENT, DECREMENT } from './constant'
export const createIncrementAction = data => ({
      type: INCREMENT, data })
export const createDecrementAction = data => ({
      type: DECREMENT, data })
count_reducer.js:
2.1.4 求和案例(异步Action版)
修改如下:
安装对应组件:
npm install redux-thunk
count_action.js:增加以下代码
- 异步
action就是指action的值为函数,异步action中一般会调用同步的action。 - 需要
npm install redux-thunk,并配置在store中。 - 创建
action的函数不再返回一般对象,而是一个函数,该函数中写一个异步任务。 - 异步任务有结果后,分发一个同步的
action去真正操作数据。
export const createIncrementAsyncAction = (data, time) => {


    return (dispatch) => {

        setTimeout(() => {

            dispatch(createIncrementAction(data))
        }, time);
    }
}
store.js:
/**
 * 改文件专门用来暴露一个store对象,整个应用只有一个store对象
 */
// 引入createStore,专门用于创建redux中最为核心的store对象
import {
      applyMiddleware, createStore } from 'redux'
// 引入为Count组件服务的reducer
import countReducer from './count_reducer'
import thunk from 'redux-thunk'
// 暴露store
export default createStore(countReducer, applyMiddleware(thunk))
Count组件:修改对应异步函数内容。
incrementAsync = () => {

    const {
      value } = this.selectNumber
    store.dispatch(createIncrementAsyncAction(value * 1, 500))
}
总结
基于以上案例,可以对Store、Reducer、Action做一个简单的归纳:
Action:负责定义对象,包括其type类型以及数据体内容。 表示动作对象。Reducer:负责初始化状态,并且根据状态type的不同,去做对应的逻辑,去修改状态。 返回值是新状态,本质上就是一个函数。Store:负责通过createStore(Reducer)来暴露一个Store对象。
2.2 对Redux的理解

- 所有的UI组件都应该包裹一个容器组件,他们是父子关系。
- 容器组件是真正和Redux打交道的,里面可以随意的使用Redux的API。
- UI组件中不能使用任何Redux的API。
- 容器组件会传给UI组件2类东西:1.Redux中保存的状态。2.用于操作状态的方法。并且都通过
props来传递。
2.2.1 连接容器组件和UI组件
前期工作:安装react-redux
npm install react-redux
项目结构:

1.将原本的Count组件改装成一个UI组件(与Redux没有任何关联)
import React, {
      Component } from 'react';

class Count extends Component {

    increment = () => {

        const {
      value } = this.selectNumber
        this.props.jia(value * 1)
    }

    decrement = () => {

        const {
      value } = this.selectNumber
        this.props.jian(value * 1)
    }

    incrementIfOdd = () => {

        const {
      value } = this.selectNumber
        if (this.props.count % 2 !== 0) {

            this.props.jia(value * 1)
        }
    }

    incrementAsync = () => {

        const {
      value } = this.selectNumber
        this.props.jiaAsync(value * 1, 500)
    }

    render() {

        console.log('UI组件接收到的props是', this.props)
        // ...
    }
}

export default Count;
2.准备一个容器组件Count:负责与redux交互
// 引入Count的UI组件
import CountUI from '../../components/Count'
// 引入connect用来连接UI组件和redux
import {
      connect } from 'react-redux'

import {

    createIncrementAction,
    createDecrementAction,
    createIncrementAsyncAction
} from '../../redux/count_action'

// 返回的对象中,key会传递给UI组件中props属性的key,value就是props属性中对应的value,value就是状态
// mapStateToProps用于传递状态
function mapStateToProps(state) {

    return {
      count: state }
}

// mapDispatchToProps用于传递操作状态的方法
function mapDispatchToProps(dispatch) {

    return {

        jia: (number) => {

            dispatch(createIncrementAction(number))
        },
        jian: (number) => {

            dispatch(createDecrementAction(number))
        },
        jiaAsync: (number, time) => {

            dispatch(createIncrementAsyncAction(number, time))
        },
    }
}
// 使用connect()()创建并暴露一个容器组件
// 连接store的部分,必须在外层写,也就是父类App组件中写
// 此时会把mapStateToProps和mapDispatchToProps两个对象传递给UI组件
export default connect(mapStateToProps, mapDispatchToProps)(CountUI)
App组件:负责引入对应的store给容器,这样容器中就可以直接获取state与dispatch。
import React, {
      Component } from 'react';
import Count from './containers/Count'
import store from './redux/store'

class App extends Component {

    render() {

        return (
            <div>
                <Count store={
     store} />
            </div>
        );
    }
}
export default App;
做出总结:
- UI组件:不能使用任何Redux的API,只负责页面的呈现和交互。
- 容器组件:负责和Redux通信,并将结果交给UI组件。通过
connect()()传递,UI组件则通过props获取。 - 创建一个容器组件:通过
react-redux下的connect函数:
// mapStateToProps映射状态,返回值是一个对象
// mapDispatchToProps映射操作状态的方法,返回值是一个对象
export default connect(mapStateToProps, mapDispatchToProps)(UI组件)
- 容器组件中的
store是通过props传递进去的,在外层的App组件中引入。比如mapStateToProps(state)中的参数就可以直接获取到。
2.2.2 案例优化
优化点1:
- 原本:我们在
App组件外层对store进行监听,一有变化我们就会重新渲染组件。
store.subscribe(()=>{

    ReactDOM.render(<App />, document.getElementById('root'))
})
- 优化后:由于容器组件已经包含了监测的方法,因此不需要外层进行监测(都在
connect这个创建容器组件的方法中完成了),删除即可。
优化点2:容器组件中,mapStateToProps和mapDispatchToProps函数的简写。
优化点3:
- 原本:我们在
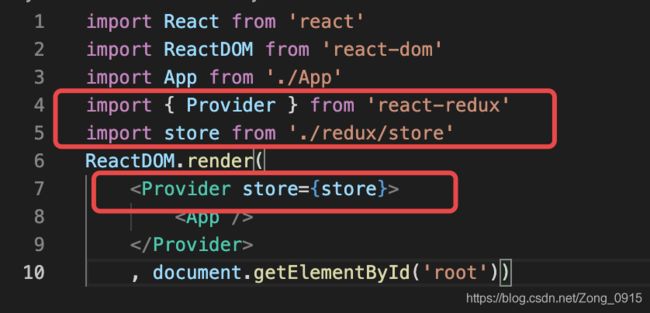
App组件中,对于容器组件,传入一个store,如:< Count store={store} />,但是如果我们App组件中有多个组件,而每个组件都需要传入store,那怎么办? - 优化后:引入
Provider,在index.js入口文件将App组件包裹起来即可。
优化点4:整合UI组件和容器组件。
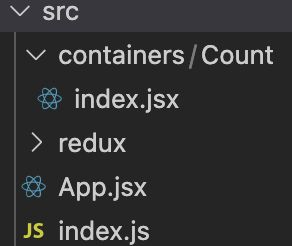
优化后的项目结构:(可见删除了UI组件)
容器组件Count:
import React, {
Component } from 'react';
// 引入connect用来连接UI组件和redux
import {
connect } from 'react-redux'
import {
createIncrementAction,
createDecrementAction,
createIncrementAsyncAction
} from '../../redux/count_action'
class Count extends Component {
increment = () => {
const {
value } = this.selectNumber
this.props.jia(value * 1)
}
decrement = () => {
const {
value } = this.selectNumber
this.props.jian(value * 1)
}
incrementIfOdd = () => {
const {
value } = this.selectNumber
if (this.props.count % 2 !== 0) {
this.props.jia(value * 1)
}
}
incrementAsync = () => {
const {
value } = this.selectNumber
this.props.jiaAsync(value * 1, 500)
}
render() {
console.log('UI组件接收到的props是', this.props)
return (
<div>
<h1>当前求和为:{
this.props.count}</h1>
<select ref={
c => this.selectNumber = c}>
<option value="1">1</option>
<option value="2">2</option>
<option value="3">3</option>
</select>
<button onClick={
this.increment}>+</button>
<button onClick={
this.decrement}>-</button>
<button onClick={
this.incrementIfOdd}>当前和为奇数时,才能够相加</button>
<button onClick={
this.incrementAsync}>异步加</button>
</div>
);
}
}
// 使用connect()()创建并暴露一个容器组件
// 连接store的部分,必须在外层写,也就是父类App组件中写
// 此时会把mapStateToProps和mapDispatchToProps两个对象传递给UI组件
export default connect(
state => ({
count: state }),
{
jia: createIncrementAction,
jian: createDecrementAction,
jiaAsync: createIncrementAsyncAction,
}
)(Count)
redux相关文件都不变。App组件删除store引入:

入口文件index.js增加Provider:
优化完成~
下一篇文章准备学习数据共享,在本篇文章的基础上,对上述案例做一个最终的完善和发布。