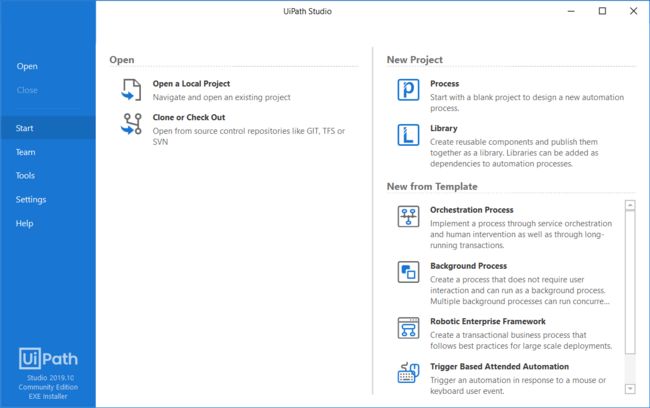
UiPath Studio 包含多个面板,便于您更轻松地访问特定功能。这些面板可以停靠,充当浮动窗口,也可以下拉列表中启用“自动隐藏”选项。
功能区
The ribbon is straightforward and can be minimized or expanded by clicking the Minimize / Expand button
. It consists of the following three tabs:
- “主页”- 从预定义模板中启动一个新项目,或者打开最近使用过的项目。您可在“打开最近的项目”列表中固定项目或从中删除项目,将鼠标悬停在项目上方可显示完整的项目“说明”。项目默认在
C:\Users\中创建。“打开本地项目”按钮可用于搜索\Documents\UiPath project.json文件。
注意:
若将 Studio 更新到 v2018.3 以上版本,系统将会重置“打开最近的项目”项目列表。
- 设计 - 向项目中添加序列、流程图和状态机,安装和管理活动包,与用户界面元素构建交互,将工作流导出到 Excel,然后将您的工作发布到 OrcheStrator 或自定义订阅源。请记住,除非您安装
UiPath.UIAutomation.Activities包,否则“功能区”中将不会显示“向导”和“用户界面探测器”。
- “调试”- 调试工作流,同时使用调试工具设置断点,逐步监视活动的执行,并调整调试速度。打开日志,查看有关项目执行以及对项目进行的任何更改的详细信息。如需有关调试的更多信息,请查看关于调试页面。
注意:
Files that are not created during the execution of the automation project become read-only when published to Orchestrator. If your business process requires you to write in a specific file at some point, be sure to create it while designing the project.
The Tools Tab
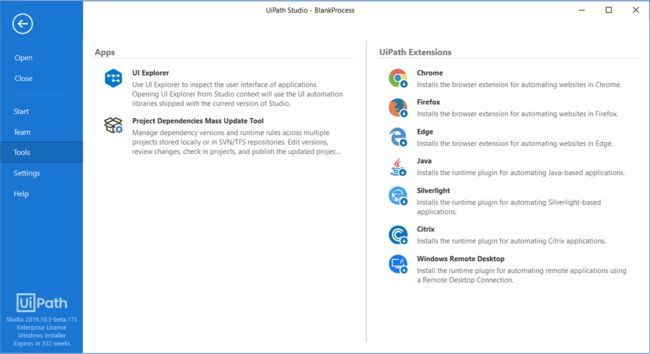
“工具”选项卡可用于安装适用于 Chrome、Firefox、Edge、Java、Silverlight、Citrix 和 Windows 远程桌面的扩展程序,也可用于启动“用户界面探测器”和“项目依赖项批量更新工具”。如需关于扩展程序的更多信息,请查看“关于扩展程序”页面。
The Project Dependencies Mass Update Tool is also located under the Tools tab, offering a user-interface tool for updating dependencies versions on multiple projects at once, located locally or in remote source control repositories.
The Settings Tab
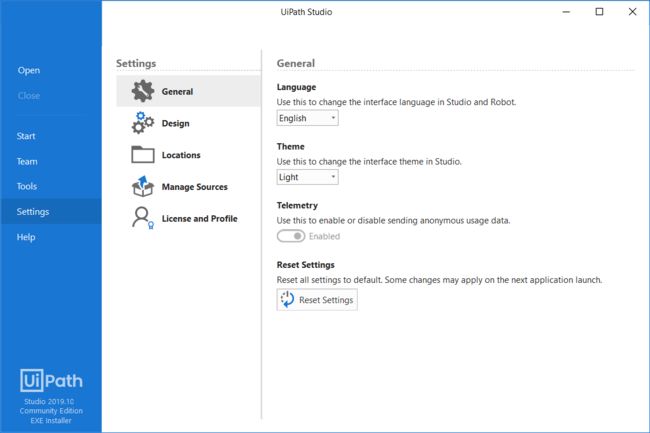
The Settings tab has options for changing the interface language, theme, setting global preferences, and managing activity feeds.
General
“常规”子部分中含有相应选项,可通过选取以下其中一种可用语言来更改 Studio 和机器人的界面语言:“英语”、“日语”、“法语”、“俄语”、“中文简体”、“德语”、“西班牙语”、“西班牙语(拉美)”、“葡萄牙语(葡萄牙)”、“葡萄牙语(巴西)”、“韩语”或“土耳其语”。
The Studio interface theme can be changed from the drop-down menu, by choosing either Light or Dark theme, and restarting Studio for the changes to apply.
Studio detects High Contrast on the machine and switches to this mode upon restart.
注意:
为正常使用“深色”主题,自动化项目必须至少具有 UiPath.System.Activities v18.4.2 和 UiPath.UIAutomation.Activities v18.4.1 依赖项。
The Reset Settings button reverts all General and Design settings in Studio to their default state. However, please note that it has no effect on feeds or favorite activities.
Aside from this, the following settings are reverted to their default state:
- The list of Recent files;
- “收藏夹”中的活动列表;
- Studio 布局调整;
- The Break on Exceptions option in the Execute tab > Options;
- Show Activities options and pinned activities in the Activities panel;
- User-added folders in the Snippets panel, the last directory where you opened a project from, and the Update Channel, which is switched to Stable.
Design
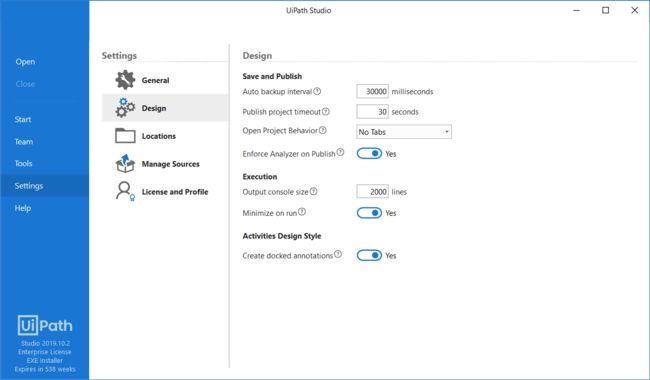
This subsection contains a set of global settings that apply to all projects opened in this version of Studio.
Save and Publish
The Auto backup interval allows you to set a regular interval at which projects are automatically backed up. This is useful for restoring the last saved copy of the workflow. The default value is set at 30,000 milliseconds. The minimum value is 10,000 milliseconds, while the maximum one is 9,999,999 ms.
The Publish project timeout sets the timeout value for publishing projects. The default value is 30 seconds. The maximum timeout is 999,999 seconds while the minimum one is 1 second.
您可通过“打开项目行为”下拉列表,选择重新打开项目时默认打开哪些文件。选择“保存上一次打开的选项卡”、“打开主入口点”或“无选项卡”。
The Enforce Analyzer on Publish toggle allows or restricts publishing of projects with Workflow Analyzer errors.
Execution
The Output console size sets up to 9,999 lines in a single session to be displayed in the Output panel. The default value is 2,000 lines. The maximum value that can be added is 9,999 lines, while the minimum one is 1 line.
The Minimize on run toggle allows you to set Studio to maximize or minimize when running projects.
活动设计样式
“创建固定注释”切换开关用于为项目中的活动创建固定或浮动注释。
位置
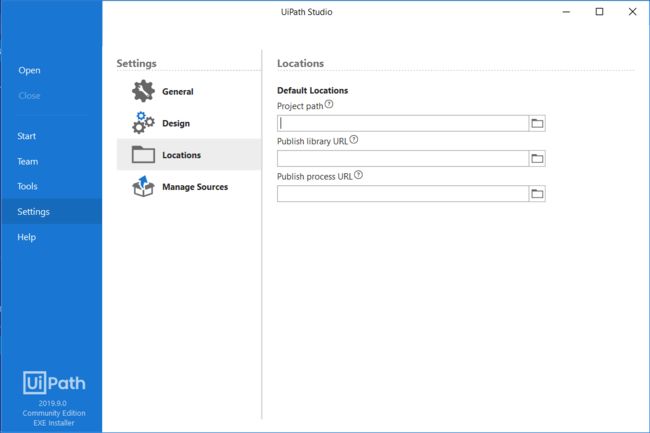
To change the default location where projects are created simply add the new path in the Project Path box.
The Publish Library URL box allows you to add a default location where all libraries are published when the custom feed option is selected.
The Publish Process URL works in the same way only for processes. It allows you to provide a default path where processes are published when the custom feed option is selected.
Manage Sources
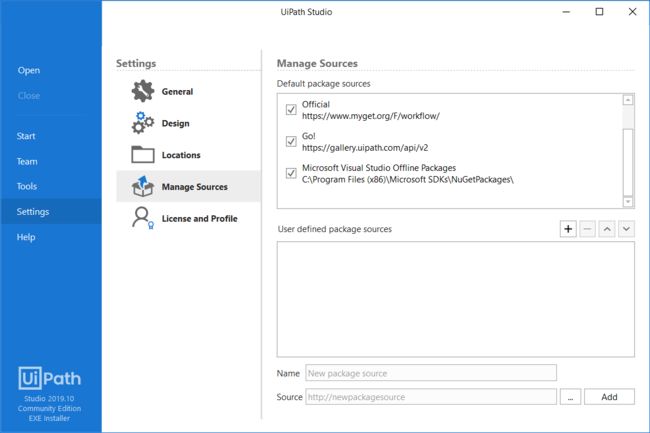
Manage feeds for activities packages from Studio Backstage view without having to open a project. This section is similar to the one in the Manage Packages window, which lets you adjust feeds per project.
注意:
The Local activity feed is enabled by default. The Orchestrator feed is also enabled if the Robot is connected to Orchestrator.
许可证和配置文件
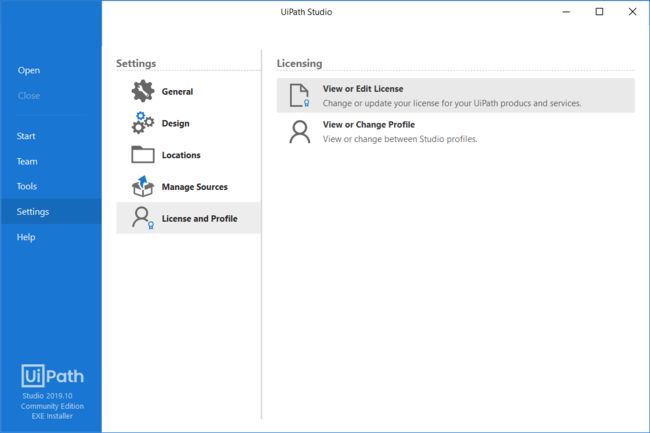
使用此选项卡激活社区版或企业版许可证,或通过 Orchestrator 为 Studio 授予许可。
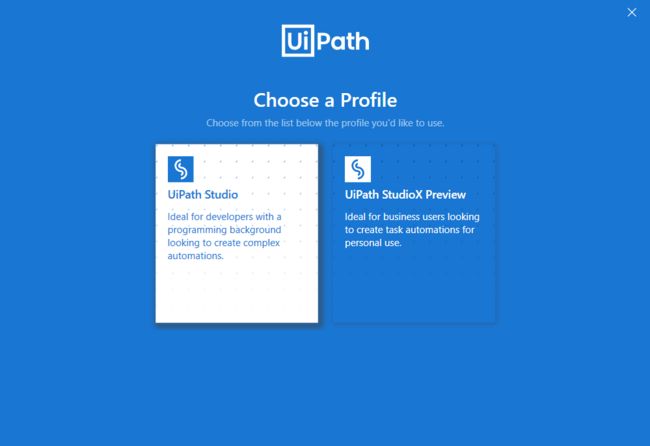
此外,您还可在 Studio 和 StudioX 配置文件之间进行切换。
The Help Tab
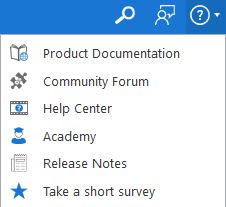
The Help tab directs you to product documentation, release notes, online resources, the Community Forum and the RPA Academy.
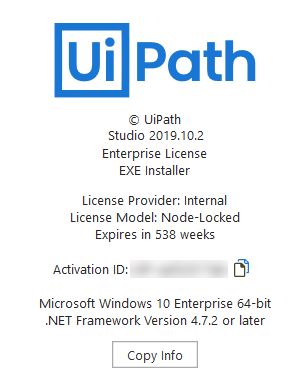
Information regarding product version and installation, license availability, update channel and device ID is also found in the Help page, together with a Copy Info button for quickly copying the details to the clipboard.
The ribbon hosts a shortcut with Help links, accessible through the icon illustrated below:
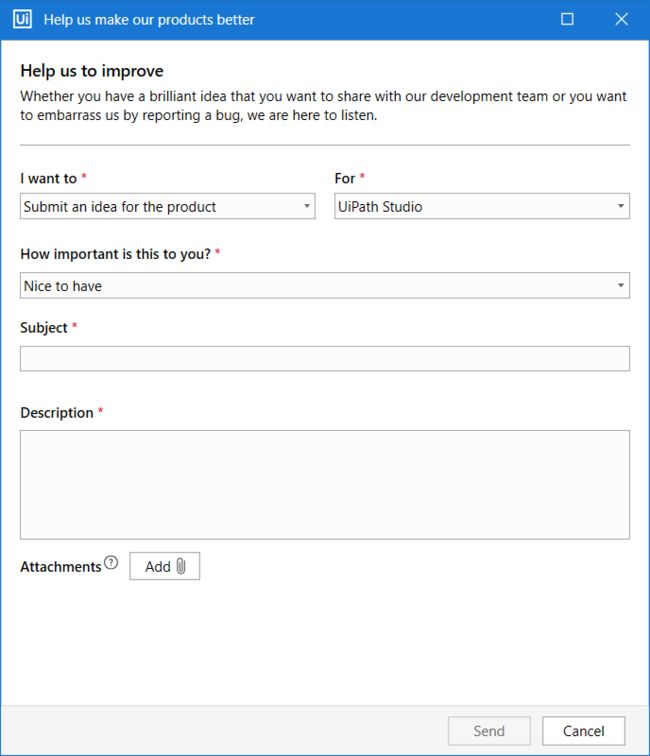
发送反馈
您可以直接从 Studio 中发送以下两类反馈:“提交产品建议”或“报告错误”。您可以单击功能区中的 [图片上传中...(image-a5388e-1580053485872-44)]
图标访问这两类反馈。
The Send Feedback feature must be used only for sending anonymous feedback to the product team. To contact our tech support team, please use the Contact Technical Support form.
From the I want to drop-down menu pick either Submit an idea for the product or Report a bug. Pick either UiPath Activities, UiPath Studio, UiPath Robot or UiPath Orchestrator from the drop-down menu under the For section.
Add a severity to your request by picking from Nice to have, Important or Critical from the drop-down menu. In the Subject field, add a short title.
Add a detailed description and attach up to 6 images, videos or text files, each with a size smaller than 10MB. The threshold for sending feedback is 3 posts in a timeframe of 5 minutes.
命令面板
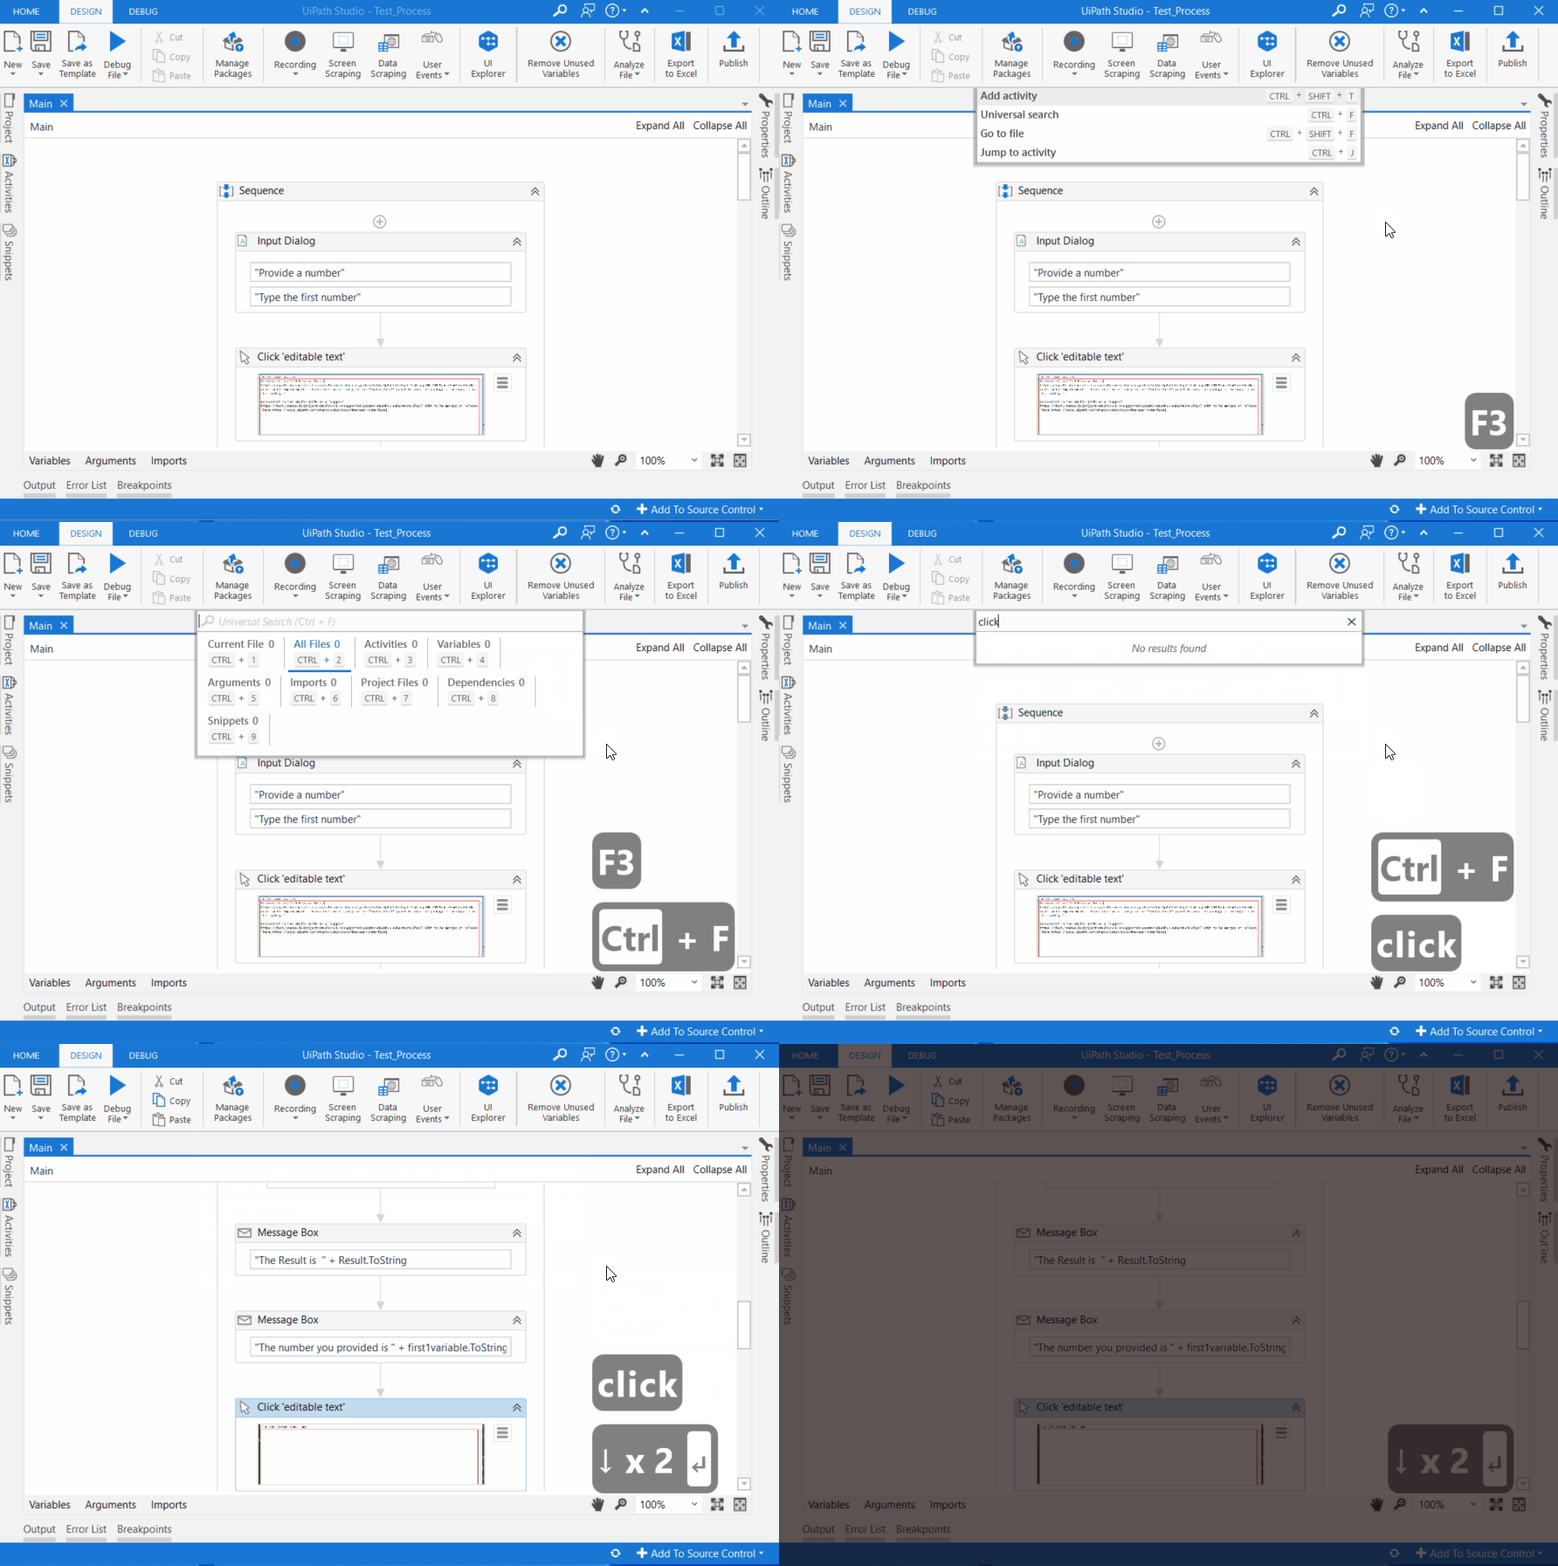
使用 Ctrl + Shift + P、F3 键盘快捷键,或单击搜索按钮,以打开“命令面板”。该面板中包含“添加活动”、“通用搜索”、“转到文件”和“跳转到活动”搜索栏。
添加活动
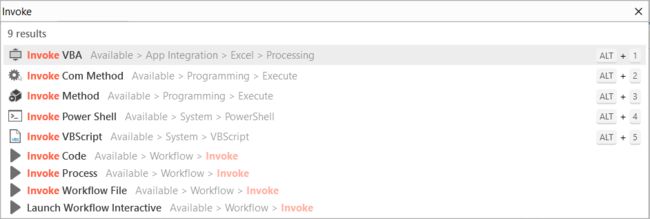
使用 Ctrl + Shift + T 键盘快捷键即可打开“添加活动”搜索栏。您可以在已安装的包中搜索活动,并将其添加到文件中选定的活动之后。该搜索栏会向前五个结果自动分配键盘快捷方式,并记住之前的搜索结果。
单击序列中某活动顶部或底部的图标即可打开“添加活动”搜索栏。
通用搜索
“通用搜索”栏可用于查找当前项目中的代码片段、活动、项目依赖项和文件。
选项
Shortcut
说明
当前文件
Ctrl + 1
列出当前打开的文件中与搜索查询相匹配的结果。
所有文件
Ctrl + 2
列出当前项目的所有文件中与搜索查询相匹配的结果。
活动
Ctrl + 3
Lists results from activities that match the search query.
变量
Ctrl + 4
查找当前项目中与搜索查询相匹配的变量。
参数
Ctrl + 5
查找项目中定义的与搜索查询相匹配的参数。
导入
Ctrl + 6
在项目中查找与搜索查询相匹配的已导入命名空间。
项目文件
Ctrl + 7
查找当前项目中与搜索查询相匹配的文件。
依赖项
Ctrl + 8
列出安装到项目的依赖项中的查询结果。
代码片段
Ctrl + 9
查找与搜索查询匹配的代码片段文件。
若使用“通用搜索”或“添加活动”,系统会在您下一次打开搜索栏之前一直保留搜索结果。若使用“转到文件”和“跳转到活动”,则不会保留之前的搜索查询。
双击活动或按 Enter 键,将活动添加至当前打开的文件。通过使用相同命令,您可以打开“所有文件”或“项目文件”类别下的文件,或聚焦所需的搜索结果。
Please keep in mind that search results might contain inconsistencies if packages were previously uninstalled from the project.
转到文件
“转到文件”栏用于搜索及打开当前项目文件夹中的文件。.xaml 文件将在 Studio 的“设计器”面板中打开,其他文件(例如屏幕截图或 Excel 文件)则由计算机上的对应默认应用程序打开。双击或按 Enter 键即可打开文件。
注意:
“活动”、“项目”面板和“命令面板”支持模糊搜索。这表示,即使搜索词并不完全匹配,系统也会返回结果列表。搜索词可能仅缺失一小部分、出现拼写错误或仅包含每个词的首字母。例如,如果在“活动”栏键入 dci,系统将返回“双击图像”活动。
跳转到活动
The Jump to activity search bar part of Command Palette helps find and focus specific activities in large workflows. It is accessed by using the Ctrl + J keyboard shortcut, or by opening using the F3 or Ctrl + Shift + P shortcuts, and selecting Jump to activity.
打开后,“跳转到活动”栏将显示“设计器”面板中目前聚焦的 .xaml 文件内的完整活动列表。
键入活动的显示名称或命名空间,例如“分配”。使用键盘箭头选择该活动,并按 Enter 键以在“设计器”面板中将它设为焦点。
在“跳转到活动”栏中,活动依以下顺序排列:容器、父活动和子活动。
The Designer Panel
The Designer panel displays your current automation project, enables you to make changes to it, and provides quick access to variables, arguments and imports.
It is possible to navigate within a diagram by double-clicking the activity you want to view. The path is displayed as breadcrumbs in the header of the Designer panel. Please note that when using multiple displays scaled differently the text in the input field part of some activities might be improperly shown.
您可使用 Ctrl + C 快捷键或上下文菜单将活动复制到文本编辑器、对其作出更改,然后复制回“设计器”面板中。
[图片上传中...(image-f5a76f-1580053485870-19)]
Activate Pan Mode by clicking the [图片上传中...(image-7a7eea-1580053485871-42)]
icon, holding the Space key or pressing the middle mouse button. Use the zoom drop-down to change the zoom level and click the [图片上传中...(image-e1c949-1580053485871-41)]
icon to reset it back to 100%.
The Fit to Screen [图片上传中...(image-ef657e-1580053485871-40)]
icon changes the zoom in such a way that the whole workflow fits in the Designer panel. Click the [图片上传中...(image-c43d0b-1580053485871-39)]
icon to get an overview of the whole project and navigate through sections by adjusting the focus.
[图片上传中...(image-cd174b-1580053485870-18)]
The Context Menu
[图片上传中...(image-cc8287-1580053485870-17)]
The context menu enables you to perform several operations on your workflow, be it a sequence or a flowchart. You can display it by right-clicking an activity inside your workflow.
注意
If you select more activities, the menu is not displayed at all.
Field Descriptions for the Context Menu
选项
说明
View Parent
Displays the parent of the target activity in the Designer panel.
Note: This option is only displayed for child-activities, if they are opened in the Designer panel.
打开
Opens the selected activity in the Designer panel. Has the same result as double-click.
Collapse
Collapses the activity thus reducing the displayed details to "Double-click to view". You can achieve the same result by clicking the Collapse button [图片上传中...(image-6d831f-1580053485868-8)]
.
Note: Only displayed for sequences.
Expand in Place
Expands the content of the activity, displaying its detailed content. You can achieve the same result by clicking the Expand button [图片上传中...(image-adb0a3-1580053485868-7)]
.
Note: Only displayed for sequences.
Cut
Removes the selected activity and places it onto the Clipboard.
复制
Copies the selected activity and places it onto the Clipboard. Activities from read-only files can be copied to another workflow or a .txt file. When copying multiple activities to clipboard, their order is reversed.
粘贴
Inserts the content of the Clipboard at the current location.
删除
Deletes the target activity.
Note: Since the Context menu is only displayed for a one-activity selection, you can use this command for more activities with the corresponding keyboard shortcut, Delete.
Annotations
Add, edit, delete, show and hide annotations added to activities in the workflow.
Copy as Image
Makes a screenshot of the content displayed in the Designer panel.
Note: If you want to make a screenshot of a child activity, make sure to firstly open it in the Designer panel.
Save as Image
Makes a screenshot of the content displayed in the Designer panel and prompts the user to set the details for saving it (Name, Type, Destination). Supported formats: JPG, PNG, GIF, XPS.
Create Variable
Creates a variable in the Variable panel.
自动排列
在流程图中自动安排活动。
Remove Surrounding Sequence
Removes the selected Sequence activity from the Designer panel. The activities that it contains are moved to the parent sequence.
Surround with Try Catch (Ctrl + T)
Inserts the activity in a Try Catch statement.
Note: A Try Catch statement is used for handling exceptions caused by data or coding errors. The Try clause encloses the activity to be checked for exceptions. The Catches clause is the exception handler. The Finally clause is used for executing an activity regardless of the status of the first two clauses.
Extract as Workflow
Creates a new workflow containing the targeted activity with the purpose of breaking down a large project into smaller ones. In the place of the extracted activity an Invoke
Open Workflow
Opens a workflow created using the above option.
Enable Activity
Enables a previously disabled activity.
Disable Activity
Disables an activity, which is then placed inside a Comment out activity.
Toggle Breakpoint
Marks the selected activity as a breakpoint for debugging. Breakpoints can also be toggled by clicking the Breakpoint button in the Execute tab. You can trigger a breakpoint for one activity at a time.
编辑断点设置
打开“断点设置”窗口。
运行至此活动
调试项目并在执行此特定活动之前停止调试。
从此活动运行
从此活动开始调试。
Show All Conditions
Displays all conditions defined in your project (Properties panel > Conditions).
Note: This option is only displayed for flowcharts when you right-click an empty space inside the project; it is not displayed if you right-click an activity in your flowchart.
Hide All Conditions
Hides all displayed conditions.
Note: This option is only displayed for flowcharts when you right-click an empty space inside the project; it is not displayed if you right-click an activity in your flowchart.
Set as Start Node
Connects the selected activity with the Start node.
Note: Only displayed for flowcharts.
Set as Initial State
Connects the State Machine specific activity to with the Start node.
Note: Only displayed for state machines.
The context menu is also displayed for tabs in the Designer panel. The following options are available:
选项
说明
Close
Closes the active tab.
Close Others
Closes all tabs but the active one.
Close All Documents
Closes all tabs.
Float
Undocks the target tab and changes it to a floating state.
Pin Tab
Pins the target tab in the Designer panel.
Note: The tab pinned last is always moved in front of all other existing tabs (pinned or not). The position of a pinned tab can only be changed relative to other pinned tabs.
New Horizontal Tab Group
Splits the screen horizontally, enabling you to see two or more instances of the Designer panel within the same screen. The target project is moved onto the panel on the right.
Note: Only displayed when your project contains two or more tabs and, implicitly, workflows.
New Vertical Tab Group
Splits the screen vertically, enabling you to see two or more instances of the Designer panel within the same screen. The target project is moved onto the panel at the bottom.
Note: Only displayed when your project contains two or more tabs and, implicitly, workflows.
Move to Previous Tab Group
Moves the target tab onto the previous Designer panel displayed.
Note: Only displayed if you had used the New Vertical Tab Group or New Horizontal Tab Group options before.
Move to Next Tab Group
Moves the target tab onto the next Designer panel displayed.
Note: Only displayed if you had used the New Vertical Tab Group or New Horizontal Tab Group options before.
The Activities Panel
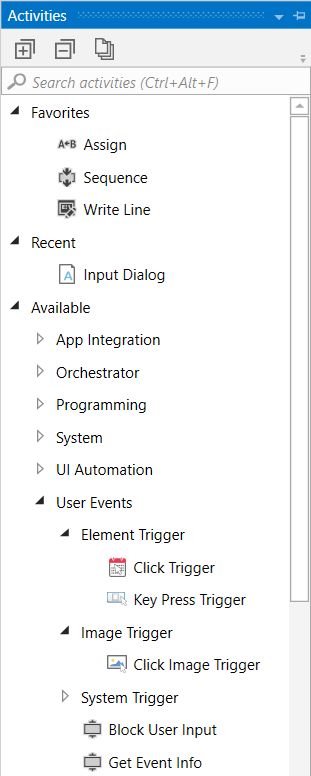
“活动”面板会显示可以添加到当前工作流的可用活动。使用搜索框查找活动,并使用导航键浏览活动,然后按 Enter 键向当前已打开的文件添加一个活动。
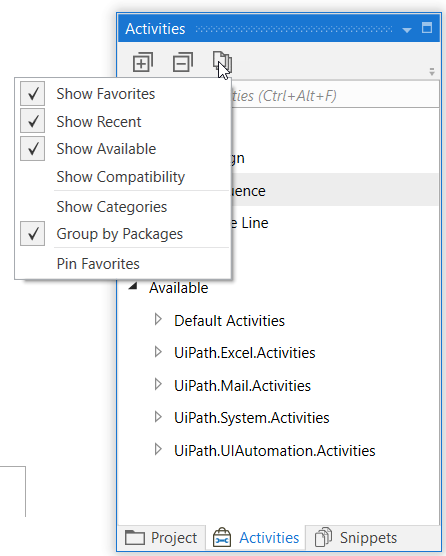
The Show Activities button opens a list with options for showing favorite, recently used, available and compatible activities. The Pin Favorites option enables you to keep favorite activities always visible in the panel.
若要按活动所属的包对活动进行分组,请单击“显示活动”按钮,并选择“按包分组”。系统随即会在“活动”面板中将活动分组。
将鼠标悬停在面板中的活动上方,即可显示该活动所属的包及其工具提示。
右键单击面板中的活动,并选择“创建测试台”以检测一个或多个活动,然后再将它们添加到项目中。在此处了解详情。
注意:
The search box can be used for finding activities by their class name, regardless of the interface language set in Studio.
The Snippets Panel
The Snippets panel enables you to easily reuse automations. It includes, by default, multiple samples and snippets.
You can add your own by clicking the **Add Folder **button and selecting a directory from your hard drive. Empty folders are not displayed.
To remove a folder, right-click it and select Remove.
The Project Panel
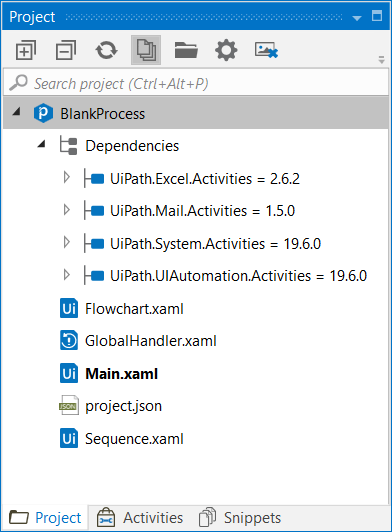
The Project panel enables you to view the contents of the current project, add folders, open the file location, manage dependencies, and adjust project settings.
选项
说明
全部展开[图片上传中...(image-539500-1580053485867-6)]
Expands all nodes in the automation project.
全部折叠[图片上传中...(image-29f2d-1580053485867-5)]
Collapses all nodes in the automation project.
Refresh
Refreshes the project.
Show All Files[图片上传中...(image-fdc5ca-1580053485867-3)]
Shows all files belonging to the automation project, including the project.json.
File Explorer[图片上传中...(image-2f3395-1580053485867-2)]
Opens the project's location on the machine.
Project Settings[图片上传中...(image-dcde22-1580053485867-1)]
Opens the Project Settings window for processes or libraries.
Remove Unused Screenshots[图片上传中...(image-3bf638-1580053485867-0)]
Removes screenshots that aren't used when running the automation project.
Context Menu for Projects
右键单击“项目”面板中的任意位置即可打开上下文菜单,其中包含以下选项:
选项
说明
Open Project Folder
Opens the local folder containing the project.
Project Settings
Opens the Project Settings window for adjusting project preferences.
添加
打开可以添加到项目的各类资源的列表:文件夹、“序列”、“流程图”、“状态机”或“全局处理程序”。
Import Workflows
Imports .xaml files to the project and adds Imported in the file name if it coincides with the name of the main file.
添加到来源控件
使用“Git Init”、“复制到 Git”、“添加到 TFS”或“添加到 SVN”选项将当前项目添加到来源控件。请注意,此选项仅在右键单击项目节点时可见。
打开
使用默认程序打开所选文件。
打开文件位置
打开包含该文件的本地文件夹。
重命名
用于重命名选定的文件或文件夹,并打开“重命名项目”窗口。系统随即会在此项目出现的所有位置处将其重命名。
删除
Deletes the selected item only from your local machine.
Select for Compare
Selects the current file for comparison.
Compare with Selected
Compares the current file with the previously selected file using Compare Files.
运行
Runs the selected .xaml file.
设置为“主要”
Sets the selected .xaml file as Main in the project definition, meaning that the project execution starts with that file. There can only be one Main project file.
Make private or public
Makes the workflow contained in the library, either public or private. After publishing, the public workflow is available in the Activities panel.
Properties
Open the library’s Properties window for adding a tooltip and Help Link.
Set as Global Handler
Sets the .xaml file as the Global Exception Handler for the project. This is applicable to one workflow per project/process.
Remove Handler
Removes the Global Exception Handler tag from the .xaml file.
The Properties Panel
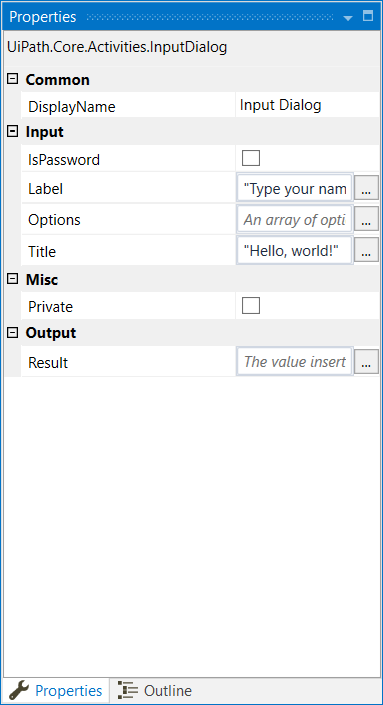
The Properties panel is contextual and enables you to view and change the properties of a selected activity. When selecting two activities in the same workflow, common properties can be modified from the Properties panel.
The Outline Panel
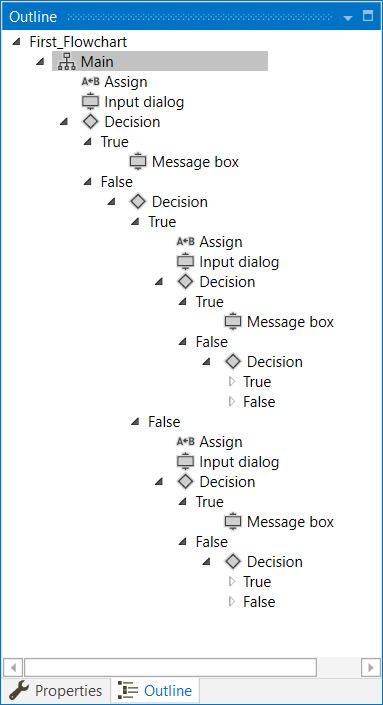
The Outline panel displays the project hierarchy, all available variables and nodes. You can highlight activities in this panel by selecting them in the Designer panel, or you can go to a specific activity by selecting it in the Outline panel.
The Output Panel
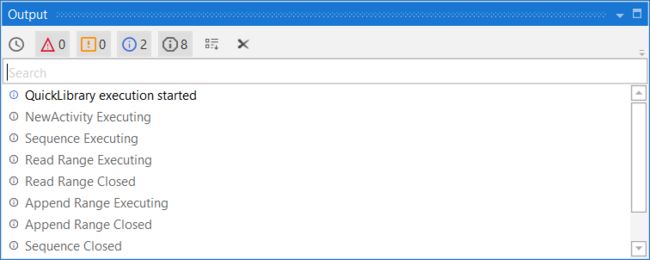
The Output panel enables you to display the output of the Log Message or Write Line activities, among other things. Exceptions for packages are also displayed in this panel.
From the Output panel, you can show or hide messages that have different log levels (errors, warnings) by clicking the buttons in the panel’s header. Double-clicking a message displays further details about it, with the option to copy information.
在“输出”面板中搜索日志并在搜索结果列表中选择项目时,相应日志将会高亮显示。
“导出日志”按钮用于将日志导出至 .txt 文件。该按钮还会导出时间戳和错误消息详情。此外还可导出筛选后的日志。例如,若想仅导出 Trace 级日志,您可筛选列表,然后使用“导出日志”按钮。
调试时,“输出”面板将显示日志,表示活动开始执行时间,直至结束的时间。您可通过“调试”选项卡中的“日志活动”选项启用此功能。
“错误列表”面板显示验证流程中在文件或项目中发现的错误,以及由“关于工作流分析器”规则生成的错误。
The Clear All button erases all info displayed in the Output panel. Logs and other data stored in this panel are erased when a workflow is run. The Output panel displays up to 2,000 lines at a time.
The Orchestrator Resources Panel
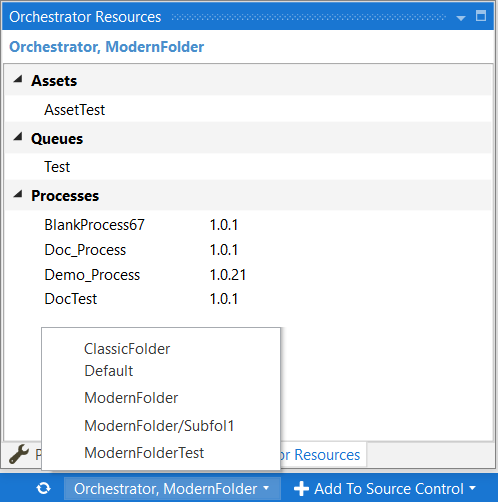
The Orchestrator Resources panel in Studio can load assets, queues and processes, provided that the Robot is connected to Orchestrator. Read the Connecting Robots to Orchestrator page to find the steps.
If the Robot connected to Orchestrator is of type Standard, then the Orchestrator Resources panel can display only the Classic folder which has this Robot provisioned.
如果是浮动型机器人,则面板将显示该机器人可访问的所有传统文件夹和新式文件夹。如要详细了解如何在 Orchestrator 中创建机器人,请参阅此处。
此面板显示 Orchestrator 内传统或新式文件夹中的资产、队列和流程。了解文件夹的更多相关信息。
注意:
使用传统的手动配置机器人时,您必须授予它相应资源(即资产、队列和流程)的 View 权限,才可让它显示在面板中。
要将资源加载到面板中,请单击 Studio 状态栏中的“刷新”按钮。单击箭头旁边的文本,即可在文件夹之间切换,如上图所示。
Hover over the text in the status bar to see the Orchestrator URL and the name of the current folder. Right-click on any item in the Orchestrator Resources panel to copy its name and use it in activities that interact with such resources.
