一、Schema base的方式
1.出现的问题:
我们使用传统方式进行项目开发的时候,我们书写好的功能模块后期的扩展比较的麻烦。
- AOP的原理:
AOP的本质是通过动态代理实现的,在Spring中动态代理主要分为两类:JDK的动态代理(基于接口)和CGLIB的动态代理(基于继承)。
2.扩展:
OOA:面向对象的分析;
OOD:面向对象的设计;
OOP:面向对象的编程;
AOP:面向切面的编程,对OOP的补充,传统的OOP是纵向的方式来解决问题,AOP是从横向上解决问题;

3.通知的类型:
前置通知:在切点前执行;
后置通知:在切点后执行;
环绕通知:可以在切点前后分别执行;
异常通知:在切点出现异常时执行;
最终通知:不管是否发生异常,都会执行(类似于finally);
- 配置属性详解:
 详细图
详细图
4.实现步骤:
(1)确定切点;
(2)通知;
(3)织入切面;
- 代码实现:
(1)BeforeAdvice类:
package com.zlw.advice;

import java.lang.reflect.Method;

import org.springframework.aop.MethodBeforeAdvice;

public class BeforeAdivce implements MethodBeforeAdvice {

    @Override
    public void before(Method method, Object[] objects, Object object) throws Throwable {

        System.out.println(method+"--"+objects+"---"+object);

        System.out.println("前置通知!");
    }
}
(2)AfterAdvice类:
package com.zlw.advice;

import java.lang.reflect.Method;

import org.springframework.aop.AfterReturningAdvice;

public class AfterAdvice implements AfterReturningAdvice{

    @Override
    public void afterReturning(Object obj, Method method, Object[] objects, Object obj1) throws Throwable {

        System.out.println(obj+"---"+method+"---"+objects+"---"+obj1);

        System.out.println("后置通知!");
    }
}
(3)RunAdvice类:
package com.zlw.advice;

import java.lang.reflect.Method;

import org.aopalliance.intercept.MethodInterceptor;
import org.aopalliance.intercept.MethodInvocation;


public class RunAdvice implements MethodInterceptor {
    /**
     * 环绕通知一般不结合前值和后置使用
     *
     * methodInvocation:封装的是切点的方法对象和所在的类
     *
     */
    @Override
    public Object invoke(MethodInvocation methodInvocation) throws Throwable {
        System.out.println("环绕通知:前置...");

        Object obj = methodInvocation.proceed();

        System.out.println("环绕通知:后置...");
        return obj;
    }
}
(4)ThrowAdvice类:
package com.zlw.advice;

import org.springframework.aop.ThrowsAdvice;

public class ThrowAdvice implements ThrowsAdvice {
    public void afterThrowing(Exception ex)throws Throwable {
        System.out.println("异常通知!");
    }
}
(5)切点:
public void B() {
        int b= 5/0;
        System.out.println("方法b()");
    }
(6)applicationContext配置文件:
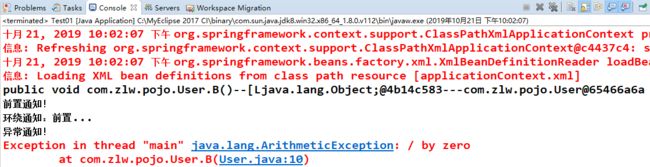
(7)测试:
package com.zlw.test;

import org.springframework.context.ApplicationContext;
import org.springframework.context.support.ClassPathXmlApplicationContext;

import com.zlw.pojo.User;

public class Test01 {
    public static void main(String[] args) {
        ApplicationContext app = new ClassPathXmlApplicationContext("applicationContext.xml");
        User user = app.getBean("user",User.class);
        user.B();
    }
}
二、AspectJ的方式
1.Schema Baes方式的不足:
我们目前使用的schema Baes 实现的方式,发现了每一个通知都需要实现对应的接口,每一个接口中就是一个方法,这样的书写方式比较的麻烦的,我们想所有的方法都在一个类中书写就比较方便了。
2.AspectJ方式实现:
我们发现 Aspect J的方式虽然可以把所有的通知都结合到一起,书写方便,但是获得切点中的参数和切点所在的类的时候比较的繁琐 。
3.代码示例:
(1)切点:
public void A() {
        int a= 10/0;
        System.out.println("方法a()");
    }
(2)通知:
package com.zlw.advice;

import org.aspectj.lang.ProceedingJoinPoint;

public class AspectJAdvice {
    //前置通知方法
    public void before(){
        System.out.println("前置通知!");
    }
    //环绕通知方法
    public Object around(ProceedingJoinPoint point)throws Throwable{
        System.out.println("环绕通知:前...");
        Object o = point.proceed();
        System.out.println("环绕通知:后...");
        return o;
    }
    //后置通知方法
    public void after(){
        System.out.println("后置通知!");
    }
    //异常通知方法
    public void throwsAd(){
        System.out.println("异常通知!");
    }

}
(3)applicationContext配置文件:
(4)测试:
package com.zlw.test;

import org.springframework.context.ApplicationContext;
import org.springframework.context.support.ClassPathXmlApplicationContext;

import com.zlw.pojo.User;

public class Test02 {
    public static void main(String[] args) {
        ApplicationContext app = new ClassPathXmlApplicationContext("applicationContext2.xml");
        User user = app.getBean("user",User.class);
        user.A();
    }
}

4.两种方式的应用场景:‘’
(1)schema base :如果我们需要使用切点中的参数或者切点所在的类对象的时候。
(2)aspect J:就是简单的给切点增加通知的时候使用这个方式比较简单。
三、登录功能增加日志信息统计
1.需求:
在原功能的基础上增加对应的日志信息统计的操作;主要对service层进行操作修改。
- 实现步骤:
切点:登录的方法;
通知:使用后置通知;
织入切面;
2.代码实现:
(1)增加后置通知:
package com.zlw.advice;

import java.lang.reflect.Method;
import java.util.Date;

import org.springframework.aop.AfterReturningAdvice;

public class AfterAdvice implements AfterReturningAdvice {

    @Override
    public void afterReturning(Object object, Method method, Object[] objcets, Object object1) throws Throwable {
        if (object != null) {
            String s = new Date().toLocaleString();
            System.out.println("用户:" + objcets[0] + "在" + s + "成功登录该系统!");
        }
    }
}
(2)修改applicationContext配置文件:

四、花卉管理系统
1.需求:
实现添加花卉信息并跳转到花卉信息展示页面;
实现花卉信息的查询和页面展示;
使用Spring+MyBatis+JSP+Servlet实现;
2.实现步骤:
(1)数据库设计:
create table flower(
    id int(5) PRIMARY key auto_increment,
    name VARCHAR(20),
    price  VARCHAR(20),
    production VARCHAR(20)
)
(2)创建实体类生成getter,setter和构造方法:
    private int id;
    private String name;
    private String price;
    private String production;
(3)mapper接口和映射文件:
package com.zlw.mapper;

import java.util.List;

import com.zlw.pojo.Flower;

public interface FlowerMapper {
    //查询所有
    List selAll();
    //添加
    int save(Flower flower);
}
insert into flower values(default,#{name},#{price},#{production});
(4)applicationContext核心配置:
(5)service层:
package com.zlw.service.impl;

import java.util.List;

import com.zlw.mapper.FlowerMapper;
import com.zlw.pojo.Flower;
import com.zlw.service.FlowerService;

public class FlowerServiceImpl implements FlowerService {
    FlowerMapper flowerMapper;

    public void setFlowerMapper(FlowerMapper flowerMapper) {
        this.flowerMapper = flowerMapper;
    }

    @Override
    public List findAll() {
        return flowerMapper.selAll();
    }
    @Override
    public int save(Flower flower) {
        return flowerMapper.save(flower);
    }
}
(6)Servlet
package com.zlw.controller;

import java.io.IOException;
import java.util.List;

import javax.servlet.ServletException;
import javax.servlet.http.HttpServlet;
import javax.servlet.http.HttpServletRequest;
import javax.servlet.http.HttpServletResponse;
import org.springframework.context.ApplicationContext;
import org.springframework.context.support.ClassPathXmlApplicationContext;

import com.zlw.pojo.Flower;
import com.zlw.service.FlowerService;

public class FindAllServlet extends HttpServlet {
    FlowerService flower ;

    public void setFlower(FlowerService flower) {
        this.flower = flower;
    }
    @Override
    public void init() throws ServletException {
        ApplicationContext app = new ClassPathXmlApplicationContext("applicationContext.xml");
        flower = app.getBean("flower",FlowerService.class);
    }
    public void service(HttpServletRequest request, HttpServletResponse response) throws ServletException, IOException {
        List list = flower.findAll();

        request.setAttribute("list", list);
        request.getRequestDispatcher("/findAll.jsp").forward(request, response);
    }
}
package com.zlw.controller;

import java.io.IOException;

import javax.servlet.ServletException;
import javax.servlet.http.HttpServlet;
import javax.servlet.http.HttpServletRequest;
import javax.servlet.http.HttpServletResponse;

import org.springframework.context.ApplicationContext;
import org.springframework.context.support.ClassPathXmlApplicationContext;

import com.zlw.pojo.Flower;
import com.zlw.service.FlowerService;

public class SaveSerlvet extends HttpServlet {

    FlowerService flower ;

    public void setFlower(FlowerService flower) {
        this.flower = flower;
    }
    @Override
    public void init() throws ServletException {
        ApplicationContext app = new ClassPathXmlApplicationContext("applicationContext.xml");
        flower = app.getBean("flower",FlowerService.class);
    }
    public void service(HttpServletRequest request, HttpServletResponse response) throws ServletException, IOException {
        request.setCharacterEncoding("utf-8");
        //获取页面信息
        String name = request.getParameter("name");
        String price = request.getParameter("price");
        String production = request.getParameter("production");

        //处理
        Flower flowe = new Flower();
        flowe.setName(name);
        flowe.setPrice(price);
        flowe.setProduction(production);
        int n = flower.save(flowe);

        if(n>0){
            response.sendRedirect(request.getContextPath()+"/findAllServlet");
        }else{
            request.setAttribute("error", "添加失败!");
            request.getRequestDispatcher("/save.jsp").forward(request, response);
        }
    }
}
(7)jsp页面:
展现页面
        花卉编号
        花卉名称
        花卉价格
        花卉产地


        ${fl.id }
        ${fl.name }
        ${fl.price }
        ${fl.production }
添加页面:
3.实现效果:

