音频节奏检测(Onset Detection)
1. 前言
最近市场上出现一些多个视频拼接而成MV,其原理是根据音频的节拍变换切换视频。
我在这里讲述下如何进行音频节拍检测。
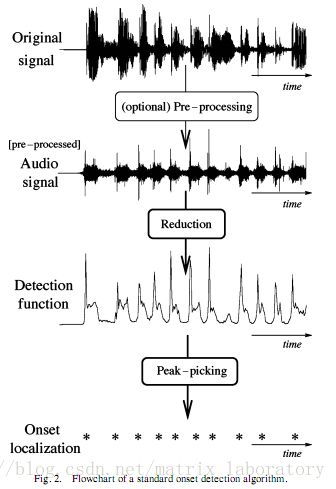
2. 音频检测一般流程
3.
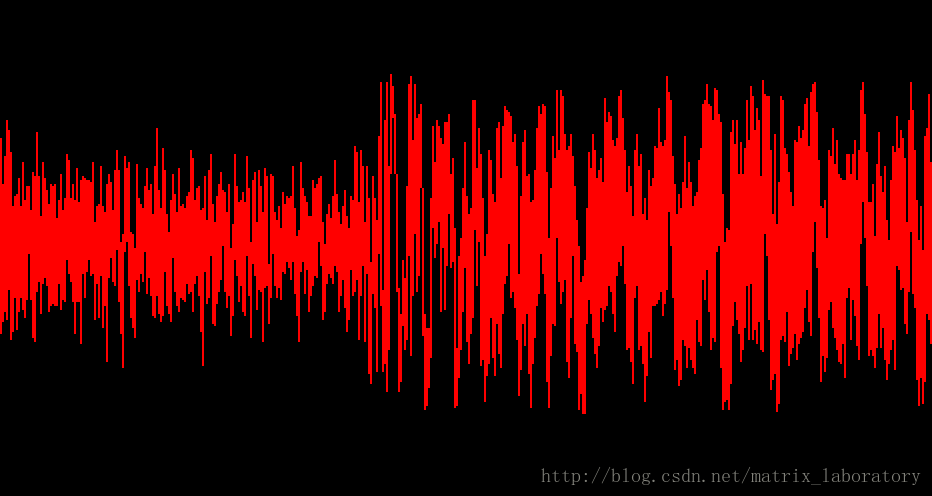
3.1 原始音频频谱
以1024为窗口(即每次读取1024个采样点)进行量化
        WaveDecoder decoder = new WaveDecoder( new FileInputStream( "samples/sample.wav" ) );
        ArrayList allSamples = new ArrayList( );
        float[] samples = new float[1024];

        while( decoder.readSamples( samples ) > 0 )
        {
            for( int i = 0; i < samples.length; i++ )
                allSamples.add( samples[i] );
        }

        samples = new float[allSamples.size()];
        for( int i = 0; i < samples.length; i++ )
            samples[i] = allSamples.get(i);

        Plot plot = new Plot( "Wave Plot", 512, 512 );
plot.plot( samples, 44100 / 1000, Color.red ); 3.2 数据预处理
(1)差值处理
差值处理是分析序列数据的基本本方法。
我们把当前窗口数据减去上一个窗口数据,得到差值数据,公式如下:
SF(k)=∑i=0n−1s(k,i)–s(k−1,i)
(2)傅里叶变换
傅立叶变换将原来难以处理的时域信号转换成了易于分析的频域信号(信号的频谱),这个我就不多提了……
想了解的推荐一篇文章:
错过这篇文章,可能你这辈子不懂什么叫傅里叶变换了
   public static final String FILE = "samples/judith.mp3";

   public static void main( String[] argv ) throws Exception
   {
      MP3Decoder decoder = new MP3Decoder( new FileInputStream( FILE  ) );
      FFT fft = new FFT( 1024, 44100 );
      float[] samples = new float[1024];
      float[] spectrum = new float[1024 / 2 + 1];
      float[] lastSpectrum = new float[1024 / 2 + 1];
      List spectralFlux = new ArrayList( );

      while( decoder.readSamples( samples ) > 0 )
      {
         fft.forward( samples );
         System.arraycopy( spectrum, 0, lastSpectrum, 0, spectrum.length );
         System.arraycopy( fft.getSpectrum(), 0, spectrum, 0, spectrum.length );

         float flux = 0;
         for( int i = 0; i < spectrum.length; i++ )
            flux += (spectrum[i] - lastSpectrum[i]);
         spectralFlux.add( flux );
      }

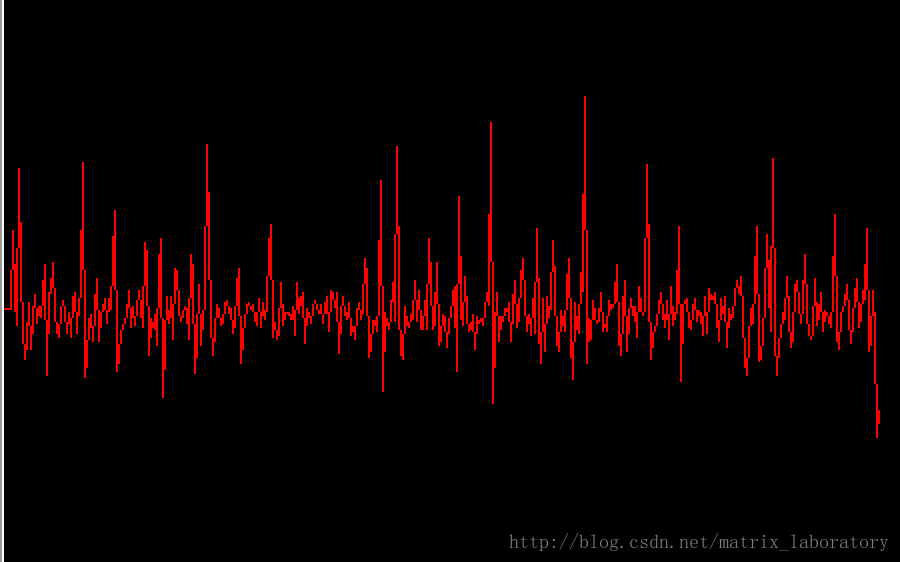
      Plot plot = new Plot( "Spectral Flux", 1024, 512 );
      plot.plot( spectralFlux, 1, Color.red );
      new PlaybackVisualizer( plot, 1024, new MP3Decoder( new FileInputStream( FILE ) ) );
} (3)再次差分
float flux = 0;
   for( int i = 0; i < spectrum.length; i++ )
   {
      float value = (spectrum[i] - lastSpectrum[i]);
      flux += value < 0? 0: value;
   }
   spectralFlux.add( flux );
4. 节拍检测(Peak Detection)
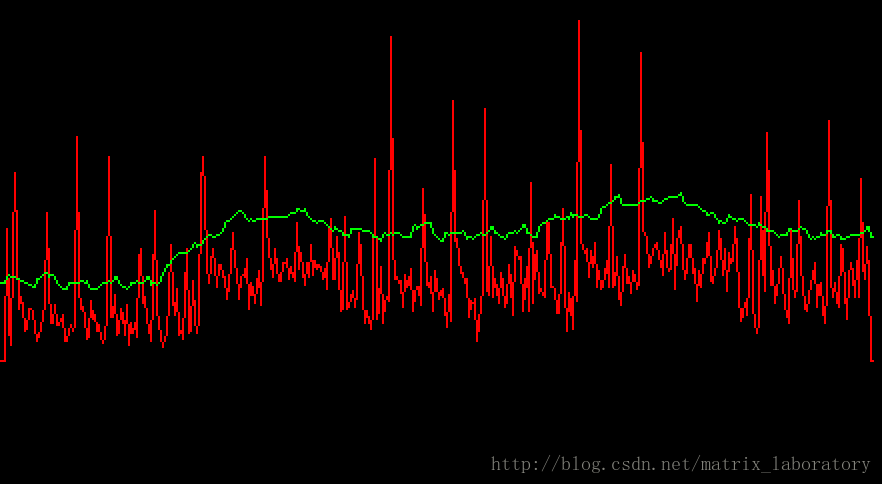
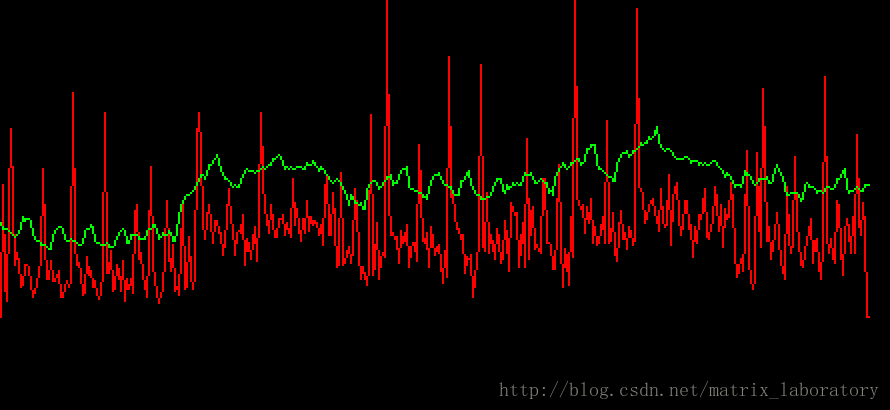
通过傅里叶变换和差分处理后的数据,基本可以看出音频节奏了,要进一步数据量化,可以采用移动均线等方法。
这部分属于时间序列数据分析的内容,具有很广泛的应用,比如金融上很多指标的基本原理也是如此。
说多了,有点跑题,我们继续……
一般音频的采样率(Sample Rate)都是44100或者48000,这里我们就以44100为例。
前文我设置窗口大小为1024:
1s包含的窗口数:44100 / 1024 = 43
一个窗口所代表的时间为:
1000 / (44100 / 1024) = 23.21ms
那么需要以0.5s为区间计算均值,需要的窗口数约为22个。这里取前10个窗口+后10个窗口计算均值。
   public static final String FILE = "samples/explosivo.mp3";
   public static final int THRESHOLD_WINDOW_SIZE = 20;
   public static final float MULTIPLIER = 1.5f;

   public static void main( String[] argv ) throws Exception
   {
      MP3Decoder decoder = new MP3Decoder( new FileInputStream( FILE  ) );
      FFT fft = new FFT( 1024, 44100 );
      fft.window( FFT.HAMMING );
      float[] samples = new float[1024];
      float[] spectrum = new float[1024 / 2 + 1];
      float[] lastSpectrum = new float[1024 / 2 + 1];
      List spectralFlux = new ArrayList( );
      List threshold = new ArrayList( );

      while( decoder.readSamples( samples ) > 0 )
      {
         fft.forward( samples );
         System.arraycopy( spectrum, 0, lastSpectrum, 0, spectrum.length );
         System.arraycopy( fft.getSpectrum(), 0, spectrum, 0, spectrum.length );

         float flux = 0;
         for( int i = 0; i < spectrum.length; i++ )
         {
            float value = (spectrum[i] - lastSpectrum[i]);
            flux += value < 0? 0: value;
         }
         spectralFlux.add( flux );
      }

      for( int i = 0; i < spectralFlux.size(); i++ )
      {
         int start = Math.max( 0, i - THRESHOLD_WINDOW_SIZE );
         int end = Math.min( spectralFlux.size() - 1, i + THRESHOLD_WINDOW_SIZE );
         float mean = 0;
         for( int j = start; j <= end; j++ )
            mean += spectralFlux.get(j);
         mean /= (end - start);
         threshold.add( mean * MULTIPLIER );
      }

      Plot plot = new Plot( "Spectral Flux", 1024, 512 );
      plot.plot( spectralFlux, 1, Color.red );
      plot.plot( threshold, 1, Color.green ) ;
      new PlaybackVisualizer( plot, 1024, new MP3Decoder( new FileInputStream( FILE ) ) );
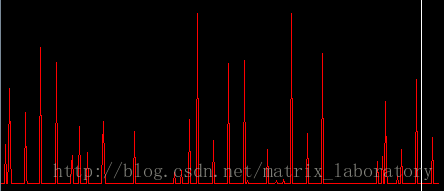
} Peak Dectection:
for( int i = 0; i < threshold.size(); i++ )
{
   if( threshold.get(i) <= spectralFlux.get(i) )
      prunnedSpectralFlux.add( spectralFlux.get(i) - threshold.get(i) );
   else
      prunnedSpectralFlux.add( (float)0 );
}
5. 参考文献
[1] http://www.badlogicgames.com/wordpress/?p=161
[2] 错过这篇文章,可能你这辈子不懂什么叫傅里叶变换了
