前言
人工智能在去年大火过后,Google开源了其机器学习工具Tensorflow,现在Tensorflow支持了移动端,支持的平台包括Android,iOS,Raspberry Pi。
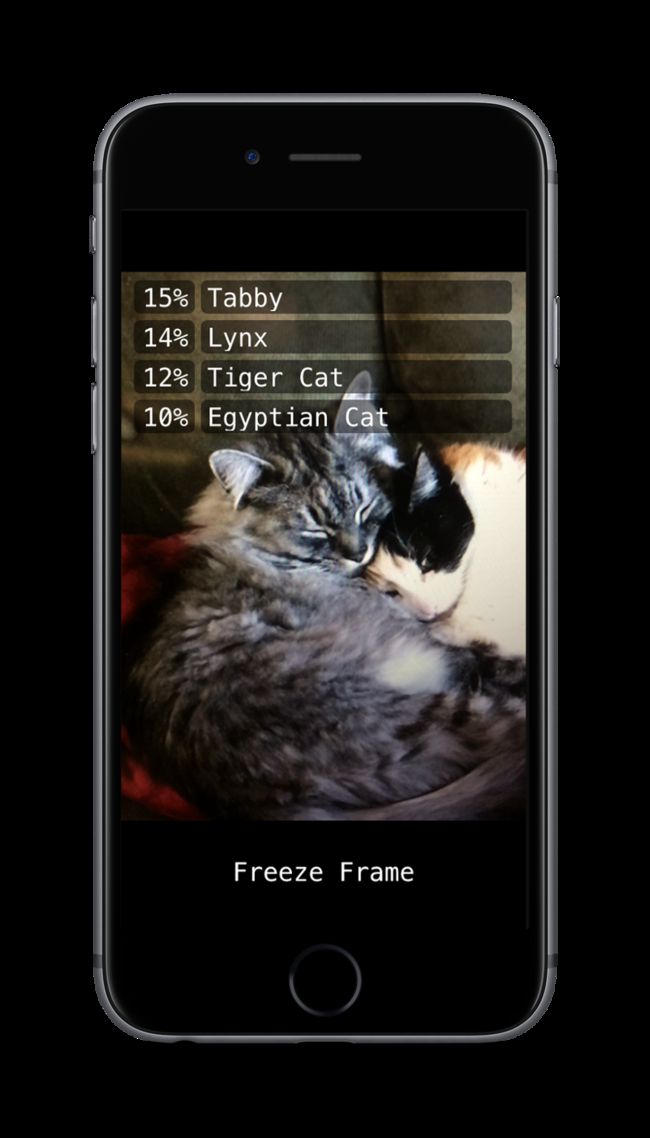
最近我也根据教程在电脑上装上了TF,跑了一下iOS的Demo,下面这幅图就是Camera这个工程的截图,如果按照教程可以下载训练好的pb,可以实现1000种物体的识别(看pb体量估计是inception_v1,训练图片来自 ImageNet)。
但如何添加自己想识别的物体?官方给了简单的教程,但是有很多坑,本文就逐步介绍如何训练自己的图片,然后在iOS设备上运行。
构建训练图片
- 首先需要将用来训练的图片按标签准备好。如下:
- 标签里面就是所有类别,我这里有9类:
范冰冰
吴彦祖
陈乔恩
周杰伦
电视机
安全帽
头盔
笔记本电脑
长虹
- 然后按教程编译build_image_data,运行就能的到供inception模型训练的图片数据。
# location to where to save the TFRecord data.
OUTPUT_DIRECTORY=$HOME/my-custom-data/

# build the preprocessing script.
bazel build inception/build_image_data

# convert the data.
bazel-bin/inception/build_image_data \
  --train_directory="${TRAIN_DIR}" \
  --validation_directory="${VALIDATION_DIR}" \
  --output_directory="${OUTPUT_DIRECTORY}" \
  --labels_file="${LABELS_FILE}" \
  --train_shards=128 \
  --validation_shards=24 \
  --num_threads=8
得到的文件如下:
至此就完成了训练与验证数据的准备工作。
训练模型
由于内存的限制,为了更好的体验和使用效果,最好降低精度,训练inception_v1模型,但是我比较懒就直接按教程重新训练的inception_v3模型。
这里我用的是教程中的flowers_train,然后将num_classes设为9,因为我的图片一共9类。同时inception_train.py记录model.ckpt的操作改成每10次记录一次(inception模型比较庞大,我又是单核cpu跑,运行比较耗时,如果按原来的5000次记录一次那么要等大概83小时,才会记录一次)。
设置好,编译flowers_train,运行就可以得到输出的checkpoints了。
# Build the model. Note that we need to make sure the TensorFlow is ready to
# use before this as this command will not build TensorFlow.
bazel build inception/flowers_train

# Path to the downloaded Inception-v3 model.
MODEL_PATH="${INCEPTION_MODEL_DIR}/inception-v3/model.ckpt-157585"

# Directory where the flowers data resides.
FLOWERS_DATA_DIR=/tmp/flowers-data/

# Directory where to save the checkpoint and events files.
TRAIN_DIR=/tmp/flowers_train/

# Run the fine-tuning on the flowers data set starting from the pre-trained
# Imagenet-v3 model.
bazel-bin/inception/flowers_train \
  --train_dir="${TRAIN_DIR}" \
  --data_dir="${FLOWERS_DATA_DIR}" \
  --pretrained_model_checkpoint_path="${MODEL_PATH}" \
  --fine_tune=True \
  --initial_learning_rate=0.001 \
  --input_queue_memory_factor=1
运行截图与生成的ckpt:
生成PB文件
为了在iOS设备上运行,必须把前面训练的参数写入graph中,生成protobuf格式的文件。
Google提供了freeze_graph,可以直接使用,将运算图和参数写成pb。
这里有4个步骤:
- 生成一个执行预测的计算图,写成input.pb。
- 调用freeze_graph,合成input.pb和ckpt。
- 调用optimize_for_inference,缩减运算,替换掉不能在iOS中运行的计算,生成inference.pb。
- 调用quantize_graph,进一步优化运算图,(这一步开始没操作,导入iOS设备中后大部分时间都崩溃)生成rounded_graph.pb。
完成上面这些步骤过后就得到可以导入iOS运行的pb文件:
下面是我集合整个流程的一个shell脚本:
cd /Users/Jiao/Desktop/SecurityKeeper/tensorflow

bazel-bin/tensorflow/python/tools/freeze_graph \
--input_graph=/Users/Jiao/Desktop/TFProject/inception_v3/protobuf/input.pb --input_checkpoint=/Users/Jiao/Desktop/TFProject/inception_v3/checkpoints/model.ckpt-80 \
--output_node_names=inception_v3/logits/predictions --input_binary=False \
--output_graph=/Users/Jiao/Desktop/TFProject/inception_v3/protobuf/frozen.pb

bazel-bin/tensorflow/python/tools/optimize_for_inference \
--input=/Users/Jiao/Desktop/TFProject/inception_v3/protobuf/frozen.pb --output=/Users/Jiao/Desktop/TFProject/inception_v3/protobuf/inference.pb \
--input_names=input --output_names=inception_v3/logits/predictions \
--frozen_graph=True

bazel-bin/tensorflow/tools/quantization/quantize_graph \
--input=/Users/Jiao/Desktop/TFProject/inception_v3/protobuf/inference.pb \
--output=/Users/Jiao/Desktop/TFProject/inception_v3/protobuf/rounded_graph.pb \
--output_node_names=inception_v3/logits/predictions  \
--mode=weights_rounded
配置iOS参数、运行、Boom...
由于前面用的是inception_v3模型,所以camera这个demo中某些参数需要改变一下,首先是const int wanted_input_width 与const int wanted_input_height,都要变成299,因为模型输入图片大小是299*299的,其次是采集图片像素归一化方式,直接除以255.0,归一化到[0,1]区间。
 //        out_pixel[c] = (in_pixel[c] - input_mean) / input_std;
          out_pixel[c] = in_pixel[c] / 255.0;
运行结果:
结语
以上是第80次迭代参数的预测结果,并不是很理想。但整体流程完成了模型训练与iOS设备运行TF。
参考:
Getting started with TensorFlow on iOS


