让数学变得更生动manim库的使用(1)-基本概念
0、概述
数学理论与数学公式的展示总是一件很枯燥的事情,但3b1b的manim动画库在github上开源之后,让这一切变得非常简单。目前这个库已经分成两个版本一个由3b1b自身维护。但作者并没有承诺长期维护该库,所以由专门团队再次基础上研发了相应的社区版,并对该版本进行长期维护。本文的所有案例都基于社区版的官方案例。本文主要介绍该库的基本概念相关的案例,文章主要以代码为主,关键代码都有相关注释。
另外本文的运行环境维jupyter这与其他的ide环境运行代码稍微有些不同
1、类库引入已经相关测试
引入类库
from manim import *1-1、shell命令格式
代码不能像传统python直接运行必须使用manim进行调用,命令格式如下
%manim -h
usage: manim file [flags] [scene [scene ...]]
       manim {cfg,init,plugins} [opts]

Animation engine for explanatory math videos

positional arguments:
  file                  Path to file holding the python code for the scene
  scene_names           Name of the Scene class you want to see

optional arguments:
  -h, --help            show this help message and exit
  -o OUTPUT_FILE, --output_file OUTPUT_FILE
                        Specify the name of the output file, if it should be
                        different from the scene class name
  -p, --preview         Automatically open the saved file once its done
  -f, --show_in_file_browser
                        Show the output file in the File Browser
  --sound               Play a success/failure sound
  --leave_progress_bars
                        Leave progress bars displayed in terminal
  -a, --write_all       Write all the scenes from a file
  -w, --write_to_movie  Render the scene as a movie file (this is on by
                        default)
  -s, --save_last_frame
                        Save the last frame only (no movie file is generated)
  -g, --save_pngs       Save each frame as a png
  -i, --save_as_gif     Save the video as gif
  --disable_caching     Disable caching (will generate partial-movie-files
                        anyway)
  --flush_cache         Remove all cached partial-movie-files
  --log_to_file         Log terminal output to file
  -c BACKGROUND_COLOR, --background_color BACKGROUND_COLOR
                        Specify background color
  --media_dir MEDIA_DIR
                        Directory to store media (including video files)
  --log_dir LOG_DIR     Directory to store log files
  --tex_template TEX_TEMPLATE
                        Specify a custom TeX template file
  --dry_run             Do a dry run (render scenes but generate no output
                        files)
  -t, --transparent     Render a scene with an alpha channel
  -q {k,p,h,m,l}, --quality {k,p,h,m,l}
                        Render at specific quality, short form of the
                        --*_quality flags
  --low_quality         Render at low quality
  --medium_quality      Render at medium quality
  --high_quality        Render at high quality
  --production_quality  Render at default production quality
  --fourk_quality       Render at 4K quality
  -l                    DEPRECATED: USE -ql or --quality l
  -m                    DEPRECATED: USE -qm or --quality m
  -e                    DEPRECATED: USE -qh or --quality h
  -k                    DEPRECATED: USE -qk or --quality k
  -r RESOLUTION, --resolution RESOLUTION
                        Resolution, passed as "height,width". Overrides the
                        -l, -m, -e, and -k flags, if present
  -n FROM_ANIMATION_NUMBER, --from_animation_number FROM_ANIMATION_NUMBER
                        Start rendering at the specified animation index,
                        instead of the first animation. If you pass in two
                        comma separated values, e.g. '3,6', it will end the
                        rendering at the second value
  --use_opengl_renderer
                        Render animations using the OpenGL renderer
  --use_webgl_renderer  Render animations using the WebGL frontend
  --webgl_renderer_path WEBGL_RENDERER_PATH
                        Path to the WebGL frontend
  --webgl_updater_fps WEBGL_UPDATER_FPS
                        Frame rate to use when generating keyframe data for
                        animations that use updaters while using the WebGL
                        frontend
  --config_file CONFIG_FILE
                        Specify the configuration file
  --custom_folders      Use the folders defined in the [custom_folders]
                        section of the config file to define the output folder
                        structure
  -v {DEBUG,INFO,WARNING,ERROR,CRITICAL}, --verbosity {DEBUG,INFO,WARNING,ERROR,CRITICAL}
                        Verbosity level. Also changes the ffmpeg log level
                        unless the latter is specified in the config
  --version             Print the current version of Manim you are using
  --progress_bar True/False
                        Display the progress bar

Made with <3 by the ManimCommunity devs
1-2 运行示例
在jupyter中运行该动画库有两种模型linemode与cellmode请参照如下示例
linemode
class SquareToCircle(Scene):
    def construct(self):
        circle = Circle()                   # create a circle
        circle.set_fill(PINK, opacity=0.5)  # set the color and transparency
        self.play(Create(circle))     # show the circle on screen
%manim SquareToCircle -p -ql -v WARNING
cellmode
%%manim SquareToCircle  -ql -v WARNING
class SquareToCircle(Scene):
    def construct(self):
        circle = Circle()                   # create a circle
        circle.set_fill(PINK, opacity=0.5)  # set the color and transparency
        self.play(Create(circle))     # show the circle on screen
        self.wait()
运行效果如下
2、静态物体绘制
2.1基本物体绘制
%%manim ManimCELogo  -ql -v WARNING
class ManimCELogo(Scene):
    def construct(self):
            #设置相机基本颜色
            self.camera.background_color = "#abcdef"
            #定义自定义颜色
            logo_green = "#87c2a5"
            logo_blue = "#525893"
            logo_red = "#e07a5f"
            logo_black = "#343434"
            #设置公式
            ds_m = MathTex(r"\mathbb{M}", fill_color=logo_black).scale(7)
            #向左上方调整位置
            ds_m.shift(2.25 * LEFT + 1.5 * UP)
            #绘制圆形
            circle = Circle(color=logo_green, fill_opacity=1).shift(LEFT)
            #绘制正方形
            square = Square(color=logo_blue, fill_opacity=1).shift(UP)
            #绘制三角形
            triangle = Triangle(color=logo_red, fill_opacity=1).shift(RIGHT)
            #对以上图形进行逻辑编组
            logo = VGroup(triangle, square, circle, ds_m)  # order matters
            #设置logo具体坐标
            logo.move_to(ORIGIN)
            self.add(logo)
            #动画保持时间
            self.wait()
效果如下
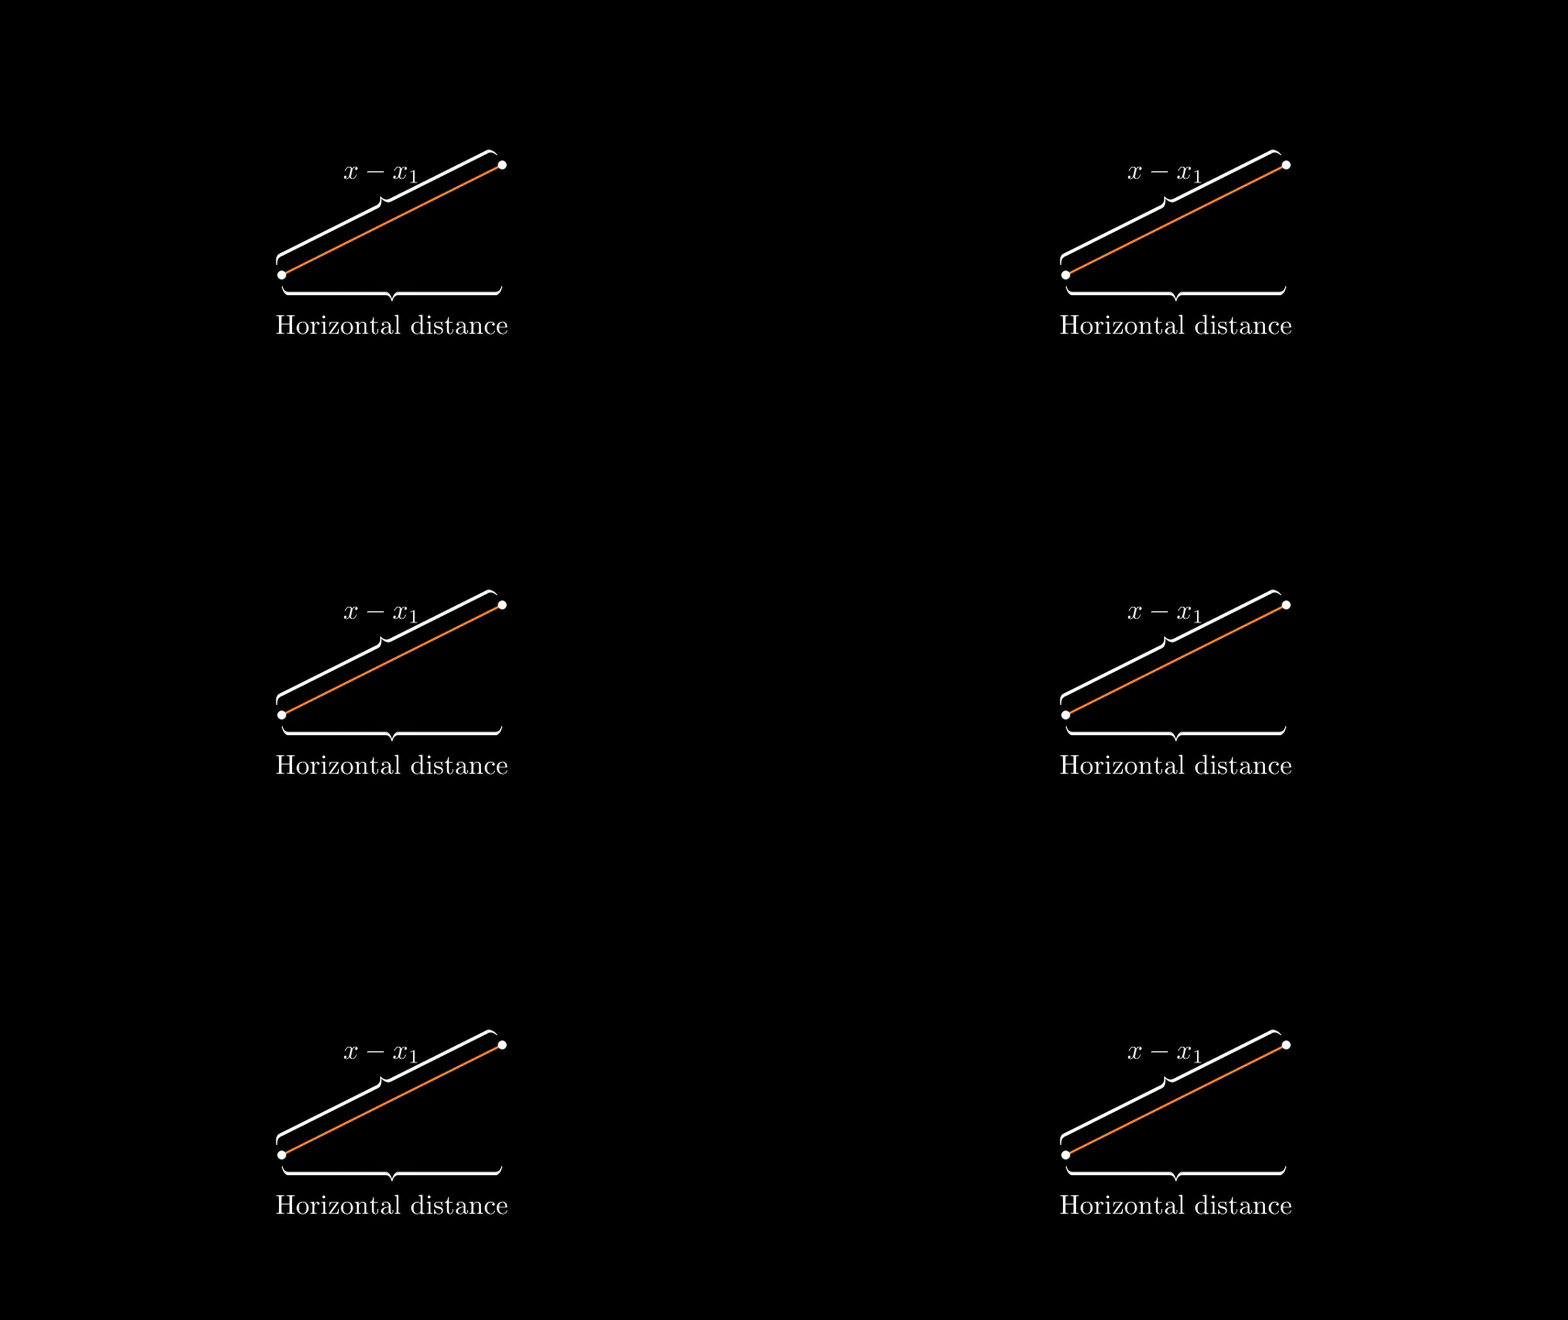
2-2 大括号的使用
%%manim BraceAnnotation  -ql -v WARNING
class BraceAnnotation(Scene):
    def construct(self):
        # 定义两个点,注意左边远点在屏幕中心,此时是一个斜率为45°的线段
        dot = Dot([-2, -1, 0])
        dot2 = Dot([2, 1, 0])
        # 定义线段
        line = Line(dot.get_center(), dot2.get_center()).set_color(ORANGE)
        # 在线段方向上应用大括号
        b1 = Brace(line)
        # 设置文本
        b1text = b1.get_text("Horizontal distance")
        # 将线段copy,为了不影响原来的线段
        # 顺时针旋转45°
        # 取其单位向量,此时即设置了括号的大小也设置了方向
        b2 = Brace(line, direction=line.copy().rotate(PI / 2).get_unit_vector())
        # 在括号上设置公式文本
        b2text = b2.get_tex("x-x_1")
        self.add(line, dot, dot2, b1, b2, b1text, b2text)
        self.wait()
效果如下
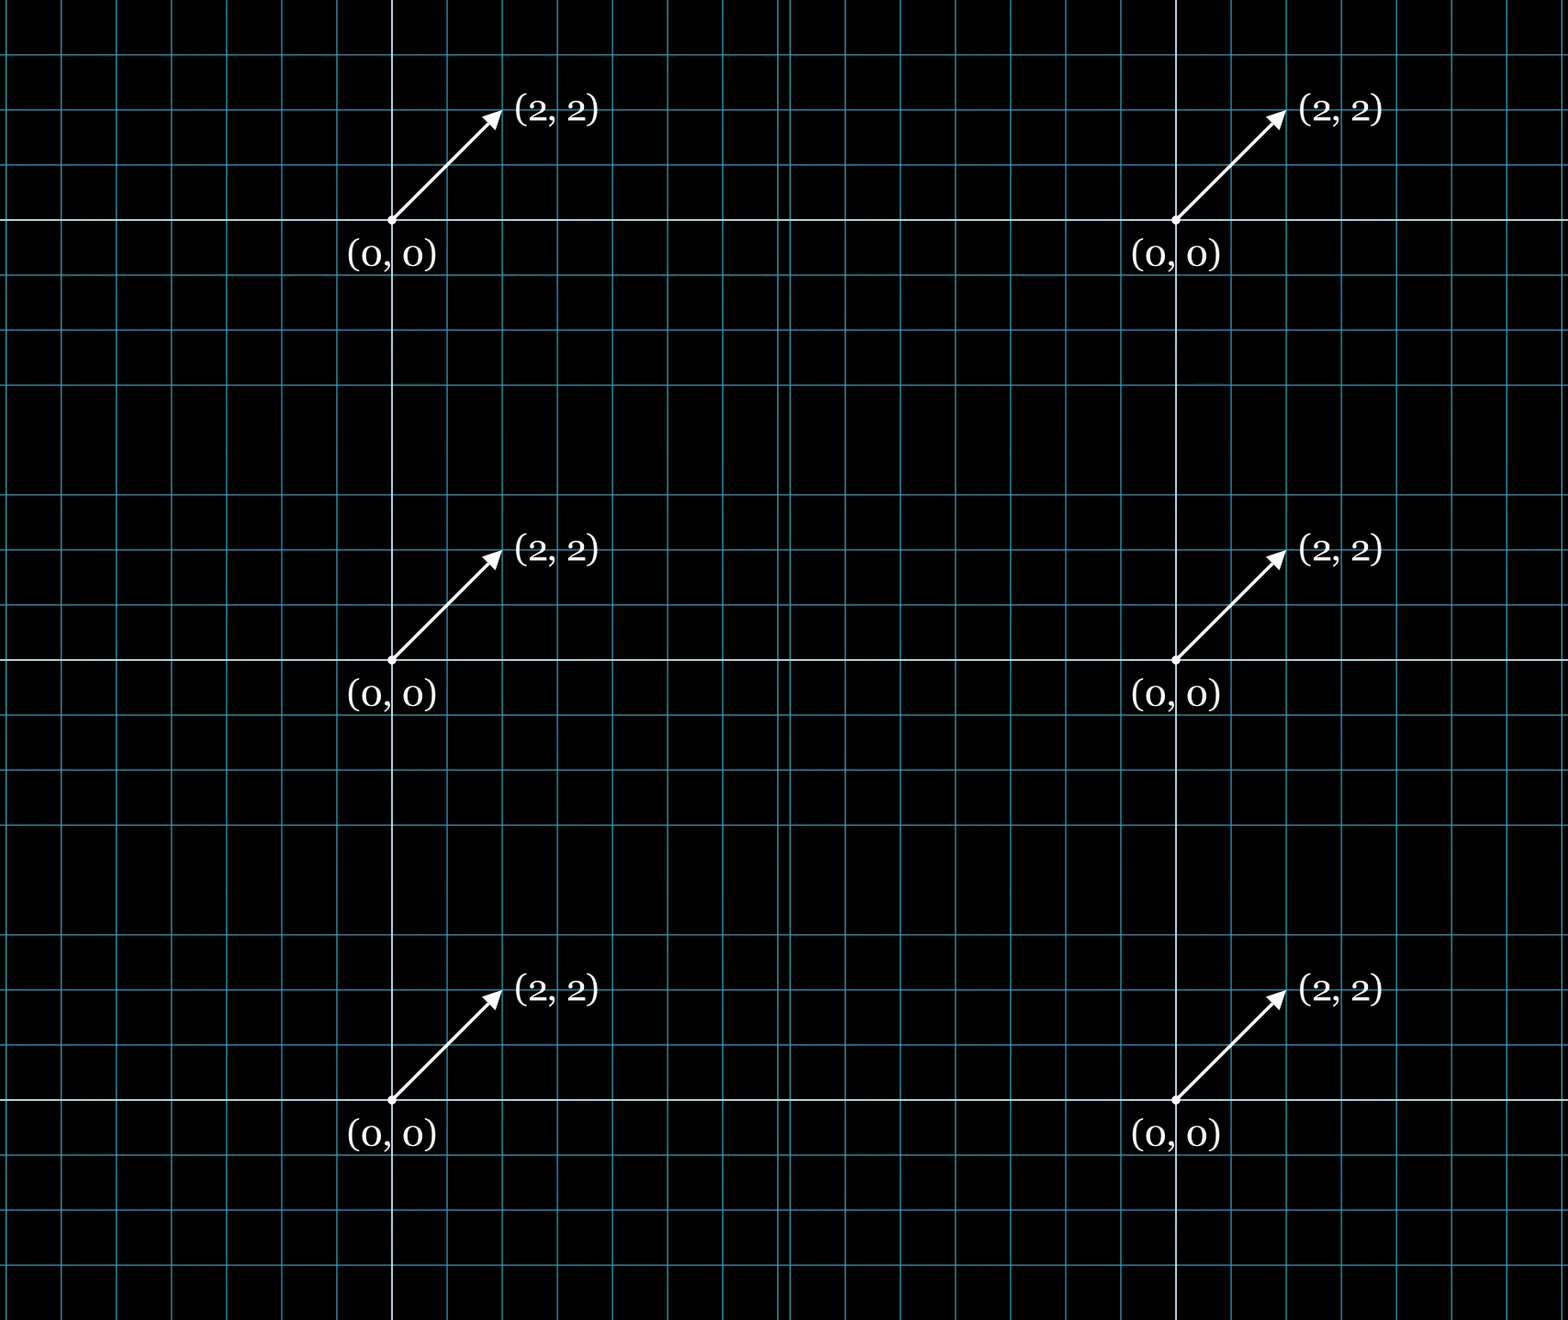
2-3 向量绘制
%%manim VectorArrow  -ql -v WARNING
class VectorArrow(Scene):
    def construct(self):
        # 在屏幕中心绘制一个点
        dot = Dot(ORIGIN)
        # 从远点到指定左边绘制向量
        arrow = Arrow(ORIGIN, [2, 2, 0], buff=0)
        # 设置数字平面
        numberplane = NumberPlane()
        # 设置原点的文本信息
        # 并设置位置
        origin_text = Text('(0, 0)').next_to(dot, DOWN)
        # 设置向量顶点的编著信息
        tip_text = Text('(2, 2)').next_to(arrow.get_end(), RIGHT)
        # 将物体加入场景
        self.add(numberplane, dot, arrow, origin_text, tip_text)
        self.wait()
效果如下
2-4 绘制渐变图像
%%manim GradientImageFromArray  -ql -v WARNING
class GradientImageFromArray(Scene):
    def construct(self):
        n = 256
        # 设置一个渐变数组
        imageArray = np.uint8(
            [[i * 256 / n for i in range(0, n)] for _ in range(0, n)]
        )
        # 缩放为原来的两倍
        image = ImageMobject(imageArray).scale(2)
        # 绘制外边框
        image.background_rectangle = SurroundingRectangle(image, GREEN)
        self.add(image, image.background_rectangle)
        self.wait()
效果如下
3、总结
本章主要讲解了静态图像的绘制下一章讲解动画绘制


