Android架构之Navigation组件(四)
Jetpack组件系列文章
Android架构之LifeCycle组件
Android架构之Navigation组件(一)
Android架构之Navigation组件(二)
Android架构之Navigation组件(三)
Android架构之Navigation组件(四)
Android架构之ViewModel组件
Android架构之LiveData组件
Android架构之Room组件(一)
Android架构之Room组件(二)
Android架构之WorkManager组件
Android架构之DataBinding(一)
Android架构之DataBinding(二)
Android架构之Paging组件(一)
Android架构之Paging组件(二)
Jetpack与MVVM架构
配合 BottomNavigationView
创建BottomViewActivity
public class BottomViewActivity extends AppCompatActivity {


    @Override
    protected void onCreate(Bundle savedInstanceState) {

        super.onCreate(savedInstanceState);
        setContentView(R.layout.activity_bottom_view);
        BottomNavigationView nv_navigation = findViewById(R.id.nv_navigation);
        NavController navController = Navigation.findNavController(this,R.id.nav_host_fragment);
        NavigationUI.setupWithNavController(nv_navigation, navController);
        nv_navigation.setOnNavigationItemSelectedListener(new BottomNavigationView.OnNavigationItemSelectedListener() {

            @Override
            public boolean onNavigationItemSelected(@NonNull MenuItem menuItem) {

                switch (menuItem.getItemId()) {

                    case R.id.homeFragment:
                        return true;
                    case R.id.chatFragment:
                        return true;
                    case R.id.MEFragment:
                        return true;
                    //case不写则该view将没有点击效果
                }
                return  false;
            }
        });
    }
}
编写布局文件
<?xml version="1.0" encoding="utf-8"?>
<LinearLayout xmlns:android="http://schemas.android.com/apk/res/android"
    xmlns:app="http://schemas.android.com/apk/res-auto"
    xmlns:tools="http://schemas.android.com/tools"
    android:layout_width="match_parent"
    android:layout_height="match_parent"
    tools:context=".BottomViewActivity"
    android:orientation="vertical">
    <fragment
        android:id="@+id/nav_host_fragment"
        android:layout_width="match_parent"
        android:layout_height="0dp"
        android:layout_weight="1"
        android:name="androidx.navigation.fragment.NavHostFragment"
        app:defaultNavHost= "true"
        app:navGraph="@navigation/nav_bottom_graph"/>

    <com.google.android.material.bottomnavigation.BottomNavigationView
        android:id="@+id/nv_navigation"
        android:layout_width="match_parent"
        android:layout_height="50dp"
        android:background="#cccccc"
        app:itemIconTint="@drawable/bottom_navigation_selector"
        app:itemTextColor="@drawable/bottom_navigation_selector"
        app:menu="@menu/navigation"/>
</LinearLayout>
bottom_navigation_selector文件
<?xml version="1.0" encoding="utf-8"?>
<selector xmlns:android="http://schemas.android.com/apk/res/android">
    <item android:color="#303F9F" android:state_checked="true"/>
    <item android:color="#666666" android:state_checked="false"/>
</selector>
编写navigation menu文件
<?xml version="1.0" encoding="utf-8"?>
<menu xmlns:android="http://schemas.android.com/apk/res/android">
    <item
        android:id="@+id/homeFragment"
        android:icon="@mipmap/ic_launcher"
        android:title="主页" />
    <item
        android:id="@+id/chatFragment"
        android:icon="@mipmap/ic_launcher"
        android:title="聊天" />
    <item
        android:id="@+id/MEFragment"
        android:icon="@mipmap/ic_launcher"
        android:title="我的" />

</menu>
id要和导航图中fragment的id一致
编写导航图文件 nav_bottom_graph.xml
<?xml version="1.0" encoding="utf-8"?>
<navigation xmlns:android="http://schemas.android.com/apk/res/android"
    xmlns:app="http://schemas.android.com/apk/res-auto"
    xmlns:tools="http://schemas.android.com/tools"
    android:id="@+id/nav_bottom_graph"
    tools:ignore="UnusedNavigation"
    app:startDestination="@id/homeFragment">


    <fragment
        android:id="@+id/homeFragment"
        android:name="com.example.jetpack.HomeFragment"
        android:label="fragment_home"
        tools:layout="@layout/fragment_home" />
    <fragment
        android:id="@+id/chatFragment"
        android:name="com.example.jetpack.ChatFragment"
        android:label="fragment_chat"
        tools:layout="@layout/fragment_chat" />
    <fragment
        android:id="@+id/MEFragment"
        android:name="com.example.jetpack.MEFragment"
        android:label="fragment_m_e"
        tools:layout="@layout/fragment_m_e" />
</navigation>
修改三个 Fragment 里面的 TextView,以区分三者。
效果图类似下面:
深层链接DeepLink
Navigation组件还有一个非常重要和实用的 特性DeepLink,即深层链接。通过该特性,我们可以利用PendingIntent或一个真实的URL链接,直接跳转到应用程序中的某个界面(Activity/Fragment)
常见的两种应用场景如下
- PendingIntent的方式: 当应用程序接收到某个通知推送,点击该通知时,能够直接跳转到展示该通知内容的页面,那么可以通过PendingIntent来完成此操作。
- URL的方式: 当用户通过手机浏览器浏览网站上的某个页面时,可以在网页上放置一个类似于"在应用内打开"的按钮。如果用户的手机安装有我们的应用程序,那么通过DeepLink就能打开相应的页面;如果没有安装,那么网站可以导航到应用程序的下载页面,从而引导用户安装应用程序。
PendingIntent的方式
点击btn发送通知
findViewById(R.id.send).setOnClickListener(new View.OnClickListener() {

            @Override
            public void onClick(View v) {

                //发送通知
                NotificationCompat.Builder builder = new NotificationCompat
                        .Builder(MainActivity.this,"ID")
                        .setSmallIcon(R.drawable.ic_launcher_foreground)
                        .setContentTitle("DeepLinkDemo")
                        .setContentText("Hello World")
                        .setPriority(NotificationCompat.PRIORITY_DEFAULT)
                        .setContentIntent(getPendintIntend())  //设置PendingIntent
                        .setAutoCancel(true);

                NotificationManagerCompat notificationManagerCompat = NotificationManagerCompat.from(MainActivity.this);
                final int notifyId = (int) (Math.random() * 1000 + 1000);
                notificationManagerCompat.notify(notifyId,builder.build());
            }
        });
点击通知跳转到目的地及参数传递
/通过PendingIntent 设置当前通知被单击时需要跳转到到达destination
    //以及传递的参数
    private PendingIntent getPendintIntend() {

        Bundle bundle = new Bundle();
        bundle.putString("params","小鑫哈哈哈哈");
        return  Navigation.findNavController(MainActivity.this,R.id.nav_host_fragment)
                .createDeepLink()
                //设置导航图
                .setGraph(R.navigation.nav_graph)
                //设置跳转的目的地,需要注意的是跳转的目的地必须在设置的导航图中进行注册
                .setDestination(R.id.settingFragment)
                //设置传递的参数
                .setArguments(bundle)
                .createPendingIntent();
    }
当通知被触发时,系统会自动打开我们在PendingIntent中设置好的目的地,就这么简单。
URL的方式
为导航图中页面添加标签
1.在导航图中为页面添加标签。在app:uri属性中填入的是你的网站的相应Web页面地址,后面的参数会通过Bundle对象传递到页面中。
<fragment
        android:id="@+id/mainFragment"
        android:name="com.example.jetpack.MainFragment"
        android:label="fragment_main"
        tools:layout="@layout/fragment_main" >

        <!--为destination添加<deepLink/>标签-->
        <deepLink app:uri="https://blog.csdn.net/qq_43404873/article/details/{params}"/>
    </fragment>
为Activity设置标签(manifest中)
当用户在Web页面中访问你的网站时,应用程序便能得到监听。
<activity androi[添加链接描述](https://developer.android.google.cn/guide/navigation/navigation-deep-link)d:name=".MainActivity">
        <!--为Activity设置<nav-graph>标签 -->
            <nav-graph android:value="@navigation/navview_graph"/>
        </activity>
测试
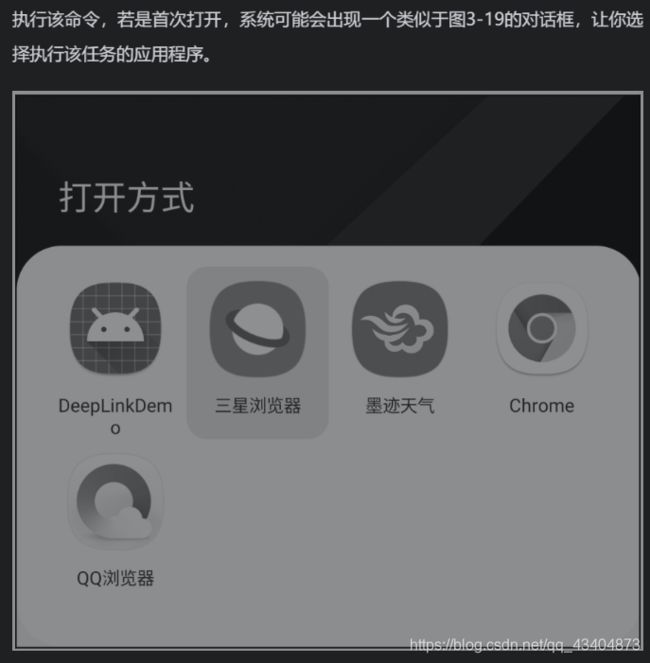
3.测试。我们可以在Google app中输入相应的Web地址;也可以通过adb工具,使用命令行来完成操作,如下所示。
adb shell am start -a android.intent.action.VIEW -d https://blog.csdn.net/qq_43404873/article/details/10953
478
选择应用程序DeepLinkDemo,你的手机便能直接打开mainFragment页面。接着,在该Fragment中,可以通过Bundle对象获取相应的参数,即URL链接后面的字符串,进而完成后续的操作。
    @Override
    public View onCreateView(LayoutInflater inflater, ViewGroup container,
                             Bundle savedInstanceState) {

        View view = inflater.inflate(R.layout.fragment_main,container,false);

        TextView tv = view.findViewById(R.id.tv_text);
        Bundle bundle = getArguments();
        if(bundle!=null){

            String params = bundle.getString("params");
            if(!TextUtils.isEmpty(params)){

                tv.setText(params);
            }
        }
        return view;
    }
}
总结
Navigation组件到这里就结束了。Navigation组件的内容很多,这里没有一一具体讲到了,想深入了解的话,可以去Android的官网。
Android官网
