Python遥感图像处理基础篇(三):arcpy遥感图像镶嵌批量处理_镶嵌至新栅格
使用情况
运行环境:由于安装arcgis的时候自动配置的是python2.7,所以直接使用2.7运行环境,有些语法上和python3有些不一样。
使用情况:把镶嵌的数据放在A、B两个文件夹把,然后按照顺序对应进行镶嵌,即A中的第i个和B中的第i个进行镶嵌。
基本语法说明
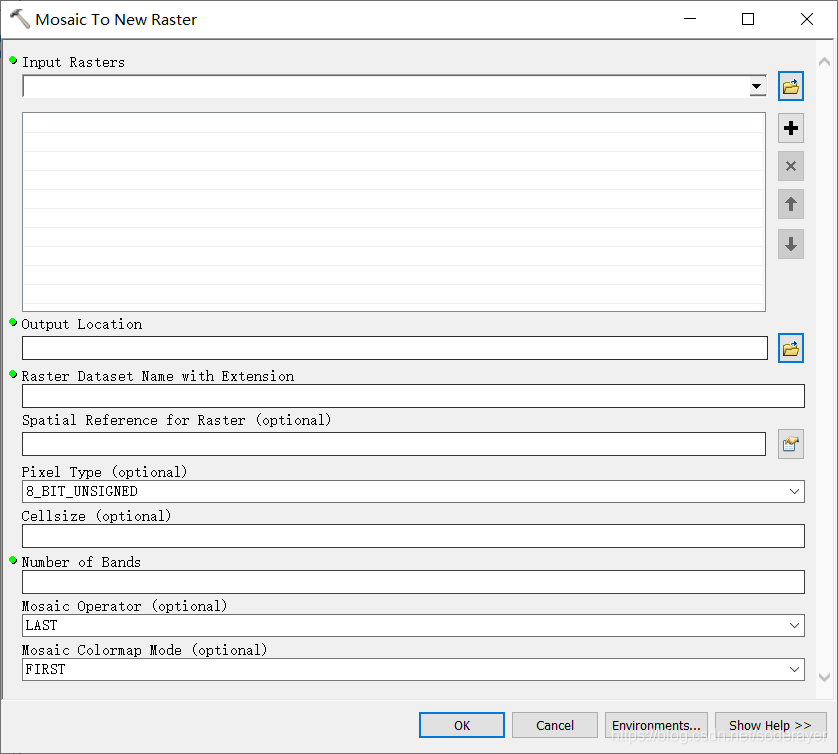
镶嵌至新栅格
这个方法直接设置背景值参数,计算结果默认为0
MosaicToNewRaster(input_rasters, output_location, raster_dataset_name_with_extension, {coordinate_system_for_the_raster}, {pixel_type}, {cellsize}, number_of_bands, {mosaic_method}, {mosaic_colormap_mode})| 参数 | 说明 | 数据类型 |
| input_rasters [input_raster,...] |
待合并的栅格数据集。输入必须具有相同的波段数和相同的位深度。 |
Composite Layer; Mosaic Dataset; Raster Dataset; Raster Layer |
| output_location |
指向栅格数据集存放位置的路径。该路径可以指向某个文件夹或地理数据库。 |
Workspace; Raster Catalog |
| raster_dataset_name_with_extension |
您正在创建的数据集名称。 以文件格式存储栅格数据集时,需要指定文件扩展名,具体如下:
将栅格数据集存储到地理数据库时,请勿向栅格数据集的名称添加文件扩展名。 将栅格数据集存储到 JPEG 文件、JPEG 2000 文件、TIFF 文件或地理数据库时,可在地理处理环境中指定压缩类型和压缩质量。 |
String |
| coordinate_system_for_the_raster (可选) |
输出栅格数据集的坐标系。若未指定坐标系,则将使用输出坐标系环境设置。 |
Coordinate System |
| pixel_type (可选) |
镶嵌数据集的位深度或辐射分辨率。 如果不设置像素类型,将使用默认值 8 位,而输出结果可能会不正确。
|
String |
| cellsize (可选) |
新栅格数据集的像元大小。 |
Double |
| number_of_bands |
输出栅格将具有的波段数。 |
Long |
| mosaic_method (可选) |
用于镶嵌重叠的方法。
有关各镶嵌运算符的详细信息,请参阅镶嵌运算符。 |
String |
| mosaic_colormap_mode (可选) |
输入栅格数据集具有色彩映射表时应用。 对输入栅格中应用于镶嵌输出的色彩映射表进行选择的方法。
|
String |
派生输出
| 名称 | 说明 | 数据类型 |
| output_raster_dataset | 输出栅格数据集。 |
栅格数据集 |
对应ArcMap工具
代码示例
MosaicToNewRaster 示例 1(Python 窗口)
这是 MosaicToNewRaster 工具的 Python 示例。
import arcpy
from arcpy import env
env.workspace = "c:/data"
arcpy.MosaicToNewRaster_management("land1.tif;land2.tif", "Mosaic2New", \
                                   "landnew.tif", "World_Mercator.prj",\
                                   "8_BIT_UNSIGNED", "40", "1", "LAST","FIRST")
MosaicToNewRaster 示例 2(独立脚本)
这是 MosaicToNewRaster 工具的 Python 脚本示例。
##==================================
##Mosaic To New Raster
##Usage: MosaicToNewRaster_management inputs;inputs... output_location raster_dataset_name_with_extension
##                                    {coordinate_system_for_the_raster} 8_BIT_UNSIGNED | 1_BIT | 2_BIT | 4_BIT
##                                    | 8_BIT_SIGNED | 16_BIT_UNSIGNED | 16_BIT_SIGNED | 32_BIT_FLOAT | 32_BIT_UNSIGNED
##                                    | 32_BIT_SIGNED | | 64_BIT {cellsize} number_of_bands {LAST | FIRST | BLEND  | MEAN
##                                    | MINIMUM | MAXIMUM} {FIRST | REJECT | LAST | MATCH}

import arcpy
arcpy.env.workspace = r"\\MyMachine\PrjWorkspace\RasGP"

##Mosaic several TIFF images to a new TIFF image
arcpy.MosaicToNewRaster_management("landsatb4a.tif;landsatb4b.tif","Mosaic2New", "landsat.tif", "World_Mercator.prj",\
                                   "8_BIT_UNSIGNED", "40", "1", "LAST","FIRST")
代码实现
# -*- coding: utf-8 -*-
import os,arcpy,datetime
#读取和存放文件夹的位置
inputPath1 = r'H:\input1'#镶嵌数据文件夹1
inputPath2 =r'H:\input2'#镶嵌数据文件夹2
path=r'H:\outputMocaic'#输出结果存放文件夹
# start calculate time
startTime = datetime.datetime.now()
print startTime
# set the intermediate data folder #这段根据需要使用
intermediateDataPath = path+"\\"+"IntermediateData" #如果有中间文件就存放在这里
# set result data folder
resultDataPath = path+"\\"+"Result"
# determine if the folder exists
if os.path.exists(intermediateDataPath):
print "IntermediateData floder exists"
else:
# create a intermediate data floder
arcpy.CreateFolder_management(path,"IntermediateData")
if os.path.exists(resultDataPath):
print("Result floder exists")
else:
# create a result floder
arcpy.CreateFolder_management(path, "Result")
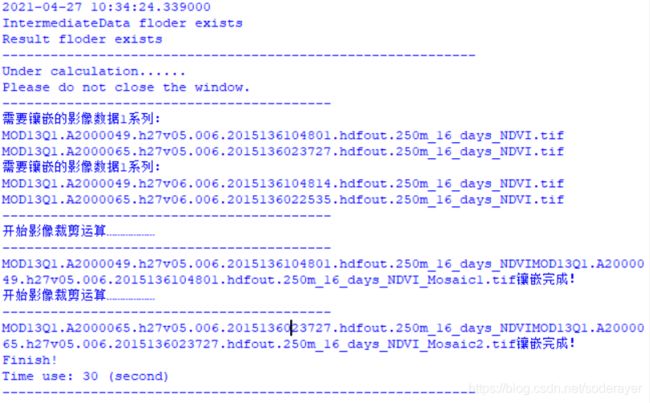
print("-----------------------------------------------------------")
print("Under calculation......")
print("Please do not close the window.")
#这段为数据处理代码
# function:按顺序拼接字符串,作为波段组合函数的的参数
def getInputRasterParam(files):
ret = []
print "需要镶嵌的影像数据1系列:"
for file in files: # 拼接其他的
if file.endswith(".tif"):
print file
ret.append(file)
return ret
def getInputShapefileParam(files):
ret = []
print "需要镶嵌的影像数据2系列:"
for file in files: # 拼接其他的
if file.endswith(".shp"):
print file
ret.append(file)
return ret
arcpy.env.workspace = resultDataPath #被裁剪栅格影像所在文件夹
arcpy.env.overwriteOutput = True#允许覆盖已有数据
files1 = os.listdir(inputPath1)
files2 = os.listdir(inputPath2)
print "-----------------------------------------"
input_param1 = getInputRasterParam(files1)
input_param2 = getInputRasterParam(files2)
#或者采用下面这种表达
#input_param=arcpy.ListRasters("*","tif") #遍历文件夹下所有tif格式文件
print "-----------------------------------------"
i=0
for input1 in input_param1:
print "开始影像裁剪运算………………"
print "-----------------------------------------"
input_tif1=inputPath1+"\\"+input1
#把栅格数据1镶嵌到栅格数据2上 背景值会覆盖重叠区域
#arcpy.Mosaic_management(input_tif1,result_tif,"LAST","LAST","", "", "", "", "")
#print result_tif+"镶嵌完成!"
#镶嵌到新的栅格数据集
input_tif2=inputPath2+"\\"+input_param2[i]
input_tifs=input_tif1+";"+input_tif2
OutputLocation=resultDataPath
result_tif=input1[:-4]+input1[:-4]+"_Mosaic"+str(i+1)+".tif"
arcpy.MosaicToNewRaster_management(input_tifs,OutputLocation,result_tif, "","16_BIT_SIGNED", "250", "1", "LAST","FIRST")
print result_tif+"镶嵌完成!"
i+=1
print "Finish!"
endTime = datetime.datetime.now()
print "Time use: " + str((endTime - startTime).seconds)+ " (second)"
print "-----------------------------------------------------------"
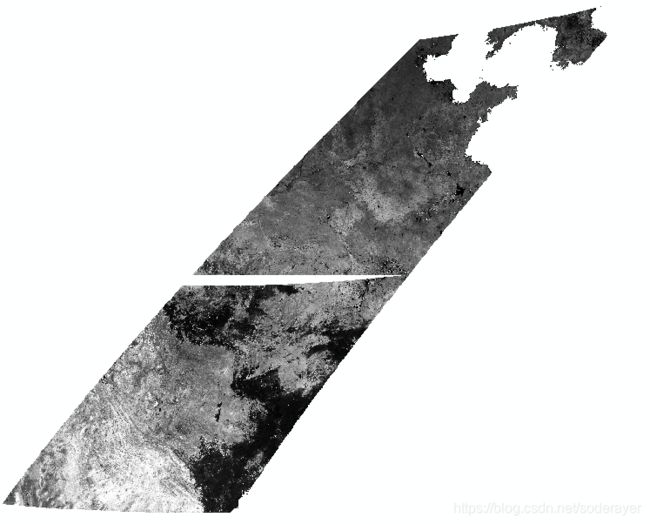
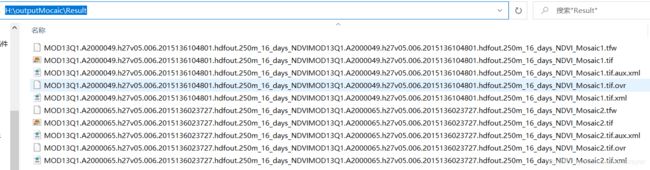
运行结果
结果输出到目标文件夹下:
背景值还是存在问题,需要调整参数