Android自定义带有阴影效果的按钮Demo
今天研究了一个Demo,这个Demo是来自一个叫:dmytrodanylyk的人分享的案例 网
址:http://android-arsenal.com/details/1/1640,感觉这种效果还不错,所以分享给
大家。
一、首先看看运行的效果图:
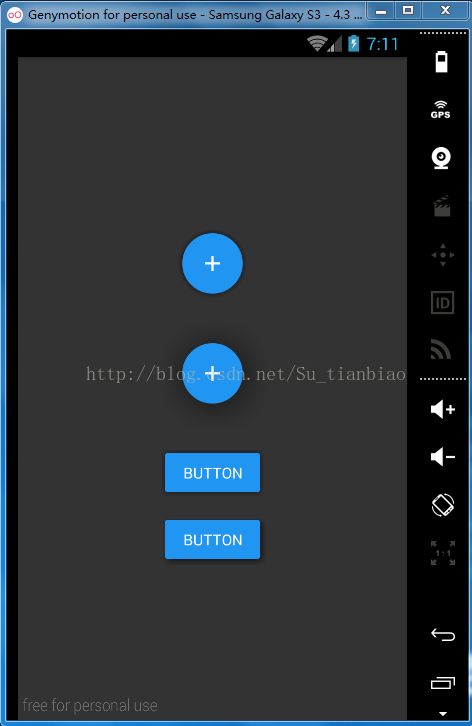
仔细看,你会发现按钮的周围的阴影效果还是比较明显的。
主要文件ShadowLayout.java,这个类是继承于FrameLayout的,从而扩展了功能。
ShadowLayout.java:
package com.dd;

import android.content.Context;
import android.content.res.TypedArray;
import android.graphics.*;
import android.graphics.drawable.BitmapDrawable;
import android.os.Build;
import android.util.AttributeSet;
import android.widget.FrameLayout;
import com.dd.shadow.layout.R;

public class ShadowLayout extends FrameLayout {
    /** 阴影颜色 **/
    private int mShadowColor;
    /** 阴影范围大小 **/
    private float mShadowRadius;
    /** 阴影圆角光滑度 **/
    private float mCornerRadius;
    /** 阴影偏离原位置x坐标多少 **/
    private float mDx;
    /** 阴影偏离原位置y坐标多少 **/
    private float mDy;

    public ShadowLayout(Context context) {
        super(context);
        initView(context, null);
    }

    public ShadowLayout(Context context, AttributeSet attrs) {
        super(context, attrs);
        initView(context, attrs);
    }

    public ShadowLayout(Context context, AttributeSet attrs, int defStyleAttr) {
        super(context, attrs, defStyleAttr);
        initView(context, attrs);
    }

    @Override
    protected void onSizeChanged(int w, int h, int oldw, int oldh) {
        super.onSizeChanged(w, h, oldw, oldh);
        if(w > 0 && h > 0) {
            setBackgroundCompat(w, h);
        }
    }

    private void initView(Context context, AttributeSet attrs) {
        initAttributes(context, attrs);
        /** x偏离量 **/
        int xPadding = (int) (mShadowRadius + Math.abs(mDx));
        /** y偏离量 **/
        int yPadding = (int) (mShadowRadius + Math.abs(mDy));
        /** 设置偏离量,分别为left,top,right,bottom **/
        setPadding(xPadding, yPadding, xPadding, yPadding);
    }

    @SuppressWarnings("deprecation")
    private void setBackgroundCompat(int w, int h) {
        Bitmap bitmap = createShadowBitmap(w, h, mCornerRadius, mShadowRadius, mDx, mDy, mShadowColor, Color.TRANSPARENT);
        BitmapDrawable drawable = new BitmapDrawable(getResources(), bitmap);
        //判断版本,设置背景
        if (Build.VERSION.SDK_INT <= Build.VERSION_CODES.JELLY_BEAN) {
            setBackgroundDrawable(drawable);
        } else {
            setBackground(drawable);
        }
    }

    /**
     * 初始化 initAttributes
     * @param context
     * @param attrs
     */
    private void initAttributes(Context context, AttributeSet attrs) {
        TypedArray attr = getTypedArray(context, attrs, R.styleable.ShadowLayout);
        if (attr == null) {
            return;
        }

        try {
            mCornerRadius = attr.getDimension(R.styleable.ShadowLayout_sl_cornerRadius, getResources().getDimension(R.dimen.default_corner_radius));
            mShadowRadius = attr.getDimension(R.styleable.ShadowLayout_sl_shadowRadius, getResources().getDimension(R.dimen.default_shadow_radius));
            mDx = attr.getDimension(R.styleable.ShadowLayout_sl_dx, 0);
            mDy = attr.getDimension(R.styleable.ShadowLayout_sl_dy, 0);
            mShadowColor = attr.getColor(R.styleable.ShadowLayout_sl_shadowColor, getResources().getColor(R.color.default_shadow_color));
        } finally {
            attr.recycle();
        }
    }

    /**
     * 获取TypedArray
     * @param context
     * @param attributeSet
     * @param attr
     * @return
     */
    private TypedArray getTypedArray(Context context, AttributeSet attributeSet, int[] attr) {
        return context.obtainStyledAttributes(attributeSet, attr, 0, 0);
    }

    /**
     * 产生阴影Bitmap
     * @param shadowWidth
     * @param shadowHeight
     * @param cornerRadius
     * @param shadowRadius
     * @param dx
     * @param dy
     * @param shadowColor
     * @param fillColor
     * @return
     */
    private Bitmap createShadowBitmap(int shadowWidth, int shadowHeight, float cornerRadius, float shadowRadius,
                                      float dx, float dy, int shadowColor, int fillColor) {

        Bitmap output = Bitmap.createBitmap(shadowWidth, shadowHeight, Bitmap.Config.ALPHA_8);
        Canvas canvas = new Canvas(output);

        RectF shadowRect = new RectF(
                shadowRadius,
                shadowRadius,
                shadowWidth - shadowRadius,
                shadowHeight - shadowRadius);

        if (dy > 0) {
            shadowRect.top += dy;
            shadowRect.bottom -= dy;
        } else if (dy < 0) {
            shadowRect.top += Math.abs(dy);
            shadowRect.bottom -= Math.abs(dy);
        }

        if (dx > 0) {
            shadowRect.left += dx;
            shadowRect.right -= dx;
        } else if (dx < 0) {
            shadowRect.left += Math.abs(dx);
            shadowRect.right -= Math.abs(dx);
        }

        Paint shadowPaint = new Paint();
        shadowPaint.setAntiAlias(true);
        shadowPaint.setColor(fillColor);
        shadowPaint.setStyle(Paint.Style.FILL);

        if (!isInEditMode()) {
            shadowPaint.setShadowLayer(shadowRadius, dx, dy, shadowColor);
        }

        canvas.drawRoundRect(shadowRect, cornerRadius, cornerRadius, shadowPaint);

        return output;
    }
}
styles.xml:自定义属性
activity_main.xml:
ps:这里就是把你要有阴影效果的按钮放到自定义类ShadowLayout里面即可,然后设置
一些属性,也就是我们在styles.xml里面自定义的属性,属性的意思
在ShadowLayout.java里面有注释。
项目源代码下载:
http://download.csdn.net/detail/su_tianbiao/8523475