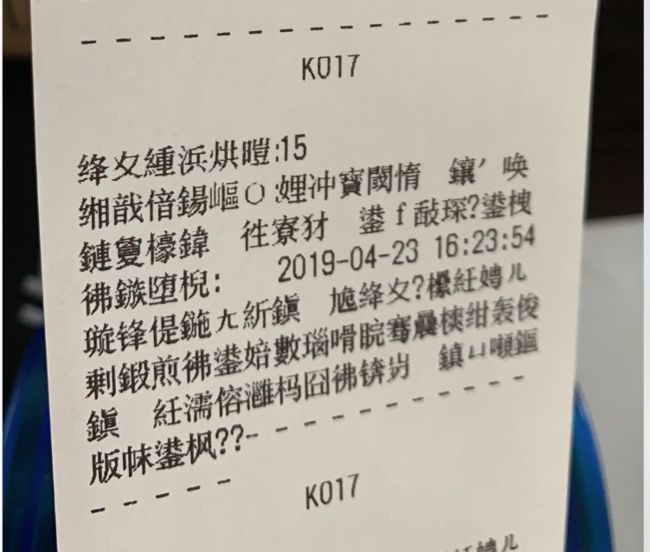
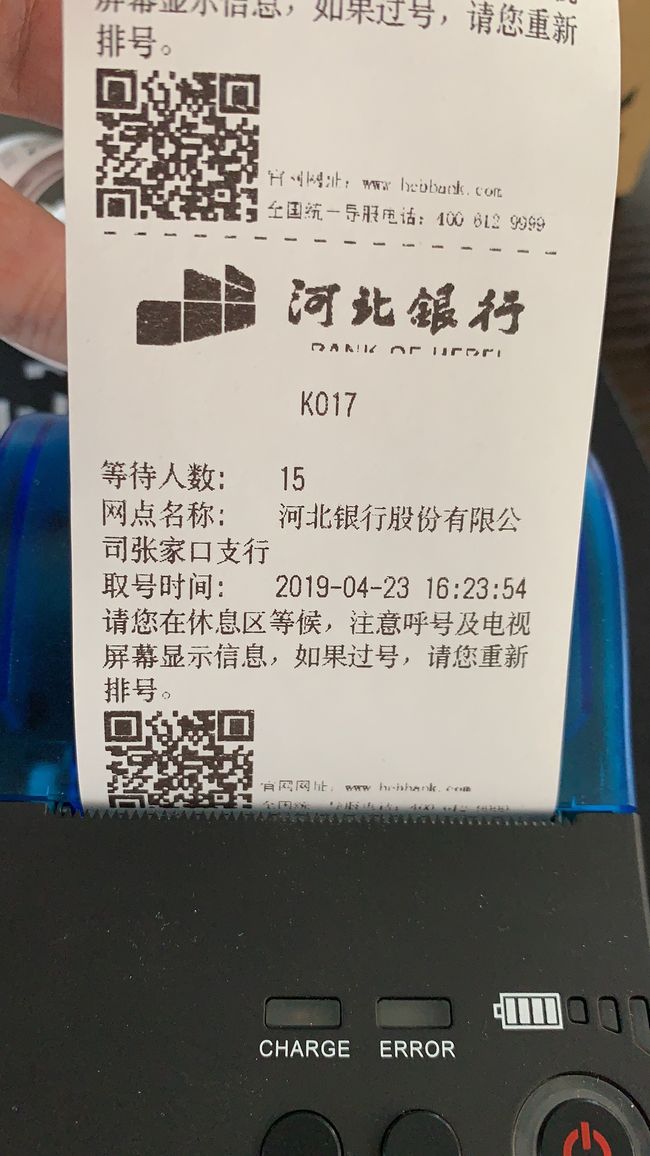
先看一下打印出来的效果:
然后说我遇到的问题:
第一个问题:
打印机型号不好说,所有的包装盒、说明书和机器上都是英文MPT-II。同事说是从卖家手里买的,没有客服,不能找他们解决问题。里面有个光盘,里面有一些exe文件和iOS demo,可是,这个demo运行报错!
报错的是开发商提供的print.framework,这报错我直接放弃了他的demo。从GitHub上找了一些蓝牙打印小票的demo,试了一下,都能连接这个打印机。但是呢,打印出来的中文都是乱码。最后,有两个编码需要设置
第一个看下面代码,第二个就是UTF-8
- (void)setText:(NSString *)text
{
    NSStringEncoding enc = CFStringConvertEncodingToNSStringEncoding(kCFStringEncodingGB_18030_2000);
    NSData *data = [text dataUsingEncoding:enc];
    [_printerData appendData:data];
}
第二个问题:
打印出来的乱码,我就觉得是编码问题,但是把编码格式都试了一下,浪费了很多纸,打印出来还是乱码。
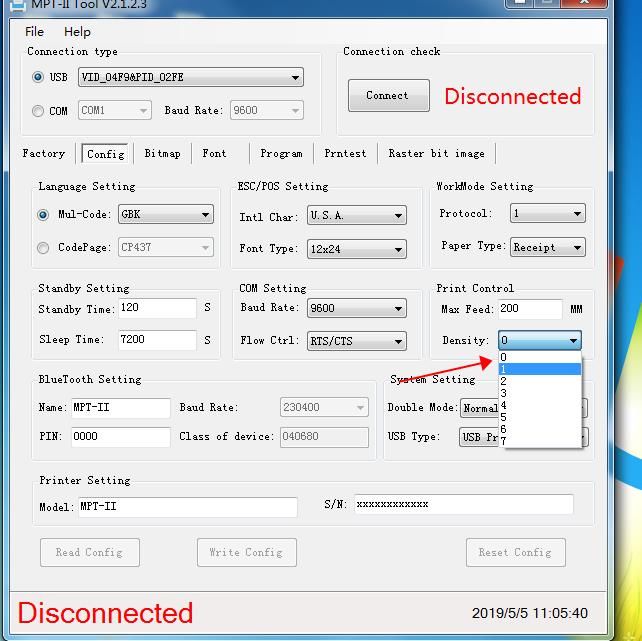
我就用光盘里面的软件刷入了一下字体。
刷入之后,可以了,但是打印出来的有问题。
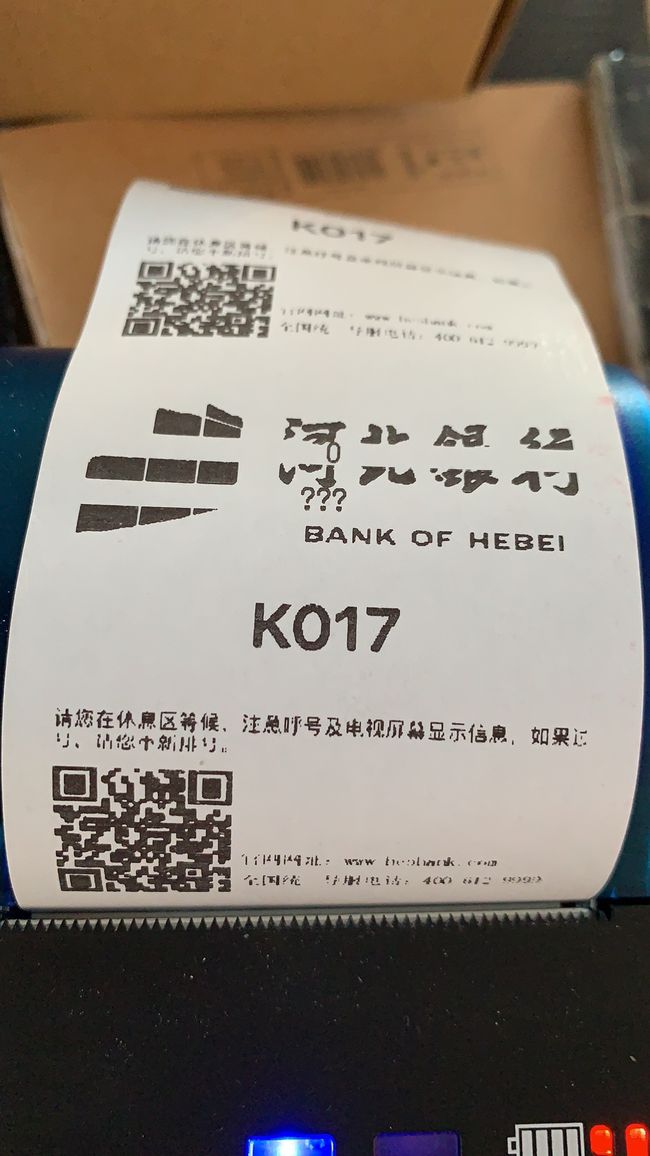
打印出来的有两个问题,1、字体都一样大,也没有粗体设置;2、图片打印出来的效果都是下面有一部分缺失了。。。
第三个问题:打印出来大字,图片不缺失
先解决打印出来的粗体和大字,刷入一下
刷入之后呢,字体只是变粗了一些而已,设置字号0x77,7倍大就是打印不出来。
我就放弃了这种打印出来大字体的想法。
那应该怎么做才能打印出来大大的叫号呢?
图片,对,把K017弄成图片。
#pragma mark - view生成image 高清方法
- (UIImage *)makeImageWithView:(UIView *)view withSize:(CGSize)size
{
    UIGraphicsBeginImageContextWithOptions(size, NO, 0.0);
    [view.layer renderInContext:UIGraphicsGetCurrentContext()];
    UIImage *image = UIGraphicsGetImageFromCurrentImageContext();
    UIGraphicsEndImageContext();

    return image;
}
做法很简单,就是写一个UIView
这个代码我就不写了,写一个白背景色的UIView,放进去一个UILabel,设置字号50,加粗,居中(记得把生成的图片保存到相册,以便参考对比)
就是这个效果了。
下面解决,图片不缺失了。我就想着,我打印了两个图片下面都缺失了,那我都把他们放进我的UIView里面,全部打印出来,下面设置大的空白footer,就不会缺失了吧。
嘿嘿嘿,这样可以了吧,看:
这是什么鬼啊,出现乱码,是因为没有蓝牙传输没有分包吗,我车看了代码,有分包处理代码。百度半天,可能这个包设置的有点大,我看了一下是146,提示必须设置偶数哦,我就改的小一点128试试,这个数字比较有感觉。
跟我猜想的一样,打印出来很完整的图片。但是有一个重大的问题就是,打印很慢,一卡一卡的,突突突的才打印出来,而且打印出来的下面说明文字很小,基本看不清,我就放弃了打印一整张图片的想法。
第四个问题:寻找最优解
把图片分开打印,多次尝试之后,决定,把银行logo和叫号生成新的图片来打印:
下面文字的用text方式打印,第二张图片直接打印,因为我没找到demo里面可以任意布局的方法,把二维码和电话分开打印,最终效果就是我的第一张图片。
下面上关键代码:
//这段代码放进AppDelegate.m,如果之前连接打印成功了,再次打开App之后,就可以直接打印,不用再手动连接。
 //自动重连打印机
    NSString *idfv = [[[UIDevice currentDevice] identifierForVendor] UUIDString];
//为什么用IDFV呢,自己体会吧,作用很大。
    if (![[SEPrinterManager sharedInstance] isConnected]&&[[NSUserDefaults standardUserDefaults]boolForKey:idfv]) {
        [[SEPrinterManager sharedInstance] autoConnectLastPeripheralTimeout:10 completion:^(CBPeripheral *perpheral, NSError *error) {
            //这里不需要处理是否出错
        }];
    }
-(void)StartPrint{
    NSString *idfv = [[[UIDevice currentDevice] identifierForVendor] UUIDString];
    if ([[NSUserDefaults standardUserDefaults]boolForKey:idfv]) {
        [self OnlinePrint];
    }else{
        HBPrintViewController *vc=[[HBPrintViewController alloc]init];
        vc.printer=[self getPrinter];
        vc.modalPresentationStyle = UIModalPresentationOverCurrentContext;
        [self.viewController presentViewController:vc animated:YES completion:^{
            vc.view.backgroundColor=[UIColor colorWithWhite:0.9 alpha:0.1];
        }];
    }
}
//已经连接过的蓝牙设备开始打印,如果completion为NO,重新初始化发起蓝牙连接
-(void)OnlinePrint{
    HLPrinter *printer = [self getPrinter];

    NSData *mainData = [printer getFinalData];
    [[SEPrinterManager sharedInstance] sendPrintData:mainData completion:^(CBPeripheral *connectPerpheral, BOOL completion, NSString *error) {
        NSLog(@"写入结果:%d:%@",completion,error);
        if (!completion) {
            //重新发起初始化 设置NO
            NSString *idfv = [[[UIDevice currentDevice] identifierForVendor] UUIDString];
            [[NSUserDefaults standardUserDefaults] setBool:NO forKey:idfv];
            [self StartPrint];
        }
    }];
}
- (HLPrinter *)getPrinter
{
    HLPrinter *printer = [[HLPrinter alloc] init];
    UIView *myView=[[UIView alloc]init];
    myView.backgroundColor=[UIColor whiteColor];
    myView.frame=CGRectMake(0, 0, 420, 250);
    UIImage *img1=[UIImage imageWithContentsOfFile:[[NSBundle mainBundle] pathForResource:@"Print1" ofType:@"pic"]];
    UIImageView *imgV1 = [[UIImageView alloc]initWithImage:img1];
    imgV1.frame=CGRectMake(10, 10, 400, 100);
    [myView addSubview:imgV1];
    UILabel *l=[[UILabel alloc]initWithFrame:CGRectMake(150, 150, 120, 60)];
    l.text=self.model.queueNum;
    l.font=[UIFont boldSystemFontOfSize:50];
    l.textAlignment=NSTextAlignmentCenter;
    l.textColor=[UIColor blackColor];
    [myView addSubview:l];
    UIImage *MYimg=[self makeImageWithView:myView withSize:CGSizeMake(420, 250)];
    UIImageWriteToSavedPhotosAlbum(MYimg, nil, nil, nil);
    [printer appendImage:MYimg alignment:HLTextAlignmentCenter maxWidth:368];

    [printer appendText:[NSString stringWithFormat:@"等待人数:%@",self.model.waitNum] alignment:HLTextAlignmentLeft];
    [printer appendText:[NSString stringWithFormat:@"网点名称:%@",self.model.orgName] alignment:HLTextAlignmentLeft];
    [printer appendText:[NSString stringWithFormat:@"取号时间:%@",self.model.printTime] alignment:HLTextAlignmentLeft];
    [printer appendText:@"请您在休息区等候,注意呼号及电视屏幕显示信息,如果过号,请您重新排号。" alignment:HLTextAlignmentLeft];
    UIImage *img2=[UIImage imageWithContentsOfFile:[[NSBundle mainBundle] pathForResource:@"Print0" ofType:@"pic"]];
    [printer appendImage:img2 alignment:HLTextAlignmentCenter maxWidth:368];

    return printer;
}
#pragma mark - view生成image 高清方法
- (UIImage *)makeImageWithView:(UIView *)view withSize:(CGSize)size
{
    UIGraphicsBeginImageContextWithOptions(size, NO, 0.0);
    [view.layer renderInContext:UIGraphicsGetCurrentContext()];
    UIImage *image = UIGraphicsGetImageFromCurrentImageContext();
    UIGraphicsEndImageContext();

    return image;
}
//HBPrintViewController.m
#import "HBPrintViewController.h"

@interface HBPrintViewController ()

@property (strong, nonatomic)  UITableView *tableView;

@property (strong, nonatomic)   NSArray  *deviceArray;  /**< 蓝牙设备个数 */
@property (strong, nonatomic)  UIViewController *presentingVC;

@end

@implementation HBPrintViewController

- (void)viewDidLoad {
    [super viewDidLoad];
    [self.view addSubview:self.tableView];
    self.tableView.delegate=self;
    self.tableView.dataSource=self;
    [self.tableView mas_makeConstraints:^(MASConstraintMaker *make) {
        make.center.equalTo(self);
        make.edges.equalTo(self).insets(UIEdgeInsetsMake(165, 260, 130, 260));
    }];
    SEPrinterManager *_manager = [SEPrinterManager sharedInstance];
    [_manager startScanPerpheralTimeout:10 Success:^(NSArray *perpherals,BOOL isTimeout) {
        NSLog(@"perpherals:%@",perpherals);
        _deviceArray = perpherals;
        [_tableView reloadData];
    } failure:^(SEScanError error) {
        NSLog(@"error:%ld",(long)error);
    }];

}
-(UITableView *)tableView
{
    if (!_tableView) {
        _tableView=[[UITableView alloc]init];
        _tableView.layer.cornerRadius=10;
        UIView *v1=[[UIView alloc]initWithFrame:CGRectMake(0, 0, [UIScreen mainScreen].bounds.size.width, 60)];
        v1.backgroundColor=[UIColor whiteColor];
        UILabel *l=[[UILabel alloc]initWithFrame:CGRectMake(0, 20, [UIScreen mainScreen].bounds.size.width, 40)];
        l.text=@"请点击您想连接的蓝牙设备";
        l.backgroundColor=[UIColor lightGrayColor];
        [v1 addSubview:l];
        _tableView.tableHeaderView=v1;
    }
    return _tableView;
}
//点别的地方返回之前页面
-(void)touchesBegan:(NSSet *)touches withEvent:(UIEvent *)event
{
    if (self.presentingVC) {
        [self dismissViewControllerAnimated:YES completion:nil];
    }else
    {
        [self.presentingViewController dismissViewControllerAnimated:YES completion:nil];
    }

}

#pragma mark - UITableViewDataSource
- (NSInteger)tableView:(UITableView *)tableView numberOfRowsInSection:(NSInteger)section
{
    return _deviceArray.count;
}

- (UITableViewCell *)tableView:(UITableView *)tableView cellForRowAtIndexPath:(NSIndexPath *)indexPath
{
    static NSString *identifier = @"deviceId";
    UITableViewCell *cell = [tableView dequeueReusableCellWithIdentifier:identifier];
    if (cell == nil) {
        cell = [[UITableViewCell alloc] initWithStyle:UITableViewCellStyleValue1 reuseIdentifier:identifier];
    }

    CBPeripheral *peripherral = [self.deviceArray objectAtIndex:indexPath.row];
    cell.textLabel.text = [NSString stringWithFormat:@"名称:%@",peripherral.name];
    cell.imageView.image = [UIImage imageNamed:@"blue"];
    return cell;
}

- (void)tableView:(UITableView *)tableView didSelectRowAtIndexPath:(NSIndexPath *)indexPath
{
    [tableView deselectRowAtIndexPath:indexPath animated:YES];
    CBPeripheral *peripheral = [self.deviceArray objectAtIndex:indexPath.row];
    dispatch_queue_t queue =  dispatch_queue_create("连接蓝牙直接打印", NULL);
    dispatch_async(queue, ^{
        [[SEPrinterManager sharedInstance] fullOptionPeripheral:peripheral completion:^(SEOptionStage stage, CBPeripheral *perpheral, NSError *error) {
            if (!error) {
                NSLog(@"连接蓝牙设备成功,但不一定是我的打印机哦");
            }
            if (stage == SEOptionStageSeekCharacteristics) {
                NSData *mainData = [self.printer getFinalData];
                [[SEPrinterManager sharedInstance] sendPrintData:mainData completion:^(CBPeripheral *connectPerpheral, BOOL completion, NSString *error)
                 {
                     if (completion) {
                         NSString *idfv = [[[UIDevice currentDevice] identifierForVendor] UUIDString];
                         [[NSUserDefaults standardUserDefaults] setBool:YES forKey:idfv];
                     }
                 }];
            }
        }];
    });

    [self dismissViewControllerAnimated:YES completion:nil];
}
#pragma mark - 重写dismiss解决方案
-(void)dismissViewControllerAnimated:(BOOL)flag completion:(void (^)(void))completion
{
    if (self.presentedViewController)
    {
        if (self.presentingViewController) {
            self.presentingVC = self.presentingViewController;
        }
        [super dismissViewControllerAnimated:flag completion:completion];
    }

}
.h文件

#import
#import "SEPrinterManager.h"

NS_ASSUME_NONNULL_BEGIN

@interface HBPrintViewController : UIViewController
@property(nonatomic , strong)HLPrinter *printer;

@end

NS_ASSUME_NONNULL_END
好了,到此我的关键代码全在这里了,至于引用的东西GitHub上就有。
完,求赞求评论求喜欢,银行信息这次不打码了,就是这么任性!


