使用步骤:
一、安装
下载seata-server:https://github.com/seata/seata/releases
我安装的是0.6.1版本
解压到/data/tool/seata-server/distribution
#运行seata-server
sh /data/tool/seata-server/distribution/bin/seata-server.sh 8091 file /data/tool/seata-server/distribution/data
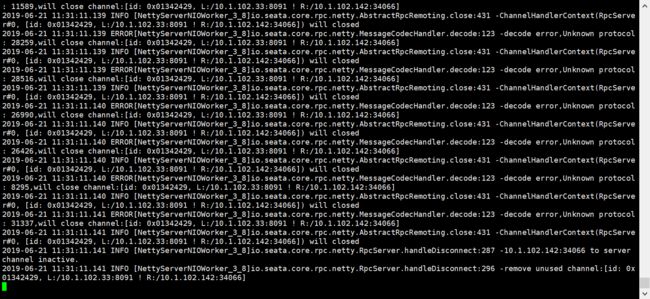
效果图:
线程守护同目录执行:touch startup.sh
#!/bin/bash
sh /data/tool/seata-server/distribution/bin/seata-server.sh 8091 file /data/tool/seata-server/distribution/data
vim /lib/systemd/system/seata-server.service
文件中填入
[Unit]
Description=seata-server
After=syslog.target network.target remote-fs.target nss-lookup.target
[Service]
Type=simple
ExecStart=/opt/seata-server/startup.sh
Restart=always
PrivateTmp=true
[Install]
WantedBy=multi-user.target
赋予权限
chmod 777 /data/tool/seata-server/distribution/startup.sh
chmod 777 /lib/systemd/system/seata-server.service
启用服务
systemctl enable seata-server.service
systemctl daemon-reload
运行
systemctl start seata-server.service
查看状态
systemctl status seata-server.service
查看进程
ps -ef|grep seata-server
运行成功后可在Nacos控制台的 服务列表 看到 服务名serverAddr的条目
注意:
每一个业务库里都需要新增以下数据表
CREATE TABLE `undo_log` (
`id` bigint(20) NOT NULL AUTO_INCREMENT,
`branch_id` bigint(20) NOT NULL,
`xid` varchar(100) NOT NULL,
`rollback_info` longblob NOT NULL,
`log_status` int(11) NOT NULL,
`log_created` datetime NOT NULL,
`log_modified` datetime NOT NULL,
`ext` varchar(100) DEFAULT NULL,
PRIMARY KEY (`id`),
UNIQUE KEY `ux_undo_log` (`xid`,`branch_id`)
) ENGINE=InnoDB AUTO_INCREMENT=1 DEFAULT CHARSET=utf8;
二、spring cloud接入
1、配置文件 bootstrap.yml
spring:
cloud: #分布式事务
alibaba:
seata:
tx-service-group: default
2、pom引用
org.springframework.cloud
spring-cloud-starter-alibaba-nacos-discovery
org.springframework.cloud
spring-cloud-starter-openfeign
org.springframework.cloud
spring-cloud-alibaba-seata
io.seata
seata-spring
3、把两个文件copy到resources。
registry.conf
registry {
# file 、nacos 、eureka、redis、zk
type = "file"
nacos {
serverAddr = "localhost"
namespace = "public"
cluster = "default"
}
eureka {
serviceUrl = "http://localhost:1001/eureka"
application = "default"
weight = "1"
}
redis {
serverAddr = "localhost:6381"
db = "0"
}
zk {
cluster = "default"
serverAddr = "127.0.0.1:2181"
session.timeout = 6000
connect.timeout = 2000
}
file {
name = "file.conf"
}
}
config {
# file、nacos 、apollo、zk
type = "file"
nacos {
serverAddr = "localhost"
namespace = "public"
cluster = "default"
}
apollo {
app.id = "fescar-server"
apollo.meta = "http://192.168.1.204:8801"
}
zk {
serverAddr = "127.0.0.1:2181"
session.timeout = 6000
connect.timeout = 2000
}
file {
name = "file.conf"
}
}
注意:
分组名称:vgroup_mapping.default = "default"
nacos地址:default.grouplist = "seata-server:8091"
file.conf
transport {
# tcp udt unix-domain-socket
type = "TCP"
#NIO NATIVE
server = "NIO"
#enable heartbeat
heartbeat = true
#thread factory for netty
thread-factory {
boss-thread-prefix = "NettyBoss"
worker-thread-prefix = "NettyServerNIOWorker"
server-executor-thread-prefix = "NettyServerBizHandler"
share-boss-worker = false
client-selector-thread-prefix = "NettyClientSelector"
client-selector-thread-size = 1
client-worker-thread-prefix = "NettyClientWorkerThread"
# netty boss thread size,will not be used for UDT
boss-thread-size = 1
#auto default pin or 8
worker-thread-size = 8
}
}
service {
#vgroup->rgroup
vgroup_mapping.default = "default"
#only support single node
default.grouplist = "seata-server:8091"
#degrade current not support
enableDegrade = false
#disable
disable = false
disableGlobalTransaction = false
}
client {
async.commit.buffer.limit = 10000
lock {
retry.internal = 10
retry.times = 30
}
}
4、代码
主方法添加:
@GlobalTransactional
子方法添加:
@Transactional(rollbackFor = Exception.class)
来源:
https://blog.csdn.net/zhangchangbin123/article/details/89310131
安装教程:
https://www.cnblogs.com/wintersoft/p/10548177.html
原理:
https://blog.csdn.net/hosaos/article/details/89136666#_251
#demo-seata-springcloud
https://github.com/SLY1311220942/demo-seata-springcloud
