本文从团队开发the Graph应用subgraph的场景为背景,介绍其环境的搭建:线下开发的机器比较复杂就以mac机器为例一步一步配置讲解,线上环境属于比较干净但辅助软件欠缺,需要从头部署,读者可以按需阅读。
The Graph 开发环境搭建
Ganache部署
NPM/Yarn 全局安装 truffle ganache-cli
$ npm install -g truffle ganache-cli
   or
$ yarn global add truffle ganache-cli
ganache-cli 启动
$ ganache-cli -h 0.0.0.0
Ganache CLI v6.12.2 (ganache-core: 2.13.2)
Available Accounts
=
(0) 0x373548217c1C6d3F896833418cCDc14426BE91cd (100 ETH)
(1) 0x65f77651165C132252ea43E34f3aE24048216ce8 (100 ETH)
(2) 0x1861c71ABC4Ccd4990bb42638C4966e9012A8fc9 (100 ETH)
(3) 0x919A60B34B05feCdB712301120677236B9a3FadE (100 ETH)
(4) 0x7C9E7100d4EA8B25Af4c56aBcf1E2C854e7c363E (100 ETH)
(5) 0xD5f03B34884F57bC9b1E4be4dA6c65c0b5ed8d0e (100 ETH)
(6) 0x79919c9e8832317c0757734C8F01164bBba1B6E3 (100 ETH)
(7) 0xCf135Fa7F9c77Ba5251B55E4A2D6F27f337f4A32 (100 ETH)
(8) 0xfD17D90c6C85C91fd0B81d65964336BC924A0113 (100 ETH)
(9) 0x7887465f89eD278960a55Bf6e391b61528747A60 (100 ETH)
Private Keys
=
(0) 0xa9b479e9304251d7f2f4dfcbc143fd037cfdb02fc3bb70f6826297bc4206b945
(1) 0x0feef1514167b7c1b4cdc11e5d8eb407ab4d04661771f3efc9ccc185c0103ee0
注:带参数的启动可以再现大部分历史环境
例如:ganache-cli -h 0.0.0.0 -v /db -b 6 -a 8 -e 1000 -d expect chair toe trade spider wedding say item scare fog shrimp garlic
打开存在库,设置自动挖矿时间6,设置8个1000gas账号,导入现有私钥,(-d ,可以是外面,也可用-m产生)
拉graph-node(本级复杂的环境历程)
下载https://download.docker.com/m...,安装放入APP中,运行并输入密码,命令行可用。
一切看起非常正常,但是后续安装可能会发生各种问题,因你的本机软硬件环境而异,但都需要平常心对之。
$ brew install jq
$ docker -v
brew install 安装更新出师不利,填坑见 brew upgrade安装报错 解决brew upgrade mac更新组件遗留问题。
Docker version 20.10.5, build 55c4c88 还ok。
拉graph-node节点
$ git clone https://github.com/graphprotocol/graph-node/此处git等常见人力不可达地区资源坑见 代理与镜像坑 有时候反复多试试就过去了,过去了就珍重劳动成果,备份一些资源,将来有不可抗力时可以把这些文件 复制/粘贴 (或者直接利用你同事的干净环境获取本地文件,回头再解决你的环境问题)
配置启动the Graph
$ cd graph-node/docker
$ ./setup.sh #write the host IP address into docker-compose.yml.
$ docker-compose up #Start a local Graph Node that will connect to Ganache on your host
graph-node_1 | Jun 22 11:13:56.395 INFO Starting JSON-RPC admin server at: http://localhost:8020, component: JsonRpcServer
graph-node_1 | Jun 22 11:13:56.395 INFO Started all subgraphs, component: SubgraphRegistrar
graph-node_1 | Jun 22 11:13:56.397 INFO Starting GraphQL HTTP server at: http://localhost:8000, component: GraphQLServer
graph-node_1 | Jun 22 11:13:56.397 INFO Starting index node server at: http://localhost:8030, component: IndexNodeServer
graph-node_1 | Jun 22 11:13:56.399 INFO Starting GraphQL WebSocket server at: ws://localhost:8001, component: SubscriptionServer
graph-node_1 | Jun 22 11:13:56.399 INFO Starting metrics server at: http://localhost:8040, component: MetricsServer
启动docker-compose up
时报错是因为访问host IP导致 解决
关闭节点 docker-compose down -v;
docker-compose down -v;
if [ -d"data" ] thenecho"Found old data for the graph node - deleting it"; # we need to sudo this to remove system locked filessudorm-rf data/;
fi
客户端graphprotocol/graph-cli 安装
$ npm install -g @graphprotocol/graph-cli
$ graph init --from-example moluoping/mark-cion
 #graph init --from-example / []
产生的yarn功能lock文件锁住了依赖包的版本,也锁住了源url不能用镜像
解决:备份lock,使用npm 拉下所有包 (淘宝镜像不全,使用官方http://registry.npmjs.org/)
(比较版本依赖)资源坑见 代理与镜像坑
上面是通过例子生产合约和subgraph
还可以直接从容器中合约向导生成subgraph工程:
$ graph init --from-contract 0x1e1215caD01aD7192832e0DACfA930Caf0132b43 --network mainnet --abi markdemo4.json moluoping/markdemo4编译&部署合约
编译与全新编译
$ truffle compile
(truffle compile --all 全新编译
https://www.trufflesuite.com/...)Compiling your contracts...
✔ Fetching solc version list from solc-bin. Attempt #1
✔ Downloading compiler. Attempt #1.
Compiling ./contracts/Gravity.sol
Compiling ./contracts/Migrations.sol
Artifacts written to /Users/gaoxiaoqing/Documents/swork/feature/markggg/build/contracts
Compiled successfully using:
solc: 0.4.25+commit.59dbf8f1.Emscripten.clang
发布与重新部署
$ truffle migrate
( truffle migrate --reset 重新部署 https://www.trufflesuite.com/...
Network name: 'development'
Network id: 1624441310514
Block gas limit: 6721975 (0x6691b7)
1_initial_migration.js
Deploying 'Migrations'
transaction hash: 0x92950fa746934bed8f1af3e1ea915c76669858c7e9b396c1dfa74276cfdb2745
Blocks: 0 Seconds: 0
contract address: 0x0A994866b43562c083C81E1B4AD6145214f56c56
block number: 1
block timestamp: 1624441330
监听合约通过合约Id,配置
$ sed -i -e 's/0x2E645469f354BB4F5c8a05B3b30A929361cf77eC/0x71e11bC372507d508E05f65c096d32F1eF62Cdf7/g'     subgraph.yaml
$ sed -i -e 's/0x2E645469f354BB4F5c8a05B3b30A929361cf77eC/0x0A994866b43562c083C81E1B4AD6145214f56c56/g'     subgraph.yaml
此处犯一低级错误,第二个合约才是真正有效的,但第二指令为达到效果
sed -i -e 's/0x2E645469f354BB4F5c8a05B3b30A929361cf77eC/0x0A994866b43562c083C81E1B4AD6145214f56c56/g' subgraph.yaml
应该改为
sed -i -e 's/0x71e11bC372507d508E05f65c096d32F1eF62Cdf7/0x0A994866b43562c083C81E1B4AD6145214f56c56/g' subgraph.yaml
因为第一次命令已经替换了文本
编译、创建subgarph,发布the graph App
下载依赖包,编译
$ yarn && yarn codegen
改成$npm install
$yarn codegen
该方案临时取得依赖完成后续工作,ok后解决环境问题见 代理与镜像坑
✔ Load subgraph from subgraph.yaml
Load contract ABI from abis/Gravity.json
✔ Load contract ABIs
Generate types for contract ABI: Gravity (abis/Gravity.json)
Write types to generated/Gravity/Gravity.ts
✔ Generate types for contract ABIs
✔ Generate types for data source templates
✔ Load data source template ABIs
✔ Generate types for data source template ABIs
✔ Load GraphQL schema from schema.graphql
Write types to generated/schema.ts
✔ Generate types for GraphQL schema
Types generated successfully
创建subgarph,发布之
$ yarn create-local
$ yarn deploy-local
$ yarn create-local
graph create moluoping/markg --node http://127.0.0.1:8020
Created subgraph: moluoping/markg
$ yarn deploy-local
✔ Write compiled subgraph to build/
Add file to IPFS build/schema.graphql
.. QmbSFRGGvHM7Cn8YSjDL41diDMxN4LQUDEMqaa5VVc5sC4
Add file to IPFS build/Gravity/abis/Gravity.json
.. QmajZTadknSpgsCWRz9fG6bXFHdpVXPMWpx9yMipz3VtMQ
Add file to IPFS build/Gravity/Gravity.wasm
.. QmbK8bwncci52cstF3P8Q8i4oGjrMt1pUqdv5Uf1VXqXdb
✔ Upload subgraph to IPFS
Build completed: Qmd77mi1ATxscqsBvLANrw9gP1dJNsQMTexvErw5XVyFLc
✖ Failed to deploy to Graph node http://127.0.0.1:8020/: Ethereum network not supported by registrar: mainnet
error Command failed with exit code 1.
找到docker/docker-compose.yml-e 的ethereum: ’mainnet:http://host.docker.internal:8545'
修改为本地:ethereum: 'mainnet:http://192.168.0.136:8545'
✔ Upload subgraph to IPFS
Build completed: QmYNgbF7YfDs6Y8YV7aqYGS7cVx5vpt1uNhk3y7wmkAUgm
Deployed to http://127.0.0.1:8000/subgrap...
Subgraph endpoints:
Queries (HTTP): http://127.0.0.1:8000/subgrap...
Subscriptions (WS): http://127.0.0.1:8001/subgrap...
✨ Done in 21.16s.
8001端口与Vray http代理端口冲突,修改Vray http代理端口为8701,顺便把git clone和yarn 下载的代理问题解决
代理与镜像坑点
特别注意8001端口与Vray http代理端口冲突
修改Vray http代理端口为8701,顺便把git clone和yarn 下载的代理问题解决
特别注意代理,代理,代理
我们不在代理,就在镜像的路上,有时候git和yarn还是会报同步错,这时候可以反复如下操作
git config --global http.proxy socks5://127.0.0.1:1080
git config --global https.proxy socks5://127.0.0.1:1080

git config --global https.proxy http://127.0.0.1:1080
git config --global https.proxy https://127.0.0.1:1080

git config --global --unset http.proxy
git config --global --unset https.proxy
开关/开关代理
NPM
查询当前镜像
npm get registry
设置为淘宝镜像
npm config set registry https://registry.npm.taobao.org/
设置为官方镜像
npm config set registry https://registry.npmjs.org/

YARN
查询当前镜像
yarn config get registry
设置为淘宝镜像
yarn config set registry https://registry.npm.taobao.org/
设置为官方镜像
yarn config set registry https://registry.yarnpkg.com
阿里和官方不停切换
brew upgrade安装报错问题解决替换homebrew-bottles
$ brew upgrade
 或者
$ 任何需要更新的命令
所以必须解决
==>Installing libtool dependency: m4
==>Pouring m4-1.4.18.mojave.bottle.1.tar.gz
tar: Error opening archive: Failed to open '/Users/gaoxiaoqing/Library/Caches/Homebrew/downloads/f25291efa07f91502eda2b4c0bd6fa41fae3c19661fa239d3855027f9c0a36d1--m4-1.4.18.mojave.bottle.1.tar.gz'
Error: Failure while executing; tar --extract --no-same-owner --file /Users/gaoxiaoqing/Library/Caches/Homebrew/downloads/f25291efa07f91502eda2b4c0bd6fa41fae3c19661fa239d3855027f9c0a36d1--m4-1.4.18.mojave.bottle.1.tar.gz --directory /private/tmp/d20210628-40770-hpzxk9 exited with 1. Here's the output:
tar: Error opening archive: Failed to open '/Users/gaoxiaoqing/Library/Caches/Homebrew/downloads/f25291efa07f91502eda2b4c0bd6fa41fae3c19661fa239d3855027f9c0a36d1--m4-1.4.18.mojave.bottle.1.tar.gz'
方案一:替换文件
找到/Users/gaoxiaoqing/Library/Caches/Homebrew/downloads/发现有66ff350c21fce7c264e33e3cff6f4995978ac401d5e5047c0ee8dd17e3493a53--m4-1.4.18.mojave.bottle.1.tar.gz,改名。ok,我估计是有两个或两个版本用到这个,后面一个就缓存不生成了,但是忙过以后还是睡不着啊,有了第二种解决方案。
方案二:替换homebrew-bottles
echo 'export HOMEBREW_BOTTLE_DOMAIN=https://mirrors.ustc.edu.cn/homebrew-bottles' >> ~/.bash_profile

source ~/.bash_profile
brew包括四块
| Homebrew | 源代码仓库 |
|---|---|
| homebrew-core | Homebrew 核心源 |
| homebrew-cask | 提供macos应用和大型二进制文件的安装 |
| homebrew-bottles | 预编译二进制软件包 |
如果用到也同样可改镜像
$ git -C "$(brew --repo)" remote set-url origin https://mirrors.ustc.edu.cn/brew.git
$ git -C "$(brew --repo homebrew/core)" remote set-url origin https://mirrors.ustc.edu.cn/homebrew-core.git
$ git -C "$(brew --repo homebrew/cask)" remote set-url origin https://mirrors.ustc.edu.cn/homebrew-cask.git
配置文件脚本自动替换坑
数据源获取不准确
graph-node_1 | Jun 24 01:34:13.558 WARN Trying again after net_version RPC call failed (attempt #18) with result Err(Transport error: Error(Connect, Os { code: 111, kind: ConnectionRefused, message: "Connection refused" })), provider: mainnet-rpc-0
graph-node_1 | Jun 24 01:34:14.517 ERRO Connection to provider failed. Not using this provider, error: deadline has elapsed, provider: mainnet-rpc-0
该报错会引起后续(相关联应用)报错:
Failed to deploy to Graph node http://127.0.0.1:8020/: Ethereum network not supported by registrar: mainnet.
解决:ConnectionRefused一般是对方服务器不能到达
找到docker/docker-compose.yml-e 的ethereum: ’mainnet:http://host.docker.internal:8545'
修改为本地:ethereum: 'mainnet:http://192.168.0.136:8545'
数据多次替换源发生变更引起
合同调试工具
- Truffle Console: A basic interactive console connecting to any Ethereum client
- Truffle Develop: An interactive console that also spawns a development blockchain
https://www.trufflesuite.com/...
the Graph 线上服务器 & certos8安装
安装线上服务器docker &启动
# sudo yum install -y yum-utils   device-mapper-persistent-data   lvm2
# sudo yum-config-manager     --add-repo     http://mirrors.aliyun.com/docker-ce/linux/centos/docker-ce.repo
# sudo yum install docker-ce docker-ce-cli containerd.io
# yum list docker-ce --showduplicates | sort -r
docker-ce.x86_64 3:20.10.7-3.el8 docker-ce-stable docker-ce.x86_64 3:20.10.7-3.el8 @docker-ce-stable
docker-ce.x86_64 3:20.10.6-3.el8 docker-ce-stable
docker-ce.x86_64 3:20.10.5-3.el8 docker-ce-stable
# sudo yum install docker-ce-20.10.7-3.el8 docker-ce-cli-20.10.7-3.el8 containerd.io
# sudo systemctl start docker
拉下节点graph-node & 配置启动
# git clone https://github.com/graphprotocol/graph-node/安装docker-compose
# yum -y install epel-release
# yum install python3-pip )
yum install python-pip(certos7)
# pip3 install --upgrade pip
# pip install docker-compose
pip3 install --upgrade pip (certos7)
若使用pip install docker-compose安装失败,则使用下面一条命令试试#pip --default-timeout=200 install -U docker-compose
安装 install 'jq'
# yum install jq
运行环境设置,重点关注IP地址copy
# cd graph-node/docker
./setup.sh
write the host IP address into docker-compose.yml. 如果ip不是你主机ip,手动修改
docker: read tcp 192.168.7.235:36512->54.230.212.9:443: read: connection reset by peer.
使用下一节阿里云镜像加速解决
阿里云镜像加速
https://help.aliyun.com/docum...
使用Docker时需要首先下载一个官方镜像,例如mysql、wordpress。然而由于网络原因,下载一个Docker官方镜像可能会需要很长的时间,甚至下载失败。为此,阿里云容器镜像服务ACR提供了官方的镜像站点,从而加速官方镜像的下载。镜像加速器是面向个人开发者的服务,仅限额支持个人开发场景,不允许有再次封装或商业用途。
# sudo mkdir -p /etc/docker
# sudo tee /etc/docker/daemon.json <<-'EOF'
{
  "registry-mirrors": ["https://de43k63h.mirror.aliyuncs.com"]
}
EOF
# sudo systemctl daemon-reload
# sudo systemctl restart docker
https://de43k63h.mirror.aliyu... 替换成你的镜像:关于加速器的地址,您登录容器镜像服务控制台后,在左侧导航栏选择镜像工具 > 镜像加速器,在镜像加速器页面就会显示为您独立分配的加速器地址。
继续./setup.sh设置,跟踪IP地址
Starting graph-node ... doneHost IP: 172.18.0.1
# ifconfig
br-c3a270be10f6: flags=4099
inet6 fe80::42:b1ff:fea4:30eb prefixlen 64 scopeid 0x20
ether 02:42:b1:a4:30:eb txqueuelen 0 (Ethernet)
RX packets 0 bytes 0 (0.0 B)
RX errors 0 dropped 0 overruns 0 frame 0
TX packets 0 bytes 0 (0.0 B)
TX errors 0 dropped 0 overruns 0 carrier 0 collisions 0
docker0: flags=4099
inet 172.17.0.1 netmask 255.255.0.0 broadcast 172.17.255.255
ether 02:42:76:73:7f:6c txqueuelen 0 (Ethernet)
RX packets 0 bytes 0 (0.0 B)
RX errors 0 dropped 0 overruns 0 frame 0
TX packets 0 bytes 0 (0.0 B)
TX errors 0 dropped 0 overruns 0 carrier 0 collisions 0
eth0: flags=4163
inet 172.31.XXX.XXX netmask 255.255.240.0 broadcast 172.31.191.255
inet6 fe80::216:3eff:fe02:a9a7 prefixlen 64 scopeid 0x20
ether 00:16:3e:02:a9:a7 txqueuelen 1000 (Ethernet)
这里我们手动修改172.18.0.1到远程的以太坊容器IP(docker/docker-compose.yml)
启动the Graph
启动# docker-compose up
停止# docker-compose down -v
ok,可以使用了
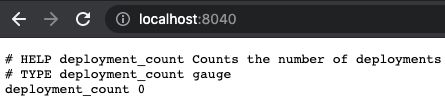
http://47.100.XXX.XXX:8000
http://47.100.XXX.XXX:8001
http://47.100.XXX.XXX:8020
http://47.100.XXX.XXX:8040
进入docker日志
远程连接再次进入日志查看
# docker ps
CONTAINER ID IMAGE COMMAND PORTS NAMESf8dea825ae05 graphprotocol/graph-node "/bin/sh -c start" 8040->8040/tcp docker_graph-node_1
890420a4b747 ipfs/go-ipfs:v0.4.23 "/sbin/tini -- /usr/…" 5001->5001/tcp docker_ipfs_1
1e477194e786 postgres "docker-entrypoint.s…" 5432->5432/tcp
# docker logs --tail 10 f8dea825ae05
# docker logs --follow f8dea825ae05
作者:Mark
欢迎区块链行业志同道合的小伙伴添加小极微信,加入blockgeek区块链技术交流群,共同推动区块链技术普及和发展~
