基于Python Django的疫情人员管理系统
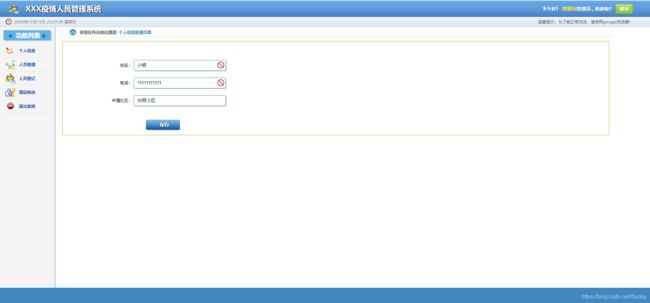
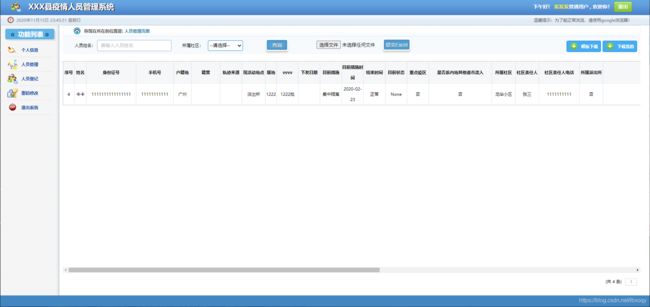
最近在学习django的drf框架,就拿了一个图书管理系统,历史一个星期,改造成为一个疫情人员管理系统。分为web 和 app端,可以追踪人员的当前情况,加入了图表统计。文末有下载链接
源码下载
文章目录
- 实现过程()
- 相关配置
- Model设计
- 接口设计
- 前端页面
- 运行情况
实现过程()
后端使用Python3.6(django、drf框架)
前端使用html(bootstrap框架)
数据库采用的mysql
相关配置
Django的一些配置,包括解决csrf、数据库、日志配置、静态文件、跨域请求、Json web token认证这些就不具体描述了,先放配置,大部分在网上都可以搜索到,等有空再统一补充一下有坑的地方。
Web端采用django的session进行认证
App端采用json web token 进行认证
Model设计
根据实际生活,设计了以下几张表
用户表
class MyUser(models.Model):  # 用户表
    roles = (('manager', "管理员"), ('staff', "普通用户"))

    account = models.CharField(max_length=20, unique=True, help_text='账户,为手机号')  # 账号
    password = models.CharField(max_length=20, help_text='用户密码')  # 用户密码,明文保存一份,用于web登陆认证
    name = models.CharField(max_length=20, null=True, help_text='用户姓名')
    identification_card = models.CharField(max_length=18, null=True, unique=True, help_text='用户身份证')  # 用户身份证
    xianshi = models.CharField(max_length=20, null=True, help_text='所属县市')  # 所属县市
    community = models.ForeignKey(Community, null=True, on_delete=models.CASCADE)  # 所属社区
    auth_user = models.OneToOneField(auth_user, null=True, on_delete=models.CASCADE, related_name='auth_user')
    role = models.CharField(max_length=20, choices=roles, default='staff', help_text='角色')
    enter = models.CharField(max_length=20, null=True, help_text='录入人')
社区表
class Community(models.Model):  # 社区表
    name = models.CharField(max_length=200, unique=True)  # 社区名称
    address = models.CharField(max_length=200, null=True)  # 主键
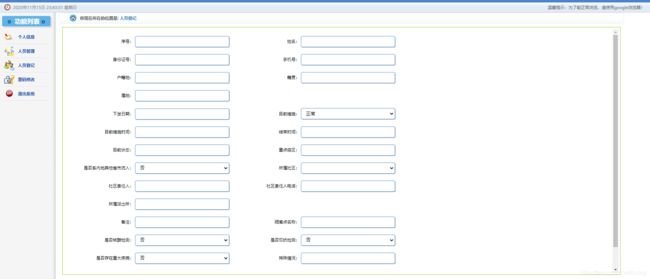
人员登记表
class PersonRegister(models.Model):  # 人员登记表
    is_or_not = (('是', '是'), ('否', '否'))

    order = models.CharField(max_length=18, null=True, help_text='序号')
    name = models.CharField(max_length=200, null=True, help_text='姓名')  # 姓名
    identification_card = models.CharField(max_length=18, unique=True, help_text='身份证号码')  # 身份证号码
    phone = models.CharField(max_length=100, help_text='手机号')  # 手机号
    census_register = models.CharField(max_length=200, null=True, help_text='户籍地')  # 户籍地
    native_place = models.CharField(max_length=200, null=True, help_text='籍贯')  # 籍贯
    track_source = models.CharField(max_length=200, null=True, help_text='轨迹来源')  # 轨迹来源
    current_activity_location = models.TextField(null=True, help_text='当前活动地点')  # 当前活动地点
    dependency = models.CharField(max_length=200, null=True, help_text='属地')  # 属地
    measure = models.CharField(max_length=100, help_text='目前措施')  # 目前措施 正常 居家隔离 集中隔离
    measure_start_time = models.CharField(max_length=100, help_text='目前措施时间')  # 目前措施时间
    measure_end_time = models.CharField(null=True, max_length=100, help_text='措施结束时间')  # 措施结束时间
    current_state = models.CharField(null=True, max_length=100, help_text='当前状态')  # 当前状态
    epidemic_area = models.CharField(null=True, max_length=100, help_text='重点疫区')
    from_other_area = models.CharField(null=True, choices=is_or_not, default='否', max_length=10,
                                       help_text='是否来自其他省份')  # 是否来自其他省份
    community = models.ForeignKey(Community, null=True, related_name='person_register',
                                  on_delete=models.CASCADE, help_text='所属社区')  # 所属社区
    community_leader = models.CharField(null=True, max_length=100, help_text='社区责任人')  # 社区责任人
    community_leader_phone = models.CharField(null=True, max_length=100, help_text='社区责任人电话')  # 社区责任人电话
    police_station = models.CharField(max_length=100, help_text='所属派出所')  # 所属派出所
    enter = models.ForeignKey(MyUser, null=True, on_delete=models.CASCADE, help_text='录入人')  # 录入人
    comments = models.TextField(null=True, help_text='备注')  # 备注
    isolation_points = models.TextField(null=True, help_text='隔离点')  # 隔离点
    nucleic_acid_test = models.CharField(choices=is_or_not, default='否', max_length=10, help_text='是否核酸检测')  # 是否核酸检测
    town = models.CharField(null=True, max_length=100, help_text='乡镇')  # 乡镇
    has_serious_disease = models.CharField(choices=is_or_not, default='否', max_length=10,
                                           help_text='是否存在重大疾病')  # 是否存在重大疾病
    special_situation = models.TextField(null=True, help_text='特殊情况')
    create_time = models.DateTimeField(null=True, auto_now_add=True, help_text="创建时间")
    update_time = models.DateTimeField(null=True, auto_now=True, help_text="最后更新时间")
个人证件记录表
class PersonImage(models.Model):
    """
    图片
    """
    person_register = models.ForeignKey(PersonRegister, null=True, related_name='poerson_img', on_delete=models.CASCADE)
    person_image = models.TextField(null=True, help_text='个人图片信息,base64')
接口设计
接口太多,不一一分享,具体可以查看源码,下面是web的登录接口,app的接口直接使用jwt的认证过程了。
def login_judge(request):  # 登入判定
    account = request.POST.get("telephone")  # 获取前端输入的账户(手机号)
    user_password = request.POST.get("password")
    result1 = MyUser.objects.filter(account=account)  # 在user表里检索是否存在该账户
    if len(result1) == 1:  # 判断后台是否存在该用户,有则进一步判断密码是否正确
        password = result1[0].password  # 获取后台的密码
        identity = role_desc.get(result1[0].role, '')  # 获取该账户的身份信息
        request.session['global_sname_xianshi'] = result1[0].xianshi
        request.session['global_sname_shequ'] = result1[0].community.name if result1[0].community else ''
        request.session['identity'] = identity

        if user_password == password:  # 将用户输入的密码和后台密码进行比对,如何正确,判断该账户身份
            request.session['account'] = account
            user = MyUser.objects.get(account=account)
            request.session['global_sname'] = user.name
            request.session['global_mname'] = user.name

            context = {

                "name": user.name,
                "id": user.identification_card,
                "community": user.community.name,
                "telephone": account,
                "enter": user.enter if user.enter else '',
                "identity": identity,
            }
            return render(request, 'manager/manager_information.html', context)  # 跳转到管理员主页界面
        else:  # 如果不一致则返回相应提示语句
            context = {

                "info": "密码错误!!!",
                "status": 2
            }
            return render(request, 'login.html', context=context)  # 密码错误回到登入界面
    else:  # 如果不存在该用户则返回相应的提示语句
        context = {

            "info": "该账户不存在!!!",
            "status": 3
        }
        return render(request, 'login.html', context=context)  # 账户不存在则继续回到登入界面
前端页面
登录页,其他页面可查看源码
DOCTYPE html>
<html>
<head>
<title>欢迎来到人员登录界面title>

	<meta name="viewport" content="width=device-width, initial-scale=1" />
	<meta http-equiv="Content-Type" content="text/html; charset=utf-8" />
	<meta name="keywords" content="" />
	<script type="application/x-javascript"> addEventListener("load", function() {
        setTimeout(hideURLbar, 0); }, false); function hideURLbar(){
        window.scrollTo(0,1); } script>


<link href="../static/css/style1.css" type="text/css" rel="stylesheet" media="all">
<link href="../static/css/jquerysctipttop.css" rel="stylesheet" type="text/css">
<style>
    .p_one{

        color: #4fff24;
        position: relative;
        left: 636px;
        top: 69px;
        font-size: 23px;
        font-family: monospace;
    }
style>
head>

<body>

<section>
  <div class="stage">
   <h1>欢迎来到XXX疫情人员管理系统h1>
    <div class="cbImage active signin agileits">
		<h3>登录h3>
		<form action="/login_judge/" method="post">
            {% csrf_token %}
			<input type="text" name="telephone" class="name" placeholder="手机号" required>
			<input type="password" name="password" class="password" placeholder="密码" required>
			<input type="submit" value="登录" style="position: relative;top: 47px;left: 11px;">
		form>
	div>
    <div class="clear">div>
  div>

section>
<script src="../static/js/jquery-2.1.4.min.js">script>
<script src="../static/js/coverflow-slideshow.js">script>

body>
html>


