Centos 7.4——LAMP架构分离部署+社区论坛部署
之前写的文章是基于一台服务器上部署的:五章——LAMP平台部署及应用 (应用——linux高级管理),用来测试不多的情况下是可以应付;那么如果web网站访问量特别多呢,这就需要我们做分离部署了。
基本概念
PHP的四种工作模式:CGI(Common Gateway Interface),Fastcgi模式,CLI模式,模块模式【apache常用的】
CGI :(比较老的模式,几乎不怎么用了)CGI即通用网关接口(Common Gateway Interface),它是一段程序, 通俗的讲CGI就象是一座桥,把网页和WEB服务器中的执行程序连接起来,它把HTML接收的指令传递给服务器的执行程序,再把服务器执行程序的结果返还给HTML页。CGI 的跨平台性能极佳,几乎可以在任何操作系统上实现
优点:是把web server和具体的程序处理独立开来,结构清晰,可控性强
缺点:如果在高访问需求的情况下,cgi的进程fork就会成为很大的服务器负担Fastcgi模式:fast-cgi 是cgi的升级版本,FastCGI 像是一个常驻 (long-live) 型的 CGI,它可以一直执行着,只要激活后,不会每次都要花费时间去 fork 一次
CLI模式:cli是php的命令行运行模式
模块模式(apache常用的):模块模式是以mod_php5模块的形式集成,此时mod_php5模块的作用是接收Apache传递过来的PHP文件请求,并处理这些请求,然后将处理后的结果返回给Apache
LAMP的安装和配置
| 机器名称 | 运行服务 | IP地址 |
| http | Apache+php | 192.168.2.7 |
| db | MySQL | 192.168.2.9 |
http安装参考:云计算——Apache的管理 安装 ,安装包网址 在/dist/httpd 指数 (apache.org) 上下载
db服务器参考:十章——MySQL主从复制与读写分离(应用——linux防护与群集)
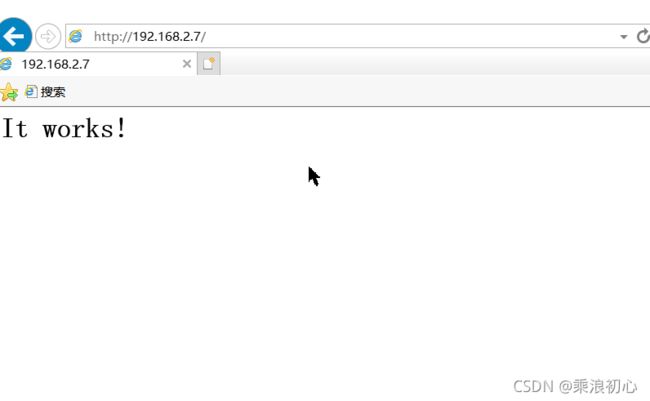
http服务器安装完成后保证可以正常访问
db服务器安装完后保证可以正常登录
[root@C7--09 ~]# mysql -uroot -p123
......
...
mysql>
(一)、准备工作
上传相关的6个安装包:mcrypt-2.6.8.tar.gz phpMyAdmin-4.7.2-all-languages.tar.gz
mhash-0.9.9.9.tar.gz libmcrypt-2.5.8.tar.gz php-5.5.38.tar.gz zend-loader-php5.5-linux-x86_64_update1.tar.gz
1、安装依赖包
[root@http ~]# yum -y install zlib-devel xz-devel libxml2-devel gd zlib-devel libjpeg-devel libpng-devel
....
..
.
2、安装扩展工具库(libmcrypt、mhash、mcrypt 等) 共6个安装包
1)、安装libmcrypt
[root@http ~]# tar zxvf libmcrypt-2.5.8.tar.gz -C /usr/src/
.......
....
[root@http ~]# cd /usr/src/libmcrypt-2.5.8/
[root@http libmcrypt-2.5.8]# ./configure && make && make install
[root@http libmcrypt-2.5.8]# ln -s /usr/local/lib/libmcrypt.* /usr/lib/
2)、安装mhash
[root@http ~]# tar zxvf mhash-0.9.9.9.tar.gz -C /usr/src/
mhash-0.9.9.9/
mhash-0.9.9.9/acinclude.m4
mhash-0.9.9.9/aclocal.m4
......
...
.
[root@http ~]# cd /usr/src/mhash-0.9.9.9/
[root@http mhash-0.9.9.9]# ./configure && make && make install
......
...
3)、安装mcrypt
[root@http ~]# tar zxvf mcrypt-2.6.8.tar.gz -C /usr/src/
....
..

[root@http ~]# cd /usr/src/mcrypt-2.6.8/
[root@http mcrypt-2.6.8]# export LD_LIBRARY_PATH=/usr/local/lib
[root@http mcrypt-2.6.8]# ./configure
......
...
[root@http mcrypt-2.6.8]# make && make install
.....
..
(二)、安装PHP
1、编译安装
[root@http ~]# tar zxvf php-5.5.38.tar.gz -C /usr/src/
[root@http ~]# cd /usr/src/php-5.5.38/
[root@http php-5.5.38]# ./configure --prefix=/usr/local/php --with-mcrypt --with-apxs2=/usr/local/httpd/bin/apxs --with-mysql  --with-mysqli --with-config-file-path=/usr/local/php --enable-mbstring --enable-sockets --with-gd --with-zlib --enable-fpm --with-jpeg-dir=/usr/lib
............
......
...

[root@http php-5.5.38]# make && make install
...................
..............
......
[PEAR] Archive_Tar    - installed: 1.4.0
[PEAR] Console_Getopt - installed: 1.4.1
[PEAR] Structures_Graph- installed: 1.1.1
[PEAR] XML_Util       - installed: 1.3.0
[PEAR] PEAR           - installed: 1.10.1
Wrote PEAR system config file at: /usr/local/php/etc/pear.conf
You may want to add: /usr/local/php/lib/php to your php.ini include_path
/usr/src/php-5.5.38/build/shtool install -c ext/phar/phar.phar /usr/local/php/bin
ln -s -f phar.phar /usr/local/php/bin/phar
Installing PDO headers:          /usr/local/php/include/php/ext/pdo/

[root@http php-5.5.38]# cp /usr/src/php-5.5.38/php.ini-development /usr/local/php/php.ini
2、添加优化模块: ZendGuardLoader (提高PHP的执行效率,优化页面的加载速度)
[root@http ~]# tar -zxvf zend-loader-php5.5-linux-x86_64_update1.tar.gz -C /usr/src/
zend-loader-php5.5-linux-x86_64/
zend-loader-php5.5-linux-x86_64/ZendGuardLoader.so
zend-loader-php5.5-linux-x86_64/opcache.so
zend-loader-php5.5-linux-x86_64/README.txt

[root@http ~]# cd /usr/src/zend-loader-php5.5-linux-x86_64/
[root@http zend-loader-php5.5-linux-x86_64]# cp ZendGuardLoader.so /usr/local/php/lib/php/

[root@http ~]# vim /usr/local/php/php.ini  +680            #进入文件第 680 行
.......
......
 679 ; http://php.net/default-charset
 680 default_charset = "UTF-8"                                  #去掉前面的 ;
 681 zend_extension=/usr/local/php/lib/php/ZendGuardLoader.so   #添加内容
 682 zend_loader.enable=1                                       #添加内容
.....
..

保存退出
[root@http ~]# vim /usr/local/httpd/conf/httpd.conf +53 #进入httpd配置文件 第 53 行
.............
......
53 LoadModule php5_module modules/libphp5.so
54 AddType application/x-httpd-php .php #添加内容
.....
...
166 #
167
168 DirectoryIndex index.php index.html #添加内容 index.php
169
170
.....
.......
297 #
298 #AddType application/x-gzip .tgz
299 AddType application/x-httpd-php .php #添加内容
300
301 #
.....
保存退出
[root@http ~]# vim /usr/local/httpd/htdocs/index.php    #新建一个文件

#添加下面的内容
重启服务
[root@http ~]# httpd restart
访问 192.168.2.7 进行测试
访问成功
(三)、PHP与MySQL连接
因为是分离部署所以我们把localhost换成mysql服务器的ip地址,并给apache授权
[root@http ~]# vim  /usr/local/httpd/htdocs/index.php      #修改文件内容


保存退出在db服务器上登录mysql数据库
[root@db ~]# mysql -uroot -p123
.........
....
mysql> grant all on *.* to 'root'@'192.168.2.7' identified by '123.com';    #授权
Query OK, 0 rows affected (0.00 sec)
验证访问网页
(四)、安装phpMyAdmin
[root@http ~]# tar -zxvf phpMyAdmin-4.7.2-all-languages.tar.gz -C /usr/src/
.........
...
..
[root@http ~]# cd /usr/src
[root@http src]# cp -r phpMyAdmin-4.7.2-all-languages/ /usr/local/httpd/htdocs/sjkroot      #创建一个文件为 sjkroot
[root@http src]# cd /usr/local/httpd/htdocs/sjkroot
[root@http sjkroot]# cp config.sample.inc.php config.inc.php
[root@http sjkroot]# vim config.inc.php
.....
...
17 $cfg['blowfish_secret'] = 'klsjfeo.ij#vlkc^niejlj464dfs6ef453ds4fs4ef5ds'; /* YOU MUST FILL IN THIS FOR COOKIE AUTH! */
18
19 /**
20 * Servers configuration
21 */
22 $i = 0;
23
24 /**
25 * First server
26 */
27 $i++;
28 /* Authentication type */
29 $cfg['Servers'][$i]['auth_type'] = 'cookie';
30 /* Server parameters */
31 $cfg['Servers'][$i]['host'] = '192.168.2.9'; #修改为mysql数据库的地址 192.168.2.9
32 $cfg['Servers'][$i]['compress'] = false;
33 $cfg['Servers'][$i]['AllowNoPassword'] = false;
34 $cfg['Servers'][$i]['user'] = 'root'; #创建用户root
35 $cfg['Servers'][$i]['Password'] = '123.com'; #设置用户的密码123.com
36
保存上方截屏中黄色框框里面的字符自己随意添加
二、在http服务器上部署社区论坛
上传论坛安装包:Discuz_X3.3_SC_UTF8.zip
1、部署程序代码
在httpd上配置
root@http ~]# ls
Discuz_X3.3_SC_UTF8.zip

[root@http ~]# yum -y install unzip
.......
...
[root@http ~]# unzip Discuz_X3.3_SC_UTF8.zip
........
...

[root@http ~]# mkdir /usr/local/httpd/htdocs/sqlt
[root@http ~]# useradd -M -s /sbin/nologin php
[root@http ~]# mv upload/ /usr/local/httpd/htdocs/sqlt
[root@http ~]# chown -R php:php /usr/local/httpd/htdocs/sqlt
[root@http ~]# chmod -R 777 /usr/local/httpd/htdocs/sqlt/
在db服务器上配置
[root@db ~]#  mysql -uroot -p123
......
...
mysql> create database sqlt;
Query OK, 1 row affected (0.00 sec)

mysql> grant all on sqlt.* to 'lt'@'192.168.2.7' identified by '123.com';
Query OK, 0 rows affected (0.00 sec)

mysql> quit
Bye
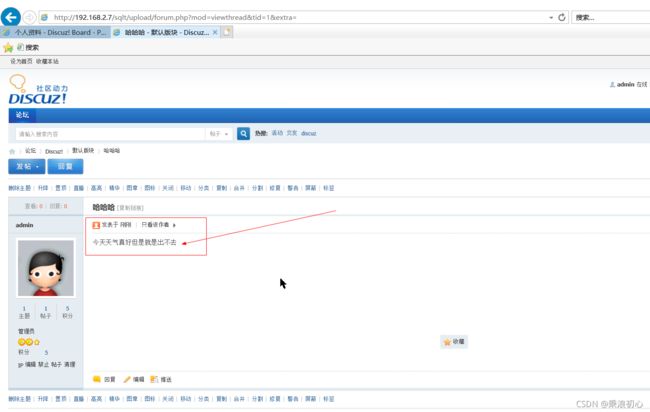
输入: http://192.168.2.7/sqlt/upload/install/
总结:在实验过程中因为忘记给权限所有在安装时会提示没有此文件,在mysql数据库中需要授权给用户lt登录mysql的权利,没有授权的情况下会拒绝访问数据库 ,在实验中有很多问题都是粗心大意以后需要更加努力。
如果有问题可留言哈哈哈欢!!!!欢迎探讨问题


