(OpenCV — 5)基本图形的绘制
学习如何用 Point 在图像中定义 2D 点、如何使用 Scalar 表示颜色值 。 涉及到的绘制函数如下 :
- 用于绘制直线的 line 函数 ;
- 用于绘制椭圆的 ellipse 函数 ;
- 用于绘制矩形 的 rectangle 函数 ;
- 用于绘制圆的 circle 函数 ;
- 用于绘制填充的多边形 的 fillPoly 函数。
1 DrawEllipse()函数的写法
/*** DrawEllipse( )函数   ********************************
 ***描述:自定义的绘制函数,实现了绘制不同角度、相同尺寸的椭圆
 ********************************************************/
void DrawEllipse( Mat img, double angle )
{
	int thickness = 2;
	int lineType = 8;

	ellipse( img,
		Point( WINDOW_WIDTH/2, WINDOW_WIDTH/2 ),
		Size( WINDOW_WIDTH/4, WINDOW_WIDTH/16 ),
		angle,
		0,
		360,
		Scalar( 255, 129, 0 ),
		thickness,
		lineType );
}
此函数的写法解析如下 。
函数 DrawEllipse 调用了 OpenCV 中的 ellipse 函数 , 将椭圆画到 图像img 上 ,
- 椭圆 中心为 点(WINDOW_WIDTH/2.0, WINDOW_ WJDTH/2.0 )
- 并且大小位于矩形(WINDOW_WJDTH/4.0, WINDOW_WIDTH/ 16.0 ) 内
- 椭圆旋转角度为 angle
- 扩展的弧度从 0 度 到 360 度
- 图形颜色为 Scalar(255, 129,0)代表的蓝色
- 线宽(thickness)为 2
- 线型(lineType)为 8 ( 8 联通线型)
2 DrawFilledCircle()函数的写法
/*** DrawFilledCircle( )函数   ***************************
 ***描述:自定义的绘制函数,实现了实心圆的绘制
 ********************************************************/
void DrawFilledCircle( Mat img, Point center )
{
    int thickness = -1;
    int lineType = 8;

    circle( img,
        center,
        WINDOW_WIDTH/32,
        Scalar( 0, 0, 255 ),
        thickness,
        lineType );
}
函数 DrawFilledCircle()调用了 OpenCV 中 的 circle 函数 , 将圆画到图像 img上,
- 圆 心 由点 center 定 义
- 圆的 半径 为 WINDOW_WIDTH/32
- 圆的 颜 色为Scalar(0,0,255), 按 BGR 的格式为红色
- 线粗定义为 thickness = -I ,
- 因此绘制的圆是实心的 。
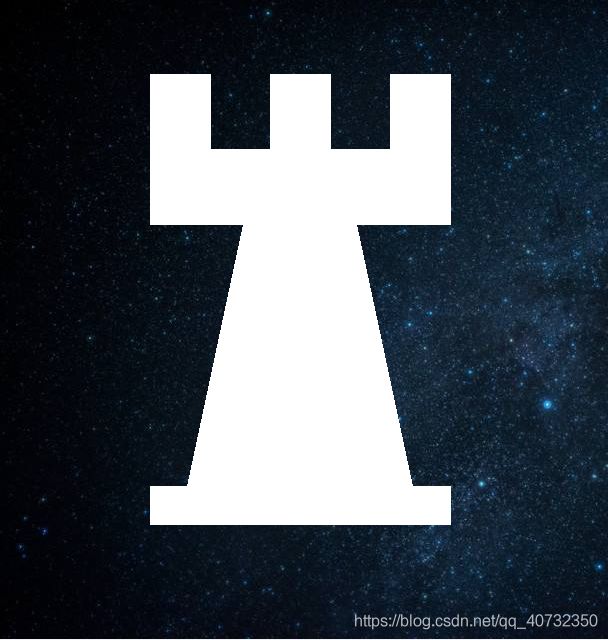
3 DrawPolygon()函数的写法
//-----------------------------------【DrawPolygon( )函数】--------------------------
//		描述:自定义的绘制函数,实现了凹多边形的绘制
//--------------------------------------------------------------------------------------
void DrawPolygon( Mat img )
{
	int lineType = 8;

	//创建一些点
	Point rookPoints[1][20];
	rookPoints[0][0]  = Point(    WINDOW_WIDTH/4,   7*WINDOW_WIDTH/8 );
	rookPoints[0][1]  = Point(  3*WINDOW_WIDTH/4,   7*WINDOW_WIDTH/8 );
	rookPoints[0][2]  = Point(  3*WINDOW_WIDTH/4,  13*WINDOW_WIDTH/16 );
	rookPoints[0][3]  = Point( 11*WINDOW_WIDTH/16, 13*WINDOW_WIDTH/16 );
	rookPoints[0][4]  = Point( 19*WINDOW_WIDTH/32,  3*WINDOW_WIDTH/8 );
	rookPoints[0][5]  = Point(  3*WINDOW_WIDTH/4,   3*WINDOW_WIDTH/8 );
	rookPoints[0][6]  = Point(  3*WINDOW_WIDTH/4,     WINDOW_WIDTH/8 );
	rookPoints[0][7]  = Point( 26*WINDOW_WIDTH/40,    WINDOW_WIDTH/8 );
	rookPoints[0][8]  = Point( 26*WINDOW_WIDTH/40,    WINDOW_WIDTH/4 );
	rookPoints[0][9]  = Point( 22*WINDOW_WIDTH/40,    WINDOW_WIDTH/4 );
	rookPoints[0][10] = Point( 22*WINDOW_WIDTH/40,    WINDOW_WIDTH/8 );
	rookPoints[0][11] = Point( 18*WINDOW_WIDTH/40,    WINDOW_WIDTH/8 );
	rookPoints[0][12] = Point( 18*WINDOW_WIDTH/40,    WINDOW_WIDTH/4 );
	rookPoints[0][13] = Point( 14*WINDOW_WIDTH/40,    WINDOW_WIDTH/4 );
	rookPoints[0][14] = Point( 14*WINDOW_WIDTH/40,    WINDOW_WIDTH/8 );
	rookPoints[0][15] = Point(    WINDOW_WIDTH/4,     WINDOW_WIDTH/8 );
	rookPoints[0][16] = Point(    WINDOW_WIDTH/4,   3*WINDOW_WIDTH/8 );
	rookPoints[0][17] = Point( 13*WINDOW_WIDTH/32,  3*WINDOW_WIDTH/8 );
	rookPoints[0][18] = Point(  5*WINDOW_WIDTH/16, 13*WINDOW_WIDTH/16 );
	rookPoints[0][19] = Point(    WINDOW_WIDTH/4,  13*WINDOW_WIDTH/16 );

	const Point* ppt[1] = { rookPoints[0] };
	int npt[] = { 20 };

	fillPoly( img,
		ppt,
		npt,
		1,
		Scalar( 255, 255, 255 ),
		lineType );
}
函数 DrawPolygon()调用了 OpenCV 中的 fillPoly 函数,用千将多边形画到图像 img 上 , 其中多边形的顶点集为 ppt , 要绘制的 多边形顶点数目 为 npt, 要绘制的多边形数械仅为 I, 多边形的颜色定义为 白色 Scalar(255,255,255) 。
4 DrawLine()函数的写法
//-----------------------------------【DrawLine( )函数】--------------------------
//		描述:自定义的绘制函数,实现了线的绘制
//---------------------------------------------------------------------------------
void DrawLine( Mat img, Point start, Point end )
{
	int thickness = 2;
	int lineType = 8;
	line( img,
		start,
		end,
		Scalar( 0, 0, 0 ),
		thickness,
		lineType );
}
DrawLinO函数调用了 OpenCV 中 的 line 函数 , 用千在图像 img 上画一条从点 start 到点 end 的 直线段 , 线的颜色为 Scalar(0,0,0)代表 的 黑色,线的粗细thickness 为 2 , 且此线为 8 联通 ( lineType = 8) 。


