代码重现:小杜的生信筆記
数据声明:该数据仅是演示数据,无任何意义
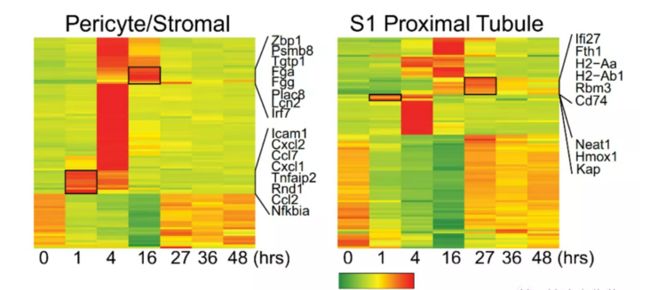
高分文章图例
绘图
导入相关的包
ComplexHeatmap在线帮助文档:https://jokergoo.github.io/Co...
#从Bioconductor安装稳定版;
if (!requireNamespace("BiocManager", quietly = TRUE))
  install.packages("BiocManager")
#安装ComplexHeatmap包;
BiocManager::install("ComplexHeatmap")
#载入ComplexHeatmap和circlize包;
library(ComplexHeatmap)
library(circlize)
导入数据
## 导入数据
df <- read.table("heatmap_inputdata.txt", header = T, row.names = 1)
head(df)
> head(df)
Control_01 Control_02 Control_03 Treat_01 Treat_02 Treat_03
gene01 11 11 11 10 11 10
gene02 14 14 14 13 14 13
gene03 14 14 14 13 14 13
gene04 7 7 7 6 7 6
gene05 11 11 11 11 11 10
gene06 14 14 14 13 14 12归一化数据
#对数据进行归一化;
#由于scale函数默认对列进行归一化,因此这里做了两次转置;
df_scaled <- t(scale(t(df)))
#查看归一化后的数据前6行;
head(df_scaled)
绘制基础型热图
#初步尝试绘制热图;
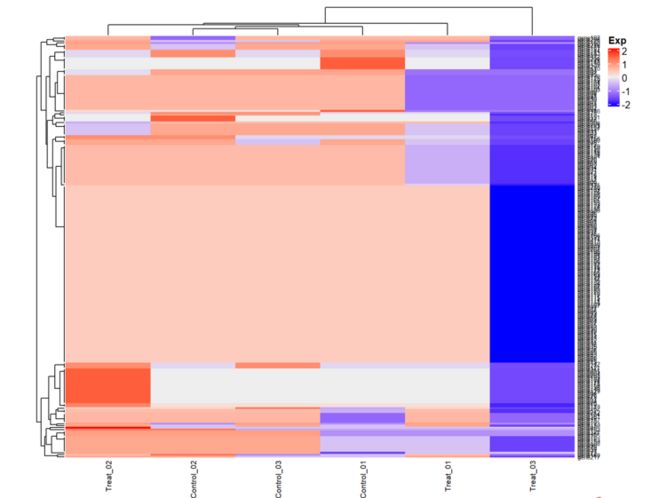
Heatmap(df_scaled,row_names_gp = gpar(fontsize = 6)
        ,column_names_gp = gpar(fontsize = 8),
        name = "Exp")
![上传中...]()
#接下来计算获得数据的大小范围;
range(df_scaled)
#[1] -2.041241  2.041241

#然后,根据数据范围建立自定义颜色映射关系;
#green-red;
col_fun = colorRamp2(c(-2,0,2), c("greenyellow","white", "red"))
#green-purple;
col_fun = colorRamp2(c(-2,0,2), c("greenyellow","white", "purple"))
#purple-orange;
col_fun = colorRamp2(c(-2,0,2), c("purple","white", "orange"))


#使用自定义渐变色绘制热图;
Heatmap(df_scaled,row_names_gp = gpar(fontsize = 6),
        column_names_gp = gpar(fontsize = 8),
        col = col_fun,
        name = "Exp")
CompleHeatmap 中相关的参数
#隐藏行聚类树;
Heatmap(df_scaled,row_names_gp = gpar(fontsize = 6),
        column_names_gp = gpar(fontsize = 8),
        col = col_fun,
        # show_row_dend = FALSE,     ## 隐藏行聚类
        # show_column_dend = FALSE,  ## 隐藏列聚类
        show_row_names = FALSE,    ## 隐藏行名
        # show_column_names = FALSE, ## 隐藏列名
name = "Exp")参考:https://www.jianshu.com/p/d8b...
heatmap_legend_param参数设定图例的格式(标题,位置,方向,高度等)
Heatmap(df_scaled,
        heatmap_legend_param = list(title= "legend",               ## 标题
                                    title_position = "",  ## 位置
                                    legend_height=unit(4,"cm"),    ## 高度
                                    legend_direction="vertical"))  ## 方向,vertical竖直,horizontal横直

# title = , 标题
# title_position = 位置
# 'arg'应当是“topleft”, “topcenter”, “leftcenter”, “lefttop”, “leftcenter-rot”, “lefttop-rot”

# legend_height = , 图例高度
legend_direction= 图例方向,vertical竖直,horizontal横直
row_title和column_title参数设定行和列的标题
Heatmap(df_scaled,
        row_title = "Test_data",    # 列的标题
        column_title = "Test_data") # 行的标题
clustering_distance_rows参数设定行聚类的距离方法,默认为"euclidean"
Heatmap(df_scaled, clustering_distance_rows = "pearson")Heatmap(df_scaled, clustering_distance_rows = function(x) dist(x))
Heatmap(df_scaled, clustering_distance_rows = function(x, y) 1 - cor(x, y))clustering_method_rows参数设定行聚类的方法,默认为"complete", "single"
Heatmap(df_scaled, clustering_method_rows = "complete")row_dend_side参数设定行聚类树放置的位置
Heatmap(df_scaled, row_dend_side = "right")km参数设定对行进行kmeans聚类分组的类数
Heatmap(df_scaled, km = 4, row_title_gp = gpar(col=rainbow(4)),
        row_names_gp = gpar(col=rainbow(4), fontsize=20),
        show_row_names = F)
使用add_heatmap函数组合多个热图或注释信息
add_heatmap(h1, h2)添加小图形
## # 添加point注释信息
ha = HeatmapAnnotation(points = anno_points(1:217,  ## 你的基因数量
                                            which = "row",
                                            gp= gpar(col=rainbow(12))))
add_heatmap(h1, ha)

## # 添加barplot注释信息
ha = HeatmapAnnotation(barplot = anno_barplot(1:217,
                                              which = "row",
                                              bar_width=0.4,
                                              gp= gpar(fill="red")),which = "row")
add_heatmap(h1, ha)
生成分组颜色条注释;
#生成分组颜色条注释;
class = anno_block(gp = gpar(fill = c("#c77cff","#FF9999","#99CC00","#FF9900"),
                             col="white"),height = unit(5, "mm"),
                   labels = c("TESA", "TESB", "TESD","TESC"),
                   labels_gp = gpar(col = "white", fontsize = 8,fontface="bold"))
group= HeatmapAnnotation(group=class)
##-----------------------------------------------------------------------------

#为热图添加分组颜色条;
Heatmap(df_scaled,
        row_names_gp = gpar(fontsize = 6),
        column_names_gp = gpar(fontsize = 8),
        col = col_fun,
        column_split = 4,
        column_title = NULL,
        cluster_rows = TRUE,
        show_row_dend = FALSE,
        show_row_names = FALSE,
        top_annotation =group,
        name = "Exp")


