(获取本节完整代码 GitHub/chizijijiadami/vue-elementui-3)
我们接着 二、vue+ElementUI开发后台管理模板—布局 这篇写功能,在此之前先说明下它末尾的文件引入路径问题,是在 vue.config.js 里文件路径加了别名,具体页面中小伙伴们可以自己试试看。
    chainWebpack:config=>{
        config.resolve.alias
         .set("@",resolve('src'))
+        .set("assets",resolve('src/assets'))
+        .set("common",resolve('src/common'))
+        .set("data",resolve('src/data'))
+        .set("store",resolve('src/data/store'))
+        .set("router",resolve('src/router'))
    }
0、写在前面
这篇文章主要内容包括:
● Menu菜单自动化
● svg 图标雪碧图 svg-sprite-loader
● 批量导入资源
● 自定义全局组件—批量全局注册
● vuex 的 modules
● Crumbs面包屑导航
● Tabs多标签
● 基于 elementUI Pagination 分页 分页自定义全局组件
1、Menu菜单自动化
(1)设置相关状态值
修改src>data>store>index.js,添加菜单列表状态及事件。
+        system:{
+            title:"大米工厂"
+        },
        menu: {
            isCollapse: false,
            location:"V",   //V、VH、H三个值,V表示在左侧,VH表示横跨头部,H表示在头部
 +          list:[]
        },

    mutations: {
        SET_MENU_ISCOLLAPSE: state => {
            state.menu.isCollapse = !state.menu.isCollapse
        },
+        SETMENU_LIST: (state,menuList) => {
+            state.menu.list=menuList
+        }
    },
    actions: {
        setMenuIsCollapse({ commit }) {
            commit('SET_MENU_ISCOLLAPSE')
        },
+        setMenuList({ commit },menuList) {
+            commit('SETMENU_LIST', menuList)
+        }
    }
(2)提取路由变量
修改src>router>index.js,要拿到导航路径就得路径值设成变量,这里就是把原本 routes 属性的值提取出来作为可外部引用 的变量,修改符号太繁琐就不加了。另外 name 后面 Crumbs 作为每个路径的唯一标识符或者权限问题都会用到的,先加上。
export const pagesRouterList=[
    {
        path: '',
        redirect: '/index/index'
    },
    {
        path: '/index',
        component: _import('Layout/index'),
        redirect: '/index/index',
        name:"Index",
        meta:{
            title:"首页",           //页面名称
            icon:"el-icon-location",   // icon名
            isShow: true         //是否在菜单栏中显示
        },
        children:[
            {
                path: 'index',
                component: _import('Index/index'),
                name:"IndexIndex",
                meta:{
                    title:"首页",
                    icon:"el-icon-location",
                    isShow: true
                }
            }
        ]
    },
    {
        path: '/list',
        component: _import('Layout/index'),
        name:"List",
        meta:{
            title:"列表",
            icon:"el-icon-s-grid",
            isShow: true
        },
        children:[
            {
                path: 'detail',
                component: _import('List/Detail/index'),
                name:"ListDetai",
                meta:{
                    title:"详情",
                    icon:"el-icon-goods",
                    isShow: true
                }
            },
            {
                path: 'feature',
                component: _import('List/Feature/index'),
                name:"ListFeature",
                meta:{
                    title:"特性",
                    icon:"el-icon-document",
                    isShow: true
                }
            }
        ]
    },
    {
        path: '/404',
        component: _import('ErrorPages/404')
    },
    {
        path: '*',
        redirect: '/404'
    }
]
export default new Router({
    scrollBehavior() {
        return { x: 0, y: 0 }
    },
    routes: pagesRouterList
})
(3)全局导航守卫中过滤路由
新建src>common>routerFilter>filter.js,先写路由过滤函数。
import {  MessageBox } from 'element-ui'
export function filterRouter(pagesRouterList) {
    let mennuList = pagesRouterList.filter(ele => ele.meta && ele.meta.isShow)
    try {
        if (mennuList.length <= 0) throw "没有可用菜单";
        filterPage(mennuList)
        return mennuList;
    } catch (err) {
        MessageBox({
            message: err,
            showCancelButton: false,
            confirmButtonText: '确定',
            type: 'error'
        })
    }
}
function filterPage(mennuList, pathFull, joinSign) {
    let pathFullCurrent = pathFull || ""
    let joinSignCurrent = joinSign || ""
    for (let i = 0; i < mennuList.length; i++) {
        const ele = mennuList[i];
        ele.pathFull = pathFullCurrent + joinSignCurrent + ele.path
        ele.showChildren=[]
        if (ele.children && ele.meta.isShow) {
            ele.showChildren=ele.children.filter(ele2=>ele2.meta.isShow)   //过滤出是否有要显示的子菜单
            filterPage(ele.children, ele.pathFull, "/")
        }
    }
}
新建 src>common>utils>getPageTitle.js,设置标签栏标题。
import store from '../../data/store'
export default function getPageTitle(pageTitle) {
    if (pageTitle) {
      return `${pageTitle} - ${store.state.system.title}`
    }
    return `${store.state.system.title}`
}
新建src>common>routerFilter>index.js,在全局导航守卫中判断添加 menu.list 的值。
import router from '../../router'
import store from '../../data/store'
import {pagesRouterList } from '../../router'
import {filterRouter} from './filter'
import getPageTitle from '../common/utils/getPageTitle'
router.beforeEach(async (to, from, next) => {
    document.title = getPageTitle(to.meta.title)  //设置标题栏名称
    if(store.state.menu.list.length===0){   //没值的时候添加一下
        store.dispatch("setMenuList",filterRouter(pagesRouterList))
        next({ ...to, replace: true })
    }else{
        next()
    }
})
src>main.js 中引入
+  //路由过滤
+ import './common/routerFilter'
到这里可以访问看看,标签栏已经有变化了,接下来就是Menu页面中的使用。
(4)使用:在Mune中渲染导航栏
新建 src>pages>Layout>components>MenuItem.vue
这里MenuItem涉及组件递归,可参见官网 组件循环引用。
修改 src>pages>Layout>components>Menu.vue
到这里看下浏览器菜单栏中的路由显示,可以修改 meta.isShow 等属性值看下效果。
(5)样式修改
但是发现收缩时和 Menu 在 Header 里时样式是有问题的
这里要修改下样式,新建 src>assets>style>elementuiReset.styl
.el-menu--collapse .app-menu-item .el-menu-item span, .el-menu--collapse .app-menu-item .el-submenu>.el-submenu__title span
    height 0
    width 0
    overflow hidden
    visibility hidden
    display inline-block
.el-menu--horizontal>.app-menu-item>.el-menu-item
    float left
    height 60px
    line-height 60px
    margin 0
    border-bottom 2px solid transparent
    color #909399
.el-menu--horizontal>.app-menu-item>.el-menu-item.is-active
    border-bottom 2px solid #409EFF
    color #303133
.el-menu--horizontal>.app-menu-item>.el-submenu
    float left
.el-menu--horizontal>.app-menu-item>.el-submenu .el-submenu__title
    height 60px
    line-height 60px
    border-bottom 2px solid transparent
    color #909399
.el-menu--horizontal>.app-menu-item>.el-submenu.is-active .el-submenu__title
    border-bottom 2px solid #409EFF
    color #303133
.el-menu--horizontal>.app-menu-item>.el-submenu .el-submenu__icon-arrow
    position static
    vertical-align middle
    margin-left 8px
    margin-top -3px
.el-menu--horizontal .el-menu .el-menu-item.is-active
    color #409eff
修改 src>assets>style>index.styl
  @require './reset.styl'
  @require './base.styl'
  @require './layout.styl'
+ @require './elementuiReset.styl'
(6)刷新后问题及主菜单的高亮
收缩没问题后,因为我们在 Menu 页面中设置的默认活动路由是 /index/index,与当前访问的路由 /list/index 不匹配,刷新后就出现了如下两张图显示的两个小问题:
图1:刷新后,主菜单没有展开;
图2:点开没有展开的主菜单,当前页面对应的子菜单没有高亮;
参见一下官网API 路由对象属性$route 我们直接可绑定 $route.path 属性。
修改 src>pages>Layout>components>Menu.vue
这么改完后, /list/index 刷新就正常,但是 /index/index 这里又有问题了,因为首页虽然重定向到了 /index/index 但是原本 path 值还是 /index 无法匹配,得在渲染路径的时候判断一下。
修改 src>pages>Layout>components>MenuItem.vue
现在再刷新试试看,完美 :)。
还有最后一个问题咯,如下图,子菜单高亮时,主菜单没有高亮。添加高亮样式,修改 src>assets>style>index.styl
 $bg-color = #eee
 .app-header
   background-color white
   position fixed
   top 0
 .app-menu
   background-color white
   position fixed
+  .app-menu-item-actived
+    color #409EFF
 .app-tabs
   position fixed
 .app-container
   height 100vh
   .app-tabs,.app-content,.app-footer
     background-color white
修改 src>pages>Layout>components>MenuItem.vue
到这里 Menu 自动根据路径渲染就写好了,不妨接着通过优化菜单栏的自定义图标来自定义全局组件。
2、自定义全局组件
(1)svg图标雪碧图
在自定义全局组件前,先来进行一个优化。我们将菜单栏的图标放在了路由配置里,若是带着路径引用,不管是开发还是修改维护都是挺麻烦的一件事,这里我们用一个插件 svg-sprite-loader 将所有svg图标的引用都做成像我们菜单代码里使用的一样,只需加一个名称。
安装
yarn add svg-sprite-loader -D
配置
修改 vue.config.js
    chainWebpack: config => {
        config.resolve.alias
            .set("@", resolve('src'))
            .set("assets", resolve('src/assets'))
            .set("common", resolve('src/common'))
            .set("data", resolve('src/data'))
            .set("store", resolve('src/data/store'))
            .set("router", resolve('src/router'))

+        config.module.rules.delete('svg') //删除默认svg的处理
+        config.module
+            .rule('svg-sprite-loader')
+            .test(/\.svg$/)
+            .include.add(resolve('src/assets/icons')) //svg目录
+            .end()
+            .use('svg-sprite-loader')
+            .loader('svg-sprite-loader')
+            .options({
+                symbolId: 'icon-[name]'   //使用时 id 名
+            })
    }
导出icons至全局
自己新建一个svg资源
新建 src>assets>icons>index.js
const requireAll = requireContext => requireContext.keys().map(requireContext)
const req = require.context('./svg', false, /\.svg$/)
requireAll(req)
main.js中引入
+ // SVG 图标
+ import '@/assets/icons'
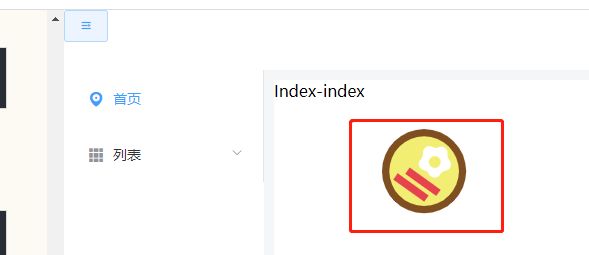
在首页测试一下
修改 src>pages>Index>index.vue
Index-index
+
+
+
(2)注册全局组件
这里我们可以将刚刚使用的几行代码注册为全局组件在项目任意位置使用。另外组件有时候不同项目会共用,我们一般把相关样式跟资源放在一个文件夹里,方便复用
新建 src>components>SvgIcon>index.vue
注册,修改 main.js
import Vue from 'vue'
import App from './App.vue'
import router from './router'
import store from './data/store'
import Element from "element-ui";
import 'element-ui/lib/theme-chalk/index.css';
Vue.config.productionTip = false
// 使用Element UI
Vue.use(Element, {
  size: "small"
});
//样式
import "@/assets/styles/index.styl";
//路由过滤
import 'common/routerFilter'
// SVG 图标
import '@/assets/icons'
+ //注册全局组件
+ import SvgIcon from'./components/SvgIcon/index'
+ Vue.component('svg-icon', SvgIcon)

new Vue({
  router,
  store,
  render: h => h(App),
}).$mount('#app')
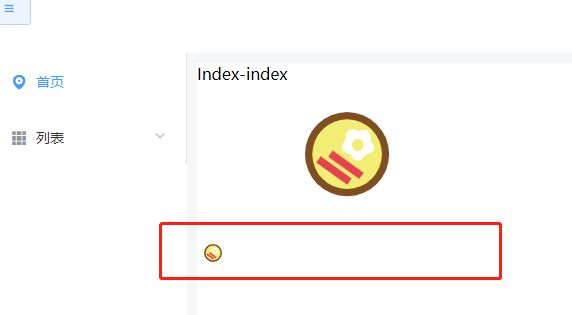
使用,修改 src>pages>Index>index.vue
Index-index
+
+
查看浏览器有了 :)
另外我们开发大型项目的时候可能会有很多全局组件,一般不会像上面那样去一个一个注册,容易造成文件的臃肿,所以我们来优化一下。
新建 src>components>index.js
import Vue from 'vue'

// 读取文件夹下以.vue格式的文件
const requireComponent = require.context('./', true, /\.vue$/)
requireComponent.keys().forEach(filePath => {
    const componentConfig = requireComponent(filePath)
    const fileName = validateFileName(filePath)
    //如果文件名为index,那么取组件中的name作为注册的组件名,否则文件名作为组件名
    const componentName =
        fileName.toLowerCase() === 'index'
            ? capitalizeFirstLetter(componentConfig.default.name)
            : fileName
    Vue.component(componentName, componentConfig.default || componentConfig)
})

//设置首字母大写
function capitalizeFirstLetter(str) {
    return str.charAt(0).toUpperCase() + str.slice(1)
}

//提取文件名
function validateFileName(str) {
    return (
        /^\S+\.vue$/.test(str) &&
        str.replace(/^\S+\/(\w+)\.vue$/, (rs, $1) => capitalizeFirstLetter($1))
    )
}
修改 main.js
 //注册全局组件
- import SvgIcon from'./components/SvgIcon/index'
- Vue.component('svg-icon', SvgIcon)
+ import './components'
查看页面没有变化,设置成功。可以拿 components>HelloWorld.vue 这个文件之前我们没有进行过全局注册,现在可以用 HelloWorld(hello-world) 去页面试一下。
(3)Menu 菜单栏优化
小伙伴们自己放几个svg,改下路由里 meta.icon 里的名称。
再修改 src>pages>Layout>components>MenuItem.vue
到这里 全局组件 及 Menu 的优化告一段落,接下来我们写 Crumbs 面包屑导航。
3、Crumbs面包屑导航
修改store为 mosules 形式
这里开始我们会在多个组件模块里用到状态管理,所以在这里把 store 改成按照模块划分去使用 vuex官网Module。
新建 src>data>store>modules>index.js
const app={
    state: {
        system:{
            title:"大米工厂"
        },
        menu: {
            isCollapse: false,
            location: "V",   //V、VH、H三个值,V表示在左侧,VH表示横跨头部,H表示在头部
            list: []
        },
        tabs: {
            isShow: false
        },
        crumbs: {
            isShow: true
        },
        footer: {
            isShow: false
        }
    },
    mutations: {
        SET_MENU_ISCOLLAPSE: state => {
            state.menu.isCollapse = !state.menu.isCollapse
        },
        SETMENU_LIST: (state,menuList) => {
            state.menu.list=menuList
        }
    },
    actions: {
        setMenuIsCollapse({ commit }) {
            commit('SET_MENU_ISCOLLAPSE')
        },
        setMenuList({ commit },menuList) {
            commit('SETMENU_LIST', menuList)
        }
    }
}
export default app
新建 src>data>store>modules>index.js
// 系统状态
import app from './app'
export default {
  app
}
新建 src>data>store>getter.js
import modules from './modules/index'
let modulesGetters = {}
Object.keys(modules).forEach(item => {
  modulesGetters[item] = state => state[item]
})
const getters = {
  ...modulesGetters
}
export default getters
修改 src>data>store>index.js,这里贴了改完的全部代码
import Vue from 'vue'
import Vuex from 'vuex'
Vue.use(Vuex)

import getters from './getters'
import modules from './modules/index'

const store = new Vuex.Store({
    modules:{
        ...modules
    },
    getters
})

export default store
这里修改完后,就是修改页面中之前使用的地方(改完后完整代码),我们在修改时加了gettter,所以这里可以用 getter 获取状态值。
修改 src>common>utils>getPageTitle.js
import store from 'store'
const title=store.getters.app.system.title
export default function getPageTitle(pageTitle) {
    if (pageTitle) {
      return `${pageTitle} - ${title}`
    }
    return `${title}`
}
修改 src>common>routerFilter>index .js。
router.beforeEach(async (to, from, next) => {
  document.title = getPageTitle(to.meta.title)
-    if(store.state.menu.list.length===0){
+    if(store.getters.app.menu.list.length===0){
      store.dispatch("setMenuList",filterRouter(pagesRouterList))
      next({ ...to, replace: true })
  }else{
      next()
  }
})
修改 src>pages>Layout>index.vue,computed内为修改后完整代码,剩下的 Header、Menu 依次修改。
   import Footer from "./components/Footer";
+  import { mapGetters } from "vuex";

 computed: {
    ...mapGetters(["app"]),
    isCollapse() {
      return this.app.menu.isCollapse;
    },
    menuLocation() {
      return this.app.menu.location;
    },
    isShowTabs() {
      return this.app.tabs.isShow;
    },
    isShowCrumbs() {
      return this.app.crumbs.isShow;
    },
    isShowFooter() {
      return this.app.footer.isShow;
    }
  },
新建 Crumbs 状态值
新建 src>data>store>modules>coponents>crumbs.js
const crumbs = {
    state: {
        crumbsList: []
    },
    mutations: {
        SET_CRUMBS(state, list) {
            state.crumbsList = list
        }
    },
    actions: {
        setCrumbs({ commit }, list) {
            commit("SET_CRUMBS", list)
        }
    }
}
export default crumbs
修改 src>data>store>modules>index.js
   // 系统状态
   import app from './app'
+  //面包屑导航
+  import crumbs from './components/crumbs'
export default {
   app,
+  crumbs
}
修改 src>common>routerFilter>index.js ,添加全局导航守卫 router-aftereach。
(很多场景下,Crumbs 的值这么设置是不符合实际需要的,这里后面抽时间来补上。)
router.afterEach(to => {
    if (store.getters.app.crumbs.isShow) {
       //很多场景下,Crumbs的值这么设置是不符合实际需要的,这里后面抽时间来补上。
        store.dispatch('setCrumbs', to.matched)
    }
})
修改 src>pages>Layoute>components>Crumbs.vue,这里有变量冲突,我们改个名字,记得 Layoute/index.vue 中绑定的变量名也要改一下。
- 首页
+ {{item.meta.title}}
Layoute/index.vue
4、Tabs多标签
新建 src>data>store>modules>components>tabs.js
const tabs = {
    state: {
        activeTab: '',
        tabsList: []
    },
    mutations: {
        SET_TABS_ACTIVETAB: (state, name) => {
            state.activeTab = name
        },
        SET_TABS_LIST: (state, item) => {
            !state.tabsList.some(ele => ele.name === item.name) && state.tabsList.push(item)
        },
        DEL_TABS_LIST: (state, name) => {
            state.tabsList.forEach((item, index) => {
                if (item.name === name) {
                    state.tabsList.splice(index, 1)
                }
            })
        }
    },
    actions: {
        setTabsActivetab({ commit }, name) {
            commit('SET_TABS_ACTIVETAB', name)
        },
        setTabsList({ commit }, item) {
            commit('SET_TABS_LIST', item)
        },
        delTabsList({ commit }, name) {
            commit('DEL_TABS_LIST', name)
        }
    }
}
export default tabs;
修改 src>data>store>modules>index.js
   // 系统状态
  import app from './app'
  //面包屑导航
  import crumbs from './components/crumbs'
+ //多标签
+ import tabs from './components/tabs'
  export default {
    app,
    crumbs,
+   tabs
  }
修改 src>data>store>index.js,Tab刷新时需要取到当前标签的路径,这里加一下菜单栏的对象形式
        menu: {
             isCollapse: false,
             location: "V",   //V、VH、H三个值,V表示在左侧,VH表示横跨头部,H表示在头部
             list: [],
+            obj:{}
        },
修改 src>common>routerFilter>filter.js,给 menu.obj 赋值
  import { MessageBox } from 'element-ui'
+ import store from 'store'

...

function filterPage(mennuList, pathFull, joinSign) {
    let pathFullCurrent = pathFull || ""
    let joinSignCurrent = joinSign || ""
    for (let i = 0; i < mennuList.length; i++) {
         const ele = mennuList[i];
         ele.pathFull = pathFullCurrent + joinSignCurrent + ele.path
         ele.showChildren = []
+        store.getters.app.menu.obj[ele.name] = ele
        if (ele.children && ele.meta.isShow) {
            ele.showChildren = ele.children.filter(ele2 => ele2.meta.isShow)
            filterPage(ele.children, ele.pathFull, "/")
        }
    }
}
修改 src>pages>Layout>components>Tabs.vue,全部删掉,改完完整代码如下。
现在可以在浏览器里操作试一下了。
5、基于 elementUI Pagination 分页 分页自定义全局组件
一个项目相同组件往往有相同的风格样式,如果用的地方比较多,客户要求改一两个可配置功能样式的话也是很繁琐的,所以我们自定义一个全局组件,里面用elementUI的 Pagination 分页组件。
新建 src>components>Pagination>index.vue
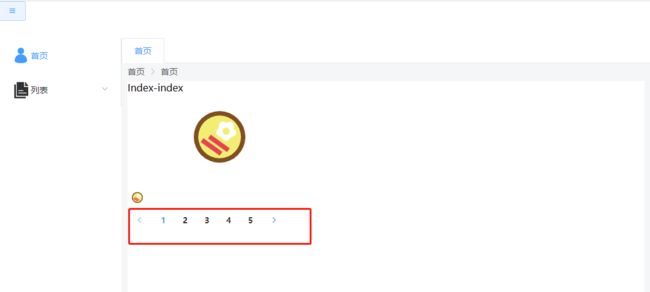
我们之前已经写了批量注册,这里建完就可以用了,修改 src>pages>Index>index.vue
Index-index
+
+ 修改 src>components>Pagination>index.vue 后完整代码
修改 src>pages>Index>index.vue
Index-index
这么设置分页就可以全局统一修改,如果有特殊的地方还可以绑定自定义的属性、事件。分页往往是跟着表格列表一起的,小伙伴们可以自己写个表格的,然后跟分页的相关事件结合起来。
感谢阅读,喜欢的话点个赞吧:)
更多内容请关注后续文章。。。
一、vue入门基础开发—手把手教你用vue开发
二、vue+ElementUI开发后台管理模板—布局
四、vue+ElementUI开发后台管理模板—方法指令、接口数据
五、vue+ElementUI开发后台管理模板—精确到按钮的权限控制
vue3 + vite + ElementPlus开发后台管理模板
vue实践1.1 企业官网——prerender-spa-plugin预渲染


