直连型交换机,根据消息携带的路由值将消息投递给对应队列。
大致流程,有一个队列绑定到一个直连交换机上,同时赋予一个路由键routing key。
然后当一个消息携带着路由值为X,这个消息通过生产者发送给交换机时,交换机就会根据这个路由值X去寻找绑定值也是X的队列。
1、Maven依赖
    org.springframework.boot
    spring-boot-starter-parent
    2.1.4.RELEASE


        org.springframework.boot
        spring-boot-starter-amqp
2、配置文件
server:
  port: 30200

spring:
  rabbitmq:
    host: 148.70.153.63
    port: 5672
    username: libai
    password: password
3、生产者
3.1、配置文件
声明队列和交换机,并设置队列和交换机绑定的路由键。
@Configuration
public class DirectRabbitConfig {
    //队列 起名:directQueue
    @Bean
    public Queue directQueue() {
        return new Queue("directQueue", true, false, false);
    }

    //Direct交换机 起名:directExchange
    @Bean
    public DirectExchange directExchange() {
        return new DirectExchange("directExchange", true, false);
    }

    //绑定  将队列和交换机绑定, 并设置路由键:directRouting
    @Bean
    public Binding bindingDirect() {
        return BindingBuilder.bind(directQueue()).to(directExchange()).with("directRouting");
    }
}
- 声明队列参数列表:
-
name:队列名称。 -
durable:是否持久化,否则RabbitMQ服务端重启,队列就不再存在。 -
exclusive:是否排他,即该队列是否只能被当前创建的连接使用,而且当连接关闭后队列即被删除。此参数优先级高于durable。 -
autoDelete:是否自动删除,当没有生产者或者消费者使用此队列,该队列会自动删除。
-
- 声明交换机参数列表:
-
name:交换机名称。 -
durable:是否持久化,否则RabbitMQ服务端重启,队列就不再存在。 -
autoDelete:是否自动删除,当没有生产者或者消费者使用此队列,该队列会自动删除。
-
3.2、发送消息
@RestController
public class SendMessageController {
    @Autowired
    private RabbitTemplate rabbitTemplate;  // 使用RabbitTemplate,这提供了接收/发送等等方法

    @PostMapping("/sendDirectMessage")
    public String sendDirectMessage() {
        Map map = new HashMap<>();
        map.put("messageId", String.valueOf(UUID.randomUUID()));
        map.put("messageData", "RabbitMQ");
        map.put("createTime", LocalDateTime.now().format(DateTimeFormatter.ofPattern("yyyy-MM-dd HH:mm:ss")));
        // 将消息携带路由键值:directRouting 发送到交换机directExchange
        rabbitTemplate.convertAndSend("directExchange", "directRouting", map);
        return "ok";
    }
}
发送到指定的交换机上,同时指定路由键。RabbitMQ会根据路由键把消息推送至和该交换机绑定的队列中。
convertAndSend函数还支持只指定消息发送的队列名称,可以不指定交换机名称;只要声明要发送的队列,也不需要和交换机绑定。不过并非不使用交换机,实际上是使用RabbitMQ自带的默认交换机和指定队列进行路由。比如:
rabbitTemplate.convertAndSend("directQueue", map);
启动服务,用postman调用发送消息接口。
3.3、查看RabbitMQ的后台管理界面
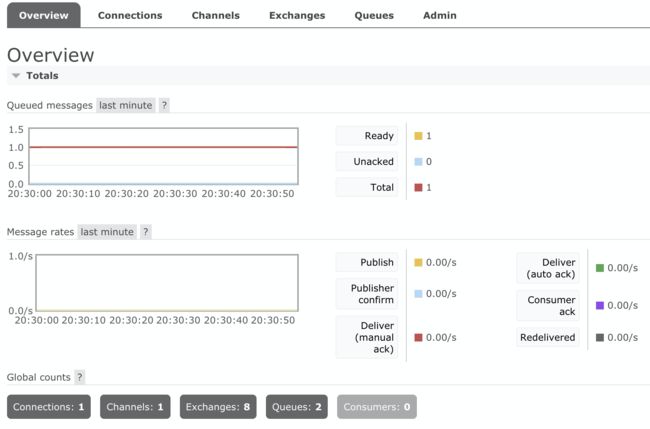
可以看到已经有一条消息推送到队列中,等待被消费。
3.4、查看交换机
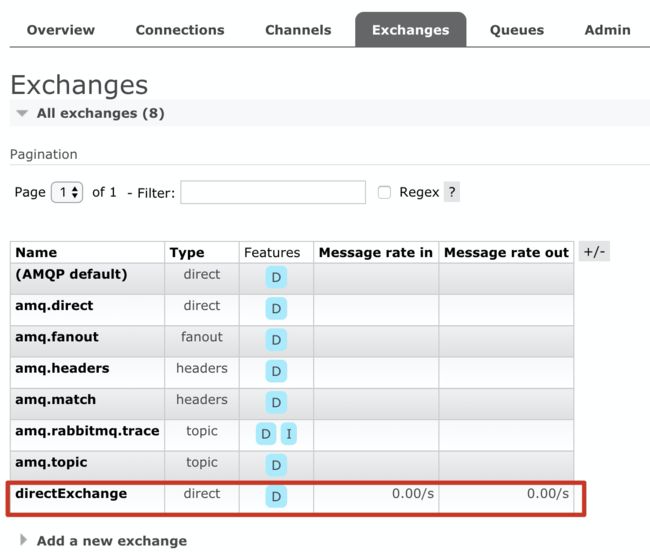
可以看到交换机已经被创建出来了。
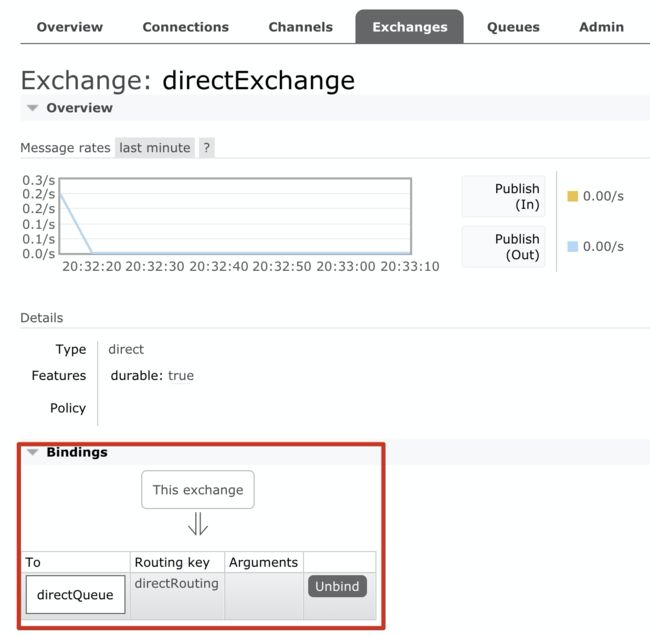
可以看到和队列的绑定关系。
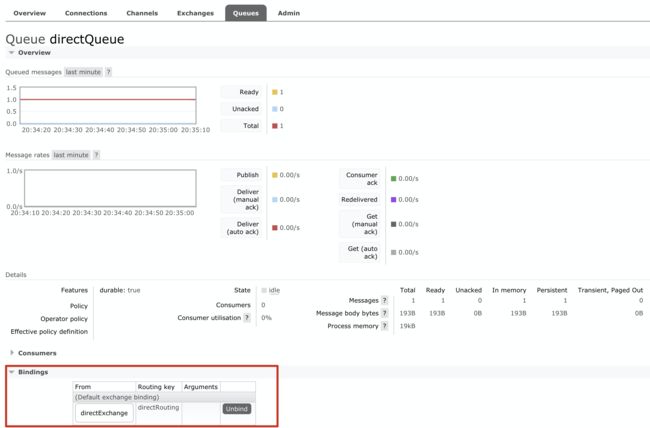
3.5、查看队列
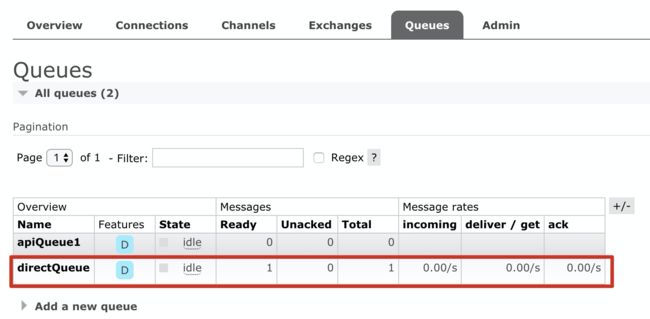
队列也已经被创建出来了。
查看绑定了哪些交换机。
4、消费者
通过注解@RabbitListener指定要消费的队列。
@Component
@RabbitListener(queues = "directQueue")
@Slf4j
public class DirectReceiver {
    @RabbitHandler
    public void process(Map testMessage) {
        log.info("DirectReceiver消费者收到消息:{}", JSONUtil.toJsonPrettyStr(testMessage));
    }
}
重新启动服务,可以看到控制台打印输出,说明该条消息已经被消费成功了。
2020-09-13 20:37:19,508 [INFO] [org.springframework.amqp.rabbit.RabbitListenerEndpointContainer#0-1] [net.zhaoxiaobin.rabbitmq.consumer.direct.DirectReceiver:25] [] DirectReceiver消费者收到消息:{
    "createTime": "2020-09-13 20:37:19",
    "messageId": "f5671a04-21ef-4ba5-8944-28d23ad4b0ad",
    "messageData": "RabbitMQ"
}
查看后台管理界面,已经没有待消费的消息了。
Springboot整合RabbitMQ(二)——Fanout扇形交换机
Springboot整合RabbitMQ(三)——Topic主题交换机
参考链接
- Springboot 整合RabbitMq ,用心看完这一篇就够了
代码地址
- github:https://github.com/senlinmu1008/rabbitmq-action/tree/master/rabbitmq
- gitee:https://gitee.com/ppbin/rabbitmq-action/tree/master/rabbitmq
