使用OpenCV实现偏斜文档校正
在这篇文章中:
- 使用OpenCV实现偏斜文档校正
- 基于FFT变换以后频率域梯度
- 基于离散点求最小外接轮廓
- 运行结果
使用OpenCV实现偏斜文档校正
纸质文档扫描中经常会发生扫描出来的图像有一定角度的偏斜,对后期的文档信息化OCR提取造成很大的干扰,导致OCR识别准确率下降从而影响文档信息化的结果。这个时候可以使用OpenCV对文档进行纠偏,最常见的文本纠偏算法有两种,分别是
- 基于FFT变换以后频率域梯度
- 基于离散点求最小外接轮廓
这两种方法各有千秋,相对来说,第二种方法得到的结果更加准确,第一种基于离散傅立叶变换求振幅的方法有时候各种阈值选择在实际项目中会有很大问题。
基于FFT变换以后频率域梯度
主要思路是先把图像转换为灰度图像,然后使用离散傅立叶变换得到图像在频率域空间的振幅,对其二值化之后,使用霍夫直线检测得到角度,然后根据角度完成旋转校正。代码实现如下:
   Mat src = imread("D:/vcprojects/images/rotate_text.png");

    Mat gray, binary;

    cvtColor(src, gray, COLOR_BGR2GRAY);


    //expand input image to optimal size

    Mat padded;

    int m = getOptimalDFTSize(gray.rows);

    int n = getOptimalDFTSize(gray.cols);

    // on the border add zero values

    copyMakeBorder(gray, padded, 0, m - gray.rows, 0, n - gray.cols, BORDER_CONSTANT, Scalar::all(0));

    Mat planes[] = { Mat_(padded), Mat::zeros(padded.size(), CV_32F) };

    Mat complexI;

    // Add to the expanded another plane with zeros

    merge(planes, 2, complexI);

    // 离散傅立叶变换

    dft(complexI, complexI);


    // 实部与虚部得到梯度图像

    // planes[0] = Re(DFT(I), planes[1] = Im(DFT(I))

    split(complexI, planes);

    magnitude(planes[0], planes[1], planes[0]);

    Mat magI = planes[0];

    magI += Scalar::all(1);

    log(magI, magI);

    // crop the spectrum, if it has an odd number of rows or columns

    magI = magI(Rect(0, 0, magI.cols & -2, magI.rows & -2));

    // rearrange the quadrants of Fourier image  so that the origin is at the image center

    int cx = magI.cols / 2;

    int cy = magI.rows / 2;

    Mat q0(magI, Rect(0, 0, cx, cy));   // Top-Left - Create a ROI per quadrant

    Mat q1(magI, Rect(cx, 0, cx, cy));  // Top-Right

    Mat q2(magI, Rect(0, cy, cx, cy));  // Bottom-Left

    Mat q3(magI, Rect(cx, cy, cx, cy)); // Bottom-Right

    Mat tmp;

    // swap quadrants (Top-Left with Bottom-Right)

    q0.copyTo(tmp);

    q3.copyTo(q0);

    tmp.copyTo(q3);

    q1.copyTo(tmp);

    q2.copyTo(q1);

    tmp.copyTo(q2);


    // 归一化与阈值化显示

    normalize(magI, magI, 0, 1.0, NORM_MINMAX);

    Mat dst;

    magI.convertTo(dst, CV_8UC1, 255, 0);

    threshold(dst, binary, 160, 255, THRESH_BINARY);


    // 霍夫直线

    vector lines;

    Mat linImg = Mat::zeros(binary.size(), CV_8UC3);

    HoughLines(binary, lines, 1, (float)CV_PI / 180, 30, 0, 0);

    int numLines = lines.size();

    float degree = 0.0;

    for (int l = 0; l  offset && abs(theta)< (CV_PI / 2.0- offset)) {

            printf("theta : %.2f\n", theta);

            degree = (theta)*180-90;

        }

        Point pt1, pt2;

        double a = cos(theta), b = sin(theta);

        double x0 = a*rho, y0 = b*rho;

        pt1.x = cvRound(x0 + 1000 * (-b));

        pt1.y = cvRound(y0 + 1000 * (a));

        pt2.x = cvRound(x0 - 1000 * (-b));

        pt2.y = cvRound(y0 - 1000 * (a));

        line(linImg, pt1, pt2, Scalar(0, 255, 0), 3, 8, 0);

    }

    imshow("lines", linImg);


    // 旋转调整

    Mat rot_mat = getRotationMatrix2D(Point(binary.cols/2, binary.rows/2), degree, 1);

    Mat rotated;

    warpAffine(src, rotated, rot_mat, src.size(), cv::INTER_CUBIC, 0, Scalar(255, 255, 255));

    imshow("input", src);

    imshow("deskew-demo", rotated);

    imwrite("D:/deskew_text.png", rotated);
基于离散点求最小外接轮廓
其主要思路是先把图像二值化,得到一系列离散的前景像素点集合,然后利用轮廓的最小外接矩形函数,得到偏斜的矩形大小与角度,通过仿射变换完成校正。代码实现如下:
运行结果
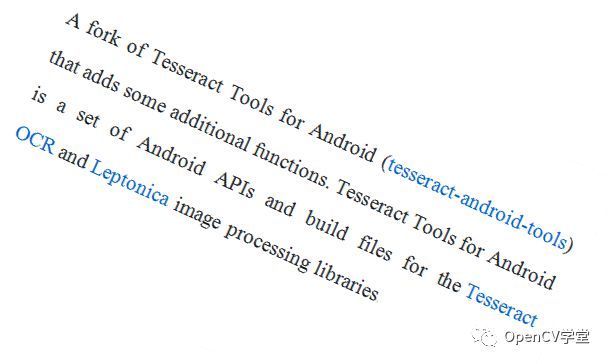
- 原图
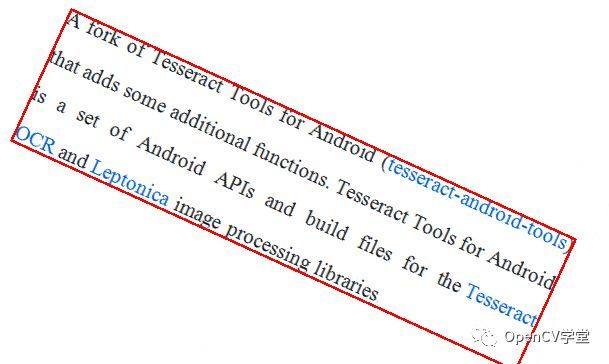
- 最小外接矩形
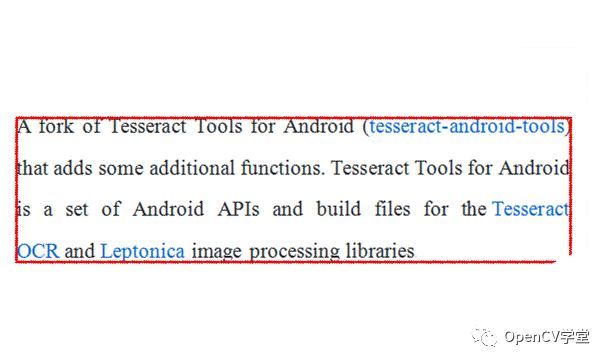
- 校正之后
本文分享自微信公众号 - OpenCV学堂(CVSCHOOL)


