深度学习与神经网络作业(附anaconda安装教程等)
以logistic_regression-exercise为例
环境配置
先下载anaconda
下载地址:https://www.anaconda.com/?modal=commercial
anaconda安装教程:


下面图是别人的,因为我电脑早装好了,vscode可以安装挺好用的(我都是从官网上下载再安装),有的anaconda版本没有这个页面也没关系,会直接显示下一张图。

WIN+R键
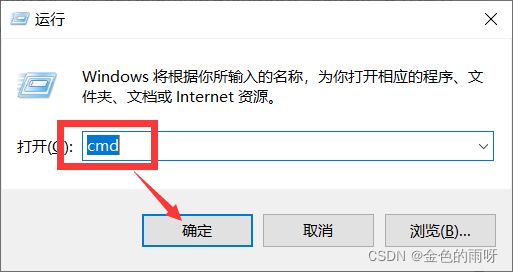
conda --version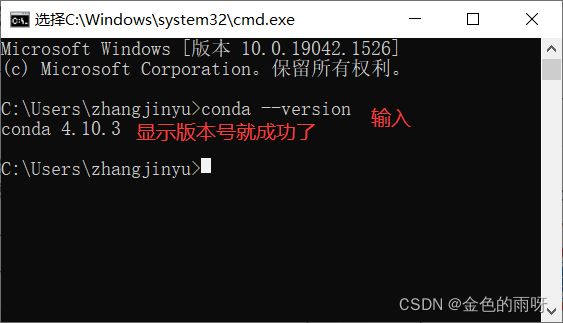
anaconda创建虚拟环境
因为此次作业用到tensorflow2.0,而tensorflow2.0对应的python貌似必须是3.6版本,因为试了用原环境的python3.8,pip install tensorflow==2.0找不到此库,所以创建一个虚拟环境专门用来做这个作业,虚拟环境可以理解为是一个大盒子中的小盒子,作业都在小盒子里做,不会影响其他的盒子,也就是说可以创建多个虚拟环境。
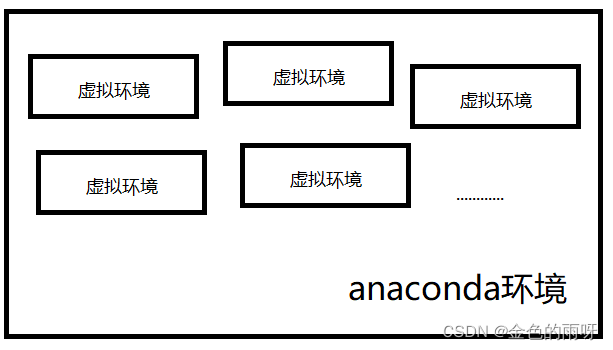
创建虚拟环境的命令
conda create -n your_env_name python=x.x
如创建python3.6版本,名为sdxx的虚拟环境
conda create -n sdxx python=3.6
创建过程中会问你y/n 输入y
激活刚才创建的虚拟环境
activate your_env_name
如:activate sdxx
安装需要的包
安装命令
pip install package_name -i https://pypi.tuna.tsinghua.edu.cn/simple
如安装tensorflow2.0版本
pip install tensorflow==2.0 -i https://pypi.tuna.tsinghua.edu.cn/simple
加 -i https://pypi.tuna.tsinghua.edu.cn/simple是为了用清华的库,不加的话会安装慢,当然可以全局配置清华源,但我觉得还是每次手动加比较好,因为全局配置可能会有莫名其妙的bug。
其他的包目前这个作业(chap3_softmax_regression)需要手动装:matplotlib、ipython。
暂时就做了这一个作业,其他后续补。
jupyter notebook添加虚拟环境
因为给的代码是用jupyter notebook写的,所以咱们也用吧,当然也可以直接记事本手搓,vscode、pycharm等都行,不用jupyter notebook跳到 pycharm添加。
但是用到jupyter notebook就出现了一个问题,虚拟环境不匹配,所以要将刚才创建的虚拟环境加到jupyter notebook中。
先激活虚拟环境,安装ipykernel包
运行下面
python -m ipykernel install --user --name 虚拟环境名
运行代码
找到下载好的代码
代码下载地址:https://github.com/nndl/exercise
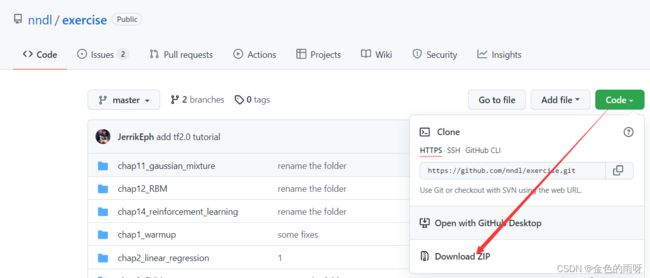
都会下载下来,几十m,解压,根据个人意愿把用到的代码拿出来即可。


直接就跳过来了,当然你会cmd命令当我没说,反正就是找到放代码的文件夹下。
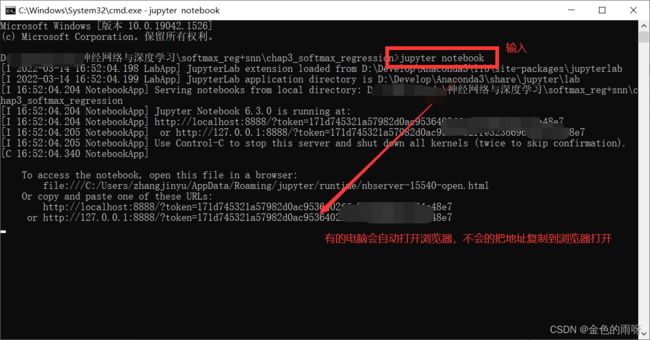
浏览器里(下图)
点开其中一个就进到代码里了,但是环境并不是自己创建的虚拟环境,直接点开就是虚拟环境的方法我不会,我只能用笨方法了,新建一个文件↓

import tensorflow as tf
tf.__version__
这里补充一下jupyter notebook快捷键(完全够用),当然直接用工具栏的按钮也行。
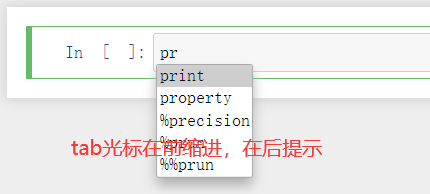


打开源代码一小块一小块的运行复制过来↓
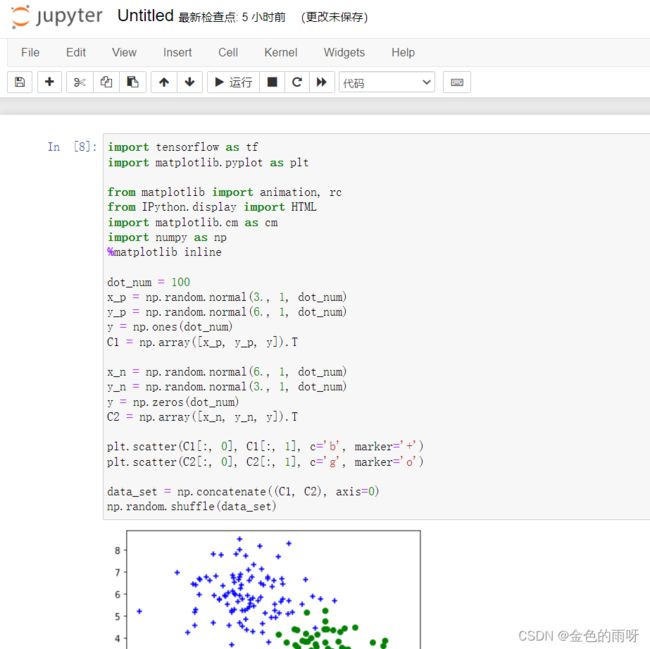
然后就能得到源代码中的结果啦(有需要填空的代码,我也不会,但百度会)!
另外发现logistic_regression-exercise最后一块代码在jupyter notebook不显示图,反正我的电脑不显示,在pycharm里显示,为了让它在jupyter notebook也显示,小改一下代码(过了几天它又显示了,离谱,直接玄学!下面的代码可以不用改)↓
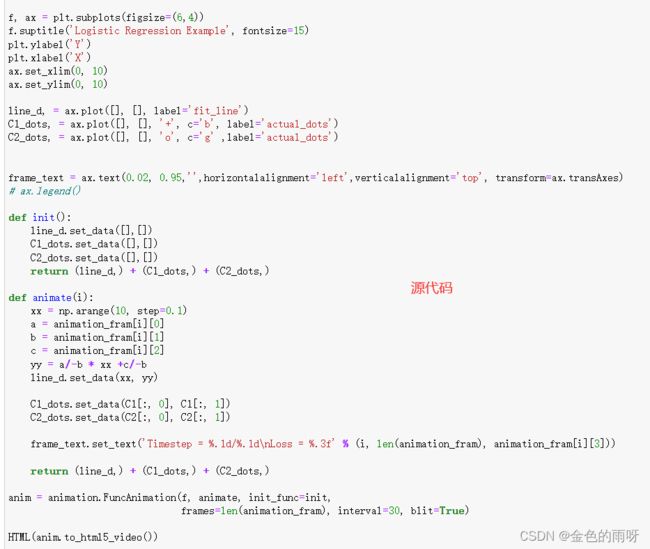
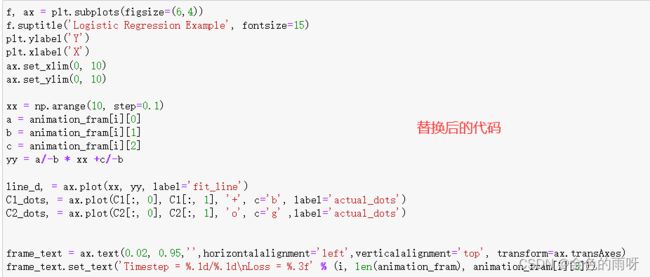
f, ax = plt.subplots(figsize=(6,4))
f.suptitle('Logistic Regression Example', fontsize=15)
plt.ylabel('Y')
plt.xlabel('X')
ax.set_xlim(0, 10)
ax.set_ylim(0, 10)

xx = np.arange(10, step=0.1)
a = animation_fram[i][0]
b = animation_fram[i][1]
c = animation_fram[i][2]
yy = a/-b * xx +c/-b

line_d, = ax.plot(xx, yy, label='fit_line')
C1_dots, = ax.plot(C1[:, 0], C1[:, 1], '+', c='b', label='actual_dots')
C2_dots, = ax.plot(C2[:, 0], C2[:, 1], 'o', c='g' ,label='actual_dots')


frame_text = ax.text(0.02, 0.95,'',horizontalalignment='left',verticalalignment='top', transform=ax.transAxes)
frame_text.set_text('Timestep = %.1d/%.1d\nLoss = %.3f' % (i, len(animation_fram), animation_fram[i][3]))
pycharmt添加
--------------------------------------------------------------------
logistic_regression-exercise
losses = -label * tf.math.log(pred + epsilon) - (1. - label) * tf.math.log(1. - pred + epsilon)
softmax_regression-exercise
#填空一
self.W = tf.Variable(initial_value=tf.random.uniform(shape=[2,3], minval=-0.1, maxval=0.1),dtype=tf.float32)
self.b = tf.Variable(initial_value=tf.zeros(shape=[1]), dtype=tf.float32)
#填空二
losses = -tf.reduce_mean(label*tf.math.log(pred+epsilon))
tf2.0-exercise
https://blog.csdn.net/qq_38061827/article/details/123509880?spm=1001.2014.3001.5502
tutorial_minst_fnn-numpy-exercise
#计算矩阵乘法的对应的梯度
grad_x = np.matmul(grad_y, W.T)
grad_W = np.matmul(x.T, grad_y)
#relu
X = self.mem['x']
grad_x = (X > 0).astype(np.float32) * grad_y
tutorial_minst_fnn-tf2.0-exercise
    def __init__(self):
        self.W1 = tf.Variable(shape=[28*28, 100], dtype=tf.float32,
                         initial_value=tf.random.uniform(shape=[28*28, 100],
                                                         minval=-0.1, maxval=0.1))
        self.b1 = tf.Variable(shape=[100], dtype=tf.float32, initial_value=tf.zeros(100))#f(x)
        self.W2 = tf.Variable(shape=[100, 10], dtype=tf.float32,# wx+b
                         initial_value=tf.random.uniform(shape=[100, 10],
                                                         minval=-0.1, maxval=0.1))
        self.b2 = tf.Variable(shape=[10], dtype=tf.float32, initial_value=tf.zeros(10))
        self.trainable_variables = [self.W1, self.W2, self.b1, self.b2]
    def __call__(self, x):
        flat_x = tf.reshape(x, shape=[-1, 28*28])
        h1 = tf.tanh(tf.matmul(flat_x, self.W1) + self.b1)
        logits = tf.matmul(h1, self.W2) + self.b2
        return logits
备用指令
-i https://pypi.tuna.tsinghua.edu.cn/simple 清华源

tf.__version__ 版本号

pip install package_name 安装包指令
pip uninstall 卸载包指令
pip list 列出安装的包

conda create -n your_env_name python=x.x 创建虚拟环境
activate env_name 激活虚拟环境
deactivate env_name 退出虚拟环境
conda env list 列出虚拟环境
conda remove -n env_name --all 删除虚拟环境

jupyter notebook虚拟环境
先安装ipykernel
python -m ipykernel install --user --name env_name
jupyter kernelspec list 列出关联的虚拟环境
jupyter kernelspec remove env_name 删除关联的虚拟环境

